ECOBOILER COUNTERTOP WATER BOILER/PUSH BUTTON
ECOBOILER PB5
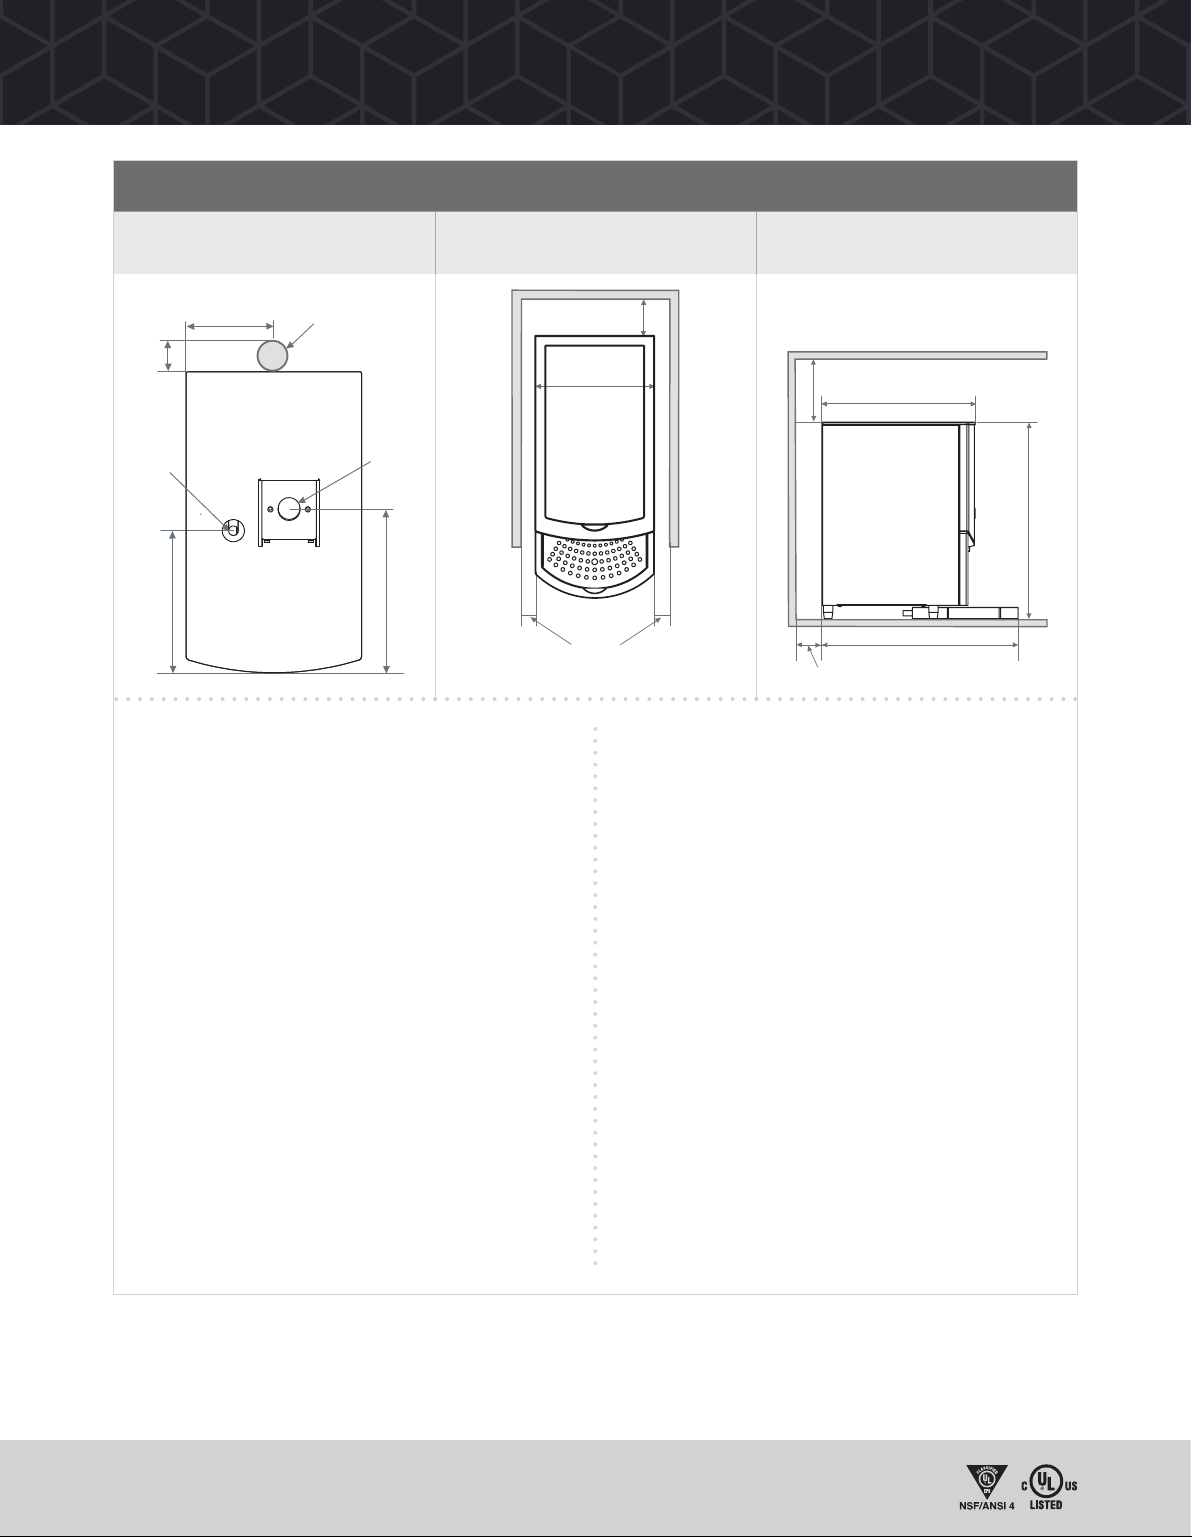
COUNTER CUTOUT CABINET CLEARANCE ECOBOILER PB5 1000665US
2”/50mm*
13.8”/350mm
18.3”/464mm
2”/50mm
2”/50mm
* Required for ventilation if the machine
is installed in an enclosed cabinet.
8.3”/211mm
18.3”/465mm
14.3”/363mm
Plan View
7.9”/200mm
6.8”/173mm
Water
2”/50mm
4.1”/105.5mm 2.5”/64mm Hole Saw
ELECTRICAL INSTALLATION PROCEDURE
When installing the machine, always observe the local
regulations and standards. The appliance is supplied with a
NEMA L6-20P moulded power cord. A suitable mains power
supply socket should be available within easy access of the
appliance so that it can be disconnected easily after install.
PLUMBING INSTALLATION PROCEDURE
• Ensure that the equipment is installed according to local
plumbing & water regulations.
• Mains water pressure required (limits): 14.5 -145psi
(100 -1000kPa, 0.1 - 1MPa).
• Requires inline water filter within your water
specifications.
• The machine is supplied with a 3/8 NPT connection.
• Connect straight tailpiece of the hose to the stop valve
fitting. Make sure that the pre-attached sealing washer
is fitted.
• Turn on the water to flush any impurities, dust etc
from the inlet hose and water pipe. Allow several litres
through, especially for new installations.
• Connect the hose to the inlet valve of the boiler.
Make sure a sealing washer is fitted.
• Turn on water and check for leaks.
OPERATING BOILER FOR THE FIRST TIME
• Check that all installation procedures have been
carried out.
• Ensure water valve is on.
• Plug boiler into a suitable socket and press power
button on the front of the machine marked ‘Power’.
NOTE: On the T5 the ‘Power’ button light also acts as
the “Ready/Status” indicator.
• The “power on” light will glow green and the machine will
fill to a safe level, above the elements, before heating.
• The “Ready/Status” light will cycle two red flashes while
the machine is filling to the safe level.
• After this amount of water has heated to about 96ºC
the boiler will draw more water in until the temperature
drops by 1 or 2 degrees. The boiler will then heat again.
This heat fill cycle continues until the boiler is full.
• Whilst the machine is above the safe level and filling,
the “Ready/Status” light will glow orange.
• The “Ready/Status” light will glow green when the
machine is both full and up to normal operating
temperature, allow approx 15 minutes.
• The boiler is now ready for use.
NOTE: Because the boiler is electronically controlled no
priming is necessary. The element cannot switch on until
a safe level of water is reached.
2”/50mm*
13.8”/350mm
18.3”/464mm
2”/50mm
2”/50mm
* Required for ventilation if the machine
is installed in an enclosed cabinet.
8.3”/211mm
18.3”/465mm
14.3”/363mm
Plan View
7.9”/200mm
6.8”/173mm
Power Water
2”/50mm
4.1”/105.5mm 2.5”/64mm Hole Saw
13.8”/350mm
18.3”/464mm
2”/50mm
2”/50mm
* Required for ventilation if the machine
is installed in an enclosed cabinet.
8.3”/211mm
18.3”/465mm
14.3”/363mm
Plan View
7.9”/200mm
6.8”/173mm
Power Water
2”/50mm
4.1”/105.5mm 2.5”/64mm Hole Saw


