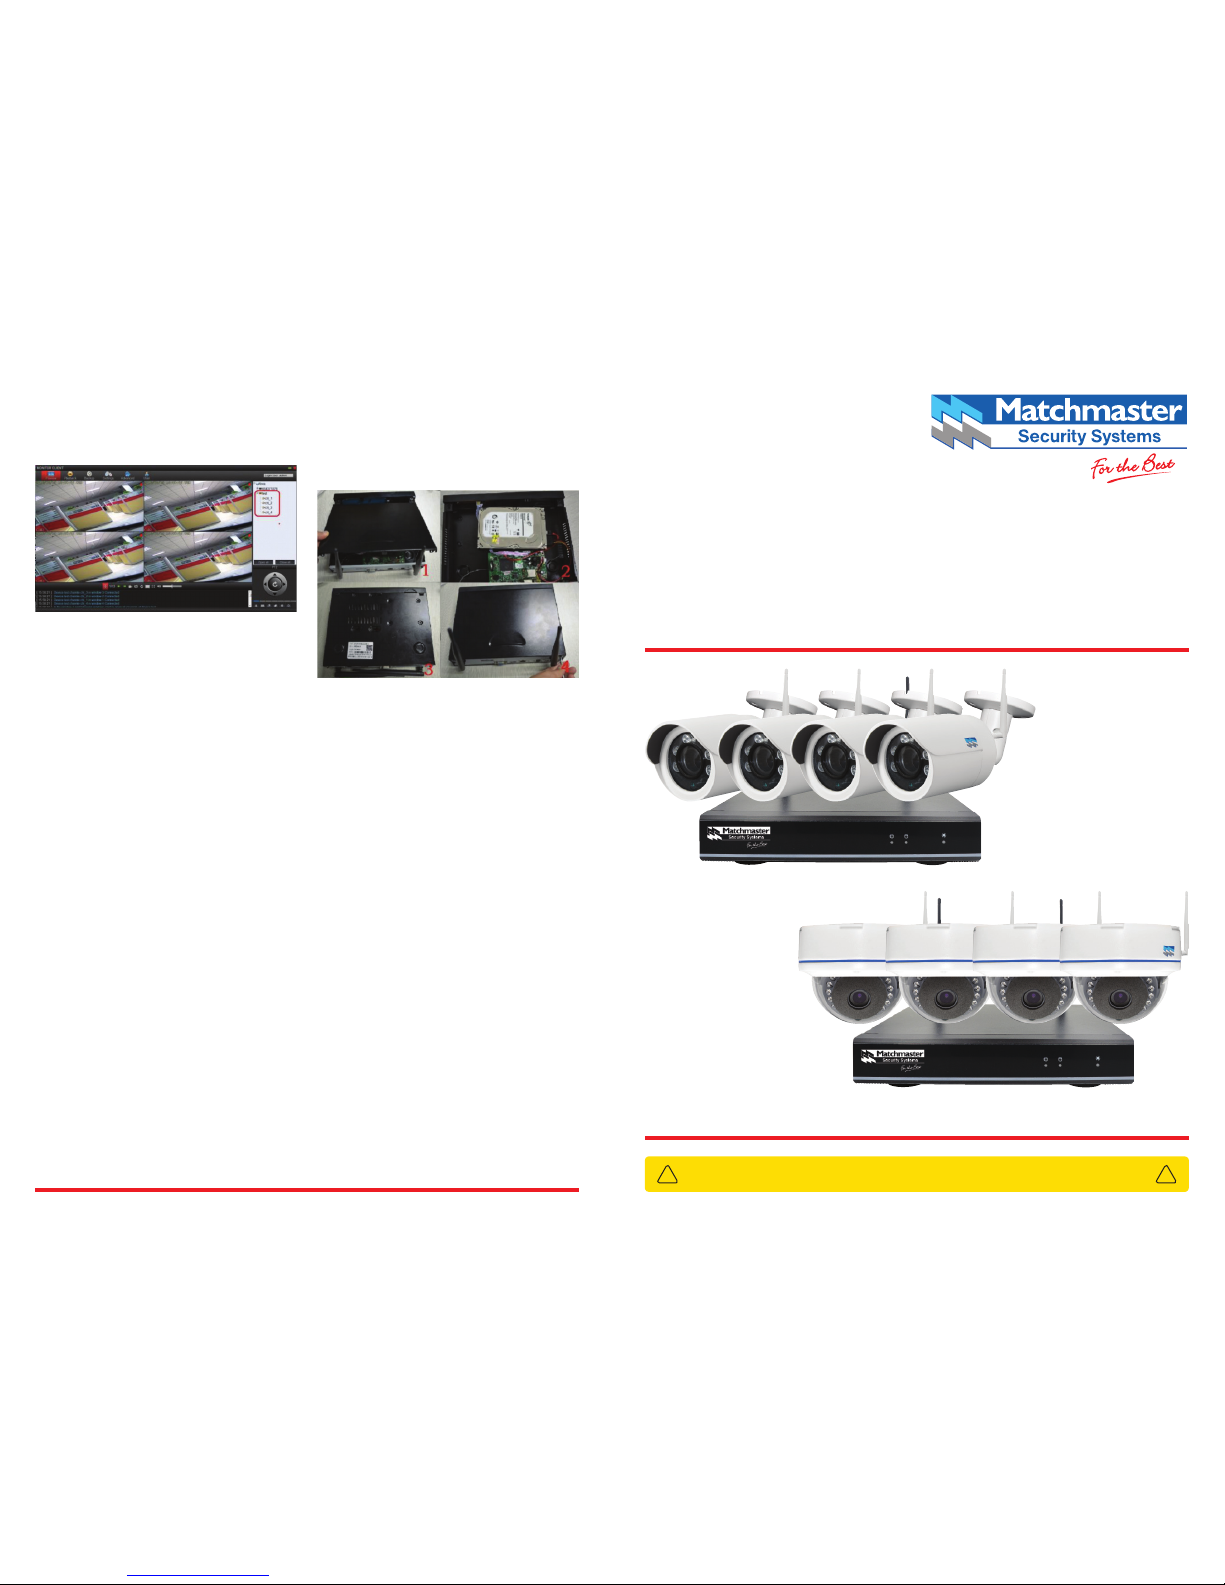
Matchmaster 50MM-WN8CH2TB4B User manual

Note: The default WNVR username and
password are, admin and, the password
is blank with no characters, if the user has
updated this detail please use the newly
added username and password.
CMS remote playback
Select “playback” on the main interface,
double click the device list or point “begin
searching” its default is to show all recording
files of that day.
The CMS also supports local playback and
remote playback support base in “file type”/
date to search, and the file will be show on
the lower window of the application.
AU Technical Support 1800-AERIAL237425 www.matchmaster.com.au
NZ Technical Support 0800-AERIAL237425 www.matchmaster.co.nz
HDD upgrade
To upgrade the Wireless Network Video
Recorder (WNVR) from its existing 2TB hard
drive to the larger 4TB hard drive please
follow the steps below and also reference
the diagram below.
1. Remove the screws as indicated in
diagram above and remove the cover
2. Turn the WNVR upside down, note
the screws that support the drive and
remove them so that the HDD is free
from the WNVR.
3. Remove the cables connected to the
existing hard drive and connect to the
new hard drive, making sure to be careful
with the connectors
4. Align the drive to the existing mounting
holes and secure using the screws
removed from the original drive
5. Place the WNVR cover back and use
the previously removed screws to
reassemble the WNVR. The unit is now
upgraded with the larger HDD.
Live remote monitoring through Smartphone and PCs
50MM-WN8CH2TB4B / 50MM-WN8CH2TB4D
HD Security Camera Kit
QUICK GUIDE
IMPORTANT: Remember to change your password from factory default.
! !

Packing List
Unpack the kit and check you have all the
components as set out in the table below,
if you are missing any components please
contact Matchmaster or its agents for
assistance.
Wireless network video
recorder (WNVR)
1 PCS
Power (WNVR) 1PCS, 12V/2A
Wireless camera (WIPC) 4/8 PCS
Power (WIPC) PCS (12v/1A)
Mouse 1 PCS
Manual 1 PCS
Ethernet cable 1 PCS
HDD screw bag 1 PCS
Camera antenna 4/8 PCS
Camera accessory bag 4/8 PCS
Chapter 1 Hardware Instruction
Chapter 2 Product Usage
A. User Login First Time
Right-click on the mouse for the system
interface, click the main menu icon of the
toolbar to enter the user login interface.
(default user: admin, password: blank)
We strongly recommend modifying the
default password for your security and to
prevent unauthorised use, it is currently
left blank with no characters entered. We
recommend a strong password including
symbols, number, lowercase and uppercase
characters and the password should be
modified every 6 months.
Preparing to install the kit into the premises
Installation of the WIFI IP cameras (WIPC).
The WNVR will need to be connected to a
monitor or television using the VGA port or
the HDMI port. Note: select HDMI or VGA on
the monitor or TV.
Now connect the mouse using the USB port
as indicated on the back of the device.
The power adaptor should now be
connected to the mains outlet and the
WNVR.
Align the WIPC antennas and assemble one
antenna to each camera, the camera will
also require the 240VAC to 12volt adaptor
provided for power.
The WIPC antennas should be aligned
vertically for the best signal performance.
Mount the cameras in the preferred positions
with the premises.
Referring to diagram above please install the
two WIFI antennas to the WNVR.
Installation of the WNVR
K. IE Remote Access
When using a computer to access the
WNVR the user has two choices, IE (Internet
Explorer) and CMS. If within the LAN just
enter the WNVR IP address, e.g.192.168.1.2
where this address is the same as the WNVR
input the user name and password for
access. The user may need to download a
browser plug-in to play the video. If asked,
click to download the plug-in and accept to
proceed with the install. Exit the browser
and restart again to allow install completion.
Using the WNVR IP address the user can
access its web interface by typing the user
name and password and clicking log in.
IMPORTANT: The user must have their PC/
Laptop/device within the same network
range of the LAN e.g 192.168.1.XXX
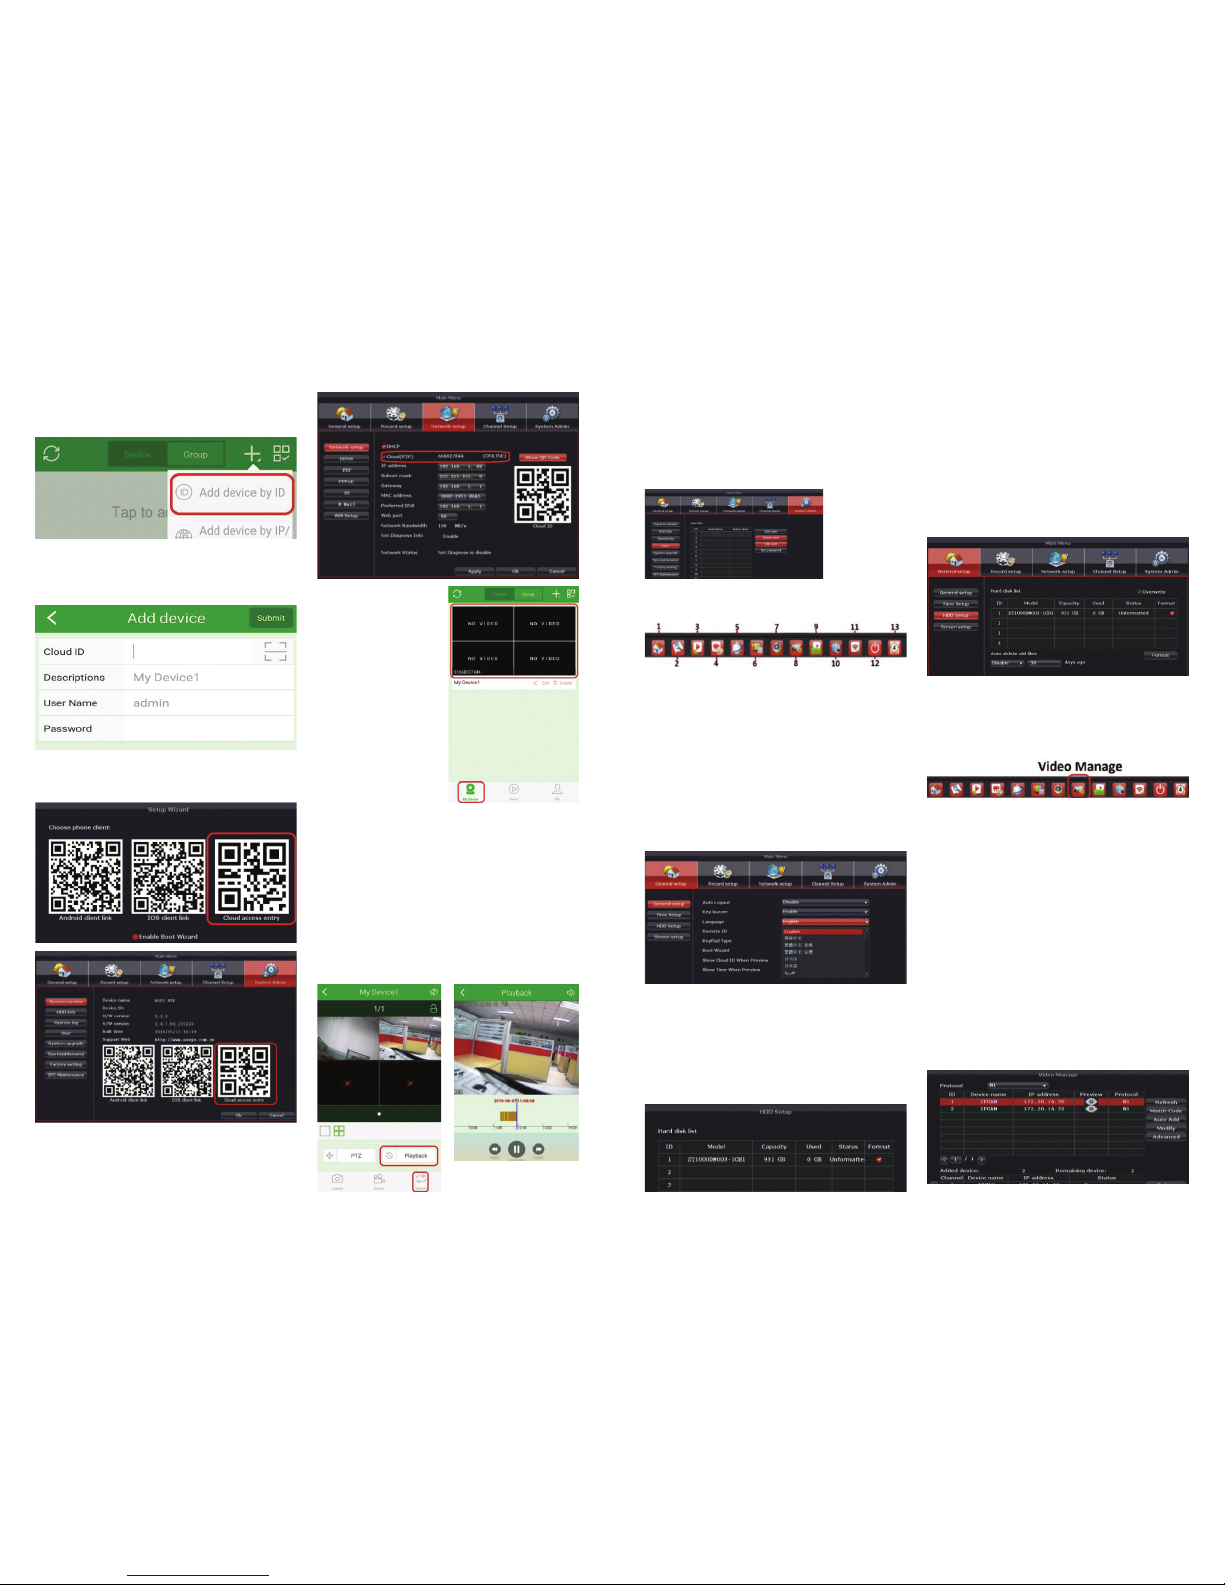
L. CMS Remote Access
Log in to the website: www.aveye.com.cn
then click download app, “CMS download”
now goto the PC download file, now locate
the downloaded file and double click to
install the app onto the PC.
Function Function Description
Add Choose device what we need,
click (add), let device into
device list on the right area.
Quick
setup
Select all device to the “area”
Add area Can add more subsidiary areas,
better to divide device by area
Add
device
Manual add device, support two
connection way (IP address
(LAN) and Cloud ID (WAN))
Modify
device
“area” right click the device
of device list, select “Modify”/
“Delete” device.
Clear
devices
Clear all device of the “area” list
Flush Flush currently device list
Manually adding a device to the CMS
app: The CMS application can support
two connection methods, LAN (local area
network)via IP address and Cloud ID in a
WAN (wide area network) environments.
See below diagram for the example of
choosing IP address or ID.

After registering, input user name and
password to login. Enter main menu, click
the “+” on the top right hand corner.
Click ”Add device by ID” and enter to the
adding interface, input cloud ID or scan QR
code directly. Input the WIFI WNVR user
name, password.
Kindly note: you can obtain the Cloud ID
from the setup wizard or use the QR code
relating to the Cloud ID.
After successfully
adding and saving
Cloud ID, click “My
Device” at the bottom
of left corner.
On the portable device, touch or click the
added device; the user can now view the live
video remotely on a mobile phone.
Note: Image quality will vary subject to the
internet speed and performance. There are
two options to accommodate difference
speeds. You can select clear or smooth for
different resolutions. Smooth is ideal where
the internet connection is slow.
Video files on the WNVR can be played back
remotely using this application.
Note: You also could get Cloud ID in network
setting page.
B. Toolbar Instructions
C. Language Select
Right-click to enter the interface, choose
main menu > general setup > language,
select the language you need.
1. Main menu
2. Setup wizard
3. Video playback
4. Manual record
5. PTZ control
6. Color adjust
7. Volume
D. HDD Format
Note: The hard disk must be formatted
when be used for the first time.
Method 1: click toolbar > setup wizard
> the last step of setup wizard > select
hard disk to be formatted > format.
8. Video managr
9. Video backup
10. Fast network
11. WIFI add
12. Exit system
13. X4 view
Method 2: Right-click the screen > main
menu > general setup > HDD setup > select
hard disk to be formatted > format.
On this page, you can see all the information
of the hard disk, including model, capacity,
state and format state.
Note: There is no need to reformat the drive
if this has already been completed in the
settings.
After entering into main menu, then the user
can set the system user name and password.
Go to admin > user, modify password, add
user, modify user authority, etc.
(“admin“ is the undeletable superuser,
password can be modified)
E. Camera Adding
Right click anywhere on the screen and
click on “Video manage” menu option note
diagram below.
The WNVR and the WIPC are set at the
factory to be paired already. Where the IP
cameras are not found please follow this
procedure. There two ways to add cameras
using the menu options “Auto Add” and
“Match code”.
Video Manage
Match code: Before using a new or existing
WIPC, the WNVR must match the code of
the camera. Using a data cable between the
WIPC and WNVR, remove the cable once the
code is matched. This must be completed for
any additional WIPC.
Auto Add: The WNVR system will search any
wired cameras and code matched wireless
cameras automatically that are on the
configured network.

F. Recording Setting
Note: The kit is set in the default to record
24hours/7days, you may change this default
to other time s and days.
Recording Modes Include:
Timing recording, motion detection
recording, manual recording and four types
of alarm recording. Each type has a different
recording mode and shows separate
indicator icons with various colours on the
top right. Right-click anywhere of the screen
> “Main Menu” > “Record Setup” > “Record
Plan”.
Motion Detection Video Recording: Select
“Channel Setup” > “Video Detection” > It will
trigger when “Detection” type be modified
to “motion”, then check “Buzzer”, “Alarm”,
“Email Notice” etc. according the demand.
Manual Record: 24/7 video recording and
recording time can’t be changed. Right-click
> toolbar > “Manual Record”.
G. Video Playback
Toolbar > “Video Playback” > select
“Channel” > select “Record mode” > select
“Search time” > click “Search”, click time
bar to select the time point you want > click
“Playback” to see the recording file.
Playback button: Playback previous video,
Playback next video, Play,
Pause, Fast “x2”, “x4”, “x8”.
H. Video Backup
Note: Where the WNVR has only one USB
port there are two options to backup video.
1. Use a USB hub into the WNVR allowing
both the mouse and a USB flash drive
2. Use network access via the management
port of the WNVR through the software
CMS (Refer K). Example using a local
flash drive for video backup.
I. Network Settings
Accessing the WNVR through the LAN
network can be achieved with a PC and
IE browser. The WNVR must be setup to
support this access.
GOTO Toolbar > Main Menu > Network
Setting to IP address. If you are not familiar
with network setting, click DHCP as
indicated in diagram below.
Where the user is familiar with network
settings and network environments manually
configure the network parameters to
operate with the premises LAN network.
Success is identified when (Online) is
indicated.
Chapter 3 Remote Access
J. Mobile Access
Download Mobile App
Method 1: Open the setup wizard, it shows
three QR codes, now scan the corresponding
QR code for Android and iPhone to
download and install mobile app;
Or enter “Main Menu” > “System Admin” >
“System Version” to scan corresponding QR
code to download and install mobile app;
Method 2: Search “AVEYE” in Google Play
to download for android device; Search
“AVEYE” in App Store to download for iOS
device.
Add WNVR Device by Mobile App
After installing
the mobile app,
launch it and
begin the once
only registration
process. Please
click on register
and follow the
registration
process.
This manual suits for next models
1
Other Matchmaster Security Camera manuals