Maycom MP-50 User manual

maycom MP-50
User's Guide

3
Information to user : PART 15, PARAGRAPH 15.21 AND
15.105(b)
Changes or modifications not expressly approved by the party
responsible for compliance could void the user’s authority to
operate the equipment
FCC Notice
NOTE : This equipment has been tested and found to comply
with the limits for a Class B digital device, pursuant to Part 15 of
the FCC Rules. These limits are designed to provide reasonable
protection against harmful interference in a residential installation.
This equipment generates, uses and can radiate radio frequency
energy and, if not installed and used in accordance with the
instructions, may cause harmful interference to radio
communications. However, there is no guarantee that interference
will not occur in a particular installation. If this equipment does
cause harmful interference to radio or television reception, which
can be determined by turning the equipment off and on, the user is
encouraged to try to correct the interference by one or more of the
following measures:
-Reorient or relocate the receiving antenna.
-Increase the separation between the equipment and receiver
-Connect the equipment into an outlet on a circuit different
from that to which the receiver is connected.
Consult the dealer or an experienced radio/TV technician for help.

4
About your maycom MP-50 Player .............................................................4
Unpacking your maycom MP-50 Player .....................................................5
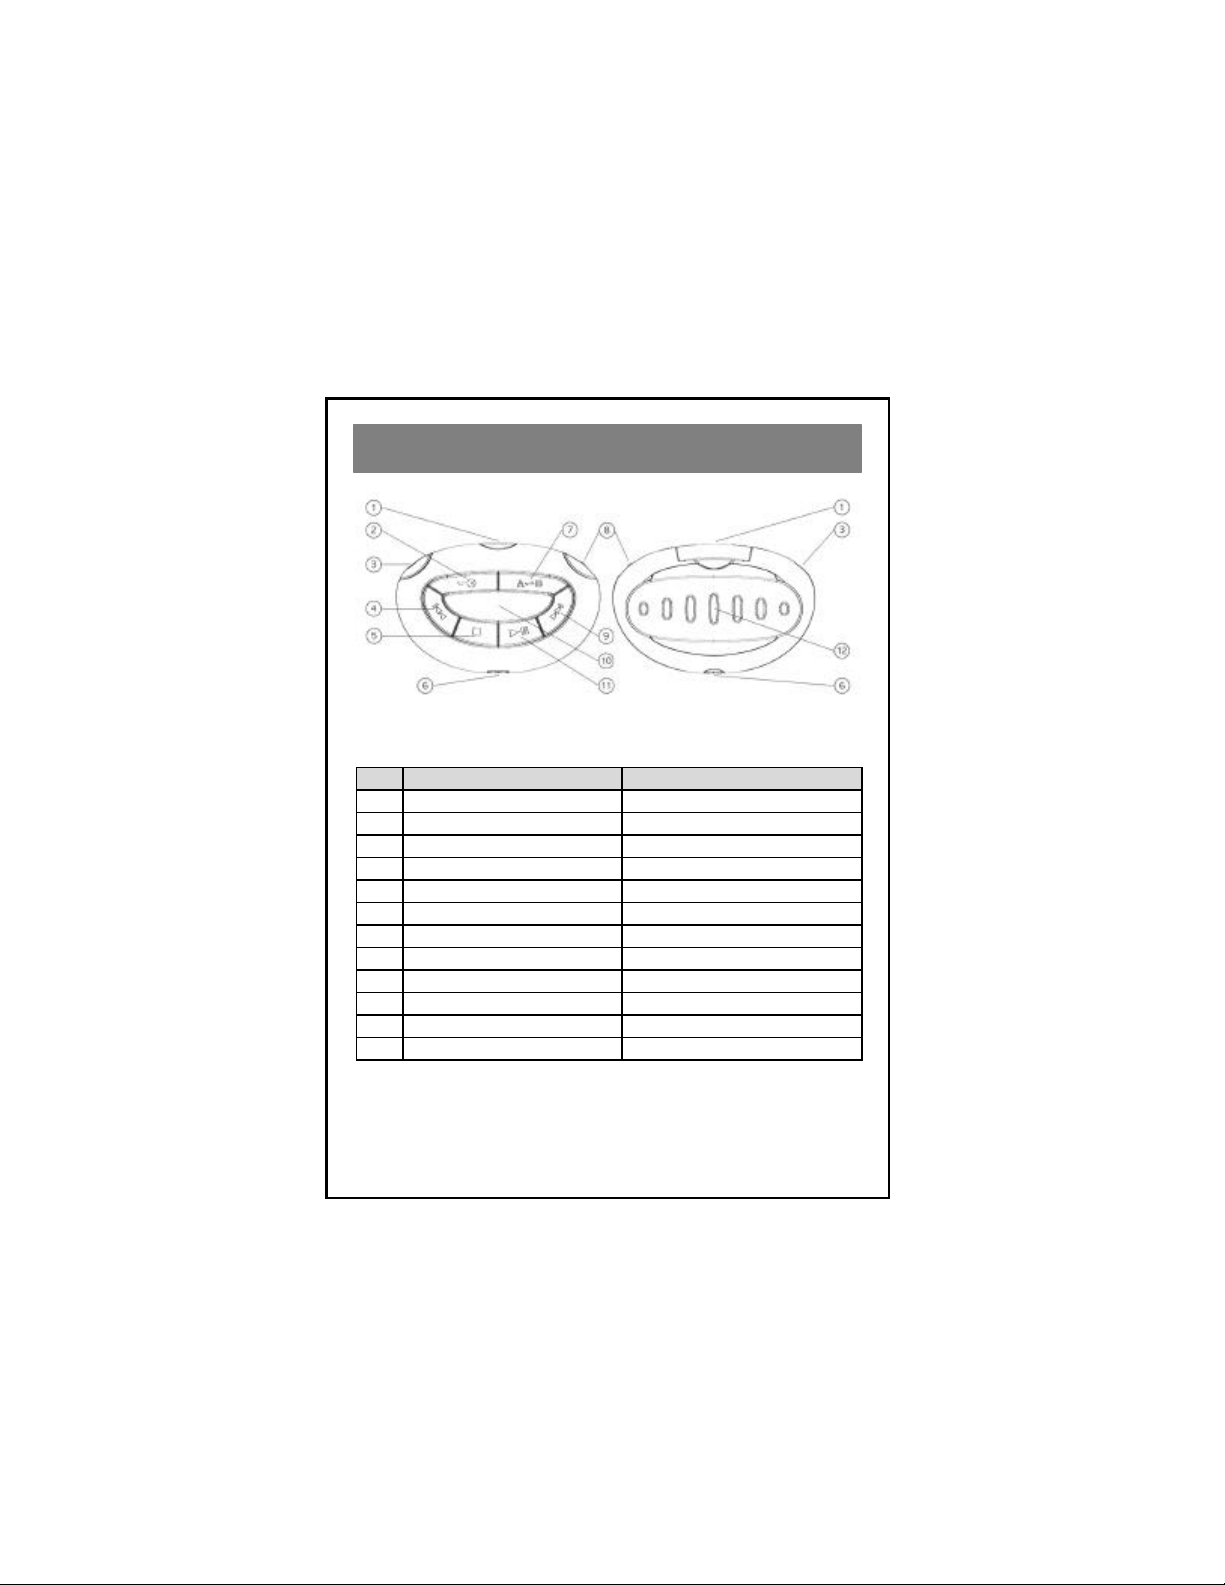
At a glance...................................................................................................6
Specifications..............................................................................................7
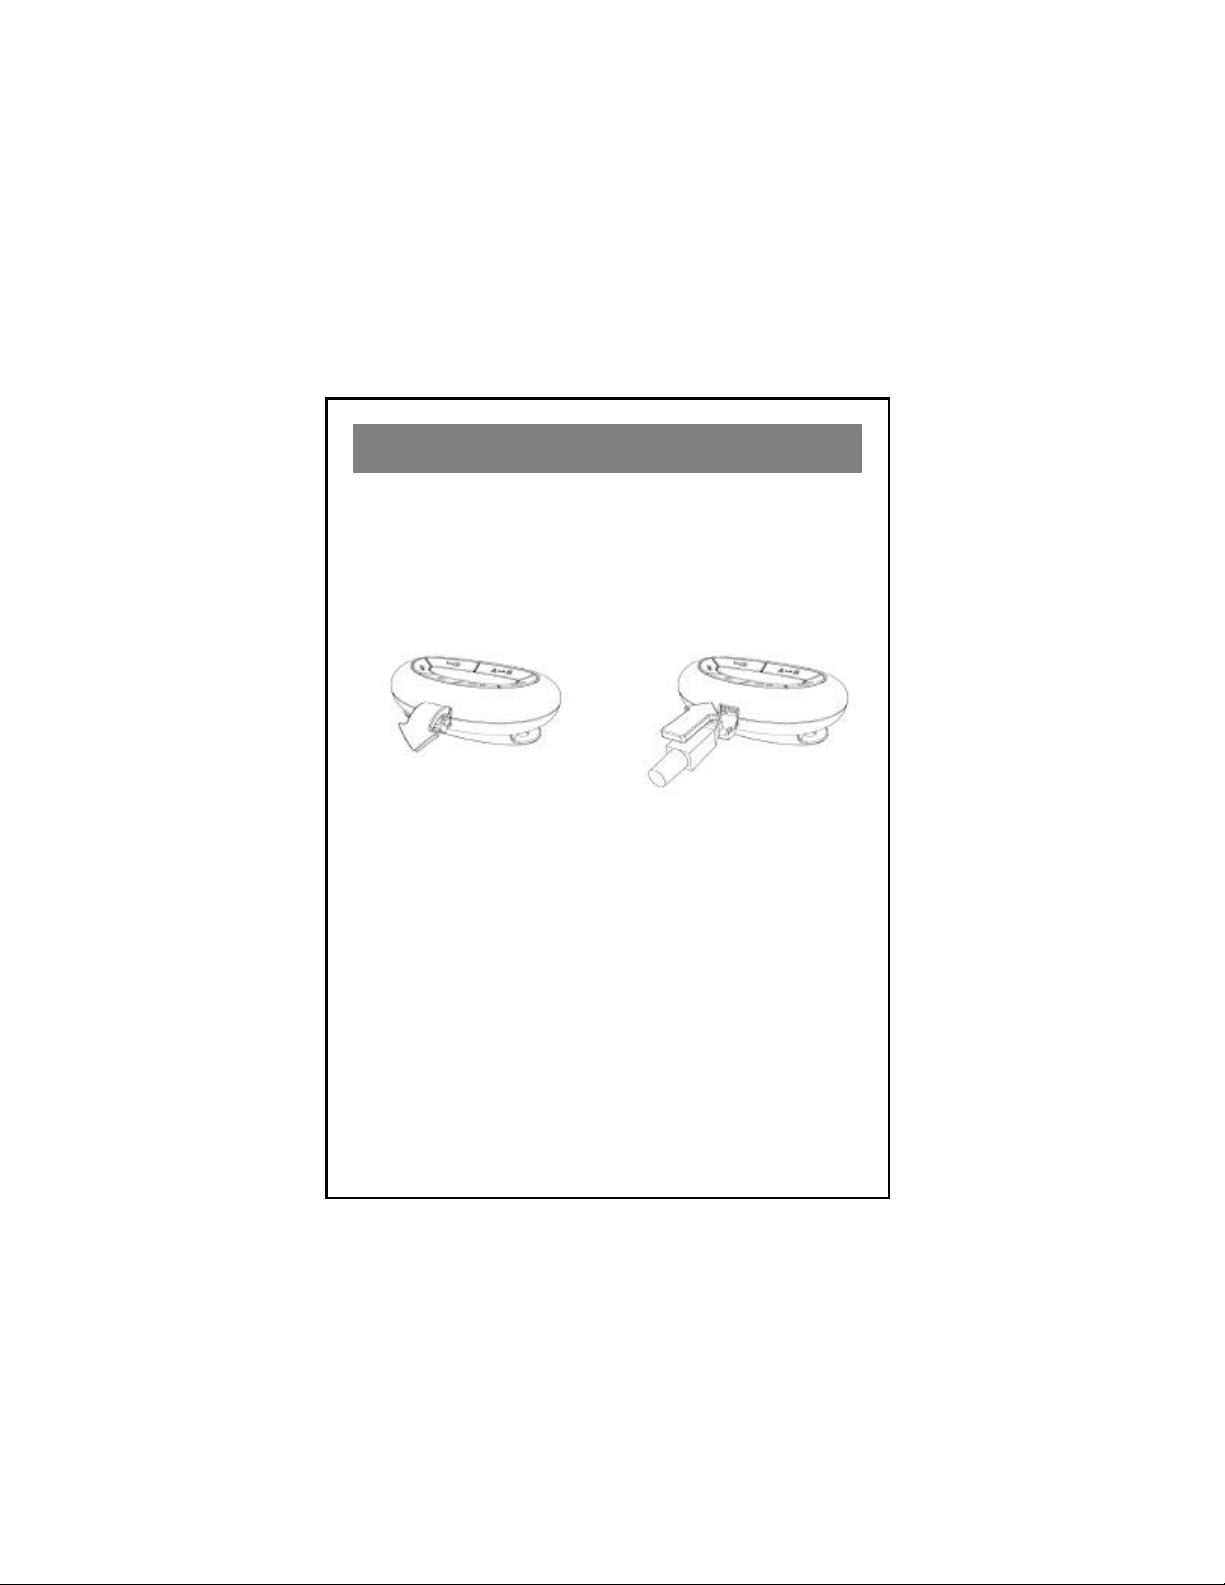
Installing Batteries.......................................................................................8
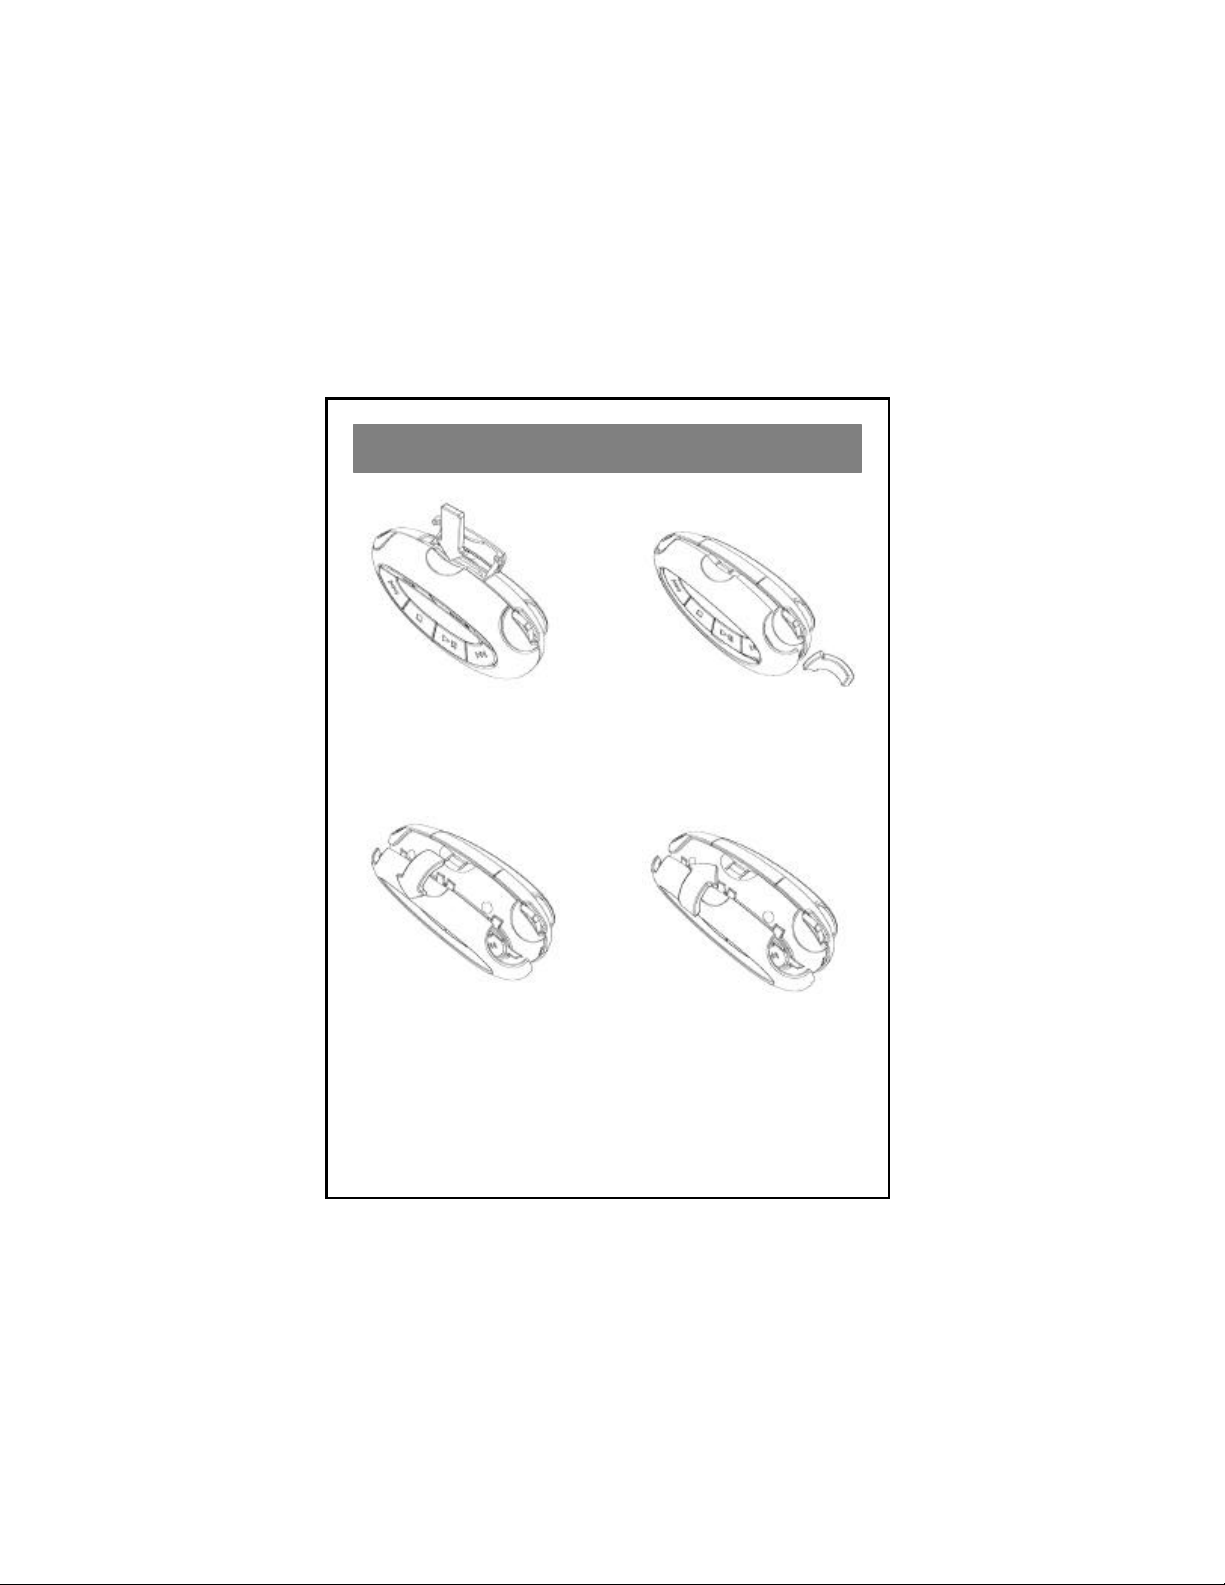
Exchanging Covers......................................................................................9
Installing the USB driver in Windows ......................................................10
Copying files to the MP-50 Player in Windows........................................17
Macintosh Operation.................................................................................19
Operating the MP-50 Player......................................................................21
Keylock.....................................................................................................22
The Menu Key...........................................................................................22
The Menu / Menu Tree / Equalizer ...........................................................23
Play Modes................................................................................................24
Using the MMC Expansion Slot...............................................................25
Inserting a MultiMediaCard......................................................................25
Selecting the source for playback..............................................................26
Removing a MultiMediaCard....................................................................27
Installing Music Match Jukebox (Windows) ............................................28
Encoding MP3 files from Audio CDs (Windows) ....................................32
Static discharge..........................................................................................33
Storing & Handling...................................................................................34
Troubleshooting.........................................................................................34
Contents

5
The maycom MP-50Player is the most convenientand easy-to-use
way to enjoy music whereever you are.
In order to make the most of your MP-50 Player read this user´s
guide thoroughly.
About your maycom MP-50 Player

6
The following components are in the MP-50Player box:
MP-50 MP3 Player Additional Cover Stereo Headphones
‚
Owner´s Manual CD-Rom USB Cable
Carrying case(Optional) Clip (Optional)
Note: All pictures are symbol pictures only. The actual look of items may vary.
Unpacking your MP-50 Player

7
Front view Back view
No Description Key pressed for approx. 2 seconds
1 MMC (MultiMediaCard) Door -
2 Display artist & title (ID3 tags) Activate/Deactivate Keylock
3 Headphones Jack -
4 Previous Track Rewind within track
5 Stop Power On/Off
6 USB Jack -
7 A-B Repeat Format (erase) internal memory
8 Menu Key / Volume up/down -
9 Next Track Fast Forward within track
10 Display Window -
11 Play/Pause Select internal memory/MMC
12 Battery Cover -
At a glance

8
MP-50 Player
•Maximum audio output power: 2x15mW
•Signal to noise ratio: >90dB
•Frequency response: 20 Hz –20 KHz
•Maximum total harmonic distortion: 0.3%
•Headphone impedance: 16 ohm
•Power consumption at 128 kbps MP3 decoding at volume
level 15, no EQ: approx. 90mA
•Playing time with new set of batteries: approx. 8-10 hours
•Dimensions (mm): W86 x D55 x H32
•Weight without batteries: 52g
•Power Supply: min. 2.4 VDC (2 pcs AAA Batteries or
rechargeable batteries-not included)
•Internal memory: 64 MB
•Maximum supported MP3 bitrate: 256 kbps
•Supported ID3 Tags: v2.2/v2.3
Minimum system requirements Windows
•Operating system: Windows 98 SE or better
•CPU: Pentium166MHz or faster
•RAM:32 MB or more
•CD-ROM drive
•USB interface
Minimum system requirements Macintosh
•Operating systems:-Mac OS 8.6 or better
-Mac OS X 10.1 or better
•CPU: Mac 604 Processor 120MHz or faster
•RAM:32 MB or more
•CD-ROM drive
•USB interface
Specifications

9
Install 2 AAA batteries* into your MP-50. You may use alkaline
batteries or NiMh rechargable batteries (NOT NiCd).
1) To release battery cover
press down where indicated. 2) Open the cover.
3) Insert batteries according
to polarity diagram. 4) Replace the battery
cover.
A new set of alkaline batteries provides an MP3 play time of
approximately 8-10 hours.
*not included
Installing Batteries

10
1) Open the MMC door. At
the marking indicated in the
above picture, gently lift the
cover towards you until you
hear a click.
2) Loosen the cover below
the menu key and below the
headphone jack.
3) The cover can now be
removed. 4) To replace the cover
simply snap it into place
over the front of the MP-50
Player.
Never use force to remove the cover. Damaged covers are not
covered by the warranty.
Exchanging Covers

11
1) Turn on your PC and the MP-50 Player.
2) Insert the MP-50 CD-Rom into your CD-Rom drive.
3) Connect the USB cable to your MP-50 Player where
indicated:
Carefully open the USB
door. Plug in the smaller end of
the USB cable.
4) Connect the larger end of the USB cable to your PC USB
port.
5) Your PC will automatically detect MP-50. Depending on
your version of Windows please turn to the appropriate page:
Windows 98...................................................................................12
Windows 2000..............................................................................14
Windows ME................................................................................16
Windows XP .................................................................................16
Installing the USB driver in Windows

12
Windows 98
1) Click "Next" to start the installation.
2) Select "Search for the best driver" and click "Next".
3) Select "Specify a location" and browse the CD to locate the
correct path of the driver (e.g. D:\USB_Driver). Click "Next".

13
4) After locating the driver the system asks for confirmation.
Click "Next".
5) Click "Finish" to complete the installation. Turn to page 17.

14
Windows 2000
1) Click "Next" to start the installation.
2) Select "Search for a suitable driver" and click "Next".
3) Select "CD-ROM drives" and click "Next".

15
4) After locating the driver the system asks for confirmation.
Click "Next".
5) Click "Finish" to complete the installation. Turn to page 17.

16
Windows ME
1) Select "Automatic search" and click "Next". Windows ME
will search the CD-ROM drive for the appropriate driver.
2) Click "Finish" to complete the installation. Turn to page 17.
Windows XP
1) Select "Install the software automatically" and click "Next".

17
2) Should the following message appear ignore it and click
"Continue Anyway". Visit the support section of
www.emaycom.com for further information on this message.
3) Click "Finish" to exit the Wizard.
After successful installation:
The driver installation has been completed. For information how to
copy files continueon this page.
To install MusicMatch Jukebox see page 29.

18
Copying files to the MP-50 Player in
Windows
1) Decide whether you want to access the internal memory or an
MMC. To access an MMC, insert it into the MP-50 Player (see
page 26) and switch to it (see page 27).
2) Connect the MP-5016 Player to your PC.
3) In Windows Explorer find the drive letter representing the
removable disk (Drive E: in our example below). If there is an
MMC installed, the icon represents the MMC. If there is no
MMC installed, it represents the internal memory. Some
versions of Windows are able to display "maycom" as the disk
name when the internal memory is being used.
Internal Memory MMC installed
Windows XP
Other versions
4) Use Windows Explorer to copy the MP3 files from your
harddisk to theMP-50Player internal memory or your MMC.
If you have encoded MP3 files with MusicMatch Jukebox these
can typically be found in C:\My Documents\MyMusic.
Beware: Never insert or remove an MMC before having
disconnected the MP-50Player from the PC.
maycom(E:)

19
The MP-50 Player can also be used like a floppy disk. You may
copy all types of files to the internal memory for portability.
However, only MP3 files can be played by theMP-50Player.
If you are using a MultiMediaCard, the MP-50 Player has the
function of an MMC Reader (similar to a floppy disk drive). You
may use it to read and write any data to or from the MMC.
However, only MP3 files can be played by theMP-50Player.

20
Since the MP-50 Player is a USB mass storage class device, no
driver needs to be installed.
1) Decide, whether you want to access the internal memory or an
MMC. To access an MMC, insert it into the MP-50Player
(see page 26) and switch to it (see page 27).
2) Connect the USB cable to your MP-50 Player:
Carefully open the USB
door. Plug in the s
maller end of
the USB cable.
3) Connect the larger end of the USB cable to your Macintosh.
4) A removable disk icon appears on the desktop. If there is an
MMC installed in the MP-50Player, the icon represents the
MMC. If there is no MMC installed, it represents the internal
memory. See the table on page 21.
5) Copy files by using the drag & drop method. File names of MP3
files must end with .mp3 to be played by the MP-50 Player.
If you use iTunes you may directly drag files from the playlist to
the removable disk icon to copy them.
6) Eject (unmount) the removable disk (drag the icon into the
trash), before disconnecting the MP-50Player from your
Macintosh.
Macintosh Operation

21
Beware: Never insert or remove an MMC before having ejected
and disconnected the MP-50 Player from the Macintosh.
If the internal memory is used, the volume´s name is "maycom". If
the MP-50 Player was connected to your Macintosh with an MMC
installed, the name of the volume is the name of the MMC
("Untitled" in the example below).
Internal Memory MMC installed
Mac OS Classic
Mac OS X
The MP-50 Player can also be used like a floppy disk. You may
copy all types of files to the internal memory for portability.
However, only MP3files can be played by the MP-50Player.
If you are using a MultiMediaCard, the MP-50 Player has the
function of an MMC Reader (similar to a floppy disk drive). You
may use it to read and write any data to or from the MMC.
However, only MP3 files can be played by the MP-50Player.
Visit the MP3 zone at www.emaycom.com for MP3 & Macintosh
MP3 software information.
maycom
maycom
Table of contents
Other Maycom MP3 Player manuals