4 5
.. ..
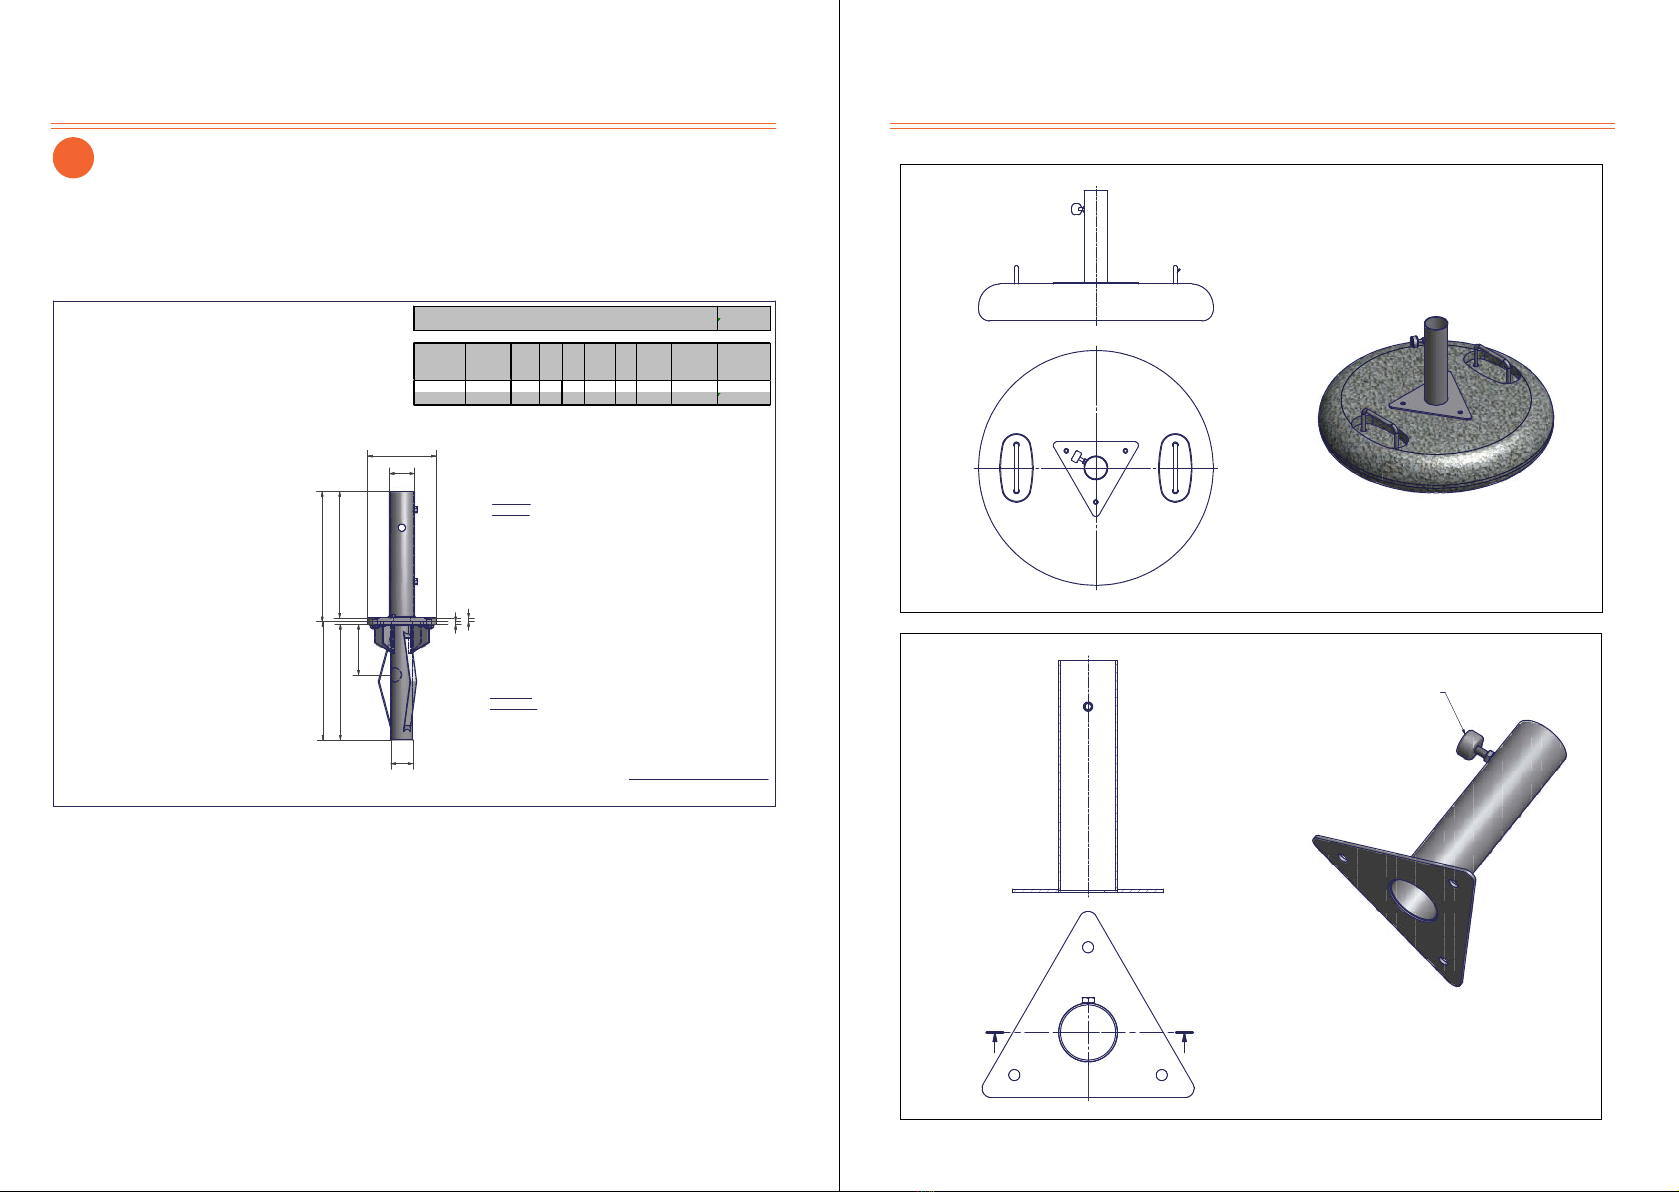
SIZE L 1 Distance ground tube L 2 Distance ground tube
2,5 x 2,5 m 250 cm 270 cm 353,5 cm 381,8 cm
3 x 3 m 300 cm 320 cm 424,5 cm 453,7 cm
ø 3 m 300 cm 320 cm 420 cm 452 cm
Distance Ground tube (middle)
01 TYP S16 HOME / TYPE S16 HOME
01
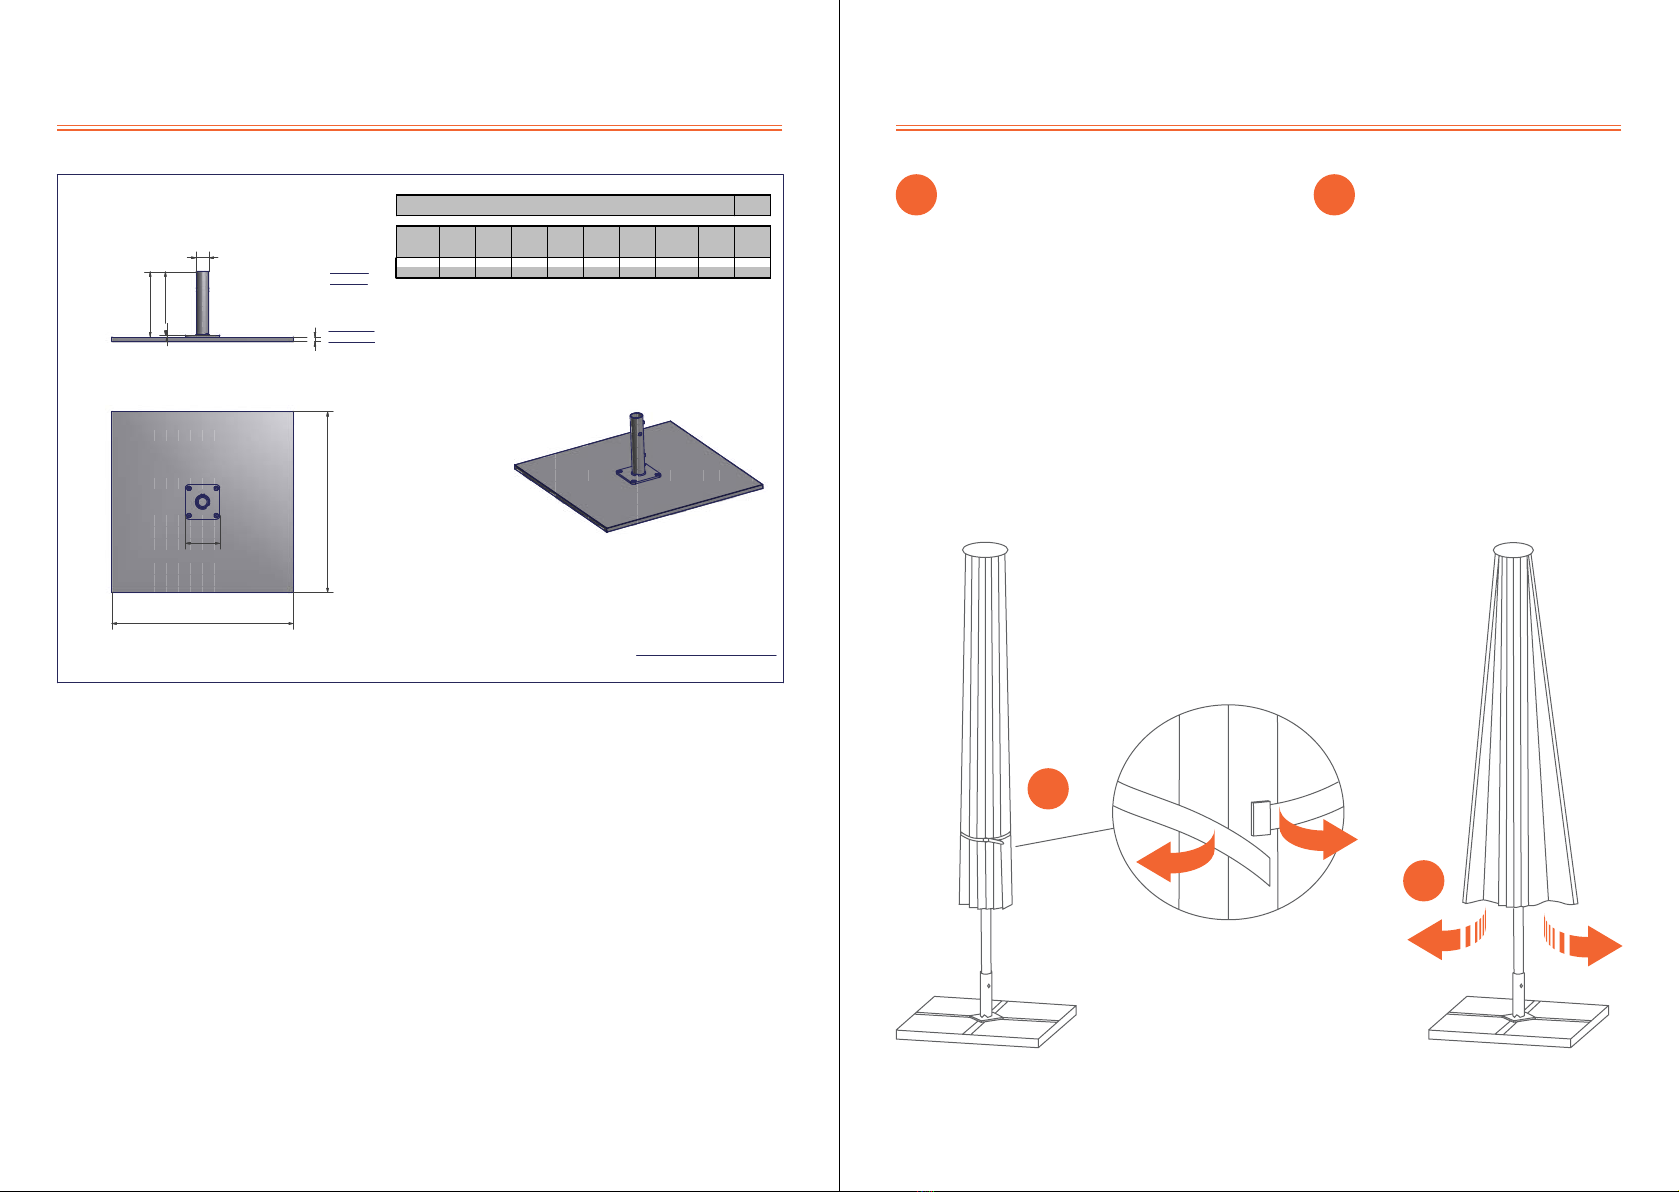
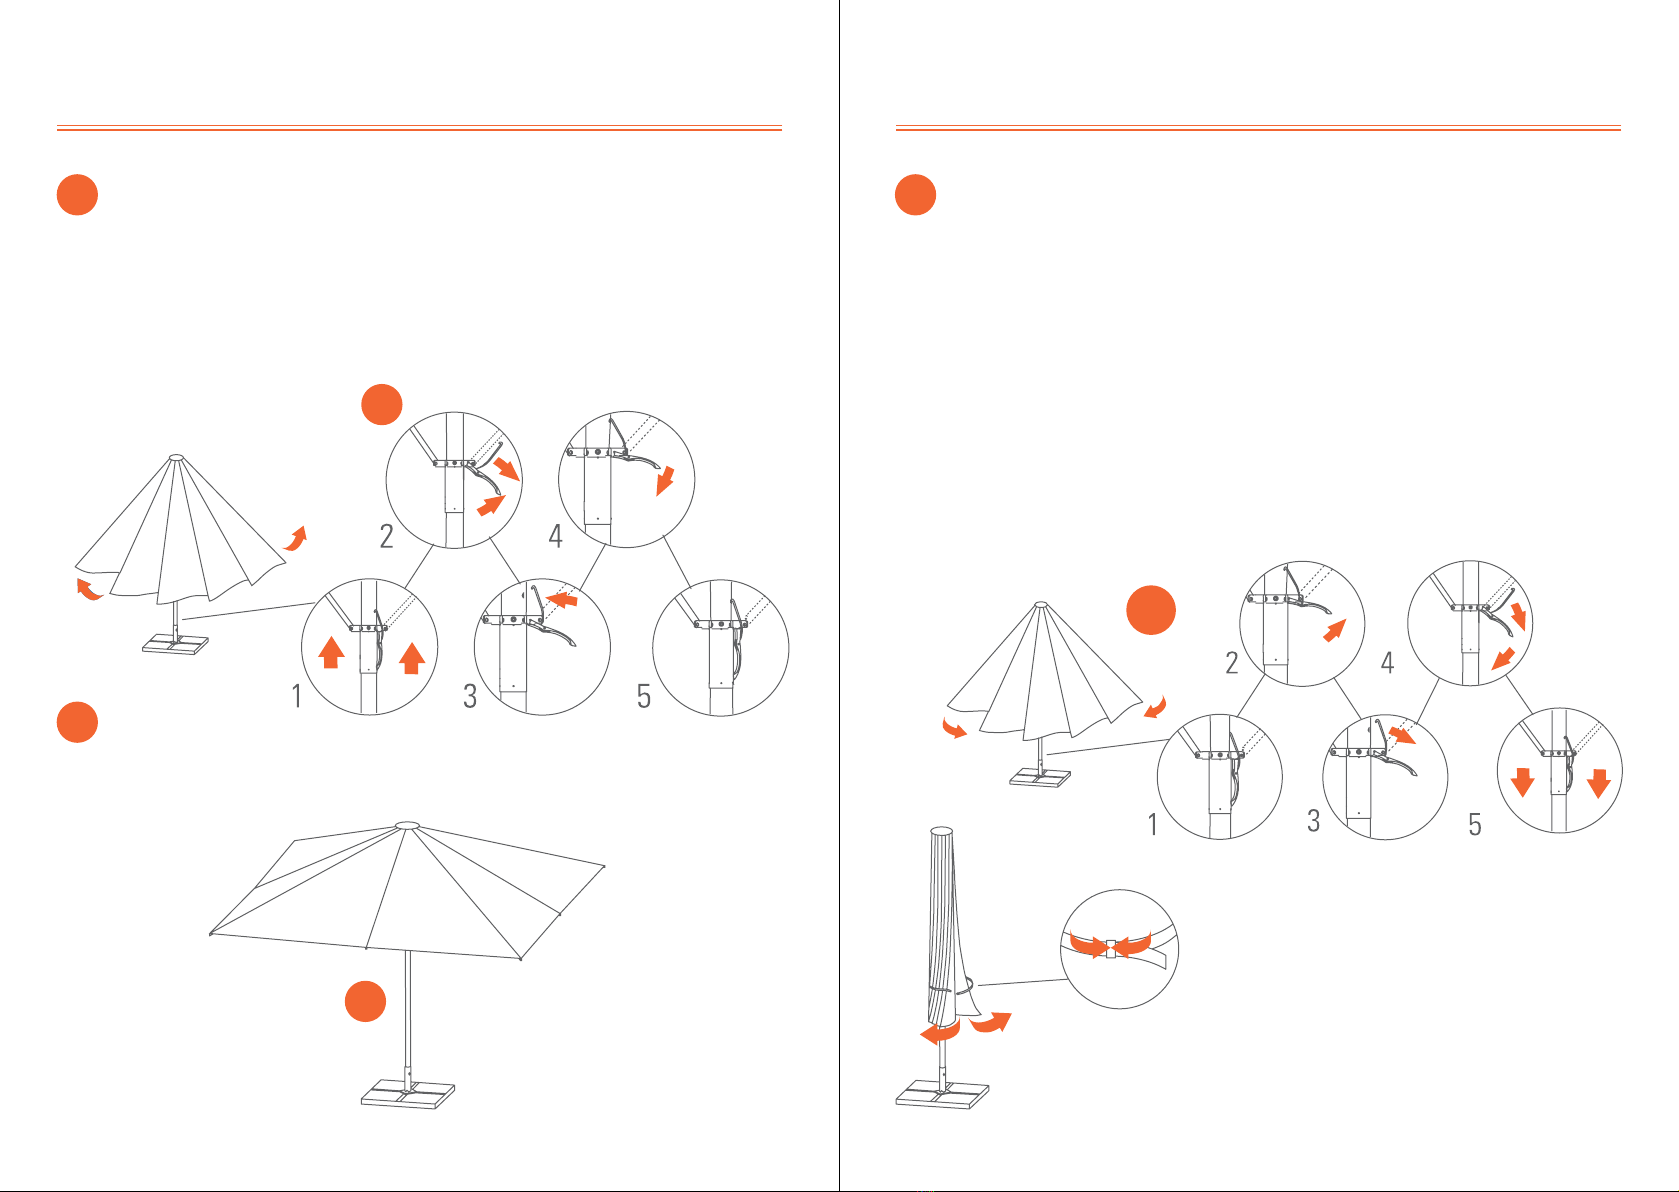
Sicherheitshinweis:
Dieser MDT-Schirm Typ S16 ist bis zu Windlasten von 60 km/h
(7 Beaufort) ausgelegt. Dieser Schirm darf aber nur ausschließ-
lich mit den von MDT vorgesehenen Bodenverankerungen bzw.
Ständern aufgestellt werden. Bei aufkommenden Wind / Böhen
muß der Schirm unverzüglich nach Beschreibung geschlossen
werden und mit dem Schirmband gesichert werden. MDT über-
nimmt keine Haftung für Schäden, die durch eine Verwendung
des Schirmes entgegen den Anweisungen in der Bedienungsan-
leitung steht.
Installationshinweis:
Der Abstand der Schirme sollte min. 20 cm betragen. Den ent-
sprechenden Abstand der Bodenhülsen entnehmen Sie bitte der
Tabelle. Sollte der Sicherungsbolzen des Schirmes nach Einbau
nicht mehr in das vorgesehene Loch in den Schirmmast passen,
kann dieses erneut duch den Mast gebohrt werden. Auf keinen
Fall dürfen die Schirme ohne Sicherungsbolzen betrieben wer-
den.
Abstand der Bodenhülsen (mittig):
SCHIRMGRÖSSE L 1 ABSTAND DER HÜLSEN L 2 ABSTAND DER HÜLSEN
2,5 x 2,5 m 250 cm 270 cm 353,5 cm 381,8 cm
3 x 3 m 300 cm 320 cm 424,5 cm 453,7 cm
ø 3 m 300 cm 320 cm 420 cm 452 cm
Alle Angaben sind ca.-Angaben und ohne Gewähr.
Safety Instruction:
The MDT-umbrella Type S16 is good for windy conditions up
to 60 km/h (7 Beaufort), but it may only be set up with bases
which are recommended by MDT. In case of upcoming wind, the
umbrella must be closed and fixed with the ribbon immediately.
MDT does not assume liability for any damages causes by the
use of the umbrella contrary the instruction manual.
Installation Instruction:
The distance between each umbrella should be at least 20 cm.
The corresponding distance between the ground ankers, please
find in the chart. In case, after mounting the safety pin does not
fit in the whole, which was designed for it in the mast, anymore,
it can be drilled again by hand.
Please never use the umbrellas without the safety pin!
All data are approximate data without guarantee
01
01
GARANTIE-
AUSSCHLUSS
DISCLAIMER
OF WARRANTY
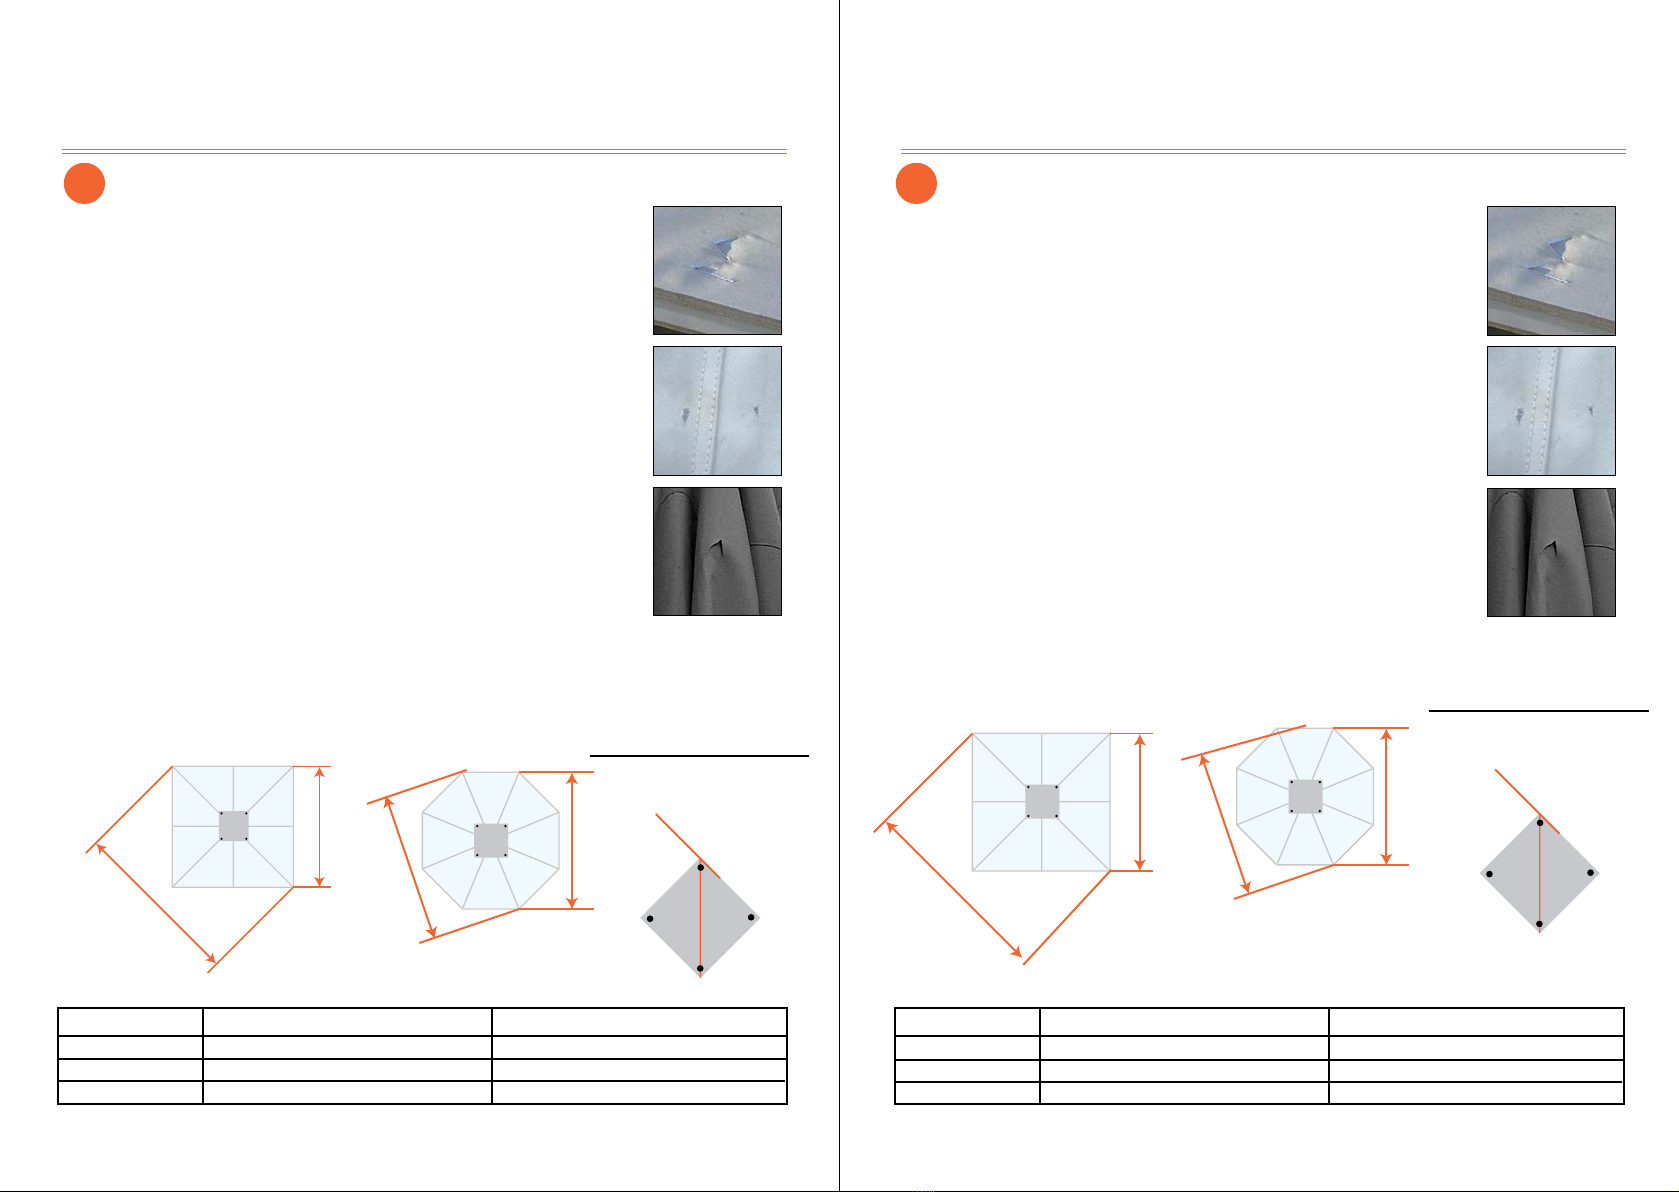
#1 Quadratischer Schirm: #1 Runder Schirm (8-Eck): WAND
L1
L2 45°
90°
BODENHÜLSE
L2
L1
#1 Quadratischer Schirm: :
#1 square umbrella #1 round umbrella (octagonal) wall
L2
L1
L2
90°
45°
Ground tube
TYP S16 HOME / TYPE S16 HOME