Mean Green Products Nemesis NXR User manual

1
GENERAL INFORMATION
This manual applies to the following Mean Green Products equipment lines:
Mean Green Mowers –48”- 52” Nemesis NXR Zero Turn Model
To the new owner
The purpose of this manual is to assist owners and operators in maintaining and operating the mower.
Please read it carefully; information and instructions furnished can help you achieve years of
dependable performance. It is the owner’s responsibility to make certain that the operators and
mechanics read and understand this manual and all decals before operating this machine. It is also the
owner’s responsibility to make certain that the operators and mechanics are qualified and physically
able individuals, properly trained in the operation of this equipment. All operators and mechanics must
become familiar with the safe operation of the equipment, operator controls and safety signs. Never let
children or untrained people operate or service the equipment. Local regulations may restrict the age of
the operator. The owner/user can prevent and is responsible for accidents or injuries occurring to
themselves, other people or property.
Using this manual
General operation, adjustment and maintenance guidance is outlined for both the experienced and
novice Mean Green Mower user. Operating conditions vary considerably and cannot all be addressed
individually. Through experience, however, operators should find no difficulty in developing good
operating skills suitable to most conditions. Directions used in this manual, for example RIGHT or
LEFT, refer to directions when seated on the mower/standing facing forward, unless otherwise stated.
Photographs and illustrations used were current at the time of printing, but subsequent production
changes may cause your machine to vary slightly in detail. Mean Green Products reserves the right to
redesign and change the machine as deemed necessary, without notification. If a change has been made
to your machine which is not reflected in this owner’s manual, or the parts manual, see your Mean
Green Products dealer for current information and parts.
Warranty registration
The Owner must register the unit by filling out the Warranty Registration Form, provided in the
owner’s packet, to validate your warranty protection. As the new equipment owner, you are
expected to see that this is done at the time of delivery. If using the Warranty Registration Form, it
MUST be completed and signed by the authorized dealer and original purchaser.
Be sure to register the mower plus each attachment that displays a model and serial identification
number plate with Mean Green Products.
IMPORTANT: Any unauthorized modification, alteration, or use of non-approved attachments voids the
warranty and releases Mean Green Products from any liability arising from subsequent use of this
equipment.
Model and serial number
The mower serial number is found on the serial identification plate located on the right inside
wall of the electronics compartment of the mower under the seat. The model is the type of Mean
Green Mower purchased i.e. MGP-20, CXR-52, SK-48 etc. The serial numbers and model are required
on the Warranty Registration form. They will also assure you of the correct service parts when
replacement becomes necessary.
Parts and service
All warranty repair and service must be handled through an
authorized Mean Green Products dealer. Arrangements should be made
through your local service center.

2
SAFETY PRECAUTIONS
This safety alert symbol is used to call attention to a message
intended to provide a reasonable degree of PERSONAL
SAFETY for operators and other persons during the normal
operation and servicing of this equipment.
DANGER –denotes immediate hazards which WILL result
in severe personal injury or death.
WARNING –denotes a hazard or unsafe practice which
COULD result in severe personal injury or death.
This manual uses two other words to highlight information.
IMPORTANT calls attention to special mechanical information
and NOTE: emphasizes general information worthy of special
attention.
All operators and mechanics should read this manual and be instructed about safe operating and maintenance
procedures. If the operators or mechanics cannot read and understand English,
it is the owner’s responsibility to explain this material to them.
However, improper use or maintenance by the operator or owner
can result in injury. To reduce the potential for injury, comply with
these safety instructions and always pay attention to the safety alert
symbol, which means DANGER or WARNING - “personal
safety instructions.” Failure to comply with the instructions
may result in personal injury or death. Incorrect usage of this machine may result in severe
injury. Personnel operating and maintaining it should be trained in the proper use and should read the
manuals completely and thoroughly before attempting to set-up, operate, adjust, or service this machine.
It is the owner’s responsibility to make certain that the operators and mechanics read and understand this manual
and all decals before operating this machine. It is also the owner’s responsibility to make certain that the
operators and mechanics are qualified and physically able individuals, properly trained in
the operation of this equipment. All operators and mechanics must become familiar with the safe operation of the
equipment, operator controls and safety signs. Never let children or untrained people operate or service the
equipment. Local regulations may restrict the age of the operator. The owner/user can prevent and is responsible
for accidents or injuries occurring to themselves, other people or property.
The owner should also ensure that the operator/mechanic know that they are responsible for their own safety as
well as the safety of other persons within the vicinity. Remember, the operator is responsible for accidents or
hazards occurring to other people or their property.
Safety and Instruction Decals
Specific safety warning decals are located on the equipment near the immediate areas of potential hazards. These
decals should not be removed or obliterated. Replace them if they become non-readable.
The following illustrations show the various decals that are located on the machine. A brief explanation, for those
requiring one, is shown to help the operator understand the meanings of these decals.
• Read Owner’s Manual and Safety Warning Decals before attempting
to operate this machine.
Important: Red Battery Quick Disconnect (Fig.7A) –(found right side battery
compartment) PULL Red Handle rearward to disconnect all power to unit. (also see
pages 19-29) Disconnect with all maintenance, repairs, cleaning and transportation of
mower!!
7A

3
DANGER: Rotating blades! (fig.1A)
* Keep shields and covers in place while
machine is in operation
* Keep hands, feet and clothing away from
rotating blades
1A
Warning: Do Not Step! (fig.1B)
*Fall Hazard* Keep Hands & Feet Away When Mower Is In Operation!
1B
Important: Deck Height Indicator (fig.1D)
*Shows mowing height level from 1” to 5” (on right side of mower deck below seat)
1D

4
DANGER: Do Not Sit OR Ride! (fig.1E)
*Do Not Carry Passengers
*Ejection Warning! 1E
DANGER: Safety Precautions!: (fig.2A) (right side control panel)
1. Read Owner’s Manual Before Operation
2. Keep Hands, Feet, And Clothing Away From Rotating Blades
3. Maintain Safe Distance From People And Pets
4. Roll Over Warning –Never Operate Machine On Greater Than 15 Degree Slope
5. Electrical Maintenance By Trained Professionals ONLY
6. Keep Safe Distance From Drop-Offs and Ditches
7. Do NOT Carry Passengers
8. Ejection Warning –Move Slowly On Slopes
9. Be Aware When Backing Up
10. Keep Flames Away From Charging Batteries
11. See Owner’s Manual For Other Information
WARNING: Never operate mower with defective guards or shields, or
without safety devices. For example, deflectors and/or grass catchers in
place. Ensure that only replacement cutting blades of the correct type are
used!
2A↓
Right Side Mower Control Panel (With Operator Seated)
Fig.3
A.Hi/Low B.Deck Blades C.Deck D.Cup
Blades On/Off Height Holder
Switch Switch Switch
A
B
C
D

5
Important: Control Buttons –Right Side Control Panel (With Operator Seated)
Fig.3A: Hi/Low Blades Switch: High Blade Mode is higher blade speed for cutting thicker
grass. Low Blade Mode provides lower blade speed used for lower battery consumption on
thinner dry grass areas.
NOTE: Mowing time may be increased up to 15% when mowing in low blade mode when
practical.
Fig.3B: Deck Blades ON and OFF Switch: This switch engages the
deck blade motors. Pull the switch up to engage blades and
push switch down to disengage blade motors. NOTE: There
is a few second delay before blades will start!
Fig.3C: Deck Height Switch –Located on right mower
control panel. Adjusts the height of mower deck.
Push switch up or down to change height of deck.
See yellow Deck Height Indicator (fig.1D) on left side of
mower deck for mowing number level of 1” to 5” increments.
Left Side Mower Control Panel (With Operator Seated)
Important: Control Buttons –Left Side Control Panel (With Operator Seated)
Fig.4A: Battery Capacity Indicator: Indicates battery state of charge and diagnostic
information. Turn the key to the ON position, wait 3seconds for diagnostics to load. Display
will indicate battery status and drive conditions with READY sign or FAULT indications.
NOTE: If FAULT occurs, first reset computer by turning key to OFF position and then to the
ON position. If FAULT continues: Call your Mean Green Mowers Dealer Immediately!
***SEE Appendix Smartec pages 8-11 for detailed Battery Capacity Indications,
Troubleshooting and Information Guide****
IMPORTANT: When battery voltage becomes low, the
mower blades will stop, although the drive motors will continue
A.Battery B. Master C. Lights D. High/Low E. Optional
Capacity Power On/Off Drive Speed USB Port
Indicator Ignition Switch Switch Switch
CDEB
A.
Fig.4
IMPORTANT
READ!!

6
to run enabling driver to continue to drive unit. When the batteries discharge to this point they
require recharging. The unit should immediately be returned to the battery charging area
and the unit connected to the battery charger.
Fig.4B: Master Power Ignition Switch –A two position switch
Off and On. With key inserted, rotate it clockwise
to the On position to start mower.
Fig.4C: Optional Lights Switch: Turns headlight On and Off when additional light is needed.
(Located left side of top mower control panel)
Fig.4D: Drive Speed Control Switch –Allows operator to select a comfortable driving speed
Low or High depending on terrain, grass conditions, slope, operator experience etc. Turn knob to
Lowest, Slow Speed for inexperienced operators, for trimming around objects, buildings and other
obstacles.
Always EASY DOES IT when unsure or new user to the equipment! Get comfortable with mower
before increasing knob into HIGH speed!
Fig.4E: Optional USB Port for convenient use of electronics.
IMPORTANT:
Blade Warning Light System (located front mower deck)
(Also see next page) Fig.10 Fig.10
GREEN: Maintain Speed and Height.
YELLOW: Reduce Speed or Raise Deck Slightly.
RED: Slow Speed and Raise Deck Slightly
**Ensure Inner Deck Is Clear and Blades Are Sharp Before Each Use!!
Blade Warning Light System:
A 3 light system to assist operator with optimal mowing performance in all grass
conditions showing speed and performance of each blade. NOTE: Allow 10 seconds for the
blade lights to turn on after blades are engaged. (Operator can start mowing grass before
lights are on.) The lights run in order of the blades –for example, the left light is
monitoring the left blade, center light is monitoring center blade and right light is
monitoring right blade. Once lights are on, operator should see solid GREEN. This will
indicate the blades are running at full speed and optimal power.

7
GREEN Light: Operator can maintain speed and the cutting height is accurate for optimal
performance.
As the operator enters thicker grass, a light or lights (depending on which blade is cutting
the thickest grass) will be YELLOW. If this occurs, it is best to slow speed and allow
blades to return to GREEN. If slowing speed does not return lights to GREEN, operator
may need to slightly raise the deck to return to GREEN and an optimal cutting
performance. A ¼ inch rise in the deck can make a huge difference in cut quality and
cutting speed especially in tall, wet grass.
YELLOW Light: Reduce speed. Operator may need to raise the deck ¼ inch to keep the
deck at optimal power and blade performance.
If the operator continues to run the mower in YELLOW with longer, taller, wet grass, the
lights will turn RED. RED lights indicate the blade tip speed and power is at the lowest
point and is on the verge of shutting down. Continuing to run in RED will result in your
blade or blades shutting down completely, requiring the operator to turn Deck Blades Off
and then On to reset the PTO. TO AVOID THE BLADES SHUTTING OFF- SLOW
DOWN AND RAISE DECK SLIGHTLY! This means the grass is too tall, thick or wet and
may need recut in this area for optimal performance.
RED Light: Slow speed. Raise deck. You may need to look at double cutting area if grass
is too tall or thick.
NOTE: Once the blade/blades have shut down, the red light will go to a blinking green
light. This will inform the operator that a blade/blades have shut off and will need reset by
turning Deck Blades Switch Off and then On. Operator will also see flashing GREEN
lights when turning the mower deck blades off letting operator know that all blades have
shut down.
Fig. 3I: Drive Control Bars –
TO DRIVE MOWER FORWARD,push right & left Drive Control Bars forward an
equal distance.
TO DRIVE MOWER IN REVERSE,pull right & left Drive Control Bars rearward an
equal distance.
3I
TO STOP,move right & left Drive Control
Bars to neutral, middle position and push
Bars OUTWARD into the neutral slots.
When going forward to slow down, pull
back gently on both Drive Control Bars.
When going in reverse to slow down,
push forward gently on right & left Drive
Control Bars.
NOTE: Always remember middle is
neutral!
Right and Left
Drive Control
Bars

8
OPERATION
Safe Operating Practices
This product is capable of amputating hands and feet and throwing objects. Always follow
all safety instructions to avoid serious injury or death.
Operation
Evaluate the terrain to determine what accessories and attachments are needed to properly and
safely perform the job. Only use accessories and attachments approved by the manufacturer.
Clean battery compartment, drive motor compartment, mower deck, seat etc. of all dirt and
debris. Keep unit free of grass clippings, leaves and other debris. DO NOT
spray with water to clean unit. Do not use, solvents, hard cleaners or abrasives. Use only
compressed air. Wear adequate eye and hearing protection when cleaning the unit.
Never leave a running machine unattended. Always stop on level ground, disengage deck
blade switch, place drive control bars in neutral position, turn key to off position,
remove key and disconnect battery cables by pulling rearward on LARGE RED battery quick
disconnect in battery box compartment for any reason including emptying the
catcher or unclogging the chute.
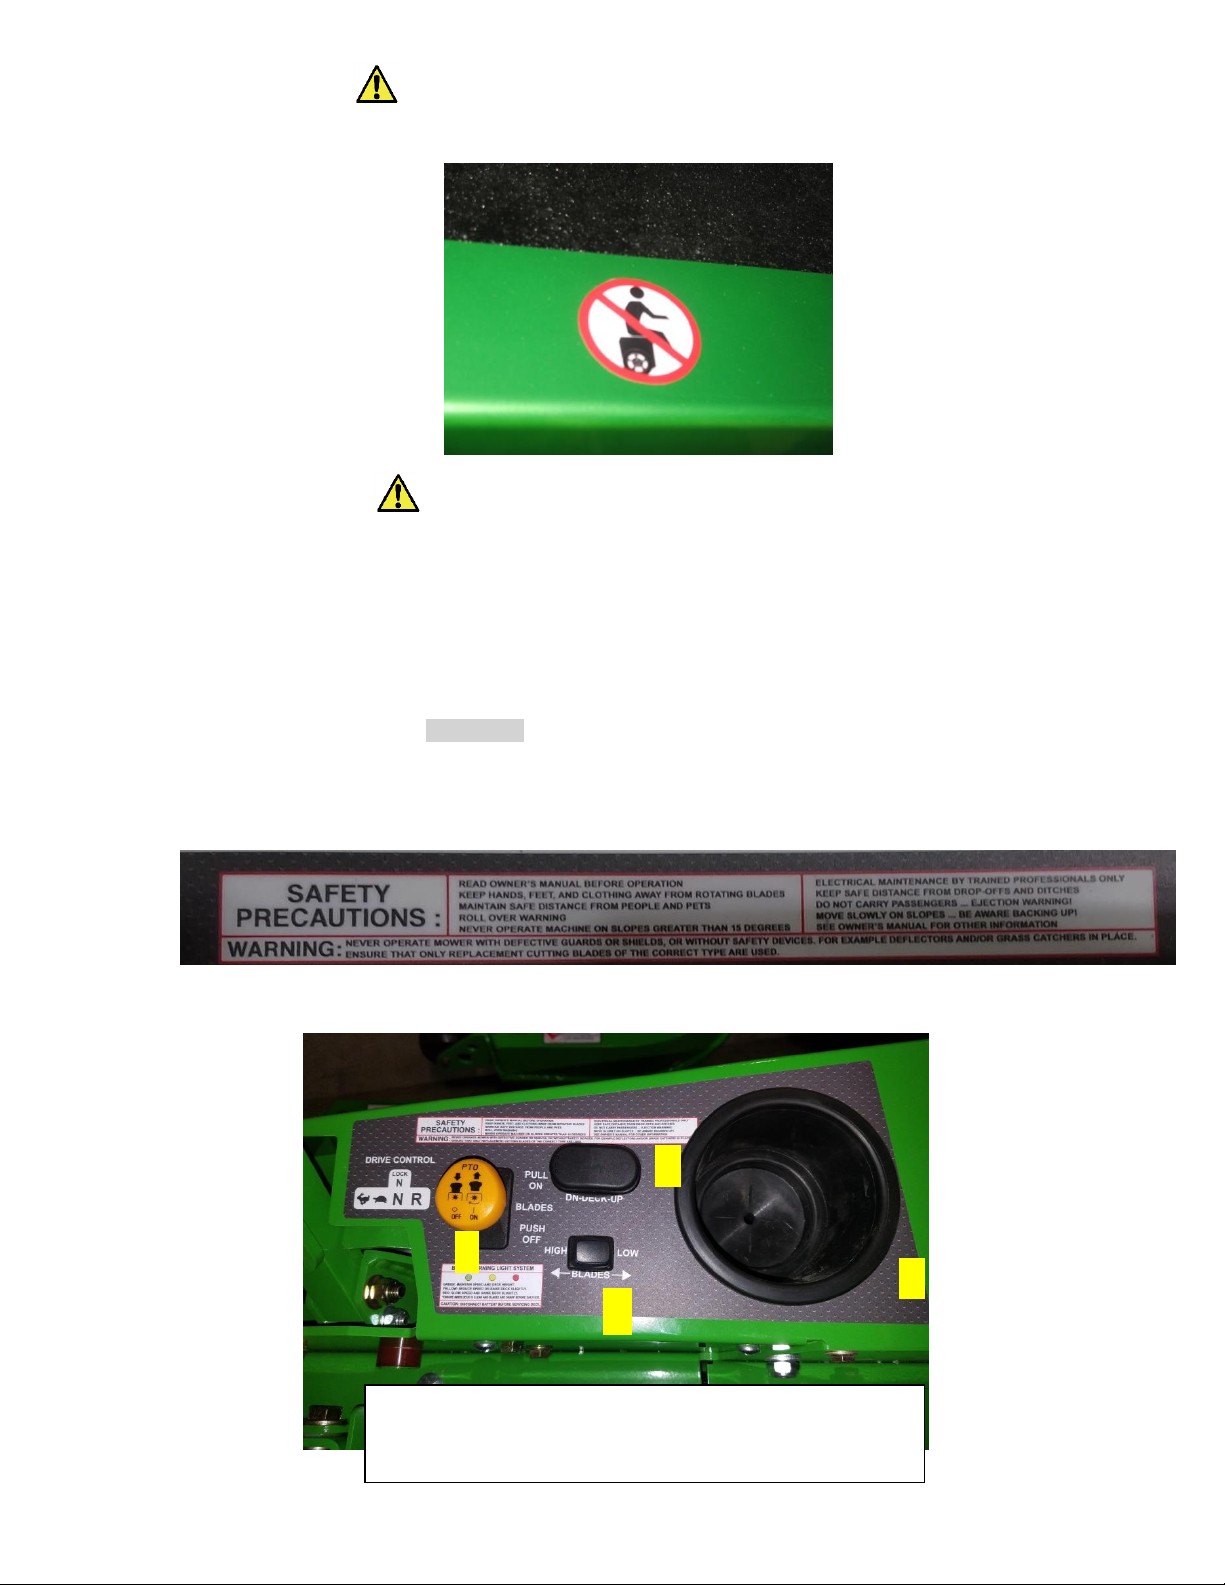
Always remain seated while operating machine.(riding mower models)
Always keep safety shields and covers in place.
Always maintain a safe distance from people and pets when mowing.
Always stop machine if someone enters the area.
Avoid injury. Keep area clear of bystanders when engaging deck blade switch.
Always operate machine in daylight or with adequate working lights.
Follow daily and weekly checklists, making sure electrical connections are secured and
bolts are tightened. Always observe traffic laws while driving machine from
one location to another. Watch for traffic when operating near or crossing roadways.
Always be alert for hazards such as rocks, metal objects and other debris which may be
thrown or entangled by mower blades. Watch out for holes or deep depressions.
Inspect area to be mowed for hazards such as rocks, metal objects and other debris which
may be thrown or entangled by mower blades. Remove these objects before mowing.
Always inspect machine for damage after striking a foreign object. If damage is found,
repair machine immediately. Be sure to stop on level ground, disengage deck blade
switch, place drive control bars in neutral position, turn key to OFF position,
remove key and disconnect battery cables by pulling rearward on LARGE RED battery quick disconnect in
battery box compartment! Always wear adequate ear protection, such as earplugs, when operating this
equipment as prolonged exposure to uncomfortable or loud noises can cause impairment
or loss of hearing. Do not wear radios or music headphones while operating the machinery.
Safe operation requires your full attention.
Do not operate the equipment while wearing sandals, tennis shoes, sneakers, shorts or
any type of loose fitting clothing. Long hair, loose clothing or jewelry may get tangled in
moving parts. Always wear long pants, safety glasses, ear protection and safety shoes when
operating this machine.
Always wear safety goggles or safety glasses with side shields when operating the mower.
Always be aware of what is behind the machine before backing up. Do not mow in reverse
unless absolutely necessary.
Always look down and behind before and while backing up.
When moving in reverse, SLOWLY pull right and left Drive Control Bars rearward and avoid sudden
movement. Rapid movement of the Drive Control Bars in either direction
could result in a reaction of the machine that can cause serious injury.
Never operate a poorly maintained machine.
Never attempt high speed maneuvering, especially in crowded, congested areas or on slopes.
Never allow persons to operate this machine without proper instruction or allow children to
operate machine. Allow only responsible adults who have read and understand
these instructions to operate this machine.
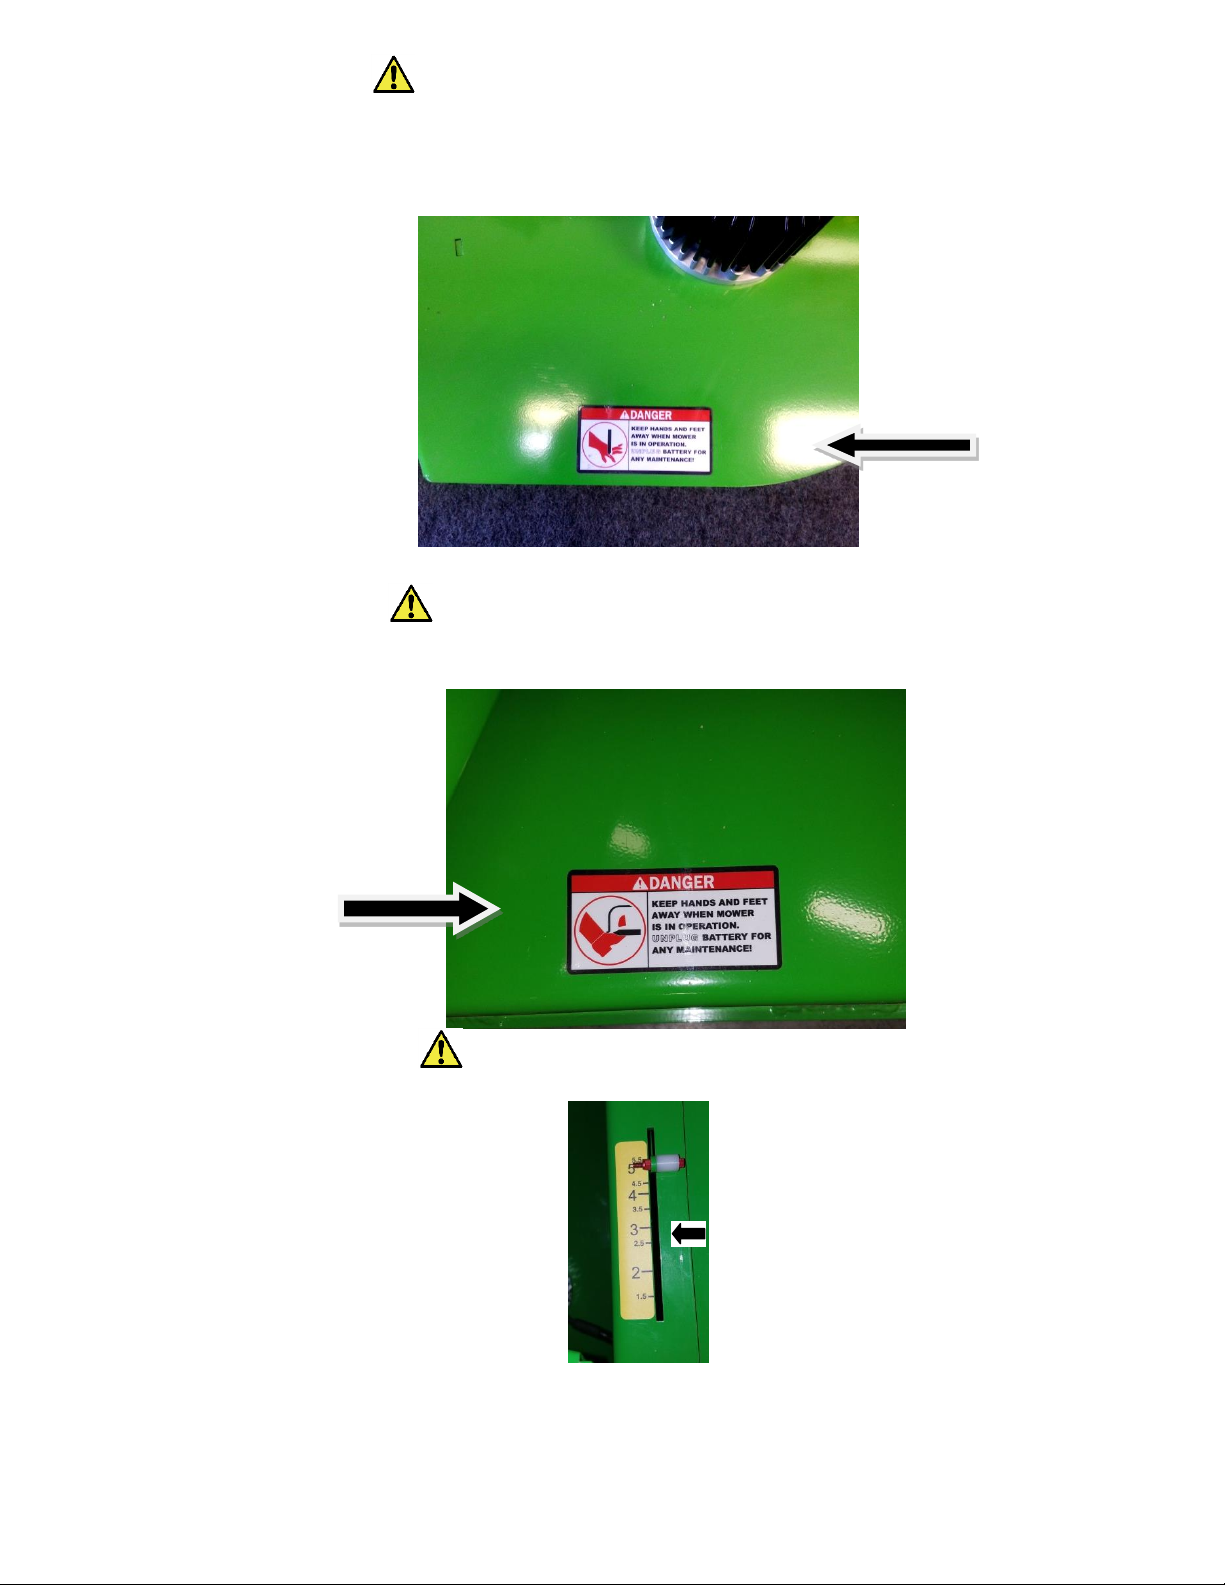
Never put hands or feet under any part of the machine while it is running.
Never carry passengers.
Never direct discharged material toward anyone. Avoid discharging material against
a wall or obstruction. Material may ricochet back toward the operator. Always disengage
the blades and wait for them to stop before crossing gravel drives, walks or roads.
Always keep clear of the mower blades and attachments during their operation.
Turn off blades when not mowing.

9
Slow down before turning.
Turn the key to the OFF position, remove key and disconnect battery cables by pulling rearward on LARGE
RED battery quick disconnect in battery box compartment before removing the grass catcher or unclogging the
discharge chute. Never clear the discharge chute with the machine running. Turn
the key to the OFF position, remove key, and make sure the blades have stopped before cleaning.
Use a stick to clear a plugged discharge area. Never use your hand!
Do not operate the machine while under the influence of alcohol or drugs.
Exercise caution when loading or unloading the machine onto a trailer or truck.
Data indicates that operators, age 60 years and above, are involved in a large percentage
of mower-related injuries. These operators should evaluate their ability to
operate the mower safely enough to protect themselves and others from serious injury.
If any attachment or additional weight is mounted on the rear or side of the unit (depending on
model), any rapid movement in either direction could result in a reaction of the machine
that can cause serious injury.
Clean flammable material from machine. Prevent
fires by keeping battery compartment, deck and operator’s
station clean of accumulated trash, grass clippings,
and other debris.
Using a ramp
Use extreme caution when loading and unloading a unit onto a truck or trailer with a ramp.
Use only a single, full width ramp; do not use individual ramps for each side of the unit.
Having a full width ramp provides a surface for the mower frame to contact if the
unit starts to tip backwards. It also reduces the risk of a wheel going off and the
machine tipping over. Do not exceed a 15 degree angle between the ramp and the ground
or between the ramp and the trailer or truck. When on a ramp avoid sudden acceleration.
Slope operation (see page 9A)
Slopes are a major factor in loss-of-control and tip-over
accidents, which can result in severe injury or death. All
slopes require extra caution. If you cannot back up the slope
or if you feel uneasy on it; do not mow it. REMINDER: Only
operate on slopes of 15 degrees or less.
Use extreme caution when operating on slopes.
• Be extremely careful changing directions on a slope.
Slow down.
• Do not operate where the machine could slip or tip.
• Turn slowly
• Turn on the most level part of the slope
• To maximize traction, it is better to turn the front of the
machine uphill, rather than downhill. If drive tires lose
traction, steering control is lost which could cause
serious injury or death.
• If it becomes necessary to turn downhill, turn slowly
and gradually.
Do not remove or modify the stabilizer wheels.
Watch for holes, ruts, bumps, rocks or other hidden
objects. Uneven terrain could overturn the machine. Tall
grass can hide obstacles.
Remove obstacles such as rocks, tree limbs, etc.
Keep all movement on slopes slow and gradual. Do not
make sudden changes in speed or direction.
Avoid starting and stopping on a slope. If tires lose traction,
disengage the blades and proceed slowly straight
down the slope.
Mow a safe distance (minimum of 10 feet, 3.05 meters)
away from drop-offs, retaining walls, drainage ditches,
embankments, water, and other types of hazards to avoid
a wheel dropping over the edge or to avoid the ground
from breaking away. This will reduce the risk of the
machine suddenly rolling over causing serious injury or death.

10
Use a walk behind, push mower or hand-held trimmer on
slopes and near drop-offs, retaining walls, drainage
ditches, embankments and water to avoid machine rollover
and serious injury or death.
Do not mow on wet grass. Reduced traction could cause
sliding and loss of steering control.
Do not tow on slopes. The weight of the towed equipment
may cause loss of traction and control.
Do not try to stabilize the machine by putting your foot
on the ground.
If the mower’s tires lose traction when operating on
slopes, disengage the deck blade switch, place the drive control bars
in the neutral position, engage emergency brake, turn the key to the
OFF position and get help.
Never make sudden starts, stops, turns, or reverse direction,
especially when maneuvering on slopes. The steering
is designed for sensitive response. Rapid movement
of the steering control levers in either direction could
result in a reaction of the machine that can cause serious
injury.
Never stop suddenly while backing down slopes. This
action may result in a reaction of the machine that can
cause serious physical injury.
The Mean Green Mower is capable of operating horizontally
(traverse) on moderate slopes. When operating on slopes
up to 15 degrees, be aware of any conditions that may
cause the mower drive tires to lose traction resulting in a
possible loss of control of the machine. An operator
should not operate on a slope until he is thoroughly
familiar with the equipment.
Do not operate on slopes greater than 15 degrees.
Refer to Slope Guide, page 9A when determining the
degree of slope to be mowed.
It is strongly recommended that the operator drive the
machine off of the slope, using extreme caution, if any
sign of loss of traction is detected. Wait until the condition
that caused the problem is resolved before attempting
to operate on the slope again.
Terrain conditions can affect traction resulting in possible
loss of control of the machine. Some of the conditions
to be aware of are:
1. Wet terrain
2. Depressions in the ground; i.e. holes, ruts, washouts
3. Mounds of dirt
4. Soil type; i.e. sand, loose dirt, gravel, clay
5. Grass type, density, and height
6. Extremely dry conditions of grass
7. Tire pressure
The attachments mounted to the mower will also
affect the way it handles on a slope. Be aware that each
attachment’s characteristics vary.
Another consideration is to always mow a safe distance
(minimum of 10 feet 3.05 meters) away from drop-offs,
retaining walls, drainage ditches, embankments,
water, and other types of hazards to avoid a wheel dropping
over the edge or to avoid the ground from breaking
away and always be aware of what is located at the bottom
of the slope. This will reduce the risk of the machine
suddenly rolling over causing serious injury or death.
Extreme caution should be used when there is a hazard
located at the bottom of the slope. Some examples
are:
1. Water; i.e. lake, river

11
2. Cliffs, retaining walls
3. Roads, highways
4. Buildings
5. Rocks
These are just a few examples of situations when caution
must be used when operating on a slope. There are
many other possibilities too numerous to mention. Just
remember to always exercise extreme caution when operating
on any slope.
Children
Tragic accidents can occur if the operator is not alert to the presence of children.
Children are often attracted to the machine and the mowing activity. Never assume that
children will remain where you last saw them.
Never leave machine unattended with key in switch, especially with children present.
Children or bystanders may be injured if they move or attempt to operate the machine while it is unattended.
Always disengage deck blade switch & turn key to OFF position and
remove key. Keep children out of the mowing area and under the watchful care of
a responsible adult other than the operator. Be alert and turn the machine off if children enter the area. Before and
while backing, look behind and down for small children.
Never carry children, even with the blades off. They may fall off and be seriously
injured or interfere with safe machine operation. Children who have been given rides
in the past may suddenly appear in the mowing area for another ride and be run over
or backed over by the machine. Never allow children to operate the machine.
Use care when approaching blind corners, shrubs, trees, the end of a fence or
other objects that may obscure vision. Never allow children or others in or on towed equipment.
Safety start interlock system
The machine is equipped with a safety start interlock system
consisting of the park brake switches, seat switch, and deck
blade switch.
Check mower safety start interlock system daily, prior to
operation. This system is an important mower safety feature. It
should be repaired immediately if it malfunctions. Call Mean Green
Products immediately! The machine incorporates a separate seat switch
which will stop the drive system and deck motors when the operator is unseated for any
reason while the mower is operating. This is a safety feature designed to prevent
runaway or accidental entanglement.
To inspect the system:
1. The operator must be on the seat when testing the seat switch.
2. Turn Master Power Ignition Switch to the ON position with key.
3. Keep Drive Control Bars in neutral position.
4. Push Deck Blades to ON position.
5. Slowly raise off of the seat. The deck blade system should stop.
6. If the deck blade system fails to stop when the operator is off of the seat
and if the cause can not be determined, contact your Mean Green Products Dealer
immediately.
Starting your mower:
1. With key inserted, turn Master Power Ignition Switch on by rotating key
clockwise to the On position AND with arms OUT WAIT for display to read READY (if Low Drive
Speed Mode) OR CUT (if High Drive Speed Mode).
2. Check for the appropriate speed mode by switching High/Low Drive Speed Switch
to LOW position.
NOTE: It is always recommended to start out in low mode/ slow speed.
3. Pull Right and Left Drive Control Bars inward until stops are contacted.
4. Pull up on Deck Blades On/Off Switch to start cutting blades for mowing.
NOTE: ONLY engage blades when Drive Control Bars are in the NEUTRAL position!
NEVER engage blades when moving!!
5. Push Drive Control Bars Forward for forward motion and pull rearward for reverse motion.
Electric Brake will engage 1.5 seconds after Drive Control Bars are returned to neutral.
Stopping your mower:
1. Return Drive Control Bars to the Neutral/Stop position.
IMPORTANT
READ!!

12
2. Push down on Deck Blades On/Off Switch to turn OFF the blades.
3. Push Drive Control Bars outward into the neutral slots. After 1.5 seconds brakes will engage.
4. Rotate key in Master Power Ignition Switch counter clockwise to the OFF position.
NOTE: If operator leaves seat with key in the “ON” position, the unit will need RESET
by turning Key Switch to OFF/ON/OFF.
Driving the mower
DANGER: Never make sudden stops or reverse
direction, especially when maneuvering on a slope.
The steering is designed for SENSITIVE response. Rapid
movement of the steering control levers in either
direction could result in a reaction of the machine that
can cause serious injury.
WARNING: Make sure seat pan is securely locked in place
down prior to each use to prevent seat from moving/
tilting in the event of mower tipping or rollover.
After turning master key to ON position:
To go forward, push both Drive Control Bars forward an equal distance
To go in reverse, pull both Drive Control Bars rearward an equal distance
To turn left, move the right Drive Control Bar farther
forward from neutral than the left Drive Control Bar.
To turn right, move the left Drive Control Bar farther
forward from neutral than the right Drive Control Bar.
Zero radius turn, move one Drive Control Bar forward
and the other Drive Control Bar back of neutral. This will
allow the drive wheels to counter-rotate.
To stop or decrease speed: To stop, move both Drive Control Bars to
neutral, middle position and push levers OUTWARD into the neutral slots.
When going forward and want to decrease speed,
pull back gently on both Drive Control Bars. When going in reverse and want to
decrease speed, push forward gently on Drive Control Bars.
For an emergency stop:
When traveling forward or rearward, place the Drive Control Bars in the neutral middle position
and push levers OUTWARD into neutral slots –this will engage mower safety brakes.
Any sudden movement could cause the front of the mower to come off of the ground resulting in
possible loss of control causing serious injury or death.
Turn the master ignition key to the OFF position. This will shut down the traction drive system and the deck blade
system.
WARNING: Always be aware of what is behind the
machine before backing up. Do not mow in reverse
unless absolutely necessary. Always look down and behind before and while backing up.
IMPORTANT: Rapid movement of Drive Control Bars is not recommended as damage to the electric system
components may occur.
To increase speed, increase the Drive Control Bars distance
from neutral. The farther forward the Drive Control Bars are
from neutral, the faster the machine will travel forward. The
farther back the Drive Control Bars are from neutral, the faster
the machine will go in reverse. Also changing the Drive Speed Control Switch from Low to High (Fig.3F)
will increase or decrease the speeds of mower in forward, reverse and turning.

13
BASIC DRIVING
Forward Travel Practice Reverse Travel Practice
Gradually move both Drive Control Bars –LOOK DOWN AND BEHIND,
evenly FORWARD from neutral. Slow down then gradually move both Drive Control
& repeat. Fig.12 Bars evenly BACK from neutral. Fig.13
PRACTICE TURNING AROUND ACORNER PRACTICE TURNING INPLACE
While traveling forward bring one handle bar To turn in place, “Zero Turn”, gradually
gradually back toward neutral. Repeat several times. move one handle bar forward from
NOTE: To prevent pivoting directly on the tire neutral and one handle bar back from
tread, it is best to keep both wheels going at least neutral simultaneously. Repeat several
slightly forward. times. NOTE: Changing the amount each
lever is pulled –forward or back,
changes the ‘pivot point” you turn on.
SMOOTH TRAVEL
The lever controls of the Zero Turn
are responsive!
The BEST method of handling the
ground speed control levers is in
three steps –as shown in Figure 11.
FIRST place your hands onto
the levers as shown.
SECOND, to go forward gradually
push the levers forward with your
palms.
THIRD, to speed up move the
levers farther forward. To slow
down smoothly, slowly move the
levers toward neutral.

14
Advanced Driving
Operating suggestions
EXECUTING AN END-OF ROW ZERO TURN
Your Zero Turn Mower’s unique ability
to turn in place allows you to turn around
at the end of a cutting row rather than
having to stop and Y-turn before starting
a new row.
To execute a left end-of row zero turn:
1. Slow down at the end of the
row.
2. Move the RIGHT handle bar
lever forward slightly while
moving the LEFT handle bar
lever back to center and then
slightly back from center.
3. Begin mowing forward again.
THIS TECHNIQUE TURNS THE RIDER
LEFT AND SLIGHTLY OVERLAPS THE
ROW JUST CUT –ELIMINATING THE
NEED TO BACK UP AND RE-CUT MISSED
GRASS.
Remember: The more you practice, the
better your control of the zero turn
mower!

15
Operating suggestions
DANGER: Prior to operating the mower the operator
should be thoroughly familiar with the proper use and
operation of the equipment, should read the manual
completely and thoroughly, and should have attempted
slow moving maneuvers to become familiar with the
operation of the equipment before attempting normal
speed operation. An inexperienced operator should not
mow on slopes or on uneven terrain and should always mow
in Slow Drive Speed.
WARNING: If you lose steering control while operating
the machine on a slope, TURN BLADES OFF, return Steering Control Bars to NEUTRAL position for brakes to
engage, and Turn key to OFF position. Call your Mean Green Products dealer to resolve problem before
continuing to operate.
WARNING: The unit’s steering control bars are
very responsive: Easy does it! For smooth operation,
move controls slowly, avoid sudden movement. Skill and
ease of operation come with practice and experience.
The machine can spin very rapidly. Use caution when
making turns and slow down before making sharp
turns.
Inexperienced operators may have a tendency to over-steer and
lose control. Slow-moving, slow speed practice maneuvers are
recommended to become familiar with these characteristics
before attempting high speed operation.
WARNING: Sharp depressions or raised obstacles
(such as gutters or curbs) should not be directly
approached at high speed in an attempt to “jump”
them as the operator could be thrown from the equipment.
Approach at a slow speed and angle one drive
wheel at the obstruction. Continue at an angle until the
wheel clears and then pivot the opposite wheel around.
When turning on soft wet turf, keep both wheels rolling either
forward or backward. Pivoting on one stopped wheel can
damage turf. This is especially important when mowing.
Keep blades sharp. Many professional mowing companies
have additional sets of blades and change blades twice a day:
once in the morning and again at noon. Many problems with
incorrect cutting patterns are due to dull blades or blades
which have been sharpened incorrectly. Information on
sharpening blades is listed in this manual’s maintenance section.
In addition, most communities have individuals or companies
which specialize in sharpening mower blades. Blade sharpness
should be checked daily.
DANGER: Never work with blades while key is in
the ignition switch. Always place deck blade switch
in the disengaged position, place steering control
bars in the neutral position and turn key to the
OFF position, remove key from switch and disconnect battery cables
by pulling rearward on LARGE RED battery quick disconnect in battery box compartment!
Block up mower when you must work under it. Wear gloves
when handling blades. Always check for blade damage if mower strikes a rock, a
branch or another foreign object during mowing!
Direct grass discharge to right (with side discharge models),
away from un-mown area. Select a mowing pattern that directs grass discharge
towards the outside, not towards center, of mowing area. Generally, this

16
means using a pattern utilizing left turns because side discharge
is to right. In any case, avoid throwing grass discharge onto
un-mowed area because grass is then mowed “twice”. Mowing
twice puts an unnecessary load on the unit and reduces mowing efficiency.
When mowing a lawn for the first time cut grass slightly
longer than normal to avoid scalping uneven terrain. When
possible, it is best to use the cutting height that was used in the
past. When cutting grass taller than six inches, you may want to
mow the lawn twice to achieve a better quality of cut.
During normal mowing cut only about 1/3 of the grass
blade. Cutting more than that is not recommended unless grass
is sparse or it is the end of the mowing season.
Alternate mowing direction to keep the grass growing
straight and better dispersion of the clippings.
Remember, grass grows at different rates at different time
of the year. Mow more often in the early spring to maintain the
same cutting height. As the growth rate slows in mid summer,
mow less frequently. If you cannot mow at a regular interval,
mow at a high cutting height; then mow again two days later at a
lower cutting height.
Raise the cutting height of the mower if the cutting width of
the mower is wider than the previous mower. This ensures that
uneven turf is not cut too short.
Raise the cutting height of the mower if the grass if slightly
taller than normal or if it contains a high degree of moisture.
Then mow it again with the cutting height set lower.
WARNING: Never direct discharge of material from
mower deck towards bystanders. Do not operate the
mower without the discharge chute (Fig.4A)(with side discharge models).
Deck cutting height adjustment
Deck height is adjustable from 1”- 5” in. Simply push deck height switch (fig.3C Pg.5)
up or down to adjust level of mowing. Yellow deck height indicator (fig.1D Pg.3) (on right side of mower deck
below seat) shows number at which the operator is mowing. Deck can be raised while mowing is in progress
to avoid stumps, rocks or other obstacle that can damage mower deck.
Anti-scalp wheels
Anti-scalp wheel kits are standard on Mean Green Mower units.
These anti-scalp wheels are designed to minimize scalping
when mowing on rough uneven terrain. After setting the cutting height, adjust
the anti-scalp wheels so they extend below the deck but do not contact the ground.
They should always be at least 1/4” to 3/4” below the deck. With the unit sitting on a flat level
surface, the wheel position can be adjusted up or down as
needed from 3/4” to 1-3/4” below the blade surface. Move the wheels up or down, in 1/2”
increments, using the different axle mount holes in the wheel mount bracket.
4A

17
Emergency Drive Brake Release Levers
If towing or manual pushing is needed:
Located beneath the battery compartment and at the end of each drive motor - 2each levers (accessible from rear
of mower) (Fig.6A)
PUSH (2) each levers Outward and Down until secured completely into locking notch. (Fig.6B) PUSH (2) each
levers UP and INWARD to re-engage drive levers.(Fig.6A)
NOTE: Never drive mower with levers released. Always push levers back to the engaged position before
driving! Failure to re-engage drive levers could cause serious damage to your mower and void mower
warranty!!!!
Fig.6B
Fig.6A
Rear of mower
beneath battery
compartment
IMPORTANT
READ!!
2 Emergency Drive Brake
Release Levers - Engaged
2 Emergency Drive Brake
Release Levers - Disengaged

18
MAINTENANCE & ADJUSTMENTS
Safe Servicing Practices
This product is capable of amputating hands and feet and
throwing objects. Always follow all safety instructions to avoid
serious injury or death.
NOTE: Always remove key and disconnect battery cables
by pulling rearward on LARGE RED battery quick disconnect
in battery box compartment when any maintenance
or repairs are performed on mower unit!
Service
Park the mower on level ground. Make sure that steering control levers
are in the neutral position, deck blade switch in OFF position, raise deck, rotate
key to OFF position, remove key from switch and disconnect battery cables by pulling
rearward on LARGE RED battery quick disconnect in battery box
compartment.
IMPORTANT!.Wait for all movement to stop before adjusting, cleaning or repairing.
Repairs or maintenance requiring power should be performed by trained maintenance
personnel only. Read and observe safety warnings in front of manual.
• Any maintenance operation that requires
the removal of safety covers must be performed
by a trained service technician.
Before working on or under the deck, make certain master power ignition
switch is OFF and key is removed and deck blade switch cannot be accidentally
started and disconnect battery cables by pulling rearward on LARGE RED battery
quick disconnect in battery box compartment.
IMPORTANT! Repairs or maintenance requiring power should be performed
by trained maintenance personnel only.
Use a stick or similar instrument to clean under the
mower making sure that no part of the body, especially
arms and hands are under mower.
Keep your machine clean and remove any deposits of
trash and clippings, which can cause fires and overheating.
Allow machine to cool before storing.
Clean flammable material from machine. Prevent
fires by keeping battery compartment, deck and operator’s
station clean of accumulated trash, grass clippings,
and other debris.
Clean battery compartment, drive motor compartment,
mower deck, seat etc. of all dirt and debris. DO NOT spray
unit with water. Do not use, solvents, hard cleaners or
abrasives. Use only compressed air.
Always wear adequate eye protection when servicing the
batteries, or when grinding mower blades and removing
accumulated debris. Never attempt to make any adjustments or repairs to the
mower’s drive system, mower deck or any attachment
while the traction drive system is running. Repairs or maintenance
requiring power should be performed by trained maintenance personnel only.
Never work under the machine or attachment unless it is
safely supported with jack stands. Make certain machine
is secure when it is raised and placed on the jack stands.
The jack stands should not allow the machine to move
when the traction drive system is running and the drive
wheels are rotating. Use only certified jack stands. Use
only appropriate jack stands, with a minimum weight rating
of 2000 pounds (907.2 kg) to block the unit up. Use in pairs only. Follow
the instructions supplied with the vehicle stands.
Do not touch hot parts of machine.

19
Keep nuts and bolts tight, especially the blade attachment
bolts. Keep equipment in good working condition.
Never tamper with safety devices. Check their proper
operation regularly.
Turn the key to the OFF position before unclogging the discharge chute.
Never clear the discharge chute with the machine running. Turn
the key to the OFF position and be sure the blades have
stopped before cleaning. Use a stick to clear a plugged
discharge area. Never use your hand!
Stop unit, and allow blades to stop before unclogging chute.
Grass collection system components are subject to wear,
damage and deterioration, which could expose moving
parts or allow objects to be thrown. Frequently check
components and replace with manufacturer’s recommended
parts, when necessary.
Exercise caution when working under the deck as the
mower blades are extremely sharp. Wear gloves and use
extra caution when servicing them.
Use only genuine Mean Green Mower parts to ensure
that original standards are maintained.
NOTE: Always remove key and disconnect battery cables
by pulling rearward on LARGE RED battery quick disconnect
in battery box compartment when any maintenance
or repairs are performed on mower unit!
Always disconnect batteries when transporting unit.
Keep unit free of grass clippings, leaves and other debris.
DO NOT spray with water to clean unit. Use only compressed
air. Wear adequate eye and hearing protection
when cleaning the unit.
Always wear safety glasses and protective gear near batteries.
Use insulated tools.
Regular Maintenance
Regular maintenance is the best prevention for costly
downtime or expensive, premature repair. The following pages
contain suggested maintenance information and schedules
which the operator should follow on a routine basis. For more
detailed information order the correct parts manual for your unit.
Remain alert for unusual noises, they could be signaling a
problem. Visually inspect the machine for any abnormal wear or
damage. A good time to detect potential problems is while
performing scheduled maintenance service. Correcting the
problem as quickly as possible is the best insurance.
Daily inspect mower for grass clippings and wire and string
tangles. The underside of the mower deck may collect a buildup
of grass clippings and dirt, especially when grass is wet or
has high moisture content. This build-up will harden, restricting
blade and air movement and will probably show a poorer quality
of cutting. Therefore it should be removed routinely.
To do this it will be necessary to raise and block the deck,
using jack stands or blocks, in the full up position and scrape the
build-up from underneath.
Some repairs require the assistance of a trained service
mechanic and should not be attempted by unskilled personnel.
Consult Mean Green Products when assistance is needed.
Torque Values: WARNING: Particular attention must be given to
tightening the drive wheel lug nuts and blade spindle
bolts. Failure to correctly torque these items may
result in the loss of a wheel or blade, which can cause
serious damage or personal injury. Call your Mean Green Products Dealer for assistance.
Torque values are given below:

20
Ft.-lbs.
Wheel (lug) Nuts………65-75
Blade spindle bolt bottom..30
Lug nuts only - It is recommended that these be checked after
the first 2 hours of operation, initially, every 100 hours and
following removal for repair or replacement.
Tires
It is important for level mowing that the rear tires have the same
amount of air pressure. The recommended pressures are: 12 psi in rear tires.
Front tires are either no flat tires (do not require air) OR pneumatic tires with the
recommended pressures of 12 psi.
Lubrication
Use SAE multi-purpose grease for front wheel bearings.
IMPORTANT: Recommended maintenance at the beginning of each mowing season
AND every 50 hours of operation.
Electrical system
This mower operates on a 48 volt electrical system. Refer to the Electrical section of this manual for detailed
information. Electrical System Located Under Operator Seat –SEE SEAT RELEASE KNOB
(Fig.5E Pg.21) for instructions on how to access electrical compartment!
Seat adjustment
The seat can be adjusted forward and rearward by moving
the black seat lever (bottom left seat fig.5B) to the left side.
IMPORTANT!*Make sure that the seat locks into place after changing positions!*IMPORTANT!
Adjust seat to where operator has best comfort and control.
Lubricate Bearings
Front Wheels
↑5B
Table of contents
Other Mean Green Products Lawn Mower manuals