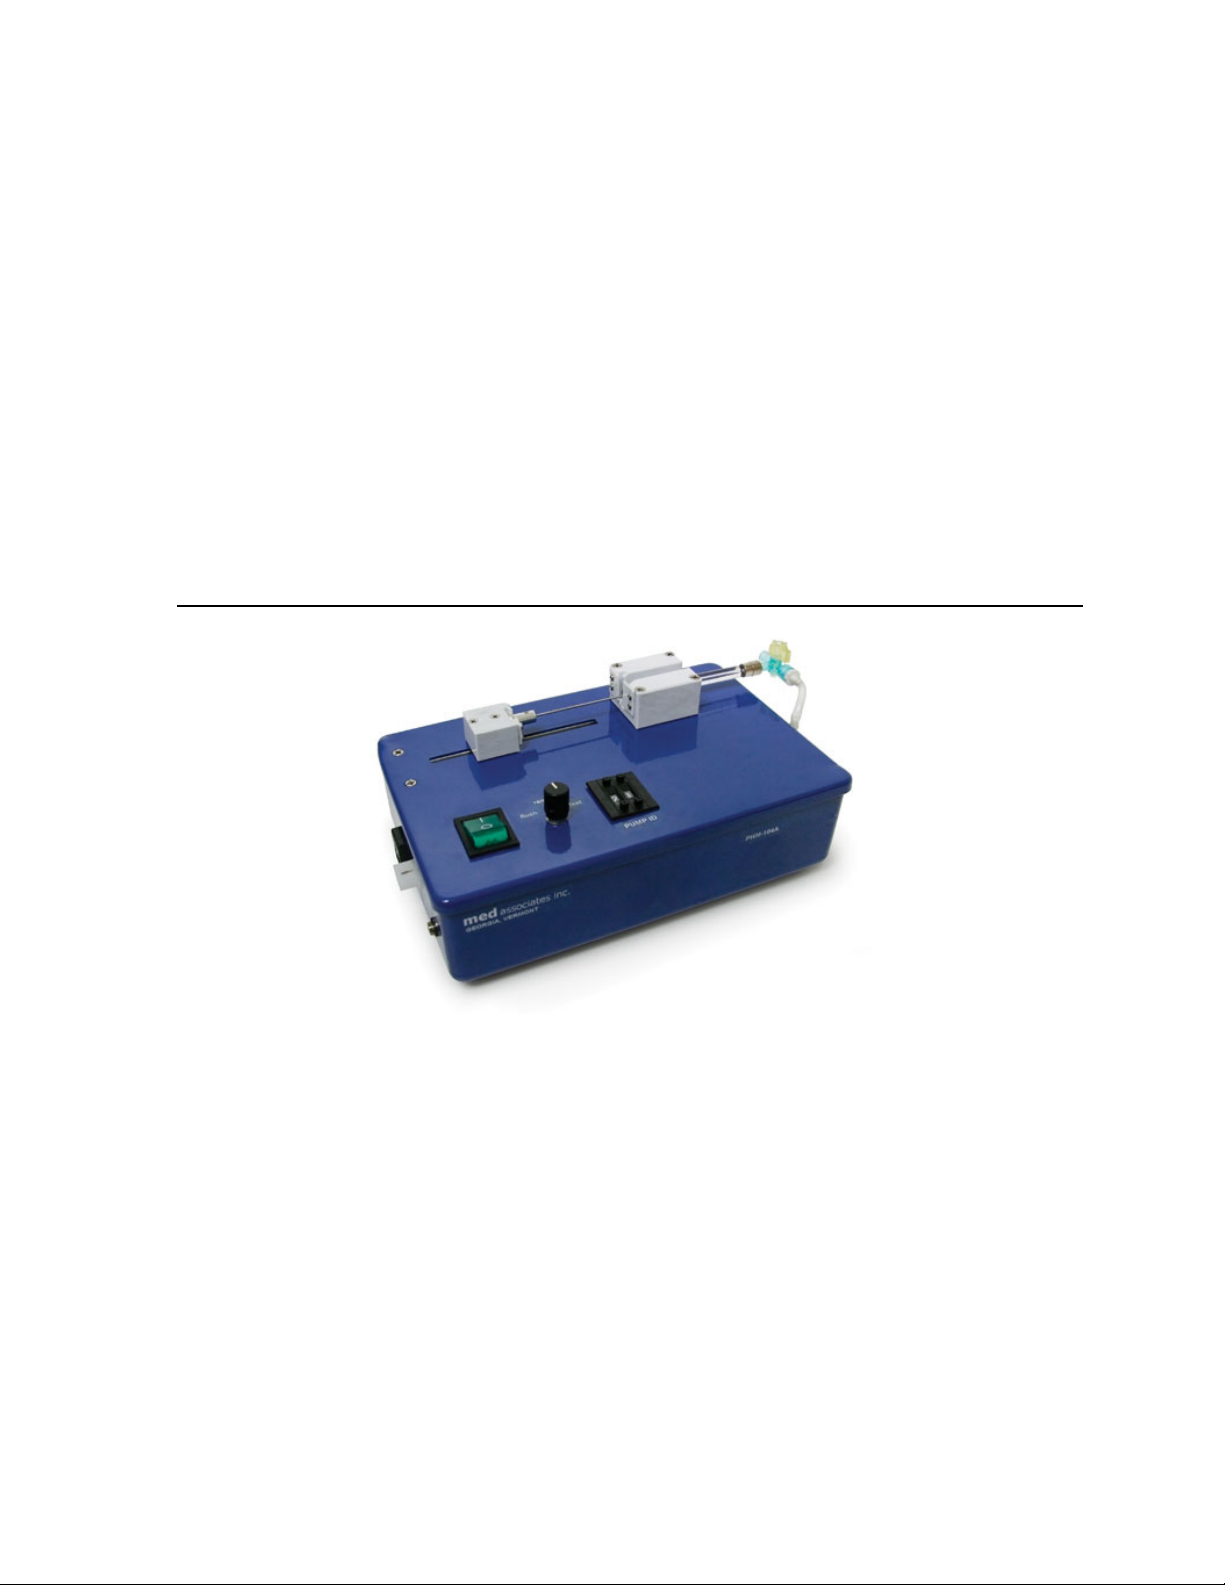
PHM-104A HIGH/LOW SPEED PRECISION PUMP
Table 3.1 - PHM-104A Control Software User Interface
Pump ID Pulldown menu that contains PUMP IDs for each pump that was connected to the computer before the
application was opened. Select the desired pump to view/change infusion settings.
Reset
Sets the Syringe, Dose, and Rate values to the pump’s default values and causes the PHM-104A Control
Application to recognize any pumps that have been connected to the computer after the application
was opened. Selecting Reset disables the Download and Set Default buttons. Changing any of the
values in the Syringe, Dose, and Rate fields will enable these buttons.
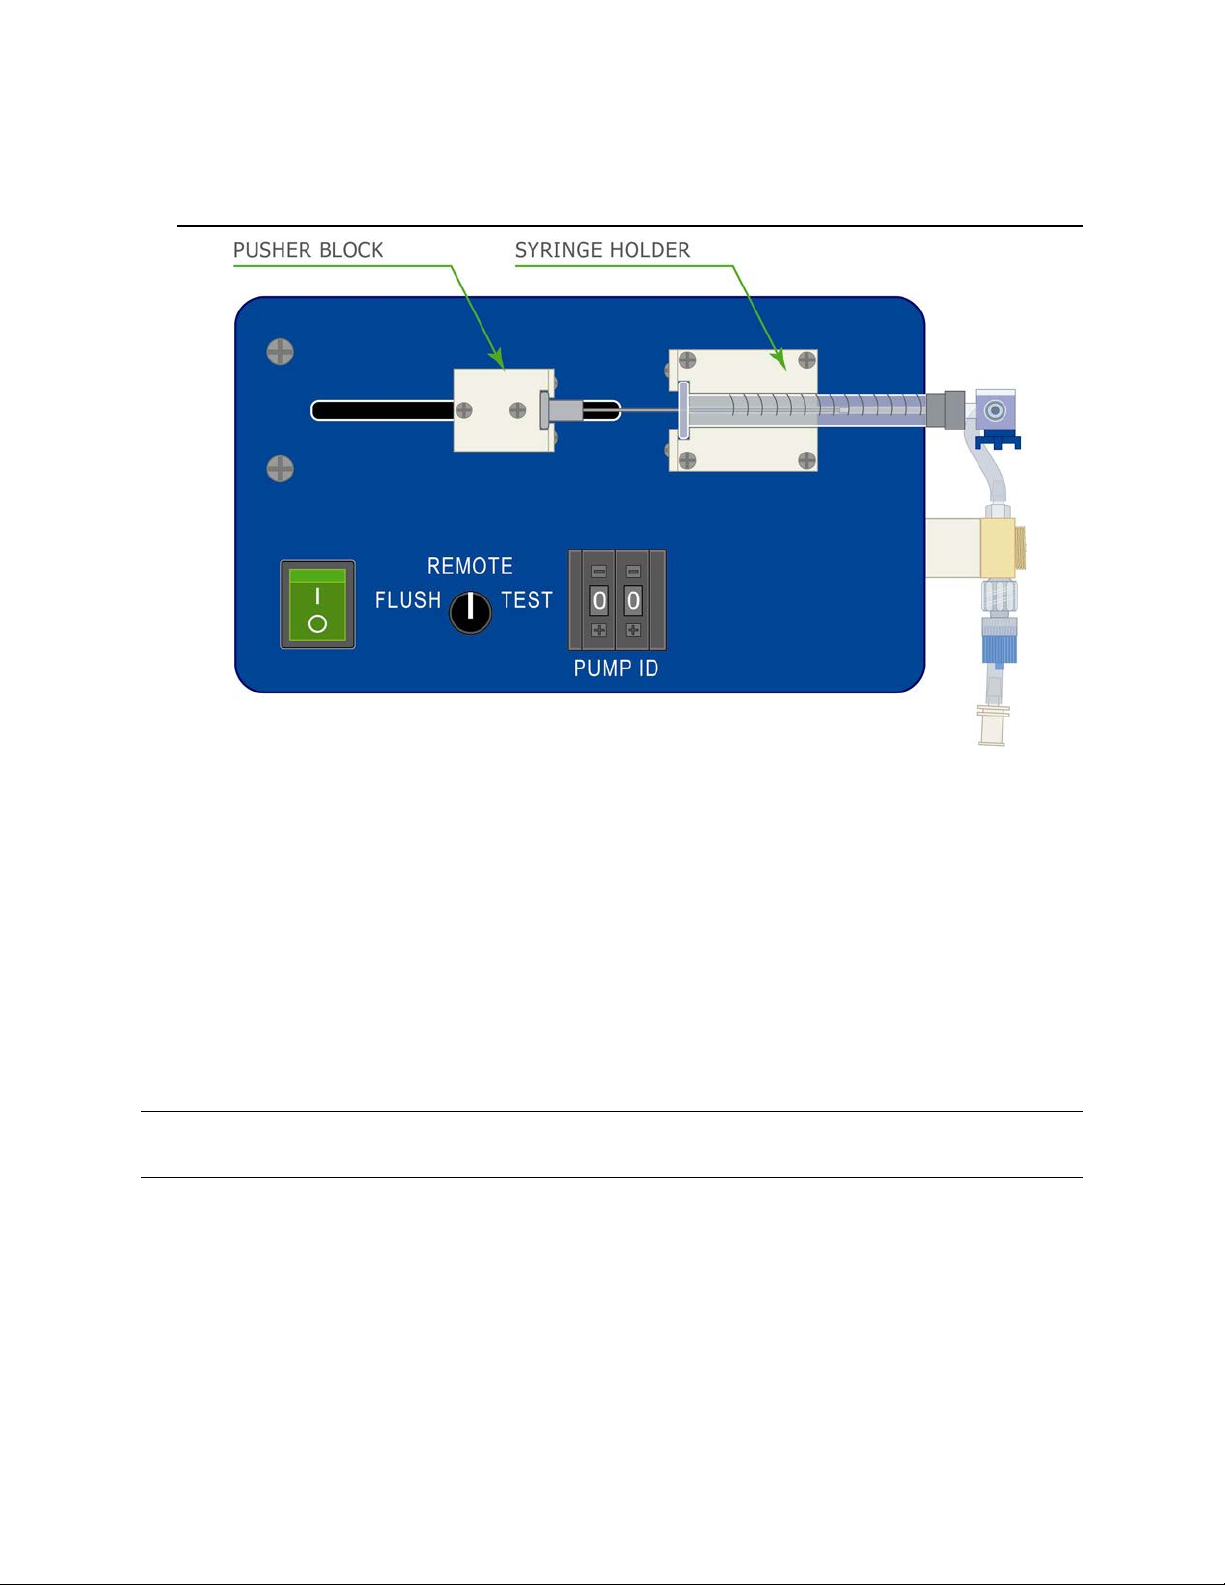
Home Returns the pusher block to the home position. This position varies based on the Syringe, Dose, and
Rate settings.
Prime Starts an injection from the current position of the pusher block to the end of the syringe then returns
the pusher block to the Home position.
Syringe (
L) Select the size of the Hamilton MICROLITER™ syringe that is loaded in the PHM-104A. Possible
selections are 10, 100 and 500 µL.
Dose (
L) Enter the desired dose (µL) in this field.
Rate (
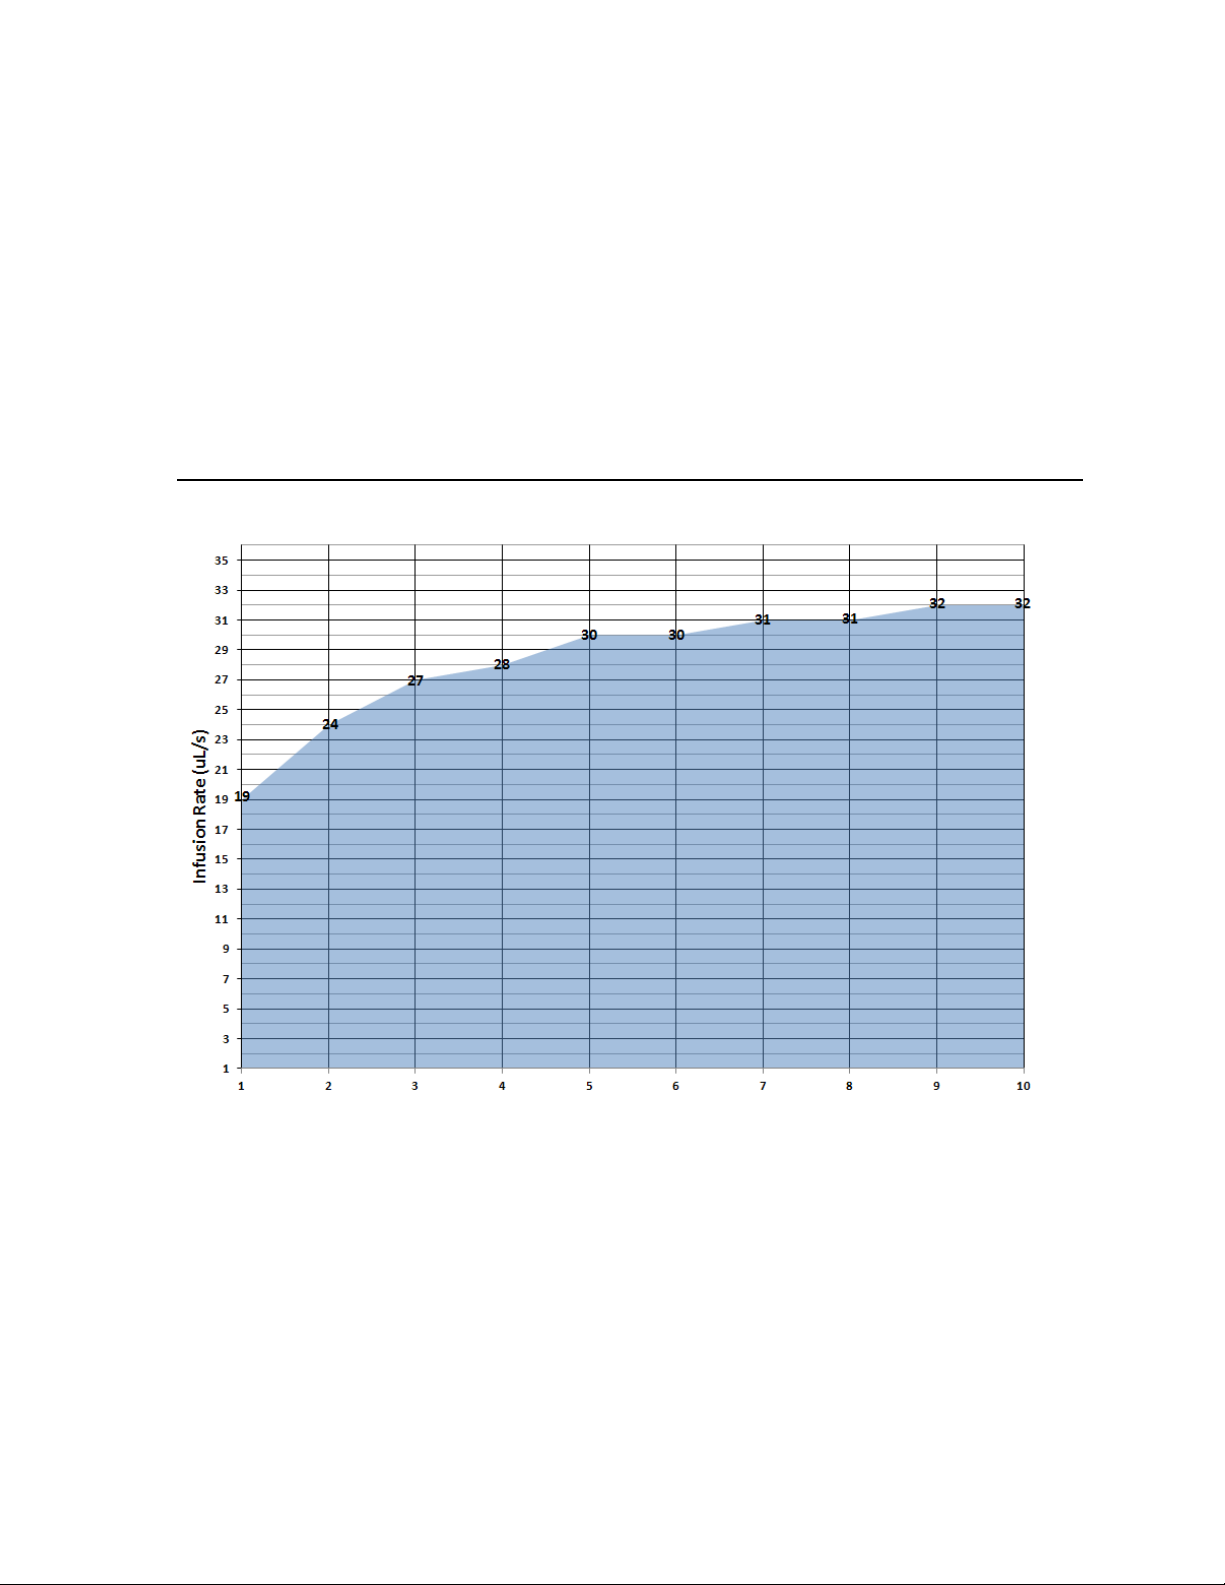
L/sec) Enter the desired rates (µL/sec) in this field. See Figure 2.6 dose capabilities.
OK Indicates that the Dose and Rate settings are within acceptable limits.
Invalid Data Indicates that the value entered in the Dose and Rate fields are not within acceptable limits. Refer to
Dose Capabilities for these limits. The value will be reverted back to the last good value used.
Download Click to send Syringe, Dose, and Rate settings to the currently selected pump. If all settings are valid,
the Inject and Set Default buttons will be enabled.
Inject Click to inject the dose.
Set Default
Enter the desired default values for the pump in the Syringe, Dose and Rate fields and click Download
to enable the Set Default button. Click Set Default to save these values as this pump’s defaults. The
default values are used when Inject button or the MED-PC input is used after the USB is connected.
7. Select the pump to configure from the Pump ID list. If a pump that is connected to the computer
does not appear on this list, verify that it is properly connected and turned on and click the Reset
button.
8. This pump’s default values for Syringe, Dose and Rate will be displayed. Click Inject to begin an
infusion using the default values or change any of these values to enable the Download and Set
Default buttons.
9. If the Syringe, Dose or Rate values are changed, click Download to send the new settings to the
pump. If these values are within acceptable limits, the Inject and Set Default buttons will be
enabled. If one or more of these values is not within acceptable limits the Status of the pump will
indicated as Invalid Data and the Inject and Set Default buttons will not be enabled.
10. Click Inject to begin the infusion or Set Default to save these values as the default settings for this
pump.
NOTE: The Inject and Set Default buttons will be disabled until valid values are entered in the Dose
and Rate fields and Download is clicked.
- 9 - DOC-187 Rev. 1.6 Copyright © 2019
Med Associates, Inc.