Medema Ergo2 User manual

UK
User Manual
Ergo2 Seat
P9-0139-B ver. 1.0.2 - August 2015
medema
gruppen

User Manual P9-0139-B 2 of 14 Version 1.0.2-2015User Manual P9-0139-B 2 of 14 Version 1.0.2-2015
Medema A/S
NB!
The latest versions of this user manual are available on our website:
www.medema.com.
In special cases, for example, important new safety regulations or other signicant
messages regarding your vehicle, you will be contacted directly by your supplier.

User Manual P9-0139-B 3 of 14 Version 1.0.2-2015User Manual P9-0139-B 3 of 14 Version 1.0.2-2015
Medema A/S
Contents
Contents................................................................................. 3
Symbols.................................................................................. 4
Help for the visually impaired .............................................. 4
Introduction............................................................................ 5
Warranty ................................................................................. 5
Declaration of conformity..................................................... 6
Preparation/adjustment ........................................................ 7
Introduction to the Ergo2 seat ............................................. 9
Extra equipment – contents ................................................. 15
Rear basket ............................................................................ 16
Walking cane holder for back tting.................................... 17
Lap belt................................................................................... 18
Inertia reel seat belt............................................................... 20
Stealth headrest..................................................................... 22
Standard armrest................................................................... 23
Alternative types of armrest................................................. 23
Adult armrest ......................................................................... 24
Child/Junior armrest ............................................................. 25
Hemiplegia armrest ............................................................... 26
Amputated leg rest................................................................ 27
Thigh rest ............................................................................... 28
Stealth side rest..................................................................... 29
Electrical Seat front/back position....................................... 30
Electrical Back....................................................................... 31
Electrical Seat rotation.......................................................... 32
Electrical Seat hoist .............................................................. 33
Operating electrical functions.............................................. 34
Seat post system................................................................... 36
Complete seats...................................................................... 38
Complete seats with square shaft ....................................... 38
Complete seats without headrest ........................................ 38
Headrest Ergo2...................................................................... 38
Warning triangle. ................................................................... 38

User Manual P9-0139-B 4 of 14 Version 1.0.2-2015User Manual P9-0139-B 4 of 14 Version 1.0.2-2015
Medema A/S
Symbols
Used in the user manual when a situation is described where
there is a risk of personal injury, and therefore requires extra
attention.
Used where the text is about electromagnetic compatibility
(EMC).
Help for the visually impaired
If you have difculty reading small letters in the user manual, we
recommend that you visit our website, where you can read this
manual in PDF format. The PDF manual can be enlarged on
your PC monitor as required.
Please contact us if you nd it difcult to understand the manual
or have general questions about the product. Our contact
information is found on back pages of this user manual.
Field Safety Notice (FSN)
All information concerning safety can be found at www.
medema.com, which is always updated with the latest safety
information. In the event of important safety-related changes,
we will issue an alert (FSN) directly to our customers.

User Manual P9-0139-B 5 of 14 Version 1.0.2-2015User Manual P9-0139-B 5 of 14 Version 1.0.2-2015
Medema A/S
Introduction
Thank you for purchasing the Ergo2 seat and/or Ergo2
accessories.
We have a wide range of accessories for the Ergo2 seat, which
can be tted to make your daily life easier. Contact us for more
information about special accessories and adjustments.
The seat has been tested and approved by TÜV in accordance
with EN 12184 for users weighing up to 175 kg,
including biocompatibility testing of the armrests and cover.
Flammability
tested in accordance with EN 1021-1 and EN 1021-2. Static,
impact and fatigue strength in accordance with ISO 7176-8.
Medema A/S is not liable for any damage or personal injury
caused by the unsuitable or unsafe use of the Ergo2 seat.
For more information about the use of the Ergo2 seat or this user
manual, contact:
Medema A/S
Tel.: +45 70 10 17 55
E-mail: [email protected]
Internet: www.medema.dk
NB We cannot be held responsible for any printing errors. We
reserve the right to update this user manual as required.
Warranty
Medema A/S provides a warranty in accordance with the Danish
Sale of Goods Act.
User Manual P9-0139-B 6 of 14 Version 1.0.2-2015User Manual P9-0139-B 6 of 14 Version 1.0.2-2015
Medema A/S
Declaration of conformity
Medema A/S hereby declares that:
Product: Ergo2 seat
Application: (prescribed application in the
user manual)
Type no.: Ergo2
Type: Class C
is CE-marked in accordance with Directive 93/42/EEC of 14
June 1993 concerning medical devices.
The product is made in accordance with EN 12184 Electrically
powered wheelchairs, scooters and their chargers.
The product has been risk assessed in accordance with DS/EN
ISO 14971 Medical devices. Application of risk management to
medical devices.
The seat can, for a fee, be delivered to the nearest dealer,
who will then see to its disposal at all times in accordance with
applicable environmental regulations.
Manufacturer: Medema A/S
Address: Enggårdvej 7, 7400 Herning, Denmark
Tel./Fax +45 7010 2054 +45 9716 8582
Date: 1 March 2015 Signature: _____________________
User Manual P9-0139-B 7 of 14 Version 1.0.2-2015User Manual P9-0139-B 7 of 14 Version 1.0.2-2015
Medema A/S
Preparation/adjustment
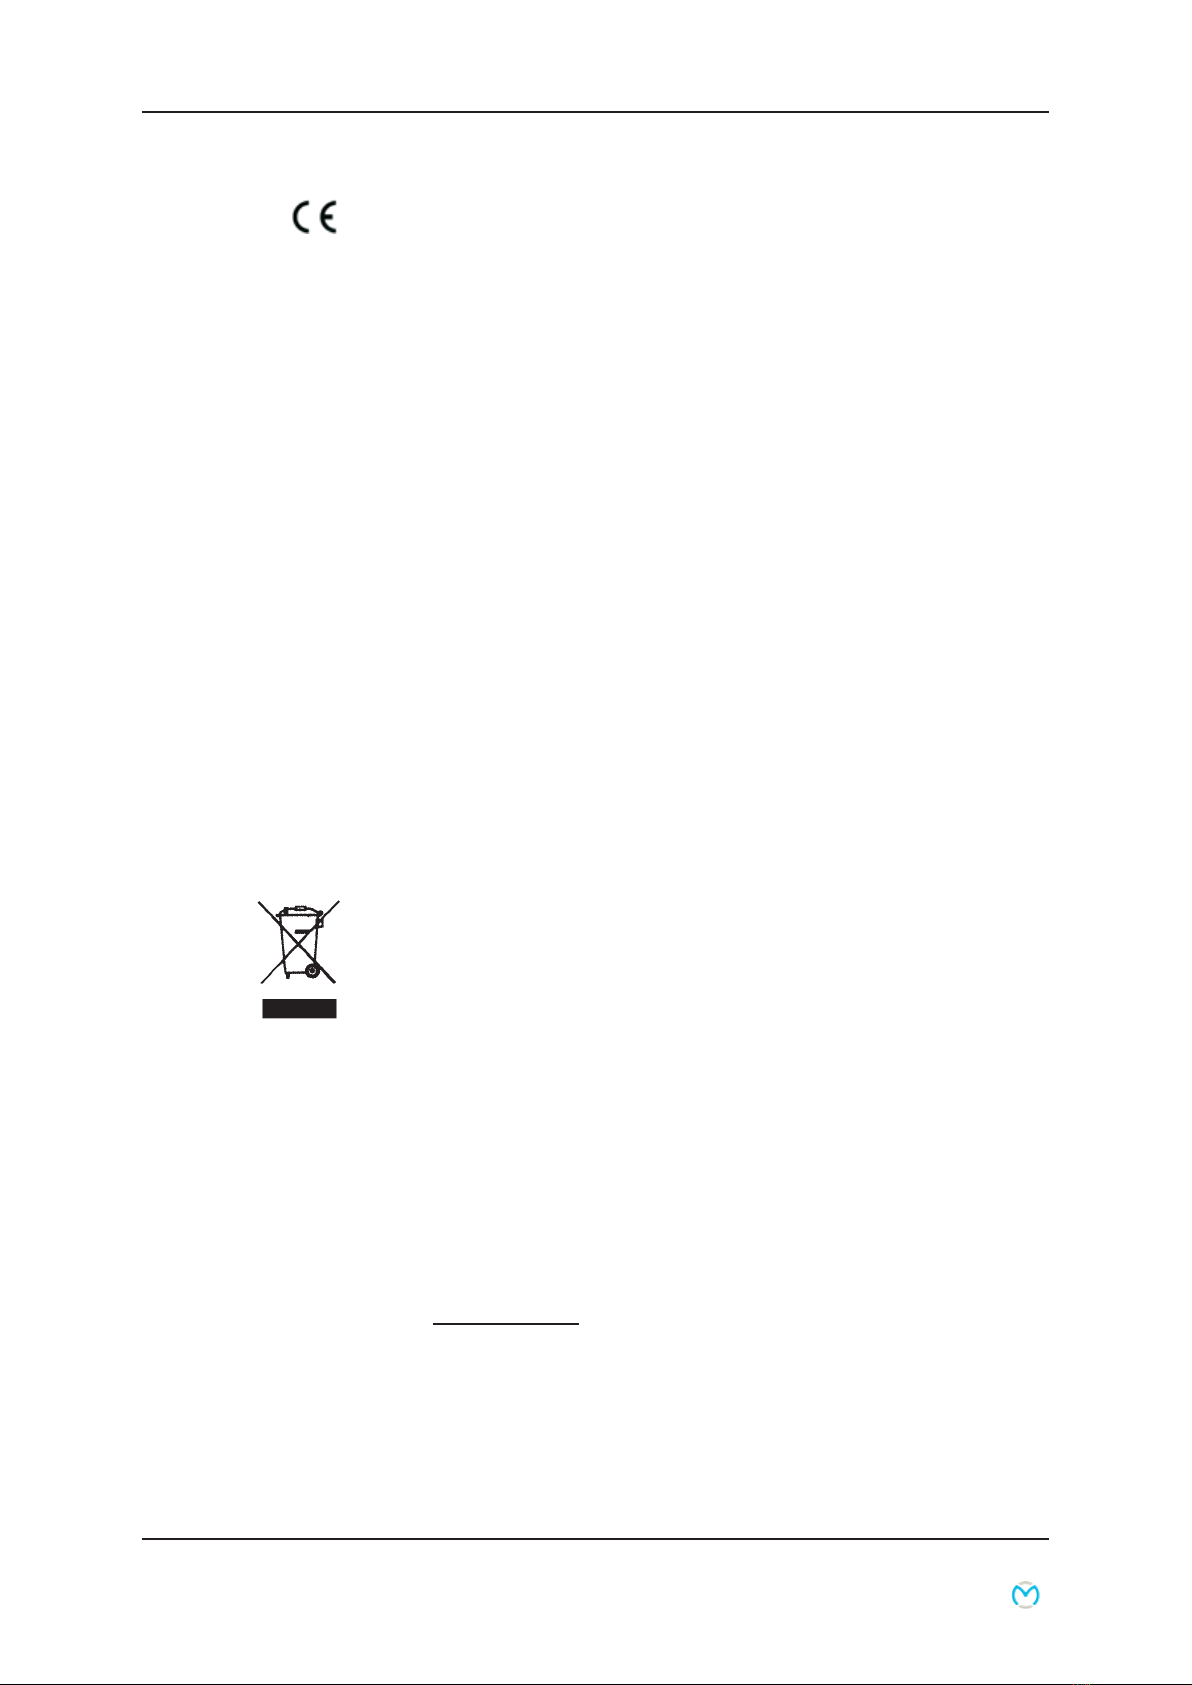
Seat height adjustment
Loosen the lever for rotating the seat, and turn the seat slightly
to the side. Remove the seat by lifting.
The seat is very heavy. When lifting the seat, ensure you have
the proper lifting posture with your back. A standard seat (45
cm), weighs 27 kg (see below).
User Manual P9-0139-B 8 of 14 Version 1.0.2-2015User Manual P9-0139-B 8 of 14 Version 1.0.2-2015
Medema A/S
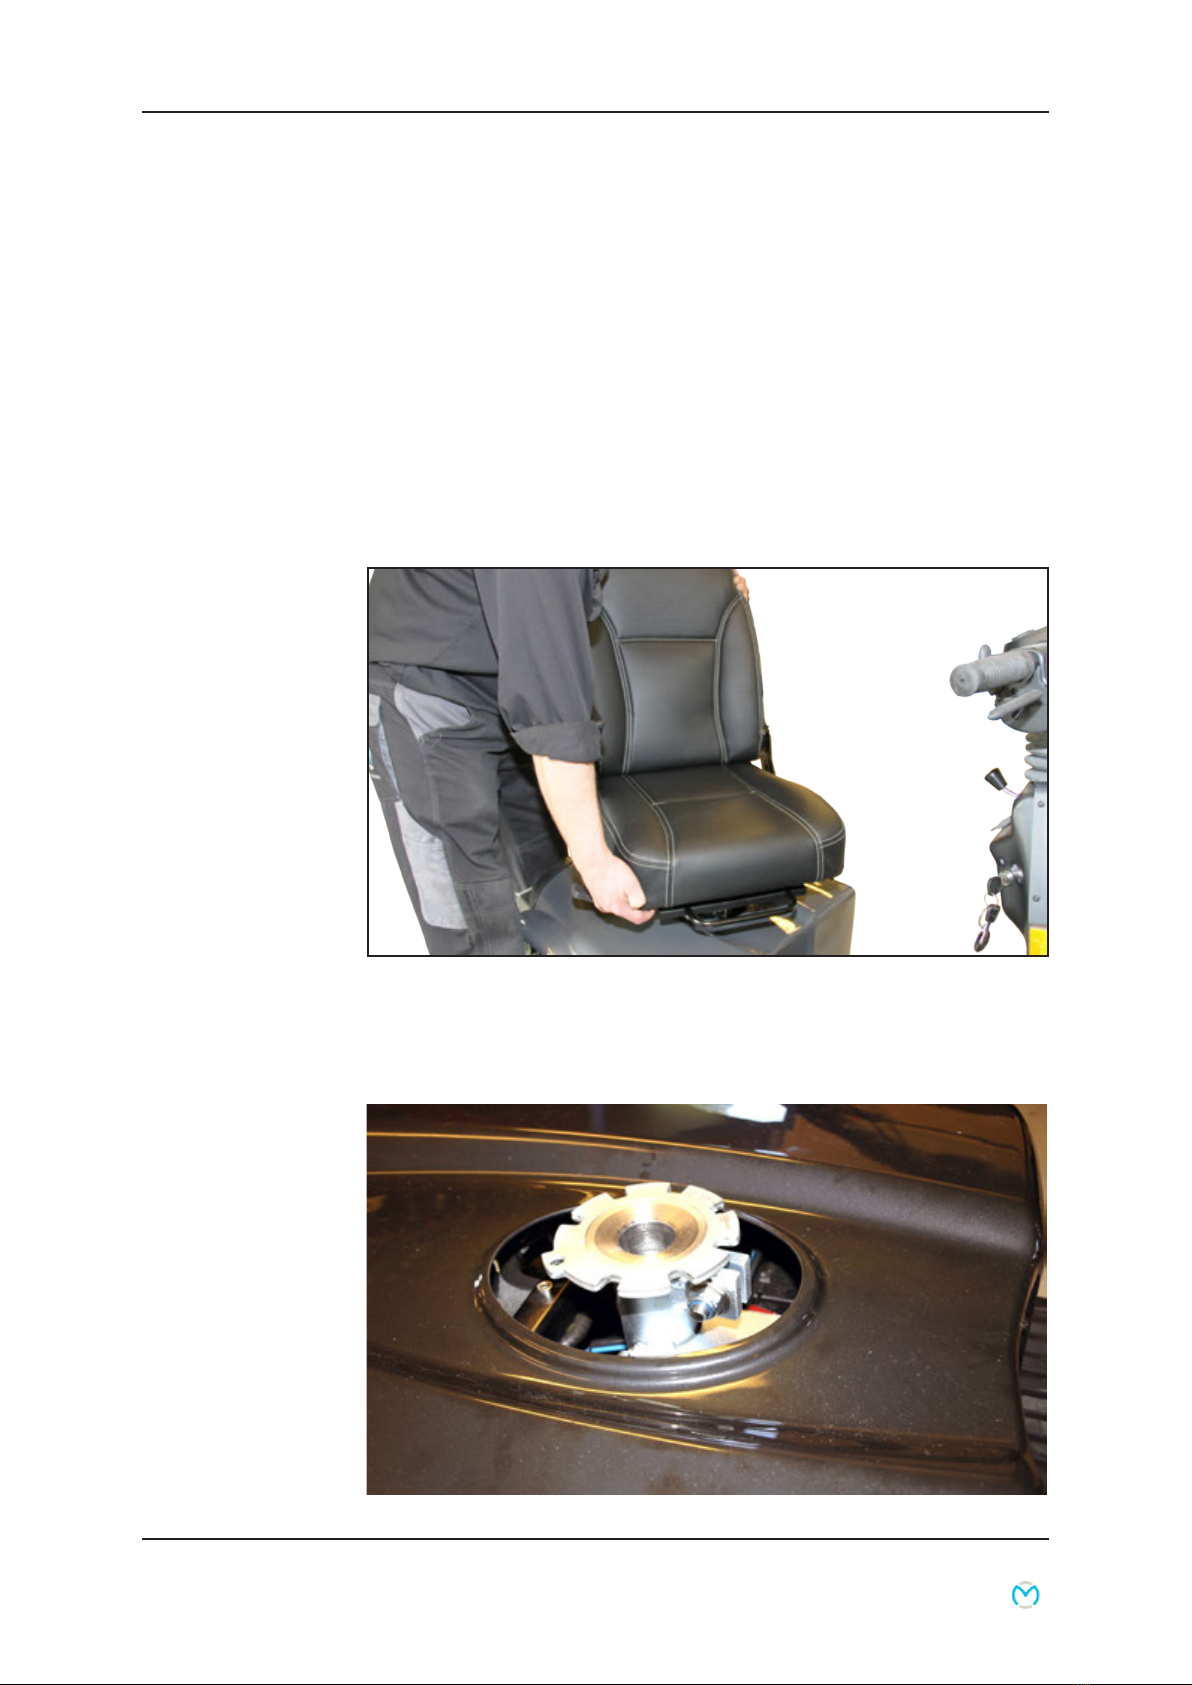
Seat release pressed in. Press
the seat release to release the seat
tting.
Seat release pressed out. You can now
raise/lower the seat tting to the required
height. Press in the seat releaser so that
it engages
with one of the ve holes in the seat
tting.
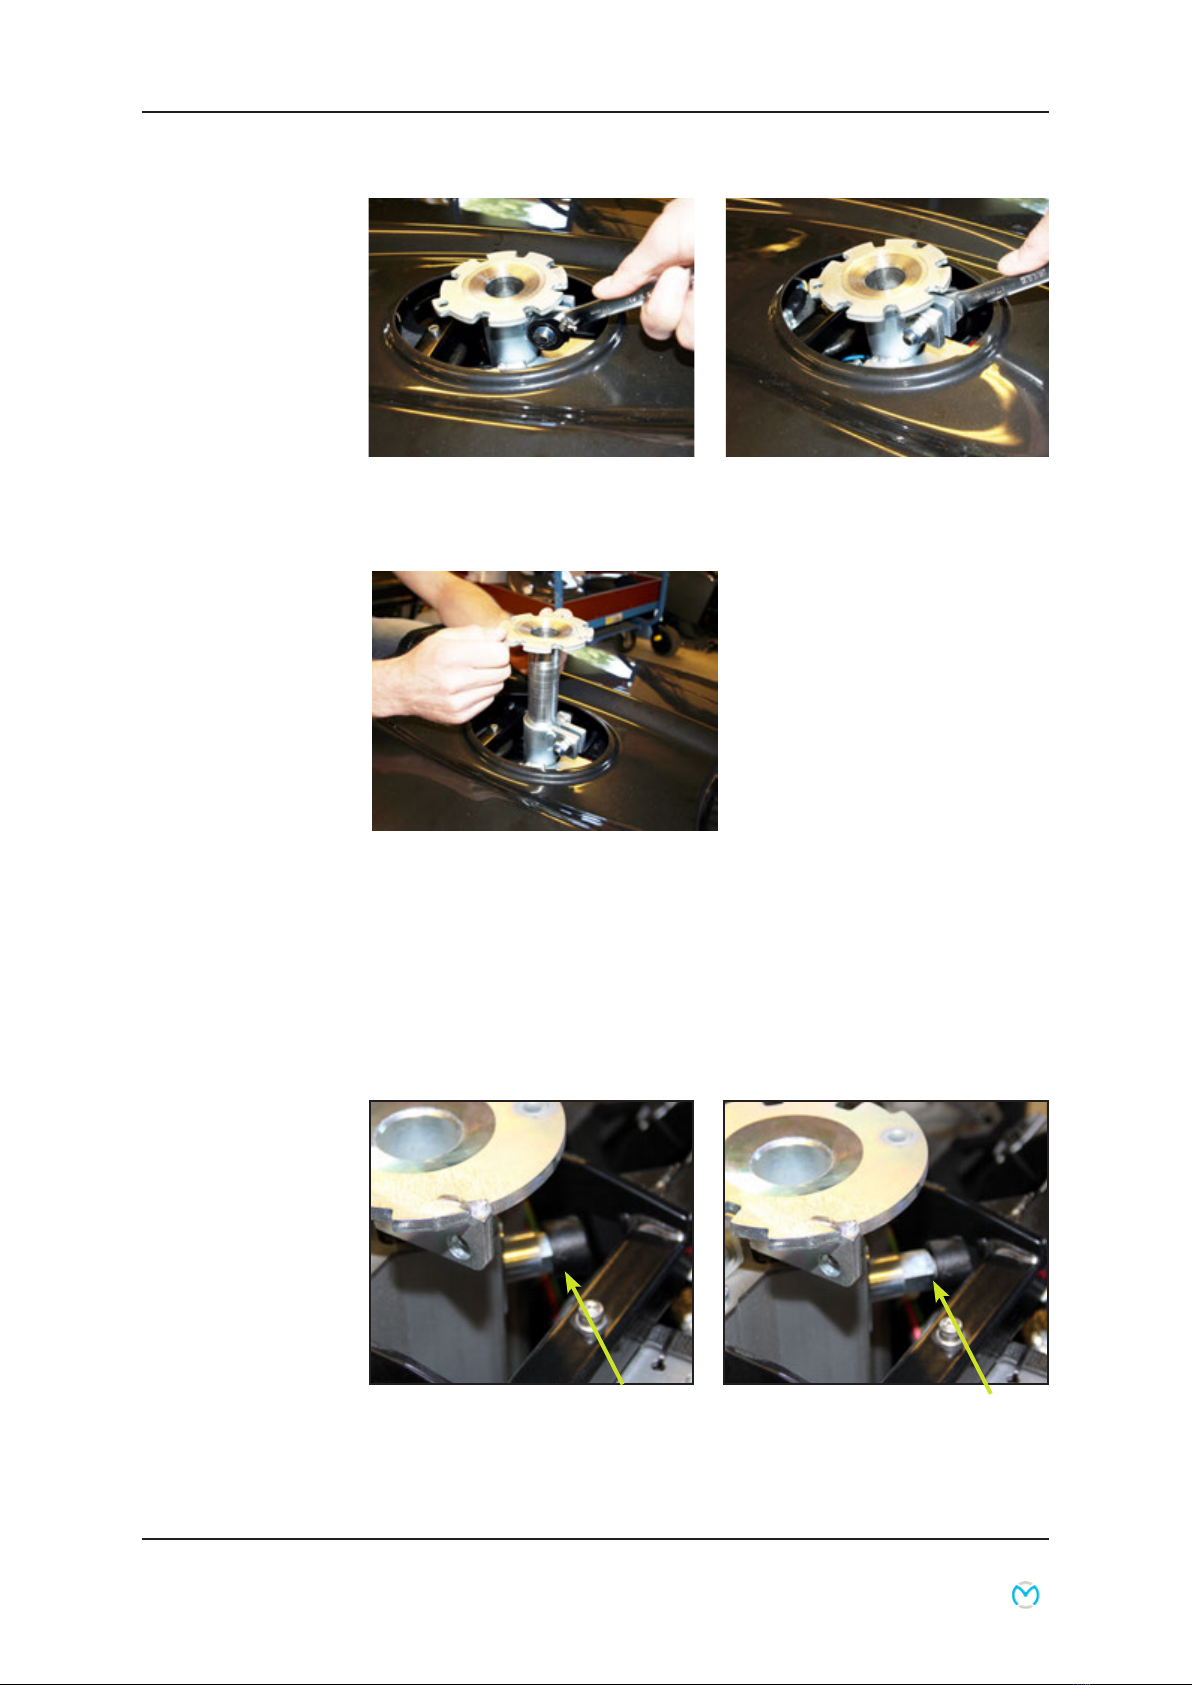
Unscrew the contra screw.
Use the combination spanner, 17 mm.
Unscrew the bolt.
Adjust the seat post height to the desired position.
The seat post is marked with a ring for each centimetre.
Tighten the bolt (50 Nm) and then tighten the contra nut (50 Nm).
Fit the seat. Adjust alignment if necessary.
Seat post height regulation using position bolt (optional)

User Manual P9-0139-B 9 of 14 Version 1.0.2-2015User Manual P9-0139-B 9 of 14 Version 1.0.2-2015
Medema A/S
Introduction to the Ergo2 seat
Lever for rotating the seat
The lever must be pulled back
to rotate the seat. The seat can
then be rotated to each side,
locking at each 45°.
The lever is spring-loaded, and the seat is locked automatically
when the lever is released. This lever is located on the right side as
standard, but can also be positioned on the left side.
When the lever is located on the left side, it must be pushed forward
in order to rotate the seat instead of pulling back.
Out/in adjustment of lever
for rotating the seat
Lift the seat off the vehicle.
Loosen the two Allen screws.
The lever can now be adjusted
out/in to the desired position.
Left positioning of lever for
rotating the seat
Remove the two Allen screws
and pull the lever out.
Move the lever in from the
left side and tighten the Allen
screws.
When installing the lever on
the left side, the lever must be
moved forward to rotate the
seat.
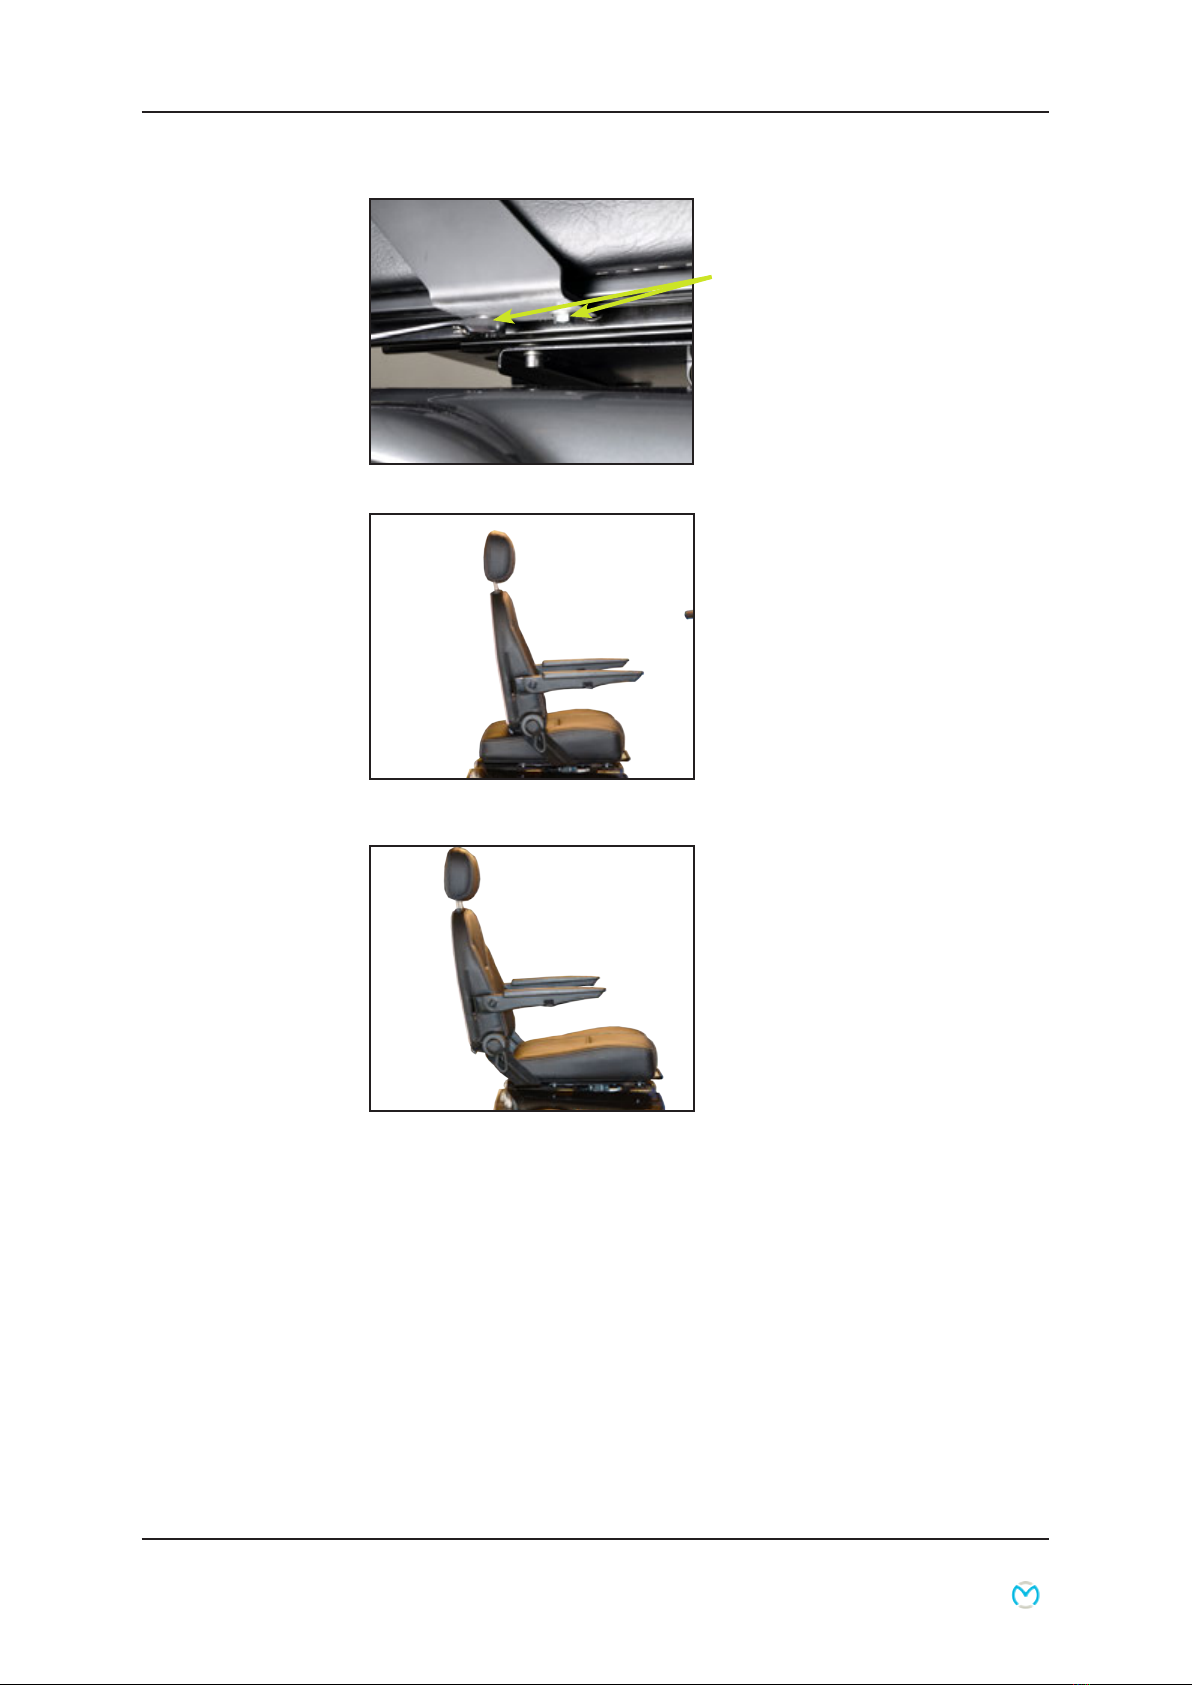
Mount the seat again
To ensure that the seat is fully
in position, release the lever
for rotating the seat, to get the
seat all the way down:

User Manual P9-0139-B 10 of 14 Version 1.0.2-2015User Manual P9-0139-B 10 of 14 Version 1.0.2-2015
Medema A/S
Seat forward/back lever
Pull the lever up to release the
seat on the slide rail.
The seat can now be moved
forward or backward as
required, with 200 mm of travel.
When the lever is released, the seat will automatically lock into
place in the closest stop position.
Armrest height adjustment
Open the zipper on the
backrest side and back.
Unscrew the Allen screw and
the armrest can be pushed up
or down as needed.
It can be adjusted by 140 mm.
Width adjustment of armrest
Each armrest can be adjusted
25 mm out.
Loosen the Allen screw and
adjust the armrest sideways.

User Manual P9-0139-B 11 of 14 Version 1.0.2-2015User Manual P9-0139-B 11 of 14 Version 1.0.2-2015
Medema A/S
Backrest angle adjustment
The backrest can be adjusted
45° backward and 90°
forward. To adjust, pull the
lever on the right side of the
seat.
The backrest angle
adjustment handle is tted
pointing down as standard.
This is because it can collide
with the armrests if these are
set to the lowest position.
If there is no need for this and
it is preferable for the handle
to be in a more horizontal
position, remove the centre
cover on the handle using a
at screwdriver.
Grip the square shaft and
turn up 90° and t then ret
the handle and cover.
Armrests angle adjustment
The armrest can be adjusted
60° by using the adjustment
screw.
The armrest can be tilted up
to facilitate entry and exit.

User Manual P9-0139-B 12 of 14 Version 1.0.2-2015User Manual P9-0139-B 12 of 14 Version 1.0.2-2015
Medema A/S
Backrest inclined forward to
90° angle.
This means that the seat does
not necessarily need to be
removed during transport, e.g.
in a car.
Backrest reclined at 45°angle.
The handle for adjusting the
backrest is shown here turned
90° up.
User Manual P9-0139-B 13 of 14 Version 1.0.2-2015User Manual P9-0139-B 13 of 14 Version 1.0.2-2015
Medema A/S
The seat depth can now
be adjusted by sliding the
backrest forward or back.
Shown here with 320 mm seat
depth
The backrest can be moved
backward or forward to the
edge of the rail. Tighten the
screws after adjusting seat
depth.
Shown here with 550 mm seat
depth
Backrest forward/back
Loosen the specied screws
in both sides. 13 mm head.
User Manual P9-0139-B 14 of 14 Version 1.0.2-2015User Manual P9-0139-B 14 of 14 Version 1.0.2-2015
Medema A/S
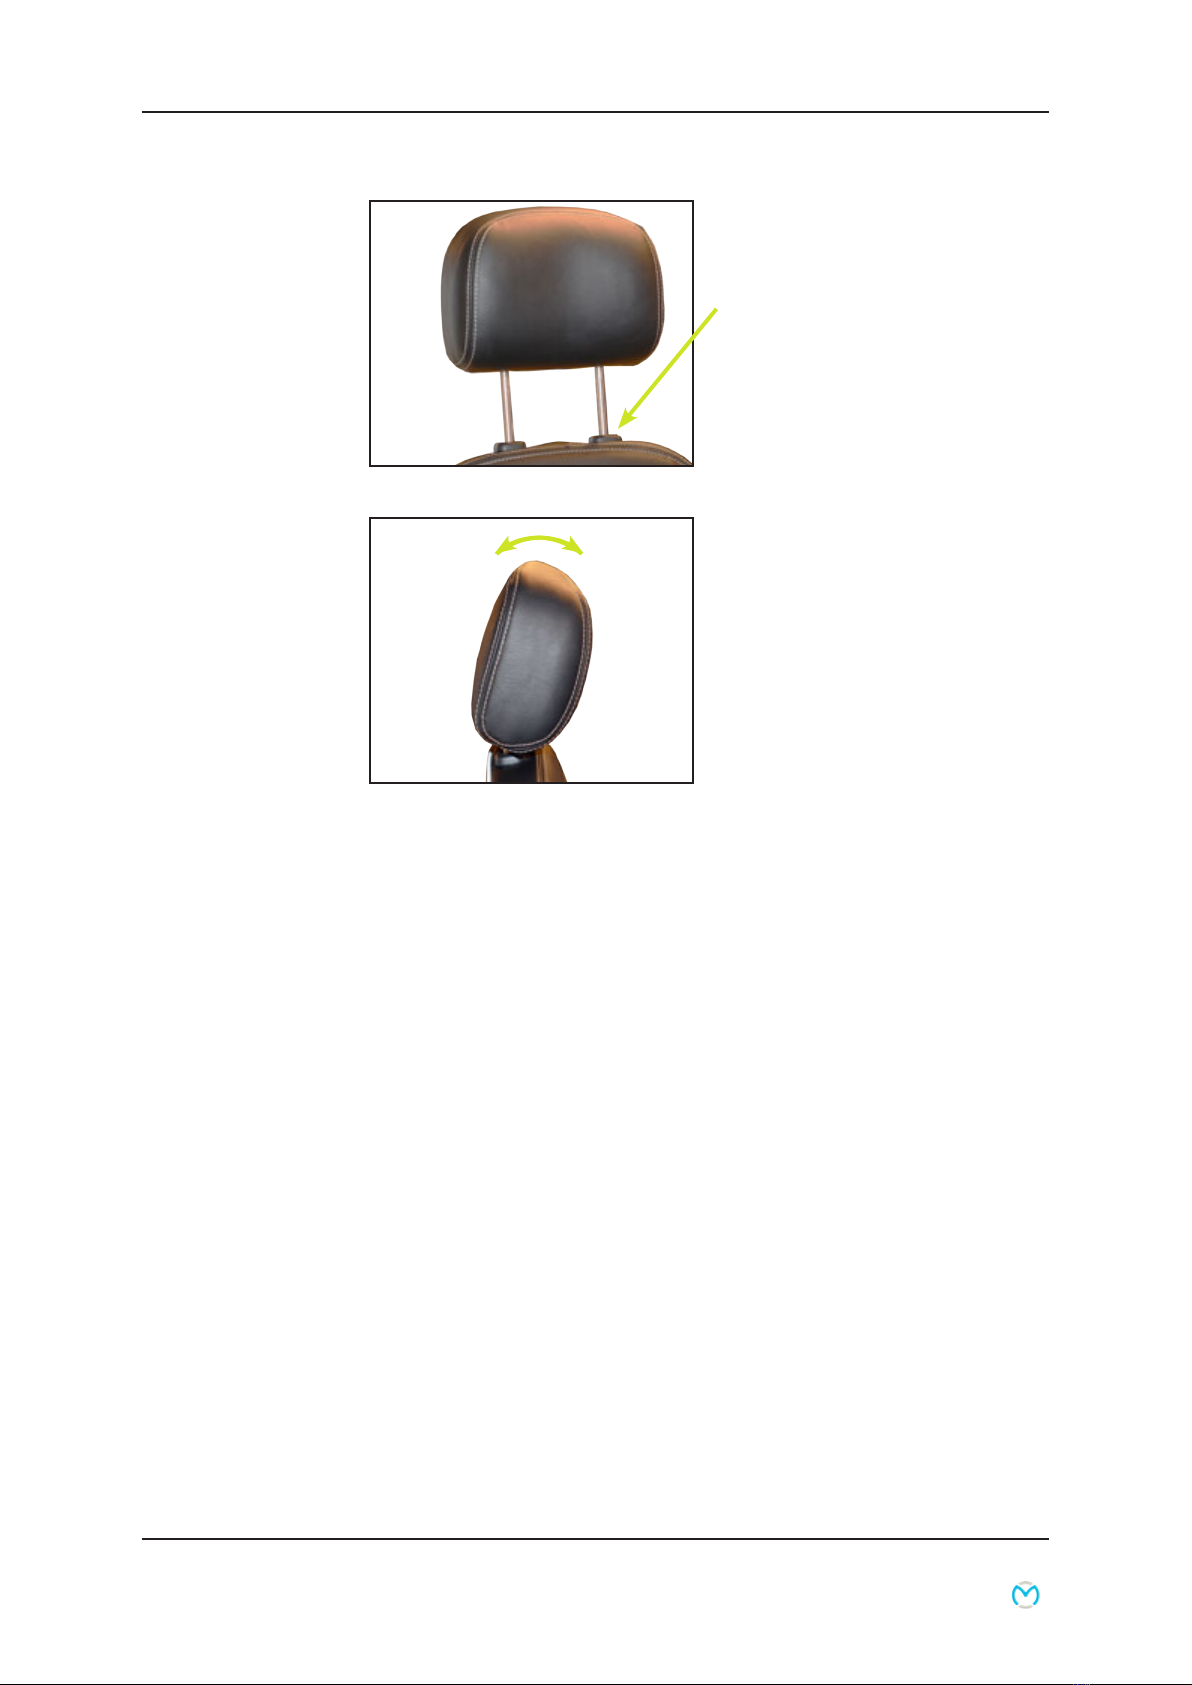
Headrest height adjustment
Press the button in and lower/
raise the headrest as required.
Headrest forward/backward
adjustment
The headrest can be tilted
forward and backward as
needed.

User Manual P9-0139-B 15 of 39 Version 1.0.2-2015User Manual P9-0139-B 15 of 39 Version 1.0.2-2015
Medema A/S
Extra equipment – contents
Rear basket ............................................................................ 16
Walking cane holder for back tting.................................... 17
Lap belt................................................................................... 18
Inertia reel seat belt............................................................... 20
Stealth headrest..................................................................... 22
Standard armrest................................................................... 23
Alternative types of armrest................................................. 23
Adult armrest ......................................................................... 24
Child/Junior armrest ............................................................. 25
Hemiplegia armrest ............................................................... 26
Amputated leg rest................................................................ 27
Thigh rest ............................................................................... 28
Stealth side rest..................................................................... 29
Electrical Seat front/back position....................................... 30
Electrical Back....................................................................... 31
Electrical Seat rotation.......................................................... 32
Electrical Seat hoist .............................................................. 33
Operating electrical functions.............................................. 34
Seat post system................................................................... 36
Complete seats...................................................................... 38
Complete seats with square shaft ....................................... 38
Complete seats without headrest ........................................ 38
Headrest Ergo2...................................................................... 38
Warning triangle .................................................................... 38

User Manual P9-0139-B 16 of 39 Version 1.0.2-2015User Manual P9-0139-B 16 of 39 Version 1.0.2-2015
Medema A/S
Fitting basket on the seat
(extra equipment)
Complete mounting kit for
basket.
Two brackets and four Allen
screws. 4 mm head.
Unzip the zip fastener and
position the bracket next to
the two pre-drilled holes.
Fit the basket on the bracket
and now it is ready for use.
Remember to insert a locking
split after tting.
Rear basket
Part number M-127-06-165
Max. load in basket 15 kg

User Manual P9-0139-B 17 of 39 Version 1.0.2-2015User Manual P9-0139-B 17 of 39 Version 1.0.2-2015
Medema A/S
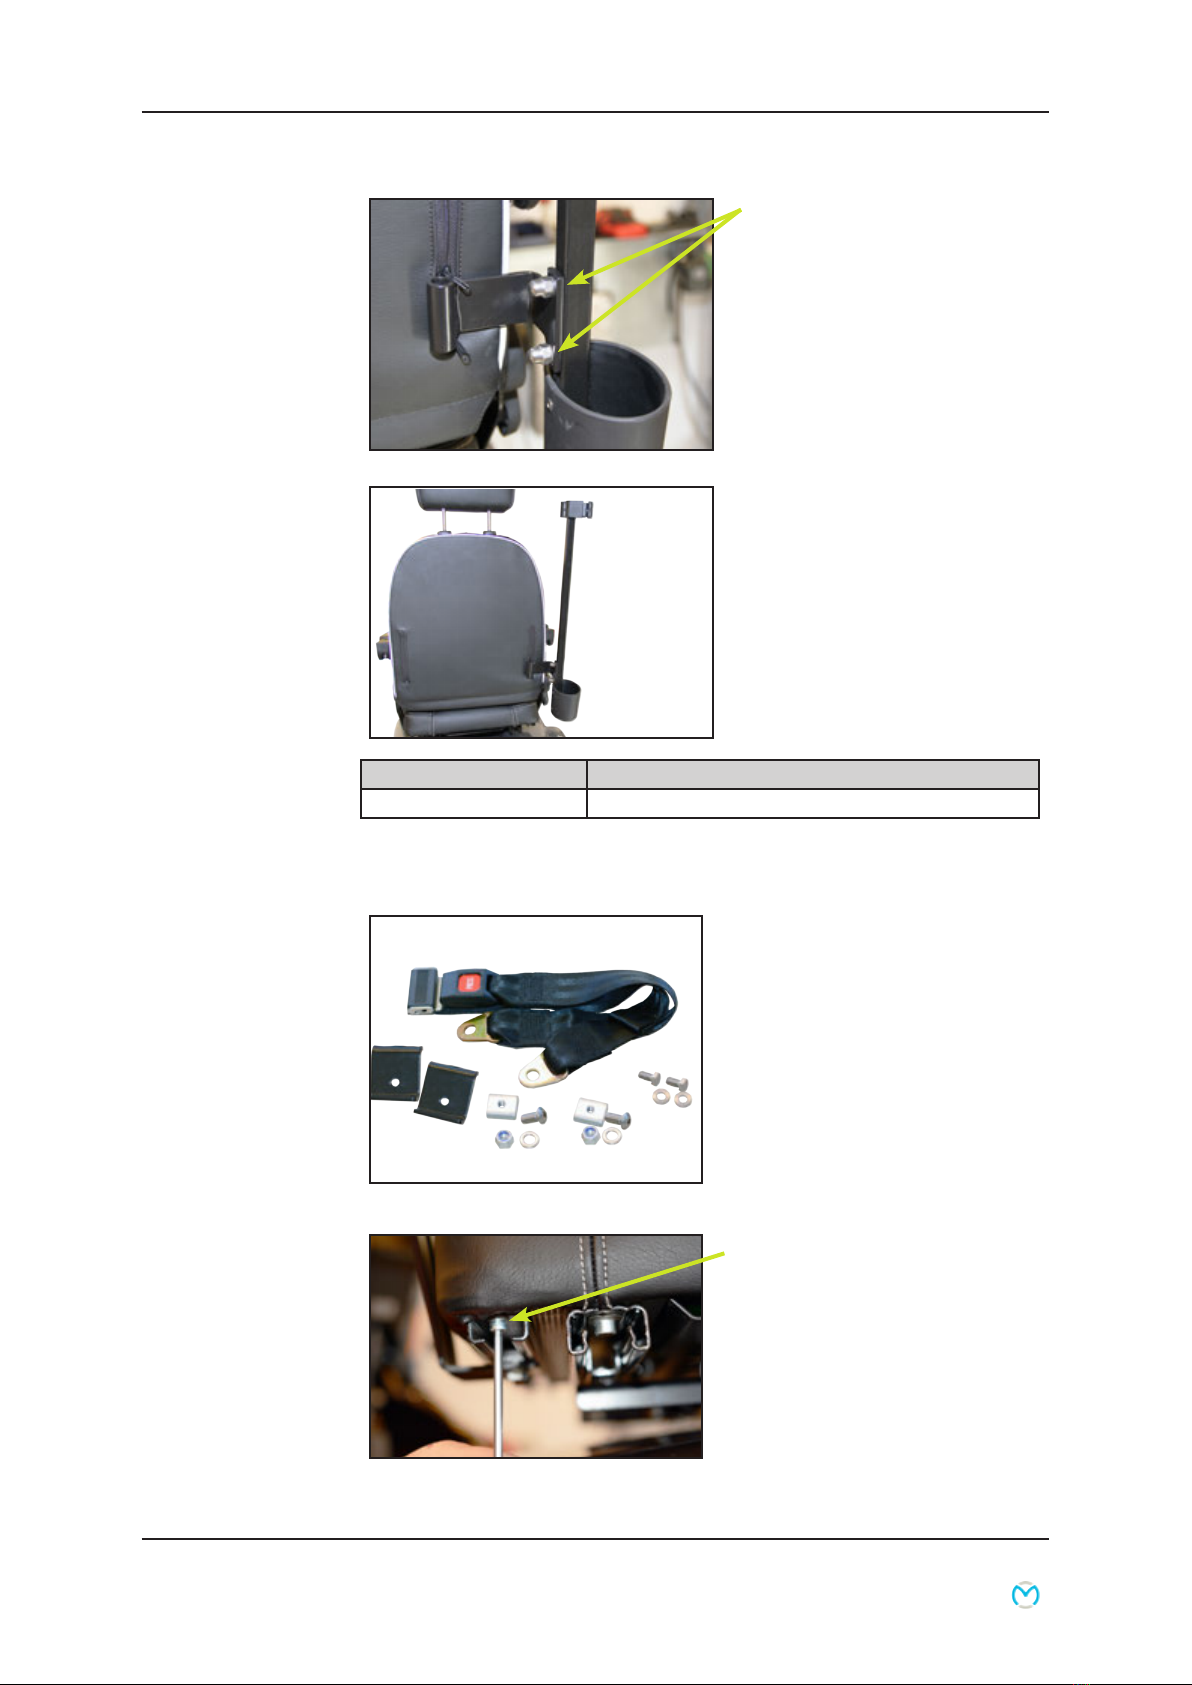
Walking cane holder for back tting
Walking cane holder,
complete set.
Zip the zip fastener and
securely t the bracket using
two screws.
4 mm head.
Bracket tted.
Secure the walking cane
holder using two screws.
6 mm head.
User Manual P9-0139-B 18 of 39 Version 1.0.2-2015User Manual P9-0139-B 18 of 39 Version 1.0.2-2015
Medema A/S
Complete lap belt set
Remove the stop screw in the
rail.
4 mm head.
Lap belt
Part number M-127-06-003
Max. weight. Two walking canes/crutches
Tighten nuts securely on the
two screws.
13 mm head.
The walking cane holder is
now fully tted.
NB: May also be tted on the
left side of the seat, by using
the mirror-image bracket.

User Manual P9-0139-B 19 of 39 Version 1.0.2-2015User Manual P9-0139-B 19 of 39 Version 1.0.2-2015
Medema A/S
Slide in assembly tting.
Re-t the stop screw. Push
the bracket back against
the stop screw and tighten
securely.
13 mm head.
Do this on both sides of the
seat.
Part number M-127-06-144
Max. weight. 250 kg user weight
One end of the seat belt is
attached to the bracket.
Allen screw 6 mm head.
Nut 17 mm head.
The other end of the seat
belt is attached in the same
way, on the opposite side of
the seat.
The lap belt is a safety belt
and functions in the same
way as a seat belt in a car.

User Manual P9-0139-B 20 of 39 Version 1.0.2-2015User Manual P9-0139-B 20 of 39 Version 1.0.2-2015
Medema A/S
Inertia reel seat belt
Slide in assembly tting. Re-
t the stop screw.
Push the bracket back
against the stop screw and
tighten securely.
13 mm head.
Screw the seat lock securely
to the assembly tting.
Remove the stop screw in
the rail.
4 mm head.
Place the inertia reel seat
belt between the seat and
the back bracket.
Table of contents


