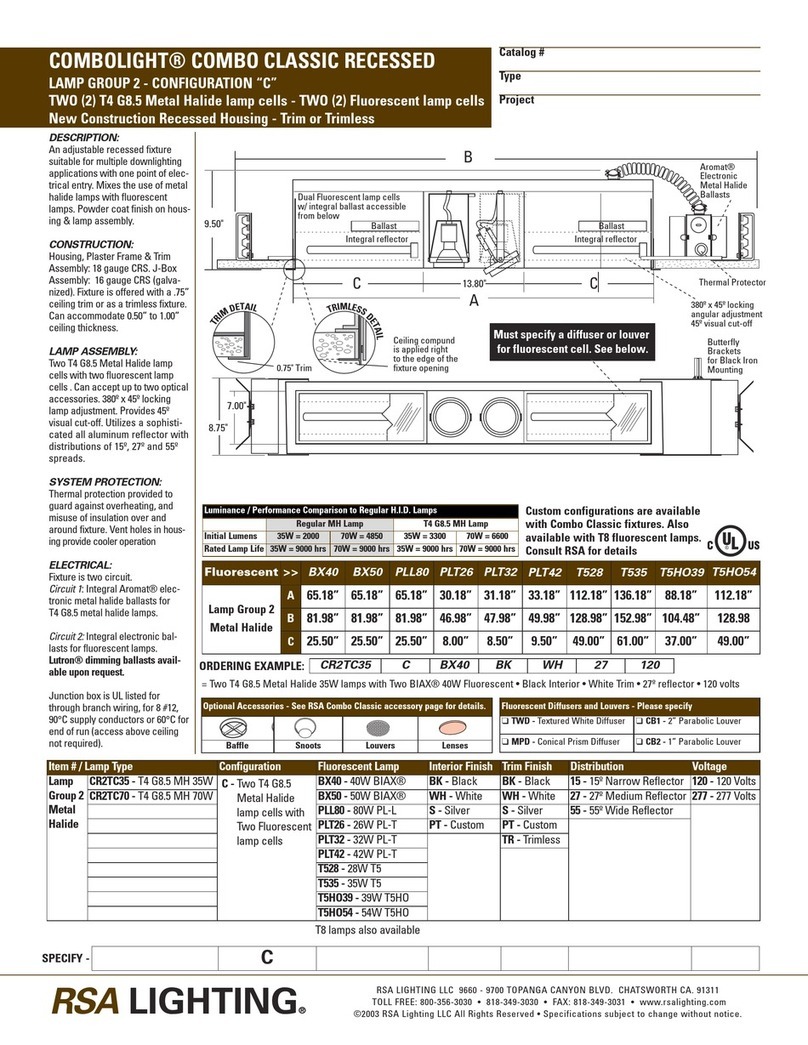
Memostar SML-0306 User manual

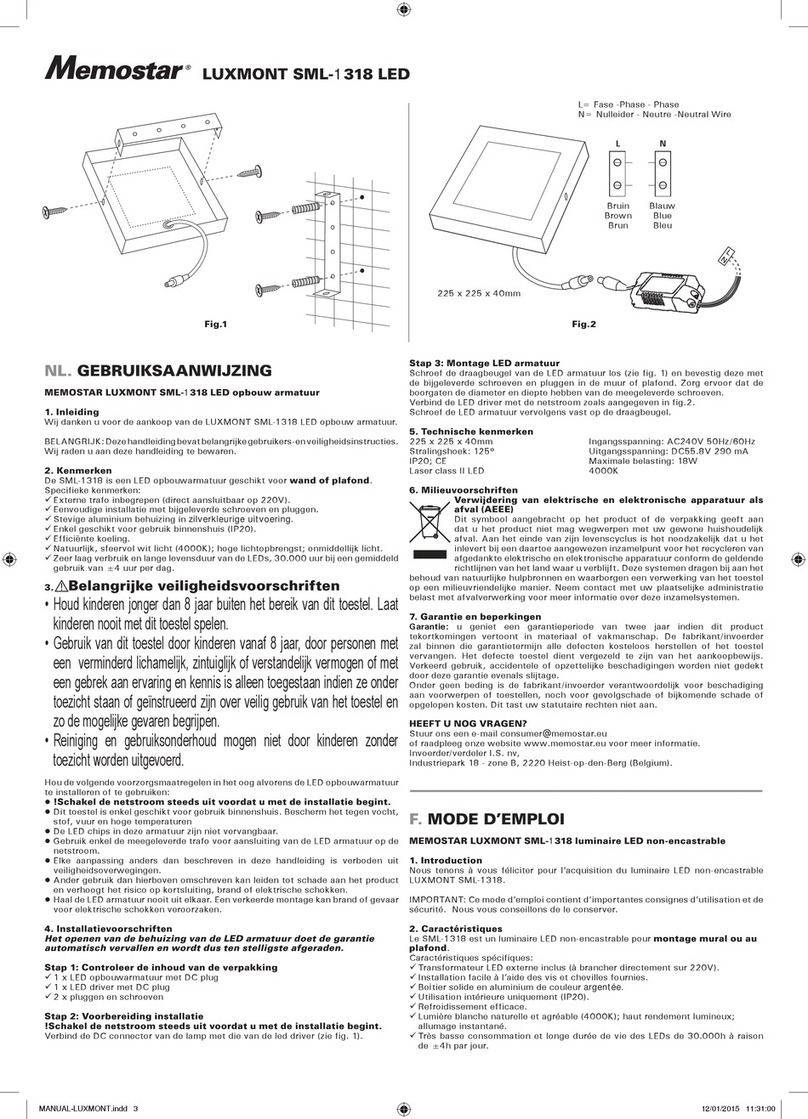
Fig .1 Fig.2
NL. GEBRUIKSAANWIJZING
MEMOSTAR LUXMONT SML-0306 LED opbouw armatuur
1. Inleiding
Wij danken u voor de aankoop van de LUXMONT SML-0306 LED opbouw armatuur.
BELANGRIJK: Dezehandleidingbevatbelangrijkegebruikers-en veiligheidsinstructies.
Wij raden u aan deze handleiding te bewaren.
2. Kenmerken
De SML-0306 is een LED opbouwarmatuur geschikt voor wand of plafond.
Specifieke kenmerken:
9Externe trafo inbegrepen (direct aansluitbaar op 220V).
9Eenvoudige installatie met bijgeleverde schroeven en pluggen.
9Stevige aluminium behuizing in witte kleur.
9Enkel geschikt voor gebruik binnenshuis (IP20).
9Efficiënte koeling.
9Natuurlijk, sfeervol wit licht (4000K); hoge lichtopbrengst; onmiddellijk licht.
9Zeer laag verbruik en lange levensduur van de LEDs, 30.000 uur bij een gemiddeld
gebruik van ±4 uur per dag.
3. Belangrijke veiligheidsvoorschriften
•Houdkinderenjongerdan8jaarbuitenhetbereikvandittoestel.Laat
kinderennooitmetdittoestelspelen.
•Gebruikvandittoesteldoorkinderenvanaf8jaar,doorpersonenmet
eenverminderdlichamelijk,zintuiglijkofverstandelijkvermogenofmet
eengebrekaanervaringenkennisisalleentoegestaanindienzeonder
toezichtstaanofgeïnstrueerdzijnoverveiliggebruikvanhettoestelen
zodemogelijkegevarenbegrijpen.
•Reiniging en gebruiksonderhoud mogen niet door kinderen zonder
toezichtwordenuitgevoerd.
Hou de volgende voorzorgsmaatregelen in het oog alvorens de LED opbouwarmatuur
te installeren of te gebruiken:
•!Schakel de netstroom steeds uit voordat u met de installatie begint.
•Dit toestel is enkel geschikt voor gebruik binnenshuis. Bescherm het tegen vocht,
stof, vuur en hoge temperaturen
•De LED chips in deze armatuur zijn niet vervangbaar.
•Gebruik enkel de meegeleverde trafo voor aansluiting van de LED armatuur op de
netstroom.
•Elke aanpassing anders dan beschreven in deze handleiding is verboden uit
veiligheidsoverwegingen.
•Ander gebruik dan hierboven omschreven kan leiden tot schade aan het product
en verhoogt het risico op kortsluiting, brand of elektrische schokken.
•Haal de LED armatuur nooit uit elkaar. Een verkeerde montage kan brand of gevaar
voor elektrische schokken veroorzaken.
4. Installatievoorschriften
Het openen van de behuizing van de LED armatuur doet de garantie
automatisch vervallen en wordt dus ten stelligste afgeraden.
Stap 1: Controleer de inhoud van de verpakking
91 x LED opbouwarmatuur met DC plug
91 x LED driver met DC plug
92 x pluggen en schroeven
Stap 2: Voorbereiding installatie
!Schakel de netstroom steeds uit voordat u met de installatie begint.
Verbind de DC connector van de lamp met die van de led driver (zie fig. 1).
Stap 3: Montage LED armatuur
Schroef de draagbeugel van de LED armatuur los (zie fig. 1) en bevestig deze met
de bijgeleverde schroeven en pluggen in de muur of plafond. Zorg ervoor dat de
boorgaten de diameter en diepte hebben van de meegeleverde schroeven.
Verbind de LED driver met de netstroom zoals aangegeven in fig.2.
Schroef de LED armatuur vervolgens vast op de draagbeugel.
5. Technische kenmerken
120 x 120 x 40mm Ingangsspanning: AC240V 50Hz/60Hz
Stralingshoek: 125° Uitgangsspanning: DC18.6V 290 mA
IP20; CE Maximale belasting: 6W
Laser class II LED 4000K
6. Milieuvoorschriften
Verwijdering van elektrische en elektronische apparatuur als
afval (AEEE)
Dit symbool aangebracht op het product of de verpakking geeft aan
dat u het product niet mag wegwerpen met uw gewone huishoudelijk
afval. Aan het einde van zijn levenscyclus is het noodzakelijk dat u het
inlevert bij een daartoe aangewezen inzamelpunt voor het recycleren van
afgedankte elektrische en elektronische apparatuur conform de geldende
richtlijnen van het land waar u verblijft. Deze systemen dragen bij aan het
behoud van natuurlijke hulpbronnen en waarborgen een verwerking van het toestel
op een milieuvriendelijke manier. Neem contact met uw plaatselijke administratie
belast met afvalverwerking voor meer informatie over deze inzamelsystemen.
7. Garantie en beperkingen
Garantie: u geniet een garantieperiode van twee jaar indien dit product
tekortkomingen vertoont in materiaal of vakmanschap. De fabrikant/invoerder
zal binnen die garantietermijn alle defecten kosteloos herstellen of het toestel
vervangen. Het defecte toestel dient vergezeld te zijn van het aankoopbewijs.
Verkeerd gebruik, accidentele of opzettelijke beschadigingen worden niet gedekt
door deze garantie evenals slijtage.
Onder geen beding is de fabrikant/invoerder verantwoordelijk voor beschadiging
aan voorwerpen of toestellen, noch voor gevolgschade of bijkomende schade of
opgelopen kosten. Dit tast uw statutaire rechten niet aan.
HEEFT U NOG VRAGEN?
Stuur ons een e-mail consumer@memostar.eu
of raadpleeg onze website www.memostar.eu voor meer informatie.
Invoerder/verdeler I.S. nv,
Industriepark 18 - zone B, 2220 Heist-op-den-Berg (Belgium).
-------------------------------------------
F. MODE D’EMPLOI
MEMOSTAR LUXMONT SML-0306 luminaire LED non-encastrable
1. Introduction
Nous tenons à vous féliciter pour l’acquisition du luminaire LED non-encastrable
LUXMONT SML-0306.
IMPORTANT: Ce mode d’emploi contient d’importantes consignes d’utilisation et de
sécurité. Nous vous conseillons de le conserver.
2. Caractéristiques
Le SML-0206 est un luminaire LED non-encastrable pour montage mural ou au
plafond.
Caractéristiques spécifiques:
9Transformateur LED externe inclus (à brancher directement sur 220V).
9Installation facile à l’aide des vis et chevilles fournies.
9Boîtier solide en aluminium de couleur blanche.
9Utilisation intérieure uniquement (IP20).
9Refroidissement efficace.
9Lumière blanche naturelle et agréable (4000K); haut rendement lumineux;
allumage instantané.
9Très basse consommation et longe durée de vie des LEDs de 30.000h à raison
de ±4h par jour.
L= Fase -Phase - Phase
N= Nulleider - Neutre -Neutral Wire
Bruin
Brown
Brun
Blauw
Blue
Bleu
L N
120 x 120 x 40mm
LUXMONT SML-0306 LED
MANUAL-LUXMONT.indd 7 12/01/2015 11:31:01

3. Consignes importantes de sécurité
•Gardezl’appareilhorsdelaportéed’enfantsdemoinsde8ans.
•Lesenfantsnedoiventpasjoueraveccetappareil.
•Cet appareil peut être utilisé par des enfants âgés d’au moins 8 ans
et par des personnes ayant des capacités physiques, sensorielles ou
mentalesréduitesoudénuéesd’expérienceoudeconnaissances,s’ils
(sielles)sontcorrectementsurveillé(e)sousidesinstructionsrelatives
àl’utilisationdel’appareilentoutesécuritéleurontétédonnéesetsiles
risquesencourusontétéappréhendés.
•Lenettoyageetl’entretienparl’utilisateurnedoiventpasêtreeffectués
pardesenfantssanssurveillance.
Veuillez observer les précautions suivantes avant d’installer et de mettre en
marche le luminaire LED:
•!Couper l’alimentation électrique secteur avant d’installer le luminaire.
•Cet appareil ne peut être utilisé qu’à l’intérieur. Ne pas l’exposer à l’humidité, à la
poussière ou à des températures élevées.
•Le luminaire LED est pourvu de chips LED non-remplaçables.
•N’utiliser que l’adaptateur secteur inclus pour connecter le luminaire LED au
réseau.
•Toute modification apportée autre que celles décrites dans ce mode d’emploi sont
interdites pour raisons de sécurité.
•Toute autre utilisation que celle décrite dans ce manuel peut endommager
l’appareil et augmente le risque de court-circuit, d’incendie ou de décharges
électriques.
•Ne jamais démonter l’appareil. Le réassemblage incorrect pourrait provoquer un
incendie ou déclencher des décharges électriques.
4. Instructions d’installation
L’ouverture du luminaire annule automatiquement la garantie et est
donc fortement déconseillée.
Etape 1: Vérifier le contenu de l’emballage
91 x LED luminaire non-encastrable avec fiche DC.
91 x transformateur LED avec fiche DC.
92 x vis et chevilles.
Etape 2: Préparation de l’installation
!Couper l’alimentation électrique secteur avant d’installer le luminaire.
Relier la fiche DC du luminaire à la fiche DC du transformateur LED (voir fig. 1).
Etape 3: Montage du luminaire LED
Démonter le support du luminaire LED (voir fig. 1) et fixer-le, à l’aide des vis et
chevilles fournies, au mur ou plafond. Veiller à ce que les forures aient le même
diamètre que les vis fournis.
Connecter le transformateur LED au réseau comme indiqué sur la fig.2.
Ensuite, fixer le luminaire LED au support installé au mur ou plafond.
5. Données techniques
120 x 120 x 40mm Tension d’entrée: AC240V 50Hz/60Hz
Angle de radiation: 125° Tension de sortie: DC18.6V 290 mA
IP20; CE Puissance maximale: 6W
Laser class II LED 4000K
6. Consignes relatives à la protection de l’environnement
Déchets d’équipements électriques et électroniques en fin de vie (DEEE)
Ce symbole figurant sur le produit ou l’emballage signifie que le produit
doit être éliminé séparément des autres déchets ménagers. A la fin de
son cycle de vie, vous devez donc éliminer l’appareil dans les centres de
triage et de recyclage prévus à cet effet, conformément aux directives
en vigueur dans votre pays de résidence. Ainsi votre appareil usagé sera
recyclé ou certains matériaux seront réutilisés de manière écologique afin
de protéger les ressources naturelles. Pour plus d’information sur les systèmes de
collecte, contactez votre organisation locale responsable des déchets.
7. Garantie et limitation de garantie
Garantie: une garantie de deux ans couvre tous les défauts de matériaux et de
fabrication du luminaire LED. Le fabricant/importateur s’engage à réparer sans frais
ou à remplacer l’appareil. L’appareil défectueux doit être accompagné de sa preuve
d’achat. Une mauvaise utilisation, des dommages accidentels ou intentionnels et
l’usure ne
sont pas couverts par cette garantie. Le fabricant/importateur ne pourra pas être
tenu responsable de la perte ou de la détérioration d’objets ou d’appareils, de
dommages
directs ou indirects ou frais encourus. Ceci n’affecte pas vos droits statutaires.
DÉSIREZ-VOUS PLUS D’INFORMATION?
Envoyez-nous un e-mail à consumer@memostar.eu
ou consultez notre site web www.memostar.eu.
Importateur/distributeur I.S. nv,
Industriepark 18 - zone B, 2220 Heist-op-den-Berg (Belgium).
-------------------------------------------
EN. OPERATING INSTRUCTIONS
MEMOSTAR LUXMONT SML-0306 LED Flush Mount Fixture
1. Introduction
Thank you for purchasing the LUXMONT SML-0306 LED Flush Mount Fixture.
IMPORTANT: This manual contains important operating and safety instructions.
We advise you to save this manual.
2. Characteristics
The SML-0306 is LED flush mount fixture for wall or ceiling.
Specific characteristics:
9External LED driver included (directly connectable to 220V).
9Simple installation with screws and plugs provided.
9Solid aluminum housing in white color.
9For interior use only (IP20).
9Efficient cooling.
9Nice natural white light (4000K); high lumen output; direct light.
9Very low power consumption and a long lifetime of the LEDs of 30.000h with an
average use of ±4h per day.
3. Safety warnings
•Keepthisapplianceoutofreachofchildrenyoungerthan8years.
•Donotpermitchildrentoplaywiththisappliance.
•Thisdevicecanbeusedbychildrenagedfrom8yearsandaboveand
personswithreducedphysical,sensoryormentalcapabilitiesorlackof
experienceandknowledgeunlesstheyhavebeengivensupervisionor
instructionconcerninguseofthisapplianceinasafewayandunderstand
thehazardsinvolved.
•Cleaningandusermaintenanceshall notbemadebychildren without
supervision.
Before installing or using the LED flush mount fixture please keep in mind the
following precautions:
•!Always cut the power before starting the installation.
•This LED fixture is designed for indoor use only. Protect it from humidity, dust
and high temperatures.
•The LED fixture is equipped with non-replaceable LEDs.
•Use only the 12V adapter included in the packaging for connecting the LED fixture
to the mains.
•All adjustments other than those described in this manual are prohibited for
safety reasons.
•Other use than described above can cause damage to the product and increase
the risk of short-circuit, fire or electric shocks.
•Do not disassemble the device. Incorrect reassembly may result in electric shock
or fire.
4. Installation instructions
Opening the housing of the LED fixture automatically voids the
warranty.
Step 1: Check the content of the packaging
91 x LED flush mount fixture with DC plug.
91 x LED driver with DC plug.
92 x clips and screws.
Step 2: Preparation installation
!Always cut the power before starting the installation.
Connect the DC plug of the LED fixture to the DC plug of the LED driver (see fig. 1).
Step 3: Installation LED fixture
Unscrew the bolts on the side of the support of the LED fixture (see fig. 1) and
mount it with the provided screws and plugs to the wall or ceiling. Make sure the
drilling holes have the same diameter and installation depth of the provided screws.
Connect the LED driver with the mains as shown in fig.2.
Then mount the LED fixture to the support and fix it with the bolts.
5. Technical data
120 x 120 x 40mm Input power: AC240V 50Hz/60Hz
Angle de radiation: 125° Output power: DC18.6V 290 mA
IP20; CE Maximum power: 6W
Laser class II LED 4000K
6. Environmental recommendations:
Waste from electrical and electronic equipment (WEEE)
This symbol on the product or the packaging indicates that the equipment
carrying this mark must not be thrown into general waste but should be
collected separately and properly processed under local regulations. The
appropriate take-back systems will reuse or recycle most of the materials
of your end life equipment in an ecological way and diminish the pressure
on the natural resources. Please contact your local waste administration if you need
more information on the collection systems.
7. Warranty and warranty limitations
Warranty: this product is warranted to be free from defects in material and
operation for two years. If in the unlikely event it is found to be defective within this
period of time, the importer/manufacturer will repair or replace it. When returning
the defect device, the sales receipt must be enclosed. Warranty does not cover
misuse, accidental or deliberate damage, wear and tear.
Opening or disassembling the device automatically void the warranty. Under no
condition can the importer/manufacturer be held liable for loss or damage to items
or appliances, consequential or incidental damages or expenses incurred. This does
not affect your statutory rights.
FOR QUESTIONS:
Please send us an e-mail at consumer@memostar.eu or
check our website www.memostar.eu
Importer/distributor I.S. nv,
Industriepark 18 - zone B, 2220 Heist-op-den-Berg (Belgium).
www.memostar.eu
MANUAL-LUXMONT.indd 8 12/01/2015 11:31:02
Other Memostar Light Fixture manuals
Popular Light Fixture manuals by other brands
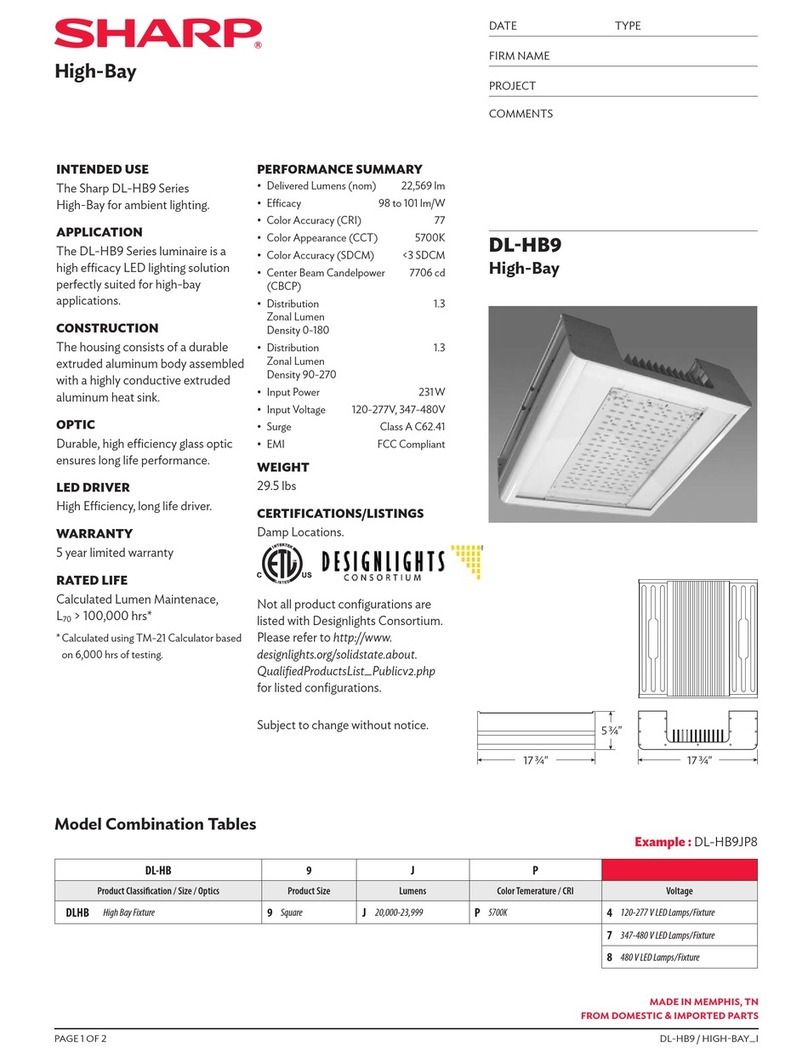
Sharp
Sharp DL-HB9 Specifications
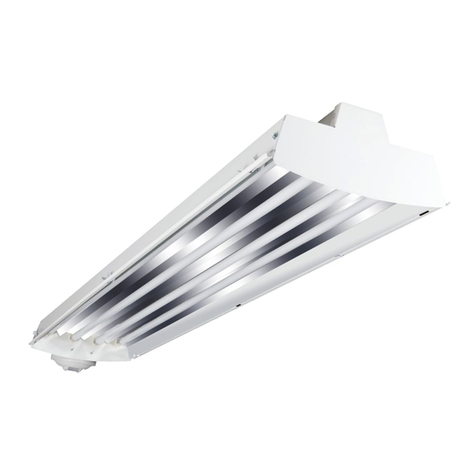
Cooper Lighting
Cooper Lighting F-Bay I8 Series Specifications
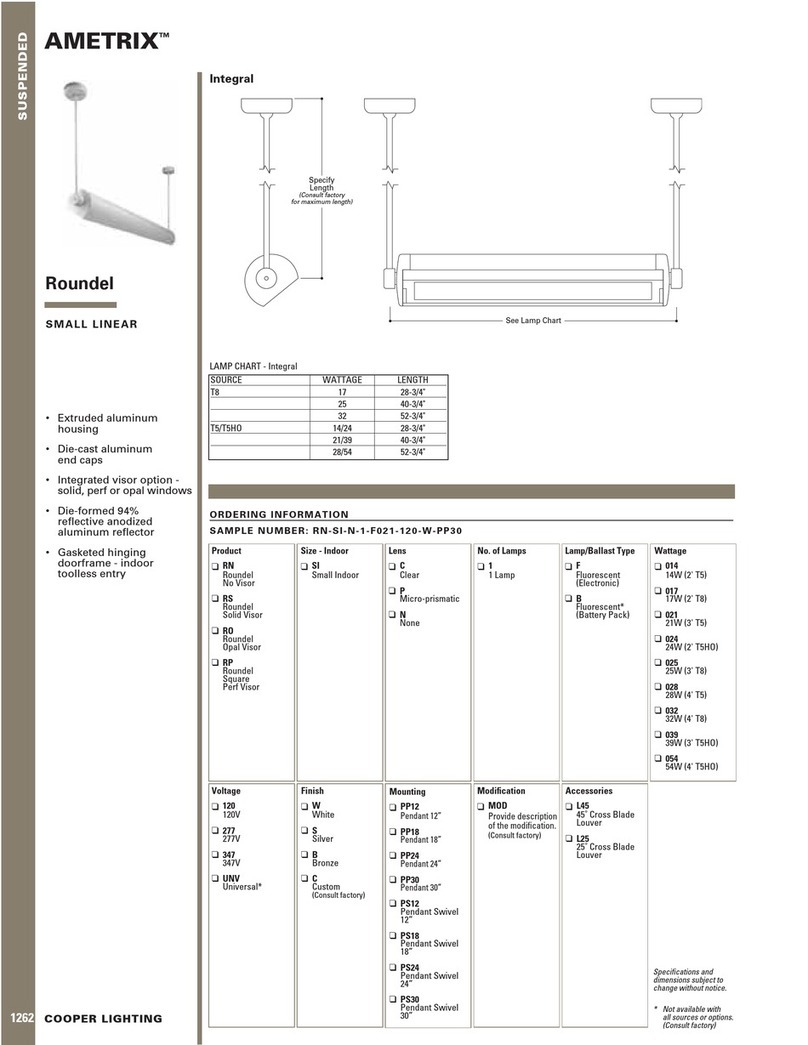
Cooper Lighting
Cooper Lighting Ametrix Suspended Lighting Specifications
SDJ
SDJ SG COBEKIT60C user manual

Elation
Elation PLATINUM WASH 16R PRO user manual
Snowball
Snowball SB-T5 Series installation instructions
WAC Lighting
WAC Lighting Volta R4RD1T Installation instruction
Chroma
Chroma Studio Force D Compact quick start guide
Ledj
Ledj Spectra Batten user manual
ETI Solid State Lighting
ETI Solid State Lighting TWPK-1-LB4-CP3-MV-LVD Use and care guide

Emos
Emos ZY1901 manual
Lightolier
Lightolier ProSpec 26383 specification
