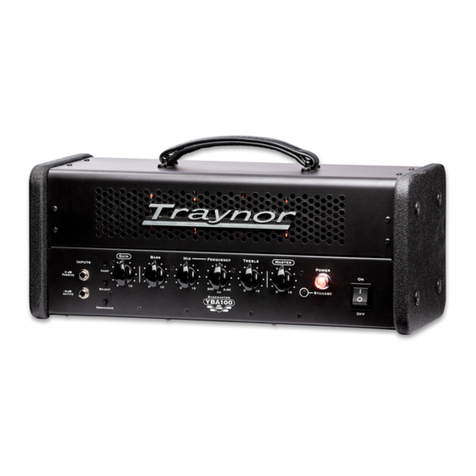
METALTRONIX M-1000 User manual

METALTRONIX
M-1000
ALL TUBE 100 WATT
GUITAR AMPLIFIER
MADE IN THE U.S.A.
OWNERS MANUAL
VERSION 1.0
WRITTEN BY: LEE JACKSON
1989 METALTRONIX/PERFECT CONNECTION INC. U.S.A.

1.0 INTRODUCTION/CONTENTS
CONGRATULATIONS!
You have just purchased a very fine piece of professional audio equipment. We know you’re eager to
crank up your new amp and get “THE SOUND” but because of the many features and complexity of the M-
1000, we suggest you take a moment to read the “GETTING STARTED” portion of this manual first.
Once you get going, you can use this manual as a reference guide (keep it in your guitar case!).
Since the M-1000 has features that no other amp has, we‘ve tried to make this manual as detailed as
possible. At the same time we’ve organized it so you can get started right away. Please take your first
opportunity to read this manual thoroughly since the same features that can give you “THE SOUND” can
give you headaches if used incorrectly!
CONTENTS
1.0 INTRODUCTION/CONTENTS
2.0 GETTING STARTED
2.1 UNPACKING/TROUBLESHOOTING
2.2 SAMPLE SETTINGS
2.3 SET-UP FOR FOOTSWTICHING
2.4 SIGNAL PATH/OVERVIEW
3.0 FEATURES
3.1 FRONT PANEL
3.2 BACK PANEL
3.3 EFFECTS LOOP
4.0 SPECIAL FEATURES
4.1 BIAS SELECTOR
4.2 TURN YOUR M-1000 INTO A 50w!
5.0 CRANK IT UP!

2.0 GETTING STARTED
UNPACKING/TROUBLE SHOOTING
1. Remove all packing material from the inside and around the amplifier.
2. Make sure all tubes are in place and secured.
3. Make sure speaker jack is in place. Do not plug in amplifier without speaker connected.
WARNING: FAILURE TO CONNECT SPEAKER WITH AMPLIFIER ON COULD RESULT
IN OUTPUT TRANSFORMER FAILURE!
4. If the amplifier “READY” light does not go on, check the main fuse (unplug the amplifier first). If
the “READY” light goes on but there is no sound, check the secondary fuse.
5. In most cases, if a secondary fuse blows you have one or more bad output tubes.
6. If a fuse blows, change it with the same value fuse (unplug the amplifier first). If the fuse blows
again, take your amplifier to an authorized METALTRONIX service center or to the place of
purchase,
7. If the amplifier makes noise but doesn’t play, check the preamp tubes. Most of the time a bad
preamp tube will be fogged a white color.

2.2 SAMPLE SETTINGS
SAMPLE SETTINGS
For those of you who just can’t wait….
We’ve included some sample settings. These are meant to be a starting point from which you can dial in
your own sound (reading the rest of this manual will be helpful here).
BUILT TO BLAST!!! HEAVY DISTORTION (rear pickup)
TUBE RHYTHM (rear pickup)
WARM CLEAN (front or middle pickup)
SPARKLING CLEAN (middle or front pickup)
LOW VOLUME HEAVEY DISTORTION (rear pickup)

2.3 SET UP FOR FOOTSWITCHING
SET-UP FOR FOOTSWITCHING
To set-up for footswitching, first plug in 3 standard ¼” on-off footswitches into the jacks on the
back panel marked “LOUD BUTTONS”. You now have a footswitch control over “STAGE II”,
“(PULLCLEAN)”, and “MASTER I”. (See section 3.0 FEATURES/FRONT PANEL for the functions of
these controls.) When “STAGE II” and “(PULL CLEAN)” are pulled, they are on and the footswitch will
have no effect.
“MASTER I” allows you to footswitch between the volume levels of “SYSTEM LEVEL” and
“MASTER I”. Set “SYSTEM LEVEL” to the loudest (lead) volume you wish to play. Now set
“MASTER I” for a softer (rhythm) volume. NOTE: “MASTER I” only cuts volume – “MASTER I” ON
“20” = ANY “SYSTEM LEVEL” VOLUME. “MASTER I” is always on – if you are not using a
footswitch set it on “20” and control the overall volume of the amplifier with “SYSTEM LEVEL”.

2.4 SIGNAL PATH/OVERVIEW
SIGNAL PATH/OVERVIEW
Even though we’ve put a lot of features on your M-1000, you only need to use those features that suit your
playing style. To help you understand your new amplifier better, let’s follow the path of your guitar signal
as it goes through the M-1000 (see diagram).
First we start at the “INPUT” jack. After our guitar signal goes in here we have a choice of routes to take.
We can go through “STAGE II” where our gain is increased and also variable, or we can bypass “STAGE
II” and go directly to preamp “VOLUME”. This is the control that sets the input sensitivity of the amplifier
and allows us to access the “(PULL CLEAN)” feature. When this control is pulled, we bypass 2 gain
stages to get that sparkling clean tone. Next we travel through the tone controls adjusting the “TREBLE,
MIDDLE, MID-SHIFT, and BASS” response. This brings us to “SYSTEM LEVEL”. This control is
where we set the amplifier for the loudest (lead) volume we wish to play at, and also where we set the level
of signal to the effects loop. At the “EFFECTS – LOOP”, we have another choice. If we pull (engage) the
“RETURN” control we can go out from the “SEND” jack into our effects, then back into the amplifier
through the “RETURN” jack. Or we can bypass the “EFFECTS – LOOP” and go straight on to “MASTER
I”. Here, if we chose to engage this control via footswitch, we can preset a different volume (rhythm) for
the amplifier.
This leads us to the output stage where the “PRESENCE” control works. This is also where “MASTER II”
can be pulled (engaged) to attenuate our overall volume.
INPUT
SPEAKER
TONE GAIN
(PULL CLN)
SYSTEM
LEVEL
EFFECTS
LOOP
MASTER I
POWER OUTPUT SECTION
PRESENCEMASTER II
STAGE II
(PULL CLN)
VOLUME
SEND
RETURN

3.0 FEATURES – FRONT PANEL
FRONT PANEL
INPUT – Instrument Input
STAGE II – Adjusts the amount of gain (distortion) to be added to the original signal. Pull to activate.
This control is footswicthable (when pulled, footswitch is overridden).
VOLUME – (preamp) volume controls the input gain or sensitivity or the amplifier. Pull to activate
“(PULL CLEAN)”. When engaged, this feature bypasses 2 stages of gain. This control is footswicthable
(when pulled, footswitch is overridden).
SYSTEM LEVEL – Sets the overall volume of the amplifier and controls the internal signal level to the
effects loop. Set this control to the loudest (lead) level you wish to play at, and before setting the effects
loop (see 2.3 SET-UP FOR FOOTSWITCHING).
TREBEL – Controls treble response.
MIDDLE – Controls mid-range response.
MID-SHIFT – This control has 6 preset positions to give you the ability to select the right overall mid
frequency of your amplifier. Position 1 enhances high mids, position 6 enhances low mids. Positions 1-2-3
will make a thick sounding guitar or pickup sound thinner, whereas positions 4-5-6 will make a thin
sounding pickup sound thicker. We recommend starting on position 3 and adjusting to taste (for cleanest
sound use position 1-2).
MASTER I – Is a presetable output level control. This control is footswitchable and is normally “on”
when no footswitch is used. After setting “SYSTEM LEVEL”, use “MASTER I” to bring down (cut) the
overall volume of the amplifier. You can set “MASTER I” for a rhythm volume then footswitch to
“SYSTEM LEVEL” for a boosted lead volume. “MASTER I” only cuts volume and cannot get any louder
than “SYSTEM LEVEL” (MASTER I on “20” = SYSTEM LEVEL).
MASTER II – (Power attenuation) control works on the output section of the amplifier. When activated
(pulled), it limits signal (power) to the speakers. This feature allows you to play at a low volume with the
amplifier working and sounding (with all the harmonics and overdrive) like it would at a high volume. If
your sound compresses (gets “squashed” or “muddy”), try turning down “STAGE II” and “VOLUME” or
“SYSTEM LEVEL” and “MASTER I”. We DO NOT recommend setting “SYSTEM LEVEL” or
“MASTER I” to “20 “ and using “MASTER II” as an overall master!
SYSTEM POWER – “READY” (red) switches overall amplifier power. Turn this switch on first to turn
on the tube heaters and warm the amplifier. “GO” (green) is the standby switch that allows the amp to idle
when not in use. After allowing a few minutes for warm-up, turn this switch on for sound!
NOTE: After turning the amplifier off, allow it to cool for 5-10 minutes before moving to prevent tube damage.

3.2 BACK PANEL
ACTIVE EFFECTS LOOP
The METALTRONIX Effects Loop is active, with individual send and return volume controls. This loop
has a flat frequency response so that it will not color the sound of your amplifier or effects and can be used
with any effect (from floor effects to the most expensive rack effects). Since this loop is between the
preamp and poweramp section, you can use the “EFFECT SEND” to drive another amplifier or the
“EFFECTS RETURN” to chain (slave) to another M-1000. WARNING: DO NOT USE “EFFECTS
SEND” TO DRIVE ANOTHER AMPLIFER WITHOUT A LOAD ON THE SPEAKER OUTPUT!
TO SET LOOP - Set the “SYSTEM LEVEL” control to the desired playing level and plug in a patch cord
from the “SEND” jack to the input of the effect. Now play the amplifier and set the “SEND” control so
that the peak level indicator does not light up (set “SEND” at 8 {2 o’clock} for floor effects). Then plug a
patch cord from the output of the effect to the “RETURN” jack of the amplifier, play a note on your
instrument and pull the “RETURN” control to engage the loop and adjust the volume. You can set the loop
for unity gain by adjusting the “RETURN” so that the volume is the same when the control is pulled
(engaged) as when it is pushed (bypassed).
IMPEDANCE SELECTOR
The general rule for selecting the right speaker impedance for your amplifier is:
IF YOU ARE USING: SET AMP AT:
1 – 4 ohm cabinet 4 ohms
2 – 8 ohm cabinets 4 ohms
4 – 16 ohm cabinets 4 ohms
1 – 8 ohm cabinet 8 ohms
2 – 16 ohm cabinets 8 ohms
1 –16 ohm cabinet 16 ohms
If you’re not sure of your impedance, always make sure the cabinet impedance is higher. EXAMPLE: if
the amplifier is set on 8ohms, you could use either an 8ohm cabinet or 16ohm cabinet (with a 16ohm
cabinet the amplifier will have 1/3 less power). WARNING: IF THE AMPLIFIER IS SET AT 8ohms DO
NOT USE A 4ohm CABINET! The amplifier will have 1/3 more power but this will cause the output
transformer to fail.
LOUD BUTTONS
MASTER I, CLEAN, STAGE II
Use standard 1/4" on-off footswitch (not included)
FUSES
MAINS: 5. amp slow blow 100-120volt / 2.5 amp slow blow 220-240volt
SECONDARY: 2. amp slow blow 100-120volt / amp slow blow 220-240 volt
AC: UNIVERSAL 100/117/220/240v.

4.0 SPECIAL FEATURES
BIAS SELECTOR
Now, for the first time you can make your own decision about whether you like EL-34 tubes or 6550 tubes.
With a flick of a switch (located on top of the amplifier chassis by the output tubes) and a quick tube
change you can switch between EL-34’s and 6550’s anywhere! The amplifier bias is still adjustable
internally and should only be done by a qualified service technician. Bias voltages: EL-34 = -42 volts,
6550 = -50 volts. WARNING: INCORRECT BIAS SELECTION (i.e. 6550 tubes on EL-34 setting) IS
UNSAFE AND CAN CAUSE DAMAGE!
TURN YOUR M-1000 INTO A 50-WATT!
If you want to turn your M-1000 100 watt into a 50-watt you need only follow these instructions. First
unplug the amplifier from the A.C. outlet and allow 15 minutes for it to cool if it has been played recently.
Next remove the 2 center output tubes (the big ones) – this cuts your output power in half. Because you
have removed the tubes, your output impedance changes also, you have to change the impedance selector
accordingly. THIS IS VERY IMPORTANT! On the impedance selector 16ohms becomes 8ohms, 8ohms
becomes 4ohms, and 4ohms becomes 2ohms. WARNING: WE DO NOT RECOMMEND RUNNING
THE AMPLIFIER AT 2ohms!
METALTRONIX WILL NOT ASSUME RESPONSIBILITY FOR INJURY OR DAMAGE DUE TO
IMPROPER OPERATION OF BIAS SELECTOR OR IMPEDANCE SELECTOR.
Table of contents
