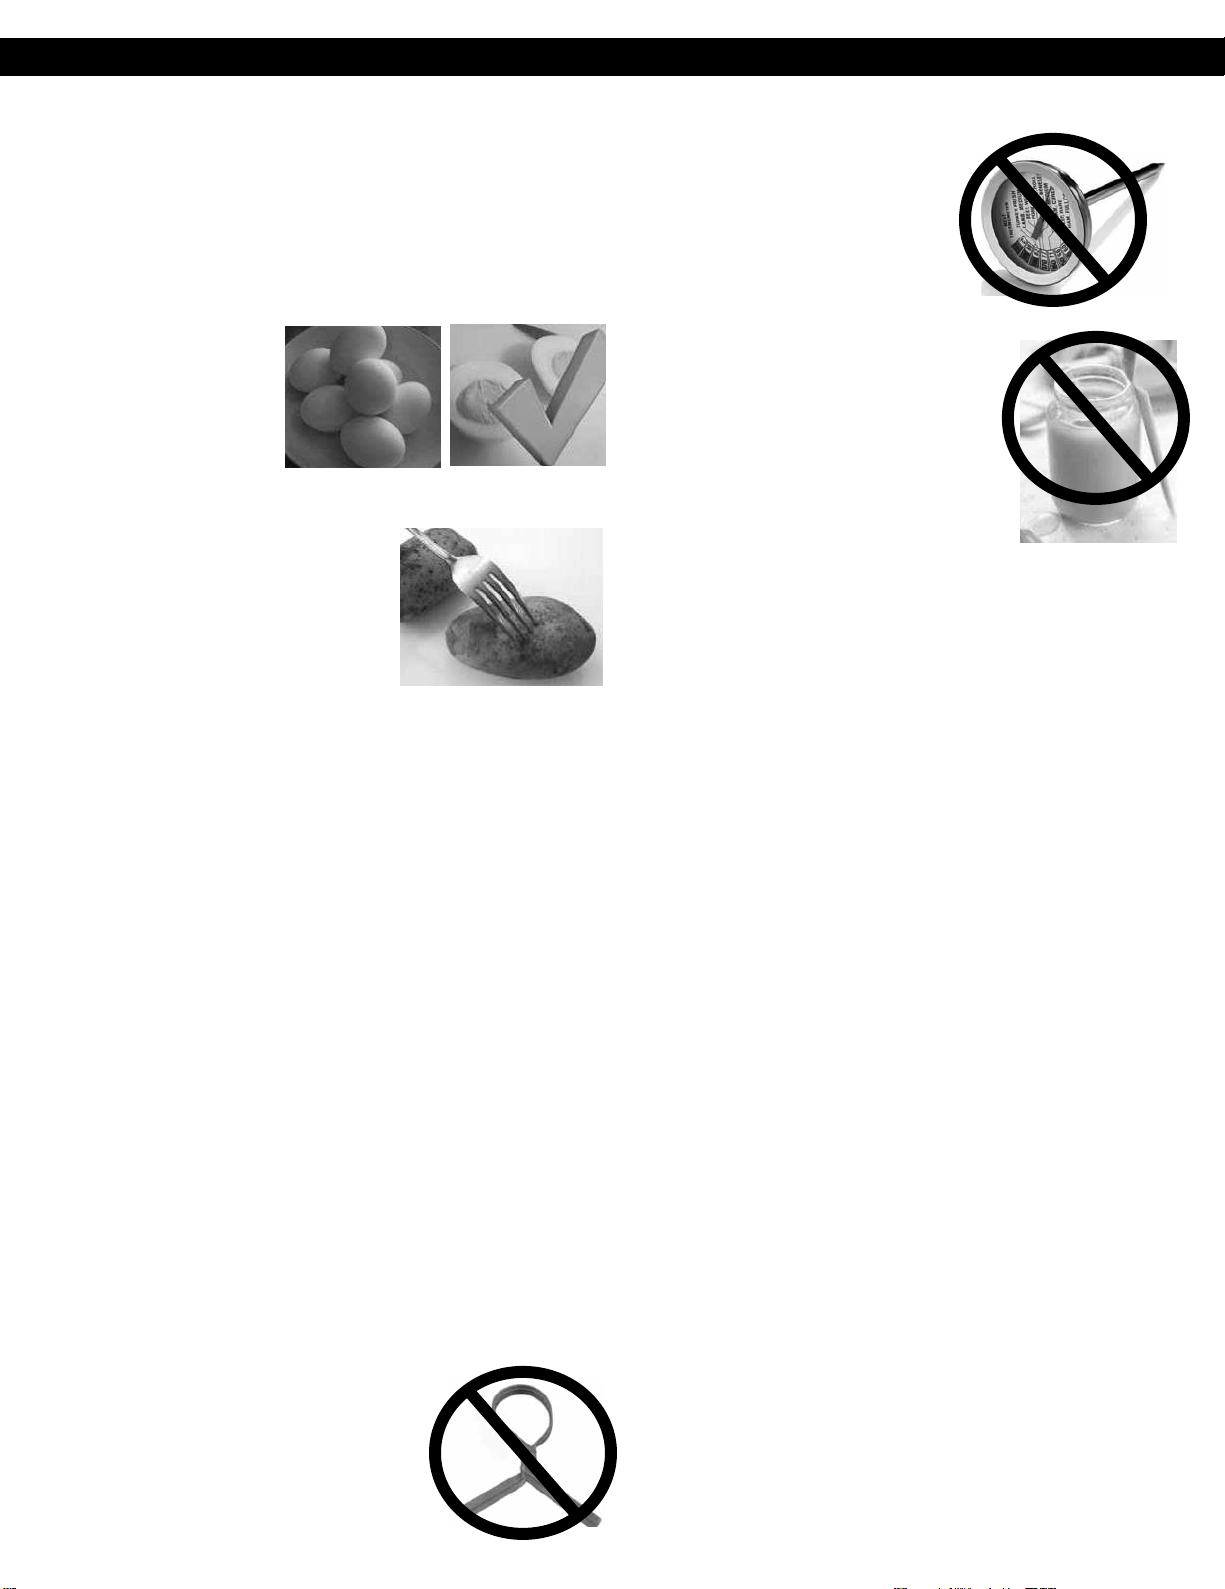
Midea AM134A2DN-P User manual

CONTENTS
Safety Information
IMPORTANT SAFETY INSTRUCTIONS ..................................................................................................................... 1-3
Installation ............................................................................................................................................................... 5
Food Preparetion...................................................................................................................................................
5-6
Cookware Guide ..................................................................................................................................................... 7
Operation
Using the Microwave for the First Time.................................................................................................................. 9
Setting the Clock .................................................................................................................................................... 9
Setting the Child Safety Lock.................................................................................................................................. 9
Cooking............................................................................................................................................................... 10
Setting a Standing Time ......................................................................................................................................... 10
Setting a Delayed Start........................................................................................................................................... 11
Quick 30 ................................................................................................................................................................ 11
Keep Warm ............................................................................................................................................................. 11
Popcorn .................................................................................................................................................................. 12
Auto Defrost ........................................................................................................................................................... 13
Defrosting Tips & Techniques................................................................................................................................. 13
Sensor Reheat......................................................................................................................................................... 14
Sensor Cook............................................................................................................................................................ 14
Sensor Cook Chart.................................................................................................................................................. 15
Setting the Timer.................................................................................................................................................... 15
Maintenance
GeneralInformation
Location of controls ................................................................................................................................................. 8
Food Characteristics............................................................................................................................................... 17
Care and Cleaning of Your Microwave Oven.......................................................................................................... 18
Shop Accessories.................................................................................................................................................... 18
Before Requesting Service...................................................................................................................................... 19
Specifications........................................................................................................................................................ 21
Limited Warranty (Only for Canada) ............................................................................................................................. 20
User’s Record................................................................................................................................................................ 22
Microwave Recipes.................................................................................................................................................16
Grounding Instructions ................................................................................................................................................... 4
Utensils
Radio Interference
3
3
..
..
..
. ... .
..
...
..
...................................................................................................................................................................................................................................................................................................................
............................................................................................................................................................... . ... .
................................................................................................................................................... .

DO NOT
(a) DO NOT
DO NOTDO NOT
DO NOTDO NOT
DO NOT
Do not
DO NOT
DO NOT
DO NOT
IMPORTANT SAFETY INSTRUCTIONS
Thank you for purchasing a Panasonic MicrowaveOven
Your microwave oven is a cooking appliance and you should use as much care as you use with a stove or any other cooking appliance.
When using this electric appliance, basic safety precautions should be followed, including the following:
To reduce the risk of burns, electric shock, fire, injury to persons, or exposure to
excessivemicrowaveenergy:
1.
Read all instructions before using this appliance.
2.
Read and follow the specific “
PRECAUTIONS TO AVOID POSSIBLE EXPOSURE TO EXCESSIVE MICROWAVE ENERGY,
”above.
3.
This appliance must be grounded. Connect only to a properly grounded outlet. See “
GROUNDING INSTRUCTIONS
”found on page
4.
4.
As with any cooking appliance,
DO NOT
leave oven unattended while in use.
5.
Locate this appliance only in accordance with the installation instructions found on page 5.
6.
DO NOT
cover or block any openings on this appliance.
7.
DO NOT
store this appliance outdoors.
DO NOT
use this product near water (for example, near a kitchen sink, in a wet basement, or
near a swimming pool or similar locations).
8.
Use this appliance only for its intended use as described in this manual.
DO NOT
use corrosive chemicals, vapors or non-food products
in this appliance. This type of oven is specifically designed to heat or cook food. It is not designed for industrial or laboratory use. The
use of corrosive chemicals in heating or cleaning will damage the appliance and may result in radiation leaks.
9.
When cleaning surfaces of the door and oven that come together on closing the door, use only mild, non-abrasive soaps or
detergents applied with a sponge or soft cloth.
PRECAUTIONS TO AVOID POSSIBLE EXPOSURE
TOEXCESSIVEMICROWAVEENERGY
(a)
DO NOT
attempt to operate this oven with the door open,
since open-door operation can result in harmful exposure to
microwave energy. It is important not to defeat or tamper
with the safety interlocks.
(b)
DO NOT
place any object between the oven front face and
the door, or allow soil or cleaner residue to accumulate on
sealing surfaces.
(c)
DO NOT
operate the oven if it is damaged. It is particularly
important that the oven door close properly and that there is
no damage to the:
(1)
door (bent),
(2)
hinges and latches (broken or loosened),
(3)
door seals and sealing surfaces.
(d) The oven should not be adjusted or repaired by anyone
except properly qualified service personnel.
Your safety and the safety of others are very important.
We have provided important safety messages in this manual and on your appliance. Always read and obey all safety
messages.
This is the safety alert symbol. It is used to alert you to potential hazards that can kill or hurt you and others.
All safety messages will follow the safety alert symbol and either the word “DANGER”, “WARNING” or “CAUTION”. These
words mean:
DANGER
WARNING
CAUTION
You can be killed or seriously injured if you don’t immediately follow instructions.
You can be killed or seriously injured if you don’t follow instructions.
You can be exposed to a potentially hazardous situation which, if not avoided, may result in
minor or moderate injury.
All safety messages will tell you what the potential hazard is, tell you how to reduce the chance of injury, and tell you what can happen
if the instructions are not followed.
WARNING
1

PRECAUTIONS TO AVOID POSSIBLE EXPOSURE TO EXCESSIVE MICROWAVE ENERGY
GROUNDING INSTRUCTIONS
(a) DO NOT
Safety Precautions
TO AVOID THE RISK OF SHOCK:
DO NOT
remove outer panel from
oven. Repairs must be done only by
a
qualified service person.
TO REDUCE THE RISK OF EXPOSURE TO MICROWAVE ENERGY:
DO NOT
tamper with, or make any adjustments or repairs to Door,
Control Panel Frame, Safety Interlock Switches, or any other part of
the oven. Microwave leakage may result.
TO AVOID THE RISK OF FIRE:
1.
DO NOT
operate the microwave oven
empty or use metal containers.
When
using the microwave oven without
water or food, microwave energy
cannot be absorbed and will
continuously reflect throughout the
cavity. This will cause arcing and damage the oven cavity, door
or other components, which can lead to a fire hazard.
2.
DO NOT
store flammable materials next to, on top of, or in the
oven.
WARNING
10.
DO NOT
allow children to use this appliance, unless closely supervised by an adult.
DO NOT
assume that because a child has
mastered one cooking skill he/she can cook everything.
11.
DO NOT
operate this appliance if it has a damaged cord or plug, if it is not working properly, or if it has been damaged or dropped.
12.
DO NOT
immerse cord or plug in water.
13.
Keep cord away from heated surfaces.
14.
DO NOT
let cord hang over edge of a table or counter.
15.
This appliance should be serviced only by qualified service personnel. Contact the nearest authorized service center for examination,
repair or adjustment.
16.
Some products such as whole eggs, with or without shell, narrow neck bottles and sealed containers (for example, closed glass jars)
may explode and should not be heated in this oven.
17.
To reduce the risk of fire in the oven cavity:
(a)
DO NOT
overcook food. Carefully attend appliance when paper, plastic, or other combustible materials are placed inside
the oven to facilitate cooking.
(b)
Remove wire twist-ties from paper or plastic bags before placing bag in oven.
(c)
If material inside the oven ignites, keep oven door closed, turn oven off, and disconnect the power cord, or shut off
power at the fuse or circuit breaker panel.
(d)
DO NOT
use the cavity for storage purposes.
DO NOT
leave
paper products, cooking utensils or food in the cavity
when not in use.
18.
Superheated Liquids:
Liquids, such as water, coffee or tea are able to be overheated beyond the boiling point without showing
evidence (or signs) of boiling. Visible bubbling is not always present when the container is removed from the microwave oven. THIS
COULD RESULT IN VERY HOT LIQUIDS SUDDENLY BOILING OVER WHEN THE CONTAINER IS DISTURBED OR A UTENSIL IS INSERTED
INTO THE LIQUID. To reduce the risk of injury to persons:
(a)
STIR THE LIQUID BOTH BEFORE AND HALFWAY THROUGH HEATING.
(b)
DO NOT heat water and oil, or fats together. The film of oil will trap steam, and may cause a violent eruption.
(c)
DO NOT
use straight-sided containers with narrow necks.
(d)
After heating, allow the container to stand in the microwave oven for a short time before removing the container.
19.
DO NOT
cook directly on the turntable. It can crack, and cause injury or damage to the oven.
20.
For the oven designed for installation into a wall cabinet:
(a)
DO NOT
operate any heating or cooking appliance beneath this appliance.
(b)
DO NOT
mount unit over or near any portion of a heating or cooking appliance.
(c)
DO NOT
mount over a sink.
(d)
DO NOT
store anything directly on the top of the appliance surface when the appliance is in operation.
SAVE THESE INSTRUCTIONS
HOUSEHOLD USE ONLY (NOT FOR COMMERCIAL USE)
2

3.
DO NOT
dry clothes, newspapers or other
materials in the oven, or use newspaper or
paper bags for cooking.
4.
DO NOT
hit or strike Control Panel. Damage
to controls may occur.
5.
DO NOT
use recycled paper products
unless the paper product is labeled as safe for microwave oven
use. Recycled paper products may contain impurities, which may
cause sparking.
TO AVOID THE RISK OF SCALDING:
POT HOLDERS should always be used when removing items from
the oven. Heat is transferred from
the HOT food to the cooking
container and from the container
to the Glass Tray. The Glass
Tray can also be very HOT after
removing the cooking container
from the oven.
Glass Tray
1.
DO NOT
operate the oven without the Roller Ring and the Glass
Tray in place.
2.
DO NOT
operate the oven without the Glass Tray fully
engaged
on the drive hub. Improper cooking or damage to
the oven could result. Verify that the Glass Tray is properly
engaged and
rotating by observing its rotation when you press
Start
.
Note: The Glass Tray can turn in either direction.
3.
Use only the Glass Tray specifically designed for this oven.
DO NOT
substitute any other glass tray.
4.
If the Glass Tray is hot, allow to cool before cleaning or placing
in water.
5.
DO NOT
cook directly on the Glass Tray. Always place food in
a microwave safe dish, or on a rack set in a microwave safe dish.
6.
If food or utensil on the Glass Tray touches oven walls, causing
the tray to stop moving, the tray will automatically rotate in the
opposite direction.
RollerRing
1.
The Roller Ring and oven floor should be cleaned frequently to
prevent excessive noise.
2.
Always replace the Roller Ring and the Glass Tray in their proper
positions.
3.
The Roller Ring must always be used for cooking along with the
Glass Tray.
For proper use of your oven, read remaining safety cautions and operating instructions.
UTENSILS
Personal Injury Hazard:
Tightly-closed utensils could explode. Closed containers should
be opened and plas�c pouches should be pierced before
cooking.
There may be certain non-metallic utensils that are not safe to
use for microwaving. If in doubt, you can test the utensil in
ques�on following the procedure below.
Utensil Test:
1. Fill a microwave-safe container with 1 cup of cold water
(250ml) along with the utensil in ques�on.
CAUTION2. Cook on maximum power for 1 min.
3. Carefully feel the utensil. If the empty utensil is warm, do not use
it for microwave cooking.
4. DO NOT exceed 1 min cooking �me.
KEEP THE CAVITY CLEAN
CAUTION
RADIO INTERFERENCE
1. Opera�on of the microwave oven may cause interference to
your radio, TV or similar equipment.
2. When there is interference, it may be reduced or eliminated
by taking the following measures:
(a) Clean door and sealing surface of the oven.
(b) Reorient the receiving antenna of radio or television.
(c) Relocate the microwave oven with respect to the receiver.
(d) Move the microwave oven away from the receiver.
(e) Plug the microwave oven into a different outlet so that
microwave oven and receiver are on different branch circuits.
3

GROUNDING INSTRUCTIONS
WARNING
Improper use of the grounding can result in a risk of electric
shock. Consult a qualified electrician or serviceman if the
grounding instruc�ons are not completely understood, or if
doubt exists as to whether the appliance is properly grounded. If
it is necessary to use an extension cord, use only a 3-wire
extension cord that has a 3-blade grounded plug, and 3-slot
receptacle that will accept the plug on the appliance. The
marked ra�ng of the extension cord shall be equal to or greater
than the electrical ra�ng of the appliance.
DANGER
Electric Shock Hazard:
Touching some of the internal components can cause serious
personal injury or death. Do not disassemble this appliance.
Electric Shock Hazard:
Improper use of the grounding can result in electric shock.
1. A short power-supply cord is provided to reduce the risks
resul�ng from becoming entangled in or tripping over a longer
cord.
2. Longer cord sets, or extension cords, are not recommended.
3. If a long cord or extension cord is used:
(a) The marked electrical ra�ng of the cord set or extension
cord should be at least as great as the electrical ra�ng of the
appliance.
(b) The extension cord must be a grounding-type 3-wire cord.
(c) The longer cord should be arranged so that it will not drape
over the counter top or tabletop where it can be pulled on
by children or tripped over uninten�onally.
WARNING
(c
Grounding Instructions
The plug must be plugged into an outlet that is properly installed
and grounded.
•
Plug into properly installed and grounded three-prong
outlet.
•
DO NOT
remove ground prong.
•
DO NOT
use an adapter.
encountered, it is the personal responsibility and obligation of
the consumer to have it replaced with a properly grounded
three-
prong outlet.
3. The VOLTAGE used must be the same as specified on this
microwave oven (120 V, 60 Hz).
Using a higher voltage is dangerous and may result in a fire or
oven damage. Using a lower voltage will cause slow cooking.
Panasonic is NOT responsible for any damages resulting from the
use of the oven with any voltage other than specified.
TV / RADIO/WIRELESS EQUIPMENT INTERFERENCE
This product has been tested and found to comply with the limits
4.
or Microwave Oven, pursuant to Part 18 of the FCC Rules. This
product can radiate radio frequency energy, which could cause
interference to such products as radio, TV, baby monitor,
cordless phone, Bluetooth, wireless router, etc., which can be
confirmed by turning this product off and on. If present, the user
is encouraged to try to correct by taking one or more of the
following countermeasures:
(1)
Increase the spacing distance between the microwave oven
and other product receiving the interference.
(2)
If possible, use a properly installed receiver antenna and/or
reorient the receiving antenna of the other product receiving
the interference.
(3)
Plug the microwave oven into a different outlet from the other
product receiving the interference.
(4)
Clean door and sealing surfaces of the oven. (See Care and
Cleaning of Your Microwave Oven)
Grounding Instructions
THIS APPLIANCE MUST BE GROUNDED.
In the event of an electrical
short circuit, grounding
reduces the risk of electric
shock by providing an
escape
wire for the electric current.
This appliance is equipped
with a cord having
a
grounding wire with a
grounding plug.
3-Pronged Plug
Ground Plug
3-ProngReceptacle
Wiring Requirements
1.
The oven must be operated on a DEDICATED CIRCUIT. No other
appliance should share the circuit with the microwave oven.
If it does, the branch circuit fuse may blow or the circuit
breaker
may trip.
2.
The oven must be plugged into at least a A, 120 V, 60 Hz20
GROUNDED OUTLET. Where a standard two-prong outlet is
WARNING: IMPROPER USE OF THE GROUNDING
PLUG CAN RESULT IN A RISK OF ELECTRIC SHOCK.
Consult a qualified electrician or service person if the grounding
instructions are not completely understood, or if doubt exists as to
whether the appliance is properly grounded.
4

IMPORTANT
1) HOME CANNING / STERILIZING / DRYING FOODS / SMALL
QUANTITIES OF FOODS
•DO NOT
•DO NOT
•DO NOT
2) POPCORN
Popcorn may be popped in a microwave oven corn popper.
Microwave popcorn that pops in its own package is also available.
Follow popcorn manufacturers’ direcons and use a brand suitable
for the cooking power of your microwave oven.
CAUTION: When using pre-packaged microwave popcorn, you
can follow recommended package instructions or use the Popcorn
button (refer to page 12). Otherwise, the popcorn may not pop
adequately or may ignite and cause a fire. Never leave the oven
unaended when popping popcorn. Allow the popcorn bag to cool
before opening, and always open the bag facing away from your
face and body to prevent steam burns.
Examine Your Oven
Unpack oven, remove all packing material and examine the oven
for
any damage such as dents, broken door latches or cracks in the door.
Notify dealer immediately if oven is damaged.
DO NOT
install if oven is
damaged.
Placement of Oven
(a)
DO NOT
block air vents. If they are blocked during
operation, the oven may overheat and be damaged.
Installation
1.
DO NOT
block air vents. If they are blocked during operation, the
oven may overheat. If the oven overheats, a thermal safety device
will turn the oven off. The oven will remain inoperable
until it has
cooled.
WARNING: IMPROPER USE OF THE GROUNDING
PLUG
CAN RESULT IN A RISK OF ELECTRIC SHOCK.
Consult a qualified electrician or service person if the grounding
instructions are
not completely understood, or if doubt exists as to whether the appliance is
properly grounded. If it is necessary to use an extension cord, use only a three-
wire extension cord that has a three-prong polarized grounding plug, and a
three-slot receptacle that will accept the plug of the appliance. The marked
rating of the extension cord should be equal to or greater than the electrical
rating of the appliance.
(b)
DO NOT
place oven near a hot, damp surface such as a
gas or electric range, sink, or dishwasher.
(c)
DO NOT
operate oven when room humidity is excessive.
2. This oven is manufactured for household use only. It is not
approved or tested for mobile vehicle, marine, or commercial
use.
Installation
1. The oven must be placed on
a flat, stable surface. Place the
front surface of the door 3
inches (7.6 cm) or more from
the counter top edge to avoid
accidental tipping of the
microwave oven during normal
use. For proper operation, the
minimum installation height is
3.0 ft, and leave a minimum clearance of 3.0 inches on each
side, 3.0 inches on the top and 1.0 in the rear.
inch
5

Food Preparation (continued)
3)
DEEP FAT FRYING
•
DO NOT
deep fat fry in your microwave oven. Cooking oils
may burst into flames and may cause damage to the oven and
may result in burns. Microwave utensils may not withstand the
temperature of the hot oil, and can shatter or melt.
4)
FOODS WITH NONPOROUS SKINS
•
DO NOT COOK / REHEAT WHOLE EGGS, WITH OR WITHOUT
THE SHELL.
Steam buildup in whole
eggs may cause them
to explode, and possibly
damage the oven or
cause injury. Reheating
SLICED hard-boiledeggs
and cooking SCRAMBLED eggs is safe.
•
Potatoes, apples, whole squash
and sausages
are examples of
foods with nonporous skins. These
types of foods must be pierced
before microwave cooking to
prevent them from exploding.
CAUTION: Cooking dry or old
potatoes can cause fire.
5)
GLASS TRAY / COOKING CONTAINERS / FOIL
•
Cooking containers get hot during microwaving. Heat is
transferred from the HOT food to the container and the Glass
Tray. Use pot holders when removing containers from the oven
or when removing lids or plastic wrap covers from cooking
containers, to avoid burns.
•
The Glass Tray will get hot during cooking. It should be allowed
to cool before handling or before paper products, such as paper
plates or microwave popcorn bags, are placed in the oven for
microwave cooking.
•
When using foil in the oven, allow at least 1-inch (2.5 cm) of
space between foil and interior oven walls or door.
•
Dishes with metallic trim should not be used, as arcing
may occur.
6)
PAPER TOWELS / CLOTHS
•
DO NOT
use paper towels or cloths that contain a synthetic fiber
woven into them. The synthetic fiber may cause the towel to
ignite. Use paper toweling under supervision.
7) BROWNING DISHES / OVEN COOKING BAGS
•
Only use browning dishes that are designed
for microwave cooking. Check browning dish
information for instructions/heating chart.
DO NOT
preheat browning dish more than six minutes.
•
If an oven cooking bag is used for microwave cooking, prepare
according to package directions.
DO NOT
use a wire twist-tie to close bag. Instead
use plastic ties, cotton string or a strip cut
from the open end of the bag.
8)
THERMOMETERS
•
DO NOT
use a conventional meat
thermometer in
your oven. Arcing may occur.
Microwave safe
thermometers are
available for both meat and candy.
9)
BABY FORMULA / BABY FOOD
•
DO NOT
heat baby formula or baby
food in
the microwave oven. The glass
jar or
surface of the food may appear warm while
the interior can be so hot as to burn the
infant’s mouth and
esophagus.
10)
REHEATING PASTRY PRODUCTS
•
When reheating pastry products, check temperatures of any
fillings before eating. Some foods have fillings, which heat faster
and can be extremely hot, while the surface remains warm to the
touch (for example, jelly donuts).
11)
GENERAL OVEN USAGE GUIDELINES
•
DO NOT
use the oven for any purpose other than the
preparation of food.
6

CookwareGuide
This section answers the question, “Can I use in the Microwave?”
AluminumFoil
It is not recommended
to use. Arcing can occur
if foil is too close to oven
wall or door and cause
damage to your oven.
BrowningDish
Yes. Only use browning dishes that are designed
for microwave cooking. Check browning dish
information for instructions/heating chart. Do
not preheat for more than six minutes.
Brown Paper Bags
No. They may cause a fire in
the oven.
Microwave Safe
Yes. If labeled Microwave Safe, check
manufacturers’ directions for use in
microwave heating.
Some dinnerware
may state on the back
of the dish, “Oven-
MicrowaveSafe”.
Dinnerware
If unlabeled, use
CONTAINER TEST
below.
DisposablePolyesterPaperboardDishes
Yes. Some frozen foods
are packaged in these
dishes. Also can be
purchased in some
grocery stores.
Fast Food Cartons with
Metal Handle
No. Metal handle may cause
arcing.
Frozen Dinner Trays
If made for the microwave,
then yes. If it contains metal,
then no.
Glass Jars
No. Most glass jars are not
heat resistant.
Heat Resistant Oven
Glassware/Ceramic
Yes, but only ones for
microwave cooking
and browning.
(See
CONTAINER
TEST
below.)
Metal Bakeware
No. Metal can cause
arcing and damage to
your oven.
Metal Twist-Ties
No. May cause arcing
which could cause a fire in
the oven.
Oven Cooking Bag
Yes. Follow manufacturers’ directions. Close bag
with the nylon tie provided, a strip cut from the
end of the bag, or a piece of cotton string. Do
not close with metal twist-tie. Make six
1
⁄
2
-inch
slits near the closure.
Paper Plates/Cups
Yes. Use to warm cooked
foods, and to cook foods that
requireshortcookingtime,
such as hot dogs.
Do not
microwave paper cups; they
may overheat and ignite.
Towels & Napkins
Yes, only paper napkins/towels. Use
to warm rolls and sandwiches, only
if labeled safe for microwave use.
Do NOT use recycled paper towels.
Parchment Paper
Yes. Use as a cover to prevent splattering.
Plastic Cookware
Yes, with caution.
Should be labeled,
“Suitable for
Microwave Heating.”
Check Microwave Safe manufacturers’ directions
for recommended uses. Some microwave safe
plastic containers are not suitable for cooking
foods with high fat or sugar content. The heat
from hot food may cause warping.
Plastic, Melamine
No. This material absorbs microwave energy.
Dishes get HOT!
Plastic Foam Cups
Yes, with caution. Plastic foam
will melt if foods reach a high
temperature. Use short term
only to reheat foods to a low
serving temperature.
Do not
microwave paper cups; they
may overheat and ignite.
Plastic Wrap
Yes. Use to cover
food during cooking
to retain moisture
and prevent
splattering.
Should be labeled “Suitable for Microwave
Heating”. Check package directions.
Straw, Wicker, Wood
Yes, short term only.
Use only for short term
reheating and to bring
food to a low serving
temperature. Wood may dry out, split or crack.
Thermometers
Only microwave safe
thermometers can be
used, NOT conventional
thermometers.
Wax Paper
Yes. Use as a cover to
prevent splattering
and to retain moisture.
CONTAINER TEST
TO TEST A CONTAINER FOR SAFE MICROWAVE OVEN USE:
Fill a microwave safe cup with cool water and place it in
the microwave oven along side the empty container to be tested;
heat one (1) minute at PL 10 (HIGH)
. If the container is
microwave oven safe (transparent to microwave energy), the empty container should remain comfortably cool and the
water should be hot. If the container is hot, it has absorbed some microwave energy and should NOT be used. This test
cannot be used for plastic containers.
7

Location of Controls
1
External Air Vent
2
Internal Air Vent
3
Door Safety Lock System
4
Exhaust Air Vent
21
Auto Defrost button
(See page 13)
22
Keep Warm button (See page 11
23
Quick 30 button (See page 11)
5
Control Panel
6
IdentificationPlate
24
More button
25
Less button
(See page 12&14)
Stop/Reset button is pressed
once
during oven operation,
Start
button must be pressed
again to
restart oven.
7
Glass Tray
8
Roller Ring
9
Heat/Vapor BarrierFilm
(do not remove)
10
Waveguide Cover
(do not remove)
11
Door Release Button
12
Warning label
13
Menu label
14
Power Supply Cord
15
Power Supply Plug
16
Display Window
17
Popcorn button (See page 12)
18
Sensor Reheat button
(See page 14)
19
Sensor Cook button (See page 14)
20
Power level button (See page 10)
26
Time/Weight
/Sensor Menu Dial
27
Timer button
(See page15)
28
Clock button (See page 9)
29
Stop/Reset button
Before cooking: One tap clears
all your instructions. During
cooking: one tap temporarily
stops the cooking process.
Another tap cancels all your
instructions, and time of day
or colon appears in the display
window.
30
Start button
After cooking program setting,
one tap allows oven to begin
functioning. If door is opened or
Beep Sound:
When a button is pressed
correctly, a
beep will be heard. If a
button is pressed and no beep is
heard, the unit did
not or
cannot accept the instruction.
When operating, the oven will
beep
twice between programmed
stages. At the end of any complete
program, the oven will beep 5
times.
NOTE:
If no operation after cooking
program setting, 6 minutes later,
the oven will automatically cancel
the cooking program. The display
will return to clock or colon display.
11
12
14
15
12
13
)
8
16
18
17
19
20
22
21
23
25
24
27
28
29
30
26
(See page 12&14)

Turn the dial until the correct
blink.
setting. The colon (:) will stop
to finish
dial and press
Set the minute by turning the
to confirm the hour.
Start
hour is displayed and press
Operation
Setting the Child
Safety Lock
1
2
Press
Stop/Reset
three times;
the display will return to the
time of the day and Child Lock
will be cancelled.
NOTES:
1.
This feature prevents the
electronic operation of
the oven until cancelled. It
does not lock the door.
2.
To set or cancel child safety
lock, Start or Stop/Reset
button must be pressed 3
times within 10 seconds.
3.
You can set Child Lock
feature when the display
shows a colon or time of
day.
Setting the Clock
1
With the oven NOT cooking,
press
Clock
once;
the colon will blink. Enter
time of day by turning dial.
2
NOTES:
1.
To reset the clock, repeat
steps.
2.
The clock will retain the
time of day as long as the
oven is plugged in and
electricity is supplied.
3.
The clock is a 12-hour
display.
4.
Oven will not operate while
colon (:) is flashing.
Using the Microwave
for the First Time
Plug into a properly grounded
electrical outlet. The oven
automatically defaults to the
imperial measure system
(oz/lb) with beep on mode.
2
Press
to cycle
between
Timer
the
weight
system,
Metric( / )
or Imperial (oz/lb).
g kg
3
1
Display Window
When the time of day appears
in the display, press
Start
three
times;
Press
Start
system.
once to enter the
weight
The screen will display bEEP.
4
5
Press Timer to cycle between
the sound switch system. Beep
On or Beep Off.
The default mode is Beep On.
The screen will display On
.
Press Timer once
The mode change to Beep .
The screen will display .
oFF
oFF
Press Timer
On or off.
to cycle between
the sound system,
6
Press
Stop/Reset
to confirm;
a colon (:) will appear in the
display window.
NOTES:
1. These choices can be
selected only when you plug-
in the oven.
2. A ter beep setting, it will
revert back to the metric
weight measurement setting
if start button is pressed
again.
3. Press Stop/Reset button to
exit.
Press Start once again to
access to the sound switch
system.
(If you press start twice aer
plug-in, you can skip the
weight system and access
the sound switch system.)
9
Start

Operation (continued)
Setting a Standing
Time
1
Somerecipescallfora standing
timeaftercooking.To do this,
repeatsteps1 and2 in the
Cooking
section on previous
page.Thenpress
Timer
.
Note: Do not skip step 1, even use
high power P .
L10
2
Set desired amount of stand
time by turning dial (up to
3
Press
Start
. The timer will start
and then beep twice at the end
of cooking time (the beginning
of standing time). Five beeps
will sound when standing time
is done.
3
Press
Start
; the cooking will
start and the time will count
down in the display. At the
end of cooking, five beeps will
sound.
NOTES:
1.
For reheating, use PL10
for liquids, PL7 (MED-HIGH)
most foods, and PL6
for dense foods.
2.
For defrosting, use PL3
(MED-LOW).
DO NOT OVERCOOK
: This
oven requires less time to cook
than older units. Overcooking
will cause food to dry out and
may cause a fire. A microwave
oven’s cooking power tells
you the amount of microwave
power available for cooking.
Stage Cooking:
For more than one stage of
cooking, repeat steps 1 and
2 for each stage of cooking
before pressing
Start
. The
maximum number of stages
for cooking is three. When
operating, two beeps will
sound between each stage.
Five beeps will sound at the
end of the entire sequence.
Note: After running the oven
at PL10 power continuously
for 30 min, if the cook
process is not complete, the
oven will automatically adjust
to PL8 power to protect the
microwave and complete the
cook cycle.
If you want to cook again at
PL10 power, you will need to
wait 15 min before restarting.
Cooking
1
If cooking at high power (PL10),
skip to step 2. Press
Power Level
until the desired power level
appears in the display. PL10 is the
highest and PL1 is the lowest.
Press
Power Level
once
PL10 (HIGH)
twice
PL9
3 times
PL8
4 times
PL7(MED-HIGH)
5 times PL6 (MEDIUM)
6 times
PL5
7 times
PL4
8 times
PL3(MED-LOW)/
DEFROST
9 times
PL2
10 times
PL1 (LOW)
2
Set Cooking Time by turning
dial. PL10 (HIGH)
has max.
cooking time of 30
minutes. For
other power levels,
the max.
time is
Continued on the
Next Page
(HIGH)
for
(MEDIUM)
10
minutes.
minutes).90
90

Operation (continued)
KeepWarm
(Will keep food warm for up to
30 minutes after cooking)
1
Press
Keep Warm.
2
Set warming time by turning
dial,up to
30 minutes. This
example shows two minutes.
At the end of warming, five
beeps will sound.
3
Press
Start
; the cooking will
start and the time will count
down in the display. At the
end of cooking, five beeps will
sound.
NOTES:
Keep Warm can be set as the
final stage after cook time has
been manually entered. It
cannot be used with sensor or
auto features.
Quick 30
(Set or add cooking time in
30 seconds increments)
1
Press
Quick 30
until the
desired cooking time (up to
5 minutes) appears in the
display. Power Level is pre-set
at PL10.
2
Press
Start
; the cooking will
start and the time will count
down in the display. At the
end of cooking, five beeps will
sound.
NOTES:
1.
If desired, you can use
other power levels. Select
desired power level before
pressing
Quick 30
.
2.
After setting the time by
Quick 30 button, you
cannot use the Dial.
3.
Quick 30 button can also
be used to add more time
during manual cooking.
Setting a Delayed
Start
1
4
The start time can be delayed
to start cooking at a later time.
To do this, first press
Timer
.
2
Set Cooking Time by turning dial
(see previous page for maximum
times).
5
Set the desired delay time by
turning dial
(up to
)
.
3
Press
Start
; the delay time will
count down, then cooking will
begin. At the end of cooking,
five beeps will sound.
Press
Power Level
until the
desired power level appears
in the display. PL10 is the
highest and PL1 is thelowest.
NOTES:
1.
When each stage finishes,
the oven will beep twice. At
the end of the program, the
oven will beep five times.
2.
If the oven door is opened
during Stand Time, Kitchen
Timer or Delay Time, the
time on the display will
continue to count down.
3.
Stand Time and Delay start
cannot be programmed
before any automatic
function. This is to prevent
the starting temperature of
food from rising.
11
minutes
90

Operation (continued)
Popcorn
(Example: To pop 3.5 oz (100
g
). of popcorn)
1
Press
Popcorn
until the desired
size appears in the display.
Once for 3.5 oz (100
g
), twice for
3.0 oz (85
g
), or three times for
1.75 oz (50 g).
2
If desired, press
More
once to add 10 seconds
or twice to add 20 seconds.
Press
Less
once
to subtract 10 seconds or twice
to subtract 20 seconds.
3
NOTES:
1.
Pop one bag at a time.
2.
Place bag in oven according
to manufacturers’ directions.
3.
Start with popcorn at room
temperature.
4.
Allow popped corn to
sit unopened for a few
minutes.
5.
Open bag carefully to
prevent burns, because
steam will escape.
6.
Do not reheat unpopped
kernels or reuse bag.
7.
If popcorn is of a different
weight than listed, follow
instructions on popcorn
package.
8.
Never leave the oven
unattended.
9.
If popping slows to 2 to
3 seconds between pops,
stop oven. Overcooking
can burn popcorn or
cause fire.
10.
When popping multiple
bags one right after the
other, the cooking time
may vary slightly. This does
not affect the popcorn
results.
Press
Start
; the cooking will
start and the time will count
down in the display. At the
end of cooking, five beeps will
sound.
12

Operation (continued)
Conversion
Follow the chart to convert
ounces or hundredths of a
To use Auto Defrost,
enter the weight of the food
in pounds (1.0) and tenths of a
pound (0.1). If a piece of meat
weighs 1.95 lbs or 1 lb 14 oz,
enter 1.9 lbs.
Ounces
Hundredths
of a Pound
Tenths of
a Pound
0
.01 - .05
0.0
1 - 2
.06 - .15
0.1
3 - 4
.16 - .25
0.2
5
.26 - .35
0.3
6 - 7
.36 - .45
0.4
8
.46 - .55
0.5
9 - 10
.56 - .65
0.6
11 - 12
.66 - .75
0.7
13
.76 - .85
0.8
14 - 15
.86 - .95
0.9
FOOD
DEFROST
TIME at P3
mins (per lb)
DURING DEFROSTING
AFTER DEFROSTING
Stand Time
Rinse
Fishand Seafood
Crabmeat
[up to 3 lbs. (1.4
kg
)]
6
Break apart/Rearrange
5 min.
YES
Fish Steaks
4 to 6
Turn over
Fish Fillets
4 to 6
Turn over/Rearrange
Sea Scallops
4 to 6
Break apart/
Remove defrosted pieces
Whole fish
4 to 6
Turn over
Meat
Ground Meat
4 to 5
Turn over/
Remove defrosted portion
10 min.
NO
Roasts
[2½-4 lbs. (1.1-1.8
kg
)]
4 to 8
Turn over
30 min. in fridge.
Chops/Steak
6 to 8
Turn over/Rearrange
5 min.
Ribs/T-bone
6 to 8
Turn over/Rearrange
Stew Meat
4 to 8
Break apart/
Remove defrosted pieces
Liver (thinly sliced)
4 to 6
Drain liquid/Turn over/
Separate pieces
Bacon (sliced)
4
Turn over
----
Poultry
Chicken, Whole
[up to 3 lbs. (1.4
kg
)]
4 to 6
Turn over
20 min. in fridge.
YES
Cutlets
4 to 6
Break apart/Turn over/
Remove defrosted Pieces
5 min.
Pieces
4 to 6
Break apart/Turn over
10 min.
Cornish hens
6 to 8
Turn over
Turkey Breast
[5-6 lbs. (2.3-2.7
kg
)]
6
Turn over
20 min. in fridge.
pound into tenths of a pound.
Auto
Defrost
1
This feature allows you to
defrost foods such as meat,
poultry and seafood, simply
by entering the weight. Press
Auto Defrost
.
2
“dEF” will appear briefly in
the display, then a dash will
appear next to the weight
units.
Set weight of food by
turning dial.
3
Press
Start
. Defrosting will
start. Larger weight foods will
cause a signal midway through
defrosting. If two beeps sound,
turn over and/or rearrange
foods.
NOTE:
The maximum weight for
Auto Defrost is 6 lbs.
(2.7 kg).
Defrosting Tips & Techniques
Preparation For Freezing:
5. Drain liquids during defrosting.
1.
Freeze meats, poultry, and fish in 6. Turn over (invert) items during
packages with only one or two defrosting.
layers of food. Place wax paper
between layers.
2.
Package in heavy-duty plastic
wraps, bags (labeled “For
Freezer”),or freezer paper.
3.
Remove as much air as possible.
4.
Seal securely, date, and label.
To Defrost:
1.
Remove wrapper. This helps
moisture to evaporate. Juices
from food can get hot and cook
the food.
2.
Set food in microwave safe dish.
3.
Place roasts fat-side down. Place
whole poultry breast-side down.
4.
Select power and minimum
time so that items will be under-
defrosted.
After Defrosting:
1.
Large items may be icy in the
center. Defrosting will complete
during Standing Time.
2.
Let stand, covered, following
stand time directions on
page 10.
3.
Rinse foods indicated in the chart.
4.
Items which have been layered
should be rinsed separately or
have a longer stand time.
13

Automatic features are
Operation (continued)
Sensor Cook
1
Press
Sensor Cook
until the
number corresponding to the
desired food appears in the
display
(see chart on the next
page)
.
2
If desired, press
More
to add 20% more time
than suggested. Press
Less
to subtract 20%
cooking time.
3
Press
Start
. Cooking is
complete when five beeps
sound.
NOTES:
1.
After having used the Sensor
Cook feature a few times, you
may decide you would prefer
your food cooked to a different
doneness –that is why you
would utilize the More/Less
button.
2.
When steam is detected by the
Sensor and two beeps
sound, the remaining cooking
time will appear in the display.
3.
provided for your convenience.
If results are not suitable to your
individual preference, or if
serving size is other than what is
listed on page 15, please refer
to manual cooking on page 10.
For the best results with the
SENSOR, follow these
recommendations:
BEFORE Reheating/Cooking:
1.
The room temperature
surrounding the oven should be
below 95° F (35° C).
2.
Food weight should exceed 4
oz. (110
g
).
3.
Be sure the glass tray, the
outside of the cooking
containers and the inside
of the microwave oven are
dry before placing food in
the oven. Residual beads of
moisture turning into steam
can mislead the sensor.
4.
Cover food with lid, or with
vented plastic wrap. Never
use tightly sealed plastic
containers—they can prevent
steam from escaping and
cause food to overcook.
DURING Reheating/Cooking:
DO NOT open the oven door until
two beeps sound and cooking time
appears in the display. Doing so
will cause inaccurate cooking since
the steam from food is no longer
contained within the oven cavity.
Once the cooking time begins
to count down, the oven door
may be opened to stir, turn or
rearrange foods.
AFTER Reheating/Cooking:
All foods should have a standing
time.
Reheat
1
NOTES:
1.
Press
Sensor Reheat
.
2.
2
After having used the Sensor
Reheat feature a few times, you
may decide you would prefer
your food cooked to a different
doneness –that is why you
would utilize the More/Less
buttons.
When steam is detected by the
Sensor and two beeps
sound, the remaining cooking
time will appear in the display.
Casseroles
: Add three to four
tablespoons of liquid, cover with
lid or vented plastic wrap. Stir
when time appears in the display
window.
Canned foods
: Empty contents
into casserole dish or serving
bowl, cover dish with lid or vented
plastic wrap. After reheating, let
stand for a few minutes.
Plate of food
: Arrange food on
plate; top with butter, gravy, etc.
If desired, press
Cover with lid or vented plastic
More
to add 20% more time
wrap. After reheating, let stand for
than suggested. Press
a few minutes.
Less
to subtract 20%
cooking time.
3
DO NOT USE SENSOR REHEAT:
1.
To reheat bread and pastry
products. Use manual power
and time for these foods.
2.
For raw or uncooked foods.
3.
If oven cavity is warm.
4.
For beverages.
5.
For frozen foods.
Press
Start
. Reheating is
complete when five beeps
sound.
Sensor
14

Operation (continued)
Sensor Cook Chart
See the chart below for Sensor Cook categories.
Recipe Serving/Weight
Hints
1. Potato
1 - 4 potatoes
(6 - 8 oz. each)
(170 - 220 )
g
Pierce each potato with a fork 6 times spacing around
surface. Place potato or potatoes around the edge of
paper-towel-lined glass tray (Turntable), at least 1 inch
(2.5 cm) apart. Do not cover. Turn over after 2 beeps. Let
stand
5
minutes
to
complete
cooking.
2. Fresh
Vegetables
4 - 16 oz.
(110 - 450 )
All pieces should be the same size. Wash thoroughly, add
1 tbsp. of water per ½ cup of vegetables, and cover with
lid or vented plastic wrap. Do not salt/butter until after
cooking.
3.
Frozen
Vegetables
- 16 oz.
8
(220 - 450 )
Wash thoroughly, add 1 tbsp. of water per ½ cup of
vegetables, and cover with lid or vented plastic wrap.
Do not salt/butter until after cooking. (Not suitable for
vegetables in butter or sauce.)
4. Frozen
Pizza
(single)
oz.6-12
( )170-340
Follow manufacturers’ directions for preparation.
Add more time of cooking if needed.
5.
Frozen
Entrées
-
oz.6 32
( -
)170 900
6.
Casserole
Use appropriate amount of liquid.
7.
Setting
the Timer
1
This feature allows you to
program the oven as a kitchen
timer. Press
Timer
once.
2
Set desired amount of time by
turning dial (up to
3
Press
Start
. The timer will count
down without cooking and
beep five times when done.
Caution:
If oven lamp is lit
whileusingthetimerfeature,
the oven is
NOT
set properly;
STOP OVEN IMMEDIATELY
and re-read instructions.
8.
Rice
9. Pasta
16
-
32
oz.
(450
-
900 g)
- oz.8
(220 -
24
680
-
-
oz.
( - )
4 -
6
1.75 5.5
50 155 g
0.5 1.5 cups.
serv.
Ground Meat
Aer 2 beeps, sr or rearrange. Re-cover and press
Cover with lid or vented plasc wrap.
Follow manufacturers' directions for preparation. After
2 beeps, stir or rearrange. Be careful when removing the
film cover after cooking. Remove facing away from you to
avoid steam burns. If additional time is needed, continue
to cook manually.
Break apart in glass bowl or colander. Cover with lid or
vented plasc wrap. Aer beep , sr. Re-cover and press
Juices should be clear. Drain.
2 s
Place rice with hot tap water in a microwave safe casserole
dish.
Cover with lid or vented plasc wrap. Let stand 5 to 10
minutes before serving. Add 1 1/2 parts water to 1 part rice.
Place 1.75 oz.(50 g) pasta with 3 cups (750 ml) hot tap water
in a 2 qt microwave safe casserole, salt and oil, if desired,
covered with lid or vented plasc wrap.For 4 oz.(110 g)
pasta use 4 cups (1000 ml) hot tap water, for 5.5 oz. (155 g)
pasta use 6 cups (1500 ml) hot tap water in 3 qt casserole.
g
g
g
g
g)
In a 3 qt casserole dish, crumble 450 g (1 pound) lean
ground beef and sr in 2 medium onions (chopped), 1⁄4
teaspoon dried garlic pieces. Cover with plasc wrap and
cook on P 10 for 6 minutes. Sr aer cooking. Drain. Add
450 g (16 oz) pinto or red kidney beans, 430 g (15 oz)
stewed tomatoes (chopped), 430 g (15 oz) tomato sauce,
1 teaspoon salt and 2 to 3 tablespoons chili powder. Cover
with lid,using Stew selecon. Aer 2 beeps, sr. Re-cover
and press . Sr aer cooking. Cover again and let
stand 7 minutes before serving.
10. Stew
.
Start
.
Start
.
Start
Start
L
15
90 minutes).

Operation (continued)
MICROWAVE RECIPES
OMELET
Basic Omelet Recipe
Yield: 1 Serving
1 tablespoon buer or margarine
2 eggs
2 ablespoons milk
Salt and ground black pepper, if desired Heat buer in a microwave safe 8-inch round dish, 20 seconds at PL10, or unl melted.
Turn the dish to coat the boom with buer.
Meanwhile, combine the remaining ingredients in a separate bowl, beat together and pour into the dish. Cook, covered with vented
plasc wrap, cook 2 minutes at PL10. Let stand 2 minutes. With a spatula, loosen the edges of the omelet from the dish, fold into thirds to
serve. Always beat the eggs before making the omelet.
NOTE: Double ingredients for a 4-egg Omelet.
Yield: 4 - 6 servings
2 1/2 tablespoons buer
1 1/2 tablespoons chopped onion
1/2 clove minced garlic
4 tablespoons all-purpose flour
2/3 teaspoon dry mustard
2/3 teaspoon salt
1/8 teaspoon ground black pepper
1 1/2 cups milk
1 1/2 cups grated cheddar cheese
140 g (5 oz.) (dry weight) macaroni, cooked and drained
3 tablespoons bread crumbs
2/3 teaspoon paprika
In a casserole dish, melt the buer for 40 seconds at PL10, with cover with lid or vented plasc wrap. Add onion and garlic, cover the
casserole dish with lid or vented plasc wrap, and cook for 1 minute at PL10. Sr in flour, mustard, salt and pepper, and gradually add the
milk. Cover the casserole dish with lid or vented plasc wrap and cook for 3-4 minutes at PL10 unl sauce thickens, srring once.
Add the cheddar cheese and the macaroni into the sauce and sr well.
Sprinkle the bread crumbs and paprika on the top of the dish.
Cover with lid or vented plasc wrap.
Cook with the “6. Casserole” Sensor Cook.
Yield: 4 - 6 servings
220 g (1/2 pound) lean ground beef
1/2 small onion, chopped
1/4 green bell pepper, chopped
1/2 cup chopped celery
1 (430 g/15 oz.) can tomato sauce
2/3 cup water
1/2 cup uncooked elbow macaroni
1/2 teaspoon parsley
1/4 teaspoon salt
1/8 teaspoon grounded back pepper
1/4 cup grated cheddar cheese
Crumble the ground beef in a 3 t. casserole dish.
in the remaining ingredients, except cheese. Cover with lid or vented plasc wrap.
Cook with the “6. Casserole” Sensor Cook. Sprinkle with cheese. Cover and let stand 5 minutes.
MACARONI AND CHEESE
BEEF AND MACARONI CASSEROLE
q
3 t.
q
t
16

Food Characteristics
Bone and Fat
Both bone and fat affect cooking. Bones may cause
irregular cooking. Meat next to the tips of bones may
overcook while meat positioned under a large bone,
such as a ham bone, may be undercooked. Large
amounts of fat absorb microwave energy and the meat next to these areas
may overcook.
Density
Porous, airy foods such as breads, cakes or rolls take
less time to cook than heavy, dense foods such as
potatoes and roasts. When reheating donuts or other
foods with different centers be very careful. Certain
foods have centers made with sugar, water, or fat and
these centers attract microwaves (for example, jelly
donuts). When a jelly donut is heated, the jelly can become extremely hot
while the exterior remains warm to the touch. This could result in a burn if
the food is not allowed to cool properly in the center.
Quantity
Two potatoes take longer to cook than one potato. As the
quantity of the food decreases so does the cooking time.
Overcooking will cause the moisture content in the food to decrease and a
fire could result. Never leave microwave unattended while in use.
Shape
Uniform sizes heat more evenly. The thin end of a
drumstick will cook more quickly than the meaty end.
To compensate for irregular shapes, place thin parts
toward the center of the dish and thick pieces toward
the edge.
Size
Thin pieces cook more quickly than thick pieces.
Starting Temperature
Foods that are at room temperature take less time to cook than
if they are chilled, refrigerated or frozen.
Cooking Techniques
Piercing
Foods with skins or membranes must be pierced, scored or have a strip of skin
peeled before cooking to allow steam to escape. Pierce clams, oysters, chicken
livers, whole potatoes and whole vegetables. Whole apples or new potatoes
should have a 1-inch strip of skin peeled before cooking. Score sausages and
frankfurters. Do not Cook/Reheat whole eggs, with or without the shell. Steam
buildup in whole eggs may cause them to explode, and possibly damage
the oven or cause injury. Reheating SLICED hard-boiled eggs and cooking
SCRAMBLED eggs is safe.
Browning
Foods will not have the same brown appearance as conventionally cooked foods
or those foods which are cooked utilizing a browning feature. Meats and poultry
may be coated with browning sauce, Worcestershire sauce, barbecue sauce or
shake-on browning sauce. To use, combine browning sauce with melted butter
or margarine and brush on before cooking. For quick breads or muffins, brown
sugar can be used in the recipe in place of granulated sugar, or the surface can be
sprinkled with dark spices before cooking.
Spacing
Individual foods, such as baked potatoes, cupcakes and appetizers, will cook
more evenly if placed in the oven equal distances apart. When possible,
arrange foods in a circular pattern.
Covering
As with conventional cooking, moisture evaporates during microwave
cooking. Casserole lids or plastic wrap are used for a tighter seal. When using
plastic wrap, vent the plastic wrap by folding back part of the plastic wrap
from the edge of the dish to allow steam to escape. Loosen or remove plastic
wrap as recipe directs for stand time. When removing plastic wrap covers,
as well as any glass lids, be careful to remove them away from you to avoid
steam burns. Various degrees of moisture retention are also obtained by using
wax paper or paper towels.
Cooking
Time
Cooking times will vary because of food shape variations, starting
temperature, and regional preferences. Always cook food for the minimum
cooking time given in a recipe and check for doneness. If the food is
undercooked, continue cooking. It is easier to add time to an undercooked
product. Once the food is overcooked, nothing can be done.
Stirring
Stirring is usually necessary during microwave cooking. Always bring the
cooked outside edges toward the center and the less cooked center portions
toward the outside of the dish.
Rearranging
Rearrange small items such as chicken pieces, shrimp, hamburger patties or
pork chops. Rearrange pieces from the edge to the center and pieces from the
center to the edge of the dish.
Turning
It is not possible to stir some foods to distribute the heat evenly. At times,
microwave energy will concentrate in one area of the food. To help ensure
even cooking, these foods need to be turned. Turn over large foods, such as
roasts or turkeys, halfway through cooking.
Standing
Time
Most foods will continue to cook by conduction after the microwave oven
is turned off. After cooking meat, the internal temperature will rise 5 °F to
15 °F (3 °C to 8 °C), if allowed to stand, tented with foil, for 10 to 15 minutes.
Casseroles and vegetables need a shorter amount of standing time, but this
standing time is necessary to allow foods to complete cooking to the center
without overcooking on the edges.
Test
for
Doneness
The same tests for doneness used in conventional cooking may be used for
microwave cooking. Meat is done when fork-tender or splits at fibers. Chicken
is done when juices are clear yellow and drumstick moves freely. Fish is done
when it flakes and is opaque. Cake is done when a toothpick or cake tester is
inserted and comes out clean.
Check foods to see that they are cooked to the United States Department of
Agriculture’s recommended temperatures.
To test for doneness, insert a meat thermometer in a thick or dense area
away from fat or bone. NEVER leave the thermometer in the food during
cooking, unless it is approved for microwave oven use.
Temp Food
160 °F For fresh pork, ground meat, boneless white poultry, fish,
seafood, egg dishes and frozen prepared food.
165 °F For leftover, ready-to-reheat refrigerated, and deli and
carryout “fresh” food.
170 °F For white meat poultry.
180 °F For dark meat poultry.
17

Care and Cleaning of Your Microwave Oven
Please see below and the following page
for particular cleaning instructions for
each section of the oven.
BEFORE CLEANING:
Unplug oven at wall
outlet. If outlet is inaccessible, leave oven
door open while cleaning.
AFTER CLEANING:
Be sure to place the
Roller Ring and the Glass Tray in the proper
position and press Stop/Reset Button to
clear the Display.
1.
Outside oven surfaces:
Clean with a
damp cloth. To prevent damage to the
operating parts inside the oven, water
should not be allowed to seep into
ventilation openings.
2.
Label:
Do not remove. Wipe with a
damp cloth.
3.
Inside the Oven
: Wipe with a damp
cloth after using. Mild detergent may
be used if needed. Do not use harsh
detergents or abrasives.
4.
Oven Door:
Wipe with a soft dry cloth
when steam accumulates inside or
around the outside of the oven door.
During cooking, especially under high
humidity conditions, steam is given
off from the food. (Some steam will
condense on cooler surfaces, such as
the oven door. This is normal.) Inside surface is covered with a heat and vapor barrier film.
Do not remove.
5.
Oven Cavity Floor
: Clean the bottom surface of the oven with mild detergent, water or window cleaner, and dry.
6.
Wave Guide Cover
: Do not remove Wave Guide Cover.
It is important to keep cover clean in the same manner as the inside of the
oven.
7.
8.
Glass Tray
: Remove and wash in warm soapy water or in a dishwasher.
Roller Ring
: Roller Ring may be washed in mild soapy water or dishwasher. These areas should be kept clean to avoid excessive noise.
18
Table of contents
Other Midea Microwave Oven manuals

Midea
Midea TM131MA5-PVH User manual

Midea
Midea EG720CFF User manual

Midea
Midea MC-3015D User manual

Midea
Midea EM923A2CI-PS User manual

Midea
Midea EM720CRM-P00C User manual

Midea
Midea TC051K6BW-S User manual

Midea
Midea MD-MP012MK-WH User manual

Midea
Midea TM162A2GE-P User manual

Midea
Midea EM825AGS User manual

Midea
Midea MMW34CS User manual

Midea
Midea 1025F2A User manual

Midea
Midea AG925AE9 User manual

Midea
Midea EM925A2PL-P User manual

Midea
Midea AC930AMP-S00C User manual

Midea
Midea MW 25 DI BK User manual

Midea
Midea MM720C2AT-SM User manual

Midea
Midea EG820CTB-PM0E User manual

Midea
Midea EM044KXA-GE Owner's manual

Midea
Midea TM034D3GE-P0H User manual

Midea
Midea 1234G1A User manual