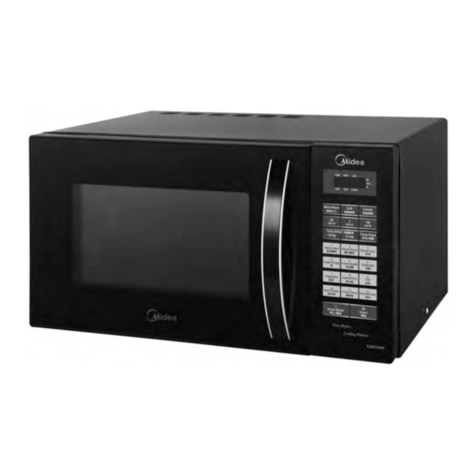
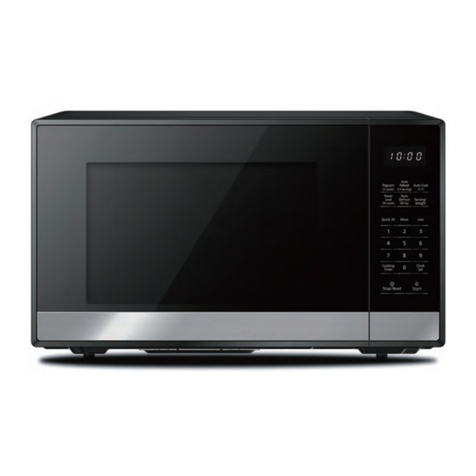
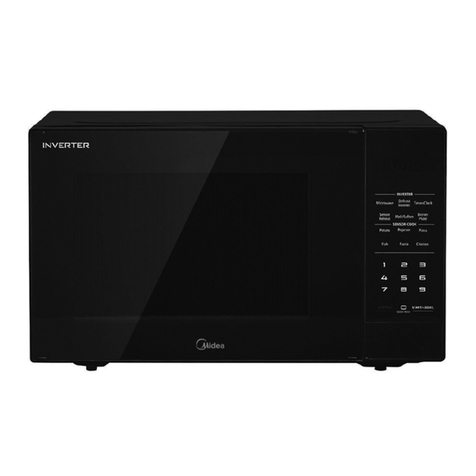
Midea MCM1817G1F User manual

MCM1817G1F
USER MANUAL
Warning notices: Before using this product, please read this manual carefully and keep it for future reference.
The design and specifications are subject to change without prior notice for product improvement. Consult
with your dealer or manufacturer for details.
The diagram above is just for reference. Please take the appearance of the actual product as the standard.
MICROWAVE
OVEN

01
CONTENTS
THANK YOU LETTER
SAFETY INSTRUCTIONS--------------------------------------------- 02
SPECIFICATION -------------------------------------------------------- 06
PRODUCT OVERVIEW------------------------------------------------ 07
PRODUCT INSTALLATION ------------------------------------------- 15
OPERATION INSTRUCTIONS ---------------------------------------22
CLEANING ----------------------------------------------------------------22
TROUBLE SHOOTING------------------------------------------------- 24
TRADEMARKS, COPYRIGHTS AND LEGAL STATEMENT -- 26
02
11
12
14
1 6
25
27
28
THANK YOU LETTER
Thank you for choosing Midea! Before using your new Midea product, please read
this manual thoroughly to ensure that you know how to operate the features and
functions that your new appliance offers in a safe way.
THANK YOU LETTER -------------------------------------------------- 01
01
DISPOSAL AND RECYCLING ---------------------------------------- 29

02
Danger
This symbol indicates that there are dangers to the life and health of
persons due to extremely flammable gas.
Warning of electrical voltage
This symbol indicates that there is a danger to life and health of
persons due to voltage.
Warning
The signal word indicates a hazard with a medium level of risk which, if
not avoided, may result in death or serious injury.
Caution
The signal word indicates a hazard with a low degree of risk which, if
not avoided, may result in minor or moderate injury.
Attention
The signal word indicates important information (e.g. damage to
property), but not danger.
Observe instructions
This symbol indicates that a service technician should only operate and
maintain this appliance in accordance with the operating instructions.
Intended Use
SAFETY INSTRUCTIONS
Read these operating instructions carefully and attentively before using/commissioning the
unit and keep them intheimmediate vicinity of the installationsite or unit for later use!
The following safety guidelines are intended to prevent unforeseen risks or damage from
unsafe or incorrect operation of the appliance. Please check the packaging and appliance
on arrival to make sure everything is intact to ensure safe operation. If you find any
damage, please contact to Midea’s nominated commercial product suppliers. Please note
modifications or alterations to the appliance are not allowed for your safety concern.
Unintended use may cause hazards and loss of warranty claims.
Explanation of Symbols

03
Precautions To Avoid Possible Exposure To Excessive
Microwave Energy
a. Do not attempt to operate this oven with the door
open since this can result in harmful exposure to
microwave energy. It is important not to break or
tamper with the safety interlocks.
b. Do not place any object between the oven front
face and the door or allow soil or cleaner residue to
accumulate on sealing surfaces.
c. WARNING: If the door or door seals are damaged,
the oven must not be operated until it has been
repaired by a competent person.
Addendum
If the apparatus is not maintained in a good state of
cleanliness, its surface could be degraded and affect
the lifespan of the apparatus and lead to a dangerous
situation.

04
Important Safety Instructions
WARNING
To reduce the risk of fire, electric shock, injury to
persons or exposure to excessive microwave oven
energy when using your appliance, follow basic
precautions, including the following:
• Read and follow the specific:”PRECAUTIONS TO
AVOID POSSIBLE EXPOSURE TO EXCESSIVE
MICROWAVE ENERGY”.
• This appliance can be used by children aged from 8
years and above and persons with reduced physical,
sensory or mental capabilities or lack of experience
and knowledge if they have been given supervision or
instruction concerning use of the appliance in a safe
way and understand the hazards involved. Children
shall not play with the appliance. Cleaning and user
maintenance shall not be made by children without
supervision.
• Keep the appliance and its cord out of reach of
children less than 8 years.
•If the supply cord is damaged, it must be replaced by
the manufacturer, its service agent or similarly
qualified persons in order to avoid a hazard.
• WARNING: Ensure that the appliance is switched off
before replacing the lamp to avoid the possibility of
electric shock.
• WARNING: It is hazardous for anyone other than a
competent person to carry out any service or repair
operation that involves the removal of a cover which
gives protection against exposure to microwave
energy.

05
heated in sealed containers since they are liable to
explode.
• When heating food in plastic or paper containers,
keep an eye on the oven due to the possibility of
ignition.
• Only use utensils that are suitable for use in micro-
wave ovens.
• If smoke is observed, switch off or unplug the
appliance and keep the door closed in order to stifle
any flames.
• WARNING: Microwave heating of beverages can
result in delayed eruptive boiling, therefore care must
be taken when handling the container.
• WARNING : The contents of feeding bottles and
baby food jars shall be stirred or shaken and the
temperature checked before consumption, in order
to avoid burns.
• Eggs in their shell and whole hard-boiled eggs should
not be heated in microwave ovens since they may
explode, even after microwave heating has ended.
• The oven should be cleaned regularly and any food
deposits should be removed.
• Failure to maintain the oven in a clean condition
could lead to deterioration of the surface that could
adversely affect the life of the appliance and possibly
result in a hazardous situation.
• The appliance must not be cleaned with a water jet.
(for appliances intended to stand on the floor and
whichare not at least IPX5)
• Only use the temperature probe recommended for
this oven. (for ovens provided with a facility to use a
temperature-sensing probe.)
• WARNING: Liquids and other foods must not be

06
• Metallic containers for food and beverages are not
allowed during microwave cooking.
• The appliance shall not be cleaned with a steam
cleaner.
READ CAREFULLY AND KEEP FOR
FUTURE REFERENCE

07
DANGER
Electric Shock Hazard Touching some of the internal
components can cause serious personal injury or
death. Do not disassemble this appliance.
WARNING
Electric Shock Hazard
Improper use of the grounding can result in electric
shock. Do not plug into an outlet until appliance is
properly installed and grounded.
This appliance must be grounded. In the event of an
electrical short circuit, grounding reduces the risk of
electric shock by providing an escape wire for the
electric current.
This appliance is equipped with a cord having a
grounding wire with a grounding plug. The plug must
be plugged into an outlet that is properly installed and
grounded.
Consult a qualified electrician or serviceman if the
grounding instructions are not completely understood
or if doubt exists as to whether the appliance is
properly grounded.
If it is necessary to use an extension cord, use only a
3-wire extension cord.
• A short power-supply cord is provided to reduce the
risks resulting from becoming entangled in or
tripping over a longer cord.
To Reduce The Risk Of Injury To Persons Grounding
Installation

08
• If a long cord set or extension cord is used:
- The marked electrical rating of the cord set or
extension cord should be at least as great as the
electrical rating of the appliance.
- The extension cord must be a grounding-type
3-wire cord.
- The long cord should be arranged so that it will not
drape over the counter top or tabletop where it
can be pulled on by children or tripped over
unintentionally.

09
Utensils
CAUTION
Personal Injury Hazard
It is hazardous for anyone other than a competent
person to carry out any service or repair operation that
involves the removal of a cover which gives protection
against exposure to microwave energy.
See the instructions on “Materials you can use in
microwave oven or to be avoided in microwave oven.”
There may be certain non-metallic utensils that are not
safe to use for microwaving. If in doubt, you can test
the utensil in question following the procedure below.
Utensil Test:
• Fill a microwave-safe container with 1 cup of cold
water (250ml) along with the utensil in question.
• Cook on maximum power for 1 minute.
•Carefully feel the utensil. If the empty utensil is warm,
do not use it for microwave cooking.
• Do not exceed 1 minute cooking time.

10
Materials You Can Use In Microwave Oven
Utensils Remarks
Browning dish
Follow manufacturer’s instructions. The bottom of browning
dish must be at least 3/16 inch (5mm) above the turntable.
Incorrect usage may cause the turntable to break.
Dinnerware Microwave-safe only. Follow manufacturer's instructions. Do
not use cracked or chipped dishes.
Glass jars Always remove lid. Use only to heat food until just warm.
Most glass jars are not heat resistant and may break.
Glassware Heat-resistant oven glassware only. Make sure there is no
metallic trim. Do not use cracked or chipped dishes.
Oven cooking bags Follow manufacturer’s instructions. Do not close with metal
tie. Make slits to allow steam to escape.
Paper plates and cups Use for short–term cooking/warming only. Do not leave
oven unattended while cooking.
Paper towels Use to cover food for reheating and absorbing fat. Use with
supervision for a short-term cooking only.
Parchment paper Use as a cover to prevent splattering or a wrap for
steaming.
Plastic
Microwave-safe only. Follow the manufacturer’s instructions.
Should be labeled "Microwave Safe". Some plastic
containers soften, as the food inside gets hot. "Boiling
bags" and tightly closed plastic bags should be slit, pierced
or vented as directed by package.
Plastic wrap Microwave-safe only. Use to cover food during cooking to
retain moisture. Do not allow plastic wrap to touch food.
Thermometers Microwave-safe only (meat and candy thermometers).
Wax paper Use as a cover to prevent splattering and retain moisture.
Materials To Be Avoided In Microwave Oven
Utensils Remarks
Aluminum tray May cause arcing. Transfer food into microwave-safe dish.
Food carton with metal
handle May cause arcing. Transfer food into microwave-safe dish.
Metal or metal-trimmed
utensils
Metal shields the food from microwave energy. Metal trim
may cause arcing.
Metal twist ties May cause arcing and could cause a fire in the oven.
Paper bags May cause a fire in the oven.
Plastic foam Plastic foam may melt or contaminate the liquid inside
when exposed to high temperature.
Wood Wood will dry out when used in the microwave oven and
may split or crack.

11
SPECIFICATION
Product Model MCM1817G1F
Rated Voltage 230-240 V~ 50 Hz
Microwave Input 3000 W
Microwave Output 1800 W
1. The order of dimensions is width x depth x height; the outline depth includes the
length of the handle a stretched back plate while the height value includes the foot.
2. The size of the cavity contains the stretch length, and the product of the width, depth
and height is multiplied obtain the volume of the cavity. Due to continuous product
upgrades, volume parameters and labeling data may differ, with a tolerance range of
+12%.
3. The actual parameters may be different from the labels as our products are subject to
improvement. Please refer to the actual product for specific parameters.
External Dimensions:
Net Weight: Approx. 3 . kg
420x563x340mm
1 6

12
PRODUCT OVERVIEW
(7)
(2) (3) (4) (5)
(1) Defrost Button
(2) USB Button
(4) Time Entry Button
(5) Double Quantity Button
(6) Triple Quantity Button
(7) Number Buttons
(8) Stop Button
(9) Start Button
(8) (9)
(1) (6)
Control Panel(with braille) and Features
(3)
Power Level Button

13
Setting Up Your Oven
Names of Oven Parts and Accessories
Remove the oven and all materials from the carton and oven cavity.
Your oven comes with the following accessories:
User Manual 1
B
C
D
A
A) Control panel
B) Observation window
C) Safety interlock system
D) Ceramic board
NOTE
1. Don’t press the ceramic board forcibly.
2. Take and put the utensils gently during the operation in order to avoid damage to the
ceramic board.
3. After using, don’t touch the ceramic board by hand in order to avoid high temperature
scald.
G
EF
E) Filter
F) Plug
G) Ventilation

14
PRODUCT INSTALLATION
Countertop Installation
Remove all packing material and accessories. Examine the oven for any damage such as
dents or broken door. Do not install if oven is damaged.
Cabinet: Remove any protective film found on the microwave oven cabinet surface.
Installation
1. Select a level surface that provide enough open space for the intake and/or outlet
vents (Figure1).
A 10-cm spacing should be kept between the appliance and right and back walls, and a
30-cm spacing kept on the top. Never dismantle the appliance's feet, nor block the air
intake and exhaust opening. The left side must be open.
- Blocking the intake and/or outlet openings can damage the oven.
- Place the oven as far away from radios and TV as possible.
Operation of microwave oven may cause interference to your radio or TV reception.
- Plug your oven into a standard household outlet. Be sure the voltage and the
frequency is the same as the voltage and the frequency on the rating label.
- Warning: The plug socket, electric appliances or the appliance which are liable
effected by heat and moisture should be kept away from any vents on the oven.
30cm
OPEN
)
4.0 inch(10cm) 4.0 inch(10cm)
12 inch(
Fig 1

15
2. Stacking and installation of the microwave oven. The maximum height of stacking
shall be two layers. Specific stacking installation is as follows
-Unscrew and remove the mounting plate, and then tighten the screws.
-Remove the four screws as shown in Figure.
-Mount the mounting plate to the lower position and fix the screws that are just
loosened.
Installation (supplement)
1. The switching operation of this microwave oven can cause voltage fluctuations
on the supply line. The operation of this oven under unfavorable voltage supply
conditions can have adverse effects. This device is intended for the connection to a
power supply system with a maximum permissible system impedance Zmax of 0.2
Ohms at the interface point of the user’s supply. The user has to ensure that this
device is connected only to a power supply system which fulfills the requirement
above. If necessary, the user can ask the public power supply company for the system
impedance at the interface point.
2. If there is no equipotential bonding conductor in the electric supply, an external
equipotential bonding conductor must be installed at the rear of the appliance (see
symbol). This terminal shall be in effective electrical contact with all fixed exposed
metal parts and shall allow the connection of a conductor having a nominal cross-
sectional area up to 10 mm².
Symbol for the external connection of equipotential bonding conductors.

16
OPERATION INSTRUCTIONS
Appendix. A User Options
Option Setting Discription
1 EOC Tone
OP:10 Beeper sounds three times
OP:11 Continuous beep
OP:12 5 quick beeps
(
repeating)
2 Beeper Volume
OP:20 Beeper Off
OP:21 Low
OP:22 Medium
OP:23 High
3 Key Tone On/Off
OP:30 Off
OP:31 On
4 Keyboard Window
OP:40 no operation in ready, pause or set state for
15sec, idle mode will be entered
OP:41 No operation in ready, pause or set state
for 30sec, idle mode will be entered
OP:42 No operation in ready, pause or set state
for 60sec, idle mode will be entered
OP:43 No operation in ready, pause or set state
for 120sec, idle mode will be entered
5 On the Fly
OP:50 Pressing number keys can’t switch
OP:51 Pressing number keys can switch
6 Door Reset
OP:60 Open the door to enter pause mode
OP:61 Open the door and return
7 Start Cook
OP:70
After successfully scanning the menu, close
the oven door and press “START” to start
cooking.
OP:71 After successfully scanning the menu, close
the oven door and start directly.
8 Manual Programming
OP:80 Manual Programming disabled
OP:81 Manual Programming Enabled
0 Clean Filter
OP:00 Off-Never Display Clean filter
OP:01 Weekly-Display every 7 days
OP:02 Monthly-Display every 30 days
OP:03 Quarterly-Display every 90 days
NOTE:
SEE " USER OPTION MODE" FOR DETAILED SETTING STEPS.

17
Appendix. B Default Cook Times
Press the number key to quickly activate the preset time and firepower.
Button Display (Time) Power
1 0:10 100%
2 0:20 100%
3 0:30 100%
4 0:45 100%
5 1:00 100%
6 1:30 100%
7 2:00 100%
8 2:30 100%
9 3:00 100%
0 3:30 100%

18
Power Up
When the oven is electrified for the first time, “ ------- ” will display on the screen. If the
“ ” button is pressed, the oven will enter Idle Mode.
Idle Mode
In Idle Mode, the screen will display “ ECO ”.
NOTE:
• In Pause Mode or Ready Mode, if there is no operation of any button within 1 minute
and you have set “OP:40”, “OP:41”, “OP:42” or “OP:43” , the oven will enter to Idle
Mode after 15, 30, 60, or 120 seconds correspondingly.
• If you press the “ ” button, a buzzer will ring, but nothing will work.
Ready Mode
1. In this mode, the oven is ready to begin a cook cycle.
2. Opening and closing the door while the oven is in Idle Mode will put the oven into
Ready Mode.
3. During Ready Mode, “READY” will display.
Door Open Mode
When the furnace door is open, the oven will enter the Door Open Mode. "DOOR" and
"OPEN" will display.
NOTE:
• When the door is open, if User Option OP:60 is selected and the oven was running a
manual cook entry or preset program cook mode, the oven will enter Pause Mode. If
User Option OP:61 is selected and the oven was running a manual cook entry or preset
program cook mode, the oven will enter the Door Open Mode.
•
Pause Mode
1. When the microwave oven is running in its own or preset cooking state, press “ ” to
enter Pause Mode. The screen will display remaining cooking time.
2. Press “ ” to enter Ready Mode or press “ ” to start cooking.
In this mode, “TIME ENTRY” or “DEFROST” can not be pressed to enter cooking setting.

19
Manual Cook Entry Mode
1. You can manually enter a cook time and power level while in this mode.
2. Press “TIME ENTRY” and press number keys to enter cooking time. The maximum time
is 60 minutes.
3. Press “POWER LEVEL” and press number keys to enter power level 0-10.
4. Press “ ” to start cooking.
Level 10 9 8 7 6 5 4 3 2 1 0
Power 100% 90% 80% 70% 60% 50% 40% 30% 20% 10% 0%
Preset Program Cook Mode
1. This mode allows cooking of food items through a one pad touch operation. While in
Ready Mode, pressing number buttons will cause the oven to run the Preset Program
associated with that number button.
2. During this mode, the screen displays the remaining cooking time. If it is multi-stage
cooking, the total remaining cooking time displays not a particular stage cooking time.
3. Press “ ” to start cooking.
End of Cook Cycle Mode
1. After the time has expired in a Manual Cook Entry Mode or Preset Program Cook
Mode, the oven will enter the End of Cook Cycle Mode.
2. During this mode, “DONE” will display.
3. If the OP:11 or OP:12 is selected, the oven will continue to sound until you open the
door or press “ ”. If OP:10 is selected, the oven will sound three times.
On the Fly Cooking
1. In Preset Program Cook Mode, if the OP:51 is set, press number key to select other
preset program.
2. Press “ ” to start cooking.
Time Defrost Function
1. In Ready Mode, press “DEFROST” button.
2. Press number keys to enter time. The maximum time is 99 minutes and 99 seconds.
3. Press “ ” to start cooking,
Table of contents
Other Midea Microwave Oven manuals

Midea
Midea TC044N6V User manual

Midea
Midea MMC09MKSST User manual

Midea
Midea MM720CFA-PM0C User manual

Midea
Midea EEHK38KIX User manual

Midea
Midea MMW34CS User manual

Midea
Midea 1025F1F-BS User manual

Midea
Midea 1025F0A User manual

Midea
Midea MT530K2HPMR User manual

Midea
Midea AG823AY9 User manual

Midea
Midea EM928ETB-P User manual

Midea
Midea MW 20 DI BK User manual

Midea
Midea EM044KYY-GE Owner's manual

Midea
Midea MD-MP012MK-WH User manual

Midea
Midea 2117G1A User manual

Midea
Midea 1234G1A User manual

Midea
Midea MW 25 DI BK User manual

Midea
Midea AS823EKW User manual

Midea
Midea EM9P032MX User manual

Midea
Midea Versa MMWV30B User manual

Midea
Midea EM928ETB User manual