Midwest RiverStone Quartz User manual
IMPORTANT: Please read through the entire instructions before starting your installation. Failure to follow these
instructions could possibly void the warranty on your countertops. RiverStone Quartz™ countertop warranty does not
cover abuse or accidental damages. The limited warranty covers replacement or repair only. For more information or to
view our RiverStone Quartz™ installation video visit us at midwestmanufacturing.com
RiverStone Quartz™ - Countertop Install Guide
Tools Required
• 48"Level
• Pencil or Fine-Tipped Marker
• Hot Melt Glue Gun
• Tape Measure
• Caulk Gun
• Razor Blade
• Denatured Alcohol
• 2x4 Lumber Strip
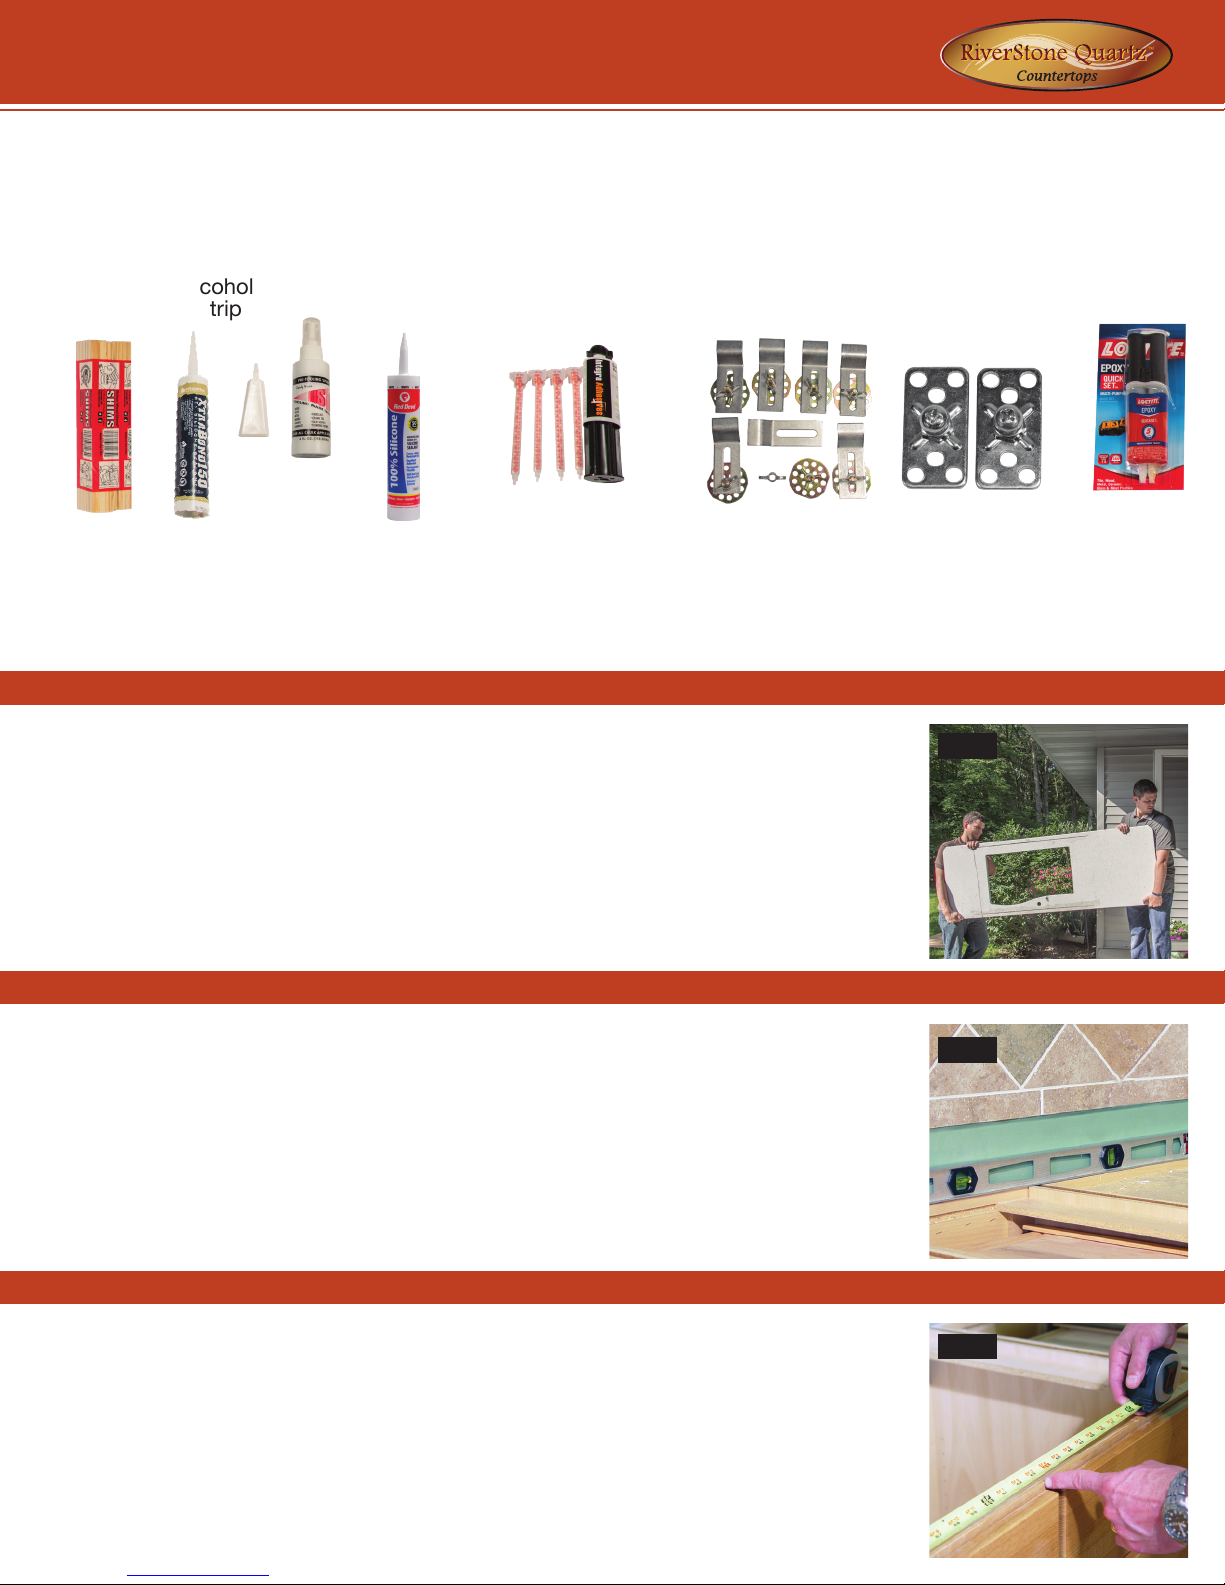
Install Kit (Included With Purchase)
1) Shims
2) Color Match Silicone
3) Spray Mist with Tool
4) Silicone Caulk
Based on Order
5) Integra™ Seam Adhesive & Tips
6) Undermount Sink Clips
7) Dishwasher Clips
8) Epoxy
1) Transporting & Handling
2) Straighten & Level Cabinets
1. RiverStone Quartz™ countertops should be stored in original packaging.
2. When handling your countertops, it is important to carry on edge to avoid damage
(Fig.A).
Be careful, RiverStone™ countertops are heavy.
3. The day before installation, the tops should be brought into the room they are to
be installed in. Be sure to allow 24 hours for the countertops to acclimate to room
temperature. Never install cold quartz countertops. Installation kits should always
be stored at room temperature to avoid freezing of the caulks and adhesives.
RiverStone Quartz™ countertops must be mounted to an even surface. Failure to
straighten cabinet will cause stress and possibly damage the tops.
1. Use a 48"level to find any non-level areas (Fig.B).
2. Level if possible. If not, mark these areas, so that later in the installation process,
you can shim the countertops to a flat surface.
1) 5) 6) 7) 8)3) 4)2)
3) Check & Pre-t
Do not install countertops that are damaged or if a defect is found. Installation fees are not
covered under the warranty.
1. Measure cabinet run and then the countertop; remember overhangs affect the
length of the top (Fig.C).
2. Place countertops into position.
3. Dry fit any seams, if applicable, by placing the seamed pieces together.
4. Verify that all edges line up and that the countertop overhangs are the appropriate size.
* Number of tips determined
by number of seams
Fig. A
Fig. B
Fig. C

1. Set the countertop in place with the unfinished,
underside facing up. Position the sink upside down,
centered over the sink cutout with equal amounts of
overhang or reveal visible on all sides of the sink. (Fig.D)
2. With a pencil or fine-tipped marker, trace the outer rim
of the sink to the underside of the countertop. (Fig.E)
3. With denatured alcohol, wipe down the underside of
the countertop where the sink rim and anchoring posts
will be adhered to. (Fig.F)
4. With an epoxy, bond the undermount sink anchoring
posts to the underside of the countertop at the four
corners and central locations along the cutouts width
and length (Fig.G). Be sure the posts are next to your
traced line, but not inside the area where the sink rim
will adhere to the countertop. Mix the 2 part epoxy
thoroughly, otherwise the epoxy will not set. Apply epoxy
to cleaned mounting locations and press the mounting
posts into the epoxy in the anchoring locations. Smooth
the epoxy around the anchoring posts and let the epoxy
dry for a minimum of 20 minutes. (Fig. D&H)
(NOTE: Do not place anchoring posts in front of sink.)
5. Run a quarter-inch bead of silicone caulk inside the
traced sink rim area on the underside of the countertop.
(Fig.I)
6. Position the undermount sink within the traced area
and butting up to the anchoring posts, press down firmly.
(Fig.J)
7. Attach undermount sink to the anchoring posts with
supplied brackets and wing nuts. Wait approximately one
hour for caulk to set before moving the countertop section
for final placement. (Fig.K)
Fig. F
1. Using a shim, level up the marked areas that
were made in step 2. Apply dime-size dabs of
silicone caulk along the front and back edge of the
cabinet run. (Fig.N)
2. With help, slowly position countertop above the
mounting surface. (Fig.O)
3. Gradually tip the countertop to a horizontal
position. Be aware of upper cabinets and installed
sinks (if applicable).
4. Once in final position, firmly apply downward-
pressure to seat the top in the caulk.
Fig. H
Fig. L
1. Level and attach standard 2x4 wood to the
wall between countertop cabinets. (Fig.L)
2. Make sure the dishwasher is centered
between the cabinets. Align dishwasher clips
to the brackets on the dishwasher.
3. Epoxy the dishwasher clips to the
underside of your countertop and let them
dry for a minimum of 20 minutes before
installing the dishwasher. (Fig. M)
Fig. J
Fig. I
Fig. D Fig. E
Fig. G Fig. K
Fig. M
Fig. N Fig. O
4) Undermount Sink Installation (If Applicable)
5) Dishwasher Clip Installation (If Applicable)
6) Install Smaller Countertop Pieces without Seam
7) Dishwasher Clips
4) Silicone Caulk
8) Epoxy 6 & 8) Undermount Sink Clips &
Epoxy
4) Silicone Caulk
Fig. 4 Fig. 6 Fig. 8
Fig.8
Fig.7
Fig.4
1. Before placing large pieces of counterop, apply
silicone caulk to the top of the cabinet. With help,
slowly position countertop above mounting surface.
(Fig.P)
2. Gradually tip the countertop to a horizontal position.
Be aware of upper cabinets and installed sinks (if
applicable). (Fig.P)
3. Once in final position, firmly apply downward-
pressure to seat the tops in the silicone caulk.
4. For large countertop pieces it will be necessary to
caulk along the outer seam between the underside of
the countertop and cabinet face. (Fig.Q)
Fig. P Fig. Q
7) Install Larger Countertop Pieces with Seam
Fig. R Fig. S
Fig. T Fig. U
1. Using the marks you made in step 2, level the areas
beneath the countertops seam with wooden shims. (Fig.R)
2. Check for seam evenness (adjust shims if needed) and
apply an eighth-inch bead of Integra™ between the two
surfaces being seamed together. (Fig.S)
3. Tighten the seam by gently tapping in a wooded shim
between the countertop and the wall (Fig.T). If there is no wall
at the end of the countertop piece, it will be necessary to
have someone to hold the countertop.
4. Once the two parts of the Integra™meet in the mixing tip,
the adhesive has a 10-15 minute working time. The adhesive
will start to cure after 15 minutes.
5. Once the Integra™ has dried over (10-15min.) use a razor
blade to scrape off any excess adhesive. (Fig.U)
8) Shims and Seaming (If Applicable)
1) Shims 5) Integra™ Seam Adhesive & Tips
1) Shims
4) Silicone Sealant
Fig. V Fig. W
Fig. X Fig. Y
Fig. Z
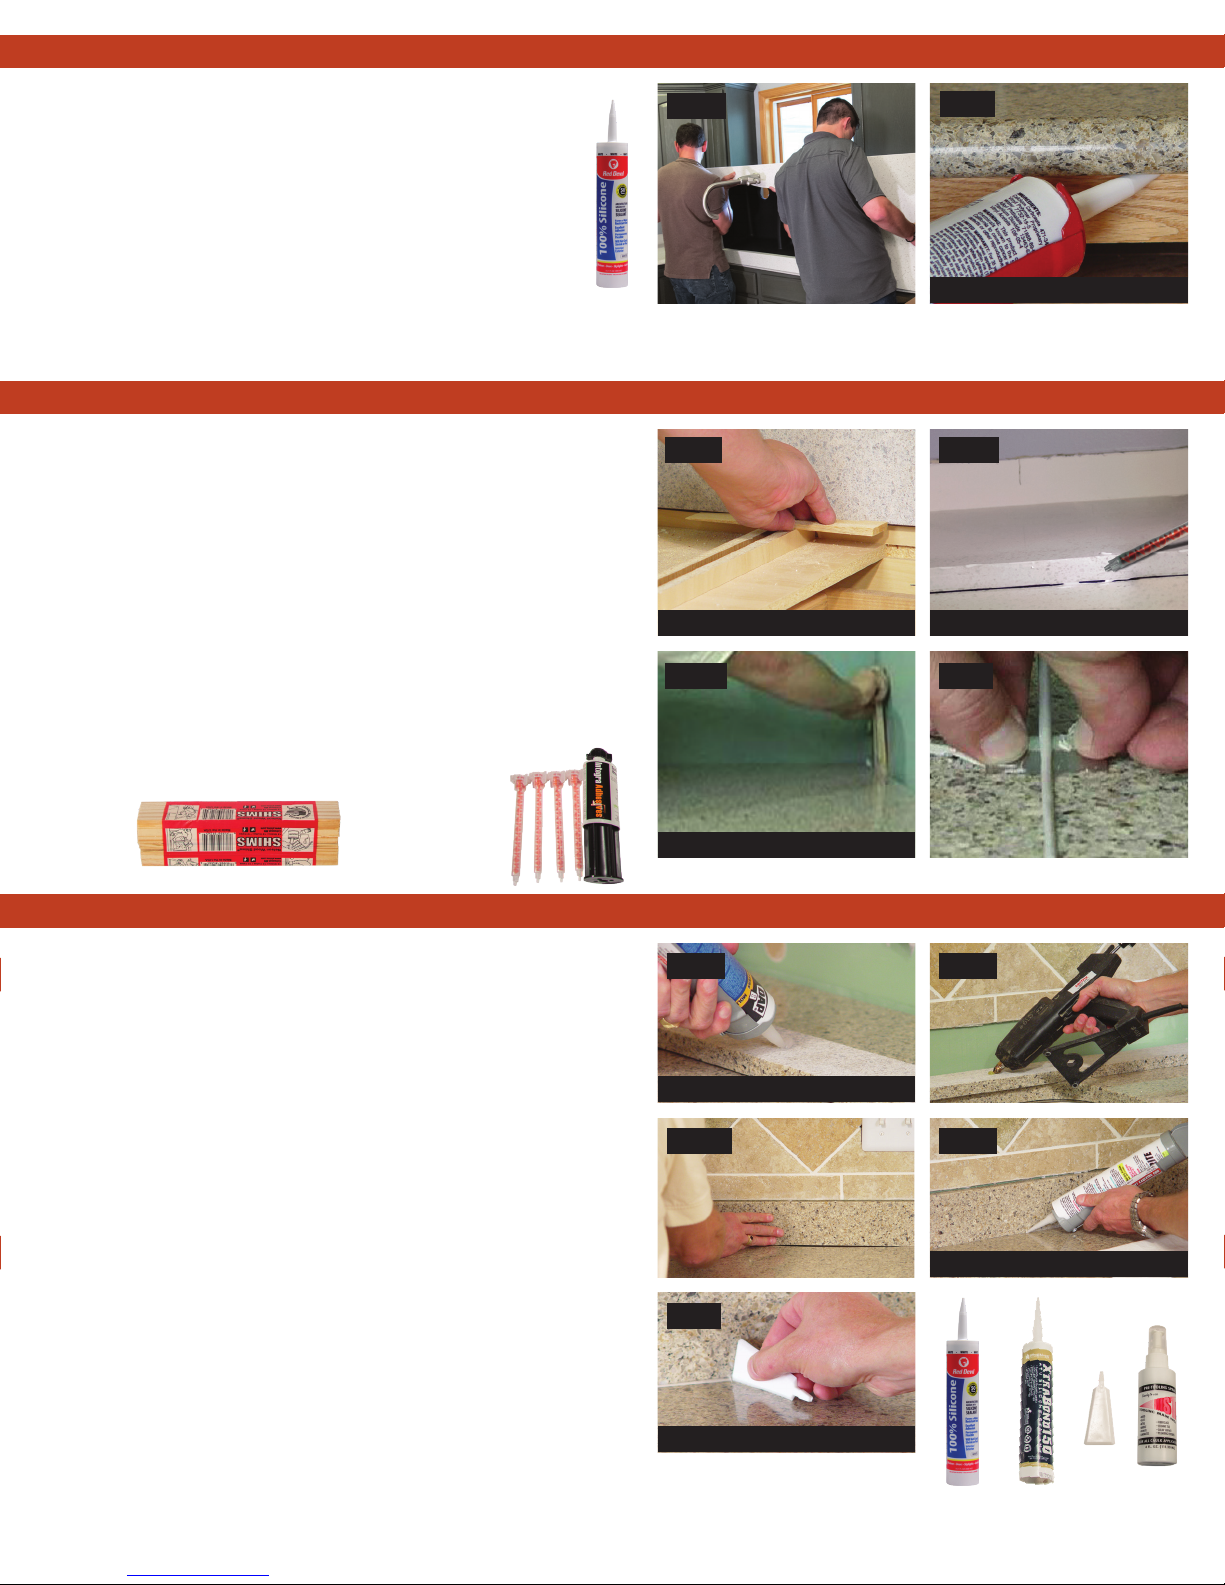
1. Before installing splash pieces, dry fit to ensure proper
placement. Place dime-sized dabs of silicone caulk (Fig.4)
every 18 inches along the piece of splash. (Fig.V)
2. With longer pieces of backsplash it may be necessary
to place dabs of hot melt glue between the caulk dabs to
hold in place until the caulk sets up. Set up time on silicone
is 15-20 minutes. However, hot melt glue will set up within
minutes, so position in a timely manner. (Fig.W)
3. Press firmly back and down against wall and countertop
until the hot melt sets. With longer pieces, assistance may be
necessary to hold in place. (Fig.X)
4. Apply an even bead of color-matched sealant, (Fig.2)
approximately 1/8" along the seam where the countertop and
splash meet. (Fig.Y) The color match sealant has a 20 minute
working time.
5. Use the spray mist (Fig.3) and spray the included tool to
help smooth the silicone bead during tooling.
6. Place the longest beveled edge of the tool (Fig.3) on the
horizontal surface and rotate the small tip in the direction of
the excess to be removed. Tilt the tool towards the splash
until the short beveled edge of the tool touches the surface
of the splash.
7. Using moderate pressure, move the tool along the silicone
bead. Removal of excess silicone is suggested throughout
the process for the best performance (Fig.Z).
9) Side & Backsplash (If Applicable)
4) Silicone Caulk
2) Color Match Silicone
3) Spray Mist with Tool
Fig.4
Fig.1 Fig.5
Fig.4 Fig.2 Fig.3

Does RiverStone Quartz™ require any special care?
Its lustrous finish does not require special conditioners or polishing. Simply clean up spills with a warm damp cloth
and mild soap.
Is RiverStone Quartz™ a sanitary surface?
Yes. RiverStone Quartz™ is a non-porous surface. This means germs and bacteria can not accumulate with regular
cleaning. RiverStone Quartz™ is an approved surface for food preparation.
Will my quartz countertop fade?
When exposed to UV light engineered quartz can fade. Engineered quartz should be avoided in outdoor applications
for this reason. This usually is not a problem to an indoor countertop.
Will my RiverStone Quartz™ countertop be seamless?
RiverStone Quartz™ is not a seamless product. Seams are generally visible but inconspicuous.
How is a sink or cooktop cut-out determined?
If your layout requires a sink or cooktop cut-out note that the fabricator does not originate and determine the sink
cut-out size and shape but rather the sink maker. These cut outs are not a matter for further modification or debate
but are the exclusive cut-out selected by the fabricator. When creating the sink or cooktop cut-out there is no
remnant.
Do I need to add supports if I have an overhang?
Overhangs 10" should have support added.
Any overhangs 15" or more require support to the floor.
The manufacturer warrants the original purchaser only that this countertop is free from defects in workmanship
and material for its lifetime. The manufacturer, at its sole discretion, agrees to repair or replace the defective
product. If the product must be replaced, the manufacturer will send the replacement product to the store where the
product was purchased. The original purchaser will then, at their own expense, pick up the replacement product.
The original purchaser must also return the defective product to the store where it was purchased, at the purchaser’s
sole expense. This limited warranty does not cover any labor for the replacement of any defective product. This
limited warranty does not cover any damage that has resulted from abuse or misuse of the product. This limited
warrantydoesnotcoveranymitersoreldjointswheretherewasimpropergluingwhenjointswereassembled.
The rights under this limited warranty are limited to the original purchaser and may not be transferred to subsequent
owners. THIS LIMITED WARRANTY IS IN LIEU OF ALL OTHER WARRANTIES, EXPRESS OR IMPLIED, INCLUDING
WARRANTIES OF MERCHANTABILITY AND FITNESS FOR A PARTICULAR PURPOSE. Sellers shall not be liable for
any special, incidental or consequential damages. THIS SOLE AND EXCLUSIVE REMEDY AGAINST SELLER WILL
BE REPAIR OR THE REPLACEMENT OF ANY DEFECTS as provided herein. As long as the seller is willing or able to
repair or replace the defective product, as provided above, THIS EXCLUSIVE REMEDY shall not be deemed to have
failed of its essential purpose.
Frequently asked Questions
Care & Maintenance
RiverStone Quartz™ Limited Lifetime Warranty
Recommended cleaners include Simple Green®, Rock Doctor cleaner, Mr Clean Magic Eraser®, and denatured alcohol.
To clean the surface, wash with a mild dish washing liquid or powdered detergent; add warm water. Use a soft dish
cloth. Rinse with warm water and dry with cloth. Water is generally all that is needed. A quick wipe will clean most
stains and maintain the rich, lustrous gloss.
For Harder to remove spots, use an all-purpose cleaner or bathroom cleanser. Follow the manufacturer’s instructions.
Rinse with warm water and dry with a soft cloth. Please note, do not use cleansers that contain harsh abrasives.
For stubborn spots, make a paste with baking soda and water. The paste will be slightly abrasive. Work carefully to
keep from damaging the surface you are cleaning. Dip a soft bristle brush into the paste to cover the bristles. Gently
rub the spot with the brush, moving in a circular motion and pressing very lightly. You may also use a Magic Eraser®
following the manufacturer’s instructions for stubborn stain.
Preventing Damages
While RiverStone Quartz™ is designed to withstand heat better than most countertop materials on the market it can be
damaged by extreme temperature changes, whether sudden or prolonged. Always use a trivet or hot pad when placing
hot items on your countertop surface. These items include, but are not limited to, pots, pans, or crock-pots.
•Neverexposeyourcountertopsurfacetoharshchemicals, such as oven cleaners, drain cleaners, paint
removers, acids, etc.
•AvoidcuttingdirectlyonRiverStoneQuartz™countertops, always use a cutting board.

•RiverStoneQuartz™ismadefrompure,naturalquartz.Variations in quartz color, shape, shade, pattern, and size
are unique traits of RiverStone Quartz™. Some RiverStone Quartz™ colors may be more consistent than granite
however color variance is an inherent trait expected in RiverStone Quartz™. In addition, small white blotches or
random distribution of particles are an inherent part of the overall design and composition and are not considered to
be defects.
•ThethicknessofRiverStoneQuartz™slabsis2cm(.79”)and3cm(1.18”)withanallowablevarianceof+/-2mm(.07”).
•RiverStoneQuartz™ismadeof93%quartzand7%binders, due to the high volume of natural stone used to
manufacture the quartz there can be some slight pitting that occurs – 1mm to 2mm in width and 1mm deep
(aboutthesizeofapinhead).Thisisaninherentcharacteristicofquartzandinnowayeectstheperformance
of the material.
General RiverStone Quartz™ Information
ForEverythingRiverStoneQuartz™hastoOer,
Visit www.midwestmanufacturing.com
•Brochures
•Videos
•InstallationInstructions
•DetailedWarrantyInformation
•FeaturesandBenetsGuides
•NewProducts
•EnergyEciencyandPerformanceData
•InspirationalImages
Questions or Concerns:
For guest assistance contact countertop help
by sending an email to:
Table of contents
Popular Kitchen Appliance manuals by other brands


Champion
Champion CHVF210 user manual

Koolatron
Koolatron Deluxe Total Chef TCFD-05 Directions for use & recipes

FoodSaver
FoodSaver V1050 user manual

Cuisinart
Cuisinart Smart Stick CSB-100C INSTRUCTION AND RECIPE BOOKLET

BROWIN
BROWIN 330527 user manual

Nostalgia
Nostalgia MSB64 Series Instructions and recipes