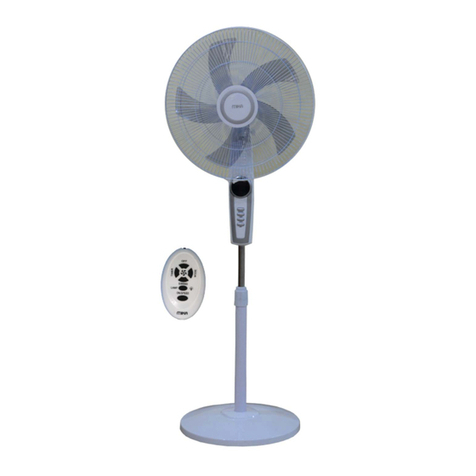
MIKA MFS1643R/WS User manual

STAND FAN WITH REMOTE
USER MANUAL
THANK YOU & CONGRATULATIONS FOR PURCHASING THIS QUALITY PRODUCT
To get the optimum use & derive maximum satisfaction from this product, we request
you to read and follow all the instructions in this user manual carefully before using the
product. Keep this user manual in a proper place where you can find it for future
reference.
TIMER
MODE
OFF
SWING
LAMP
ON/SPEED
MODEL: MFS1643R/WS
MFS1644R/BS

1
NOTE: All Pictures in this user manual are for
explanation purpose only. Any discrepancy between
the real object and the illustration in the drawing
shall be subject to the actual product.
GENERAL DESCRIPTION
Front Grill
Blade
Plastic Nut
Rear Grill
Motor Shaft
Motor
Thumb Screw
Fasten
Height Adjustment Ring
Base
Bolt
Extension Pole
Internal Pole
Spinner
Loosen
Push Buttons
Tighten
Circlip
CONTENTS
GENERAL DESCRIPTION........………………………………………..………......................................
HOW TO ASSEMBLE.......………………........………………………………………….........................
SAFETY CAUTIONS.…………………………………………………………………...............................
CAUTION..……………………...............……………………………………………...............................
BEFORE USE………………………………………………………...…………………............................
HOW TO OPERATE………………………………………………………...…………………......................
REMOTE CONTOL OPERATION………………………………………...…………………......................
CARE, MAINTENANCE & STORAGE...…………………………………….......…...............................
TROUBLE SHOOTING………………………………………………………….…………………….........
AFTER SALES SERVICE / CUSTOMER CARE.…………..……….………........................................
DISPOSAL..........................................................................................................................................
1
2
3
3
3
4
4
5
5
5
5

2
CAUTION: Height adjustment ring must be fully fastened before
the assembly of the motor section to the Internal pole.
HOW TO ASSEMBLE
Base and Pole assembly
1. Unscrew the spinner clockwise (or take the spinner out from the bag) and the plastic nut
counterclockwise to remove both of them. Fix the rear grill to the motor then tighten the plastic
nut again. (Fig. 5)
2. Insert the blade into shaft, and make sure the rotor shaft pin is fitted Into groove of the blade.
Turn the spinner counterclockwise to tighten the blade. (Fig. 6)
3. Fasten the front grill and the rear grill by the grill clip and then tighten the fan grill locking screw
and nut. (Fig. 7)
Grill & Fan Blade Assembly
1. Unscrew the Bolt from the Extension Pole. (Fig.1)
2. Insert the extension pole into the chassis and tighten the Bolt. (Fig.2)
3. From the extension pole loosen the height adjustment ring and adjust the internal pole
to the desired height (Note: If you can't find the intemal pole, it must be inside the extension pole.
You can pull it out from the extension pole. (Fig.3)
4. To attach the head unit to the internal pole, loosen the thumb screw on the bottom of the head unit.
Place the head unit on the internal pole and tighten the thumb screw in alignment with the groove
on the internal pole. (Fig.4)

3
SAFETY CAUTIONS
1. After unpacking, make sure to assemble the parts of the appliance correctly.
2. Wipe the outer part of the appliance with a wet cloth.
BEFORE USE
1. Never insert fingers, pencils, or any other objects through the grill when the fan is running.
2. Disconnect fan when moving from one point to another or when cleaning.
3 Ensure the fan is on a stable surface when operating to avoid tipping over or falling.
4. Do not use the fan near the window to avoid getting rained on as this may result to electrical hazard.
5. This fan is for indoor use only.
CAUTION
NOTE: The manufacturer shall not be held responsible for any injury to persons or damages to
property caused by incorrect installation or use of this appliance.
When using electrical appliances, basic safety precautions should always be followed, including the
following;
1. All safety and operating instructions should be read before operation and user manual should be
retained for future reference.
2. This appliance is not intended for use by persons (including children) with reduced physical,
sensory or mental incapability, and lack of experience and knowledge of the product, unless they
are under close supervision or instruction concerning use of the appliance by a person respon-
sible for their safety and who has full knowledge of the product.
3. Use the appliance only for its intended use. This appliance is for household use only. Do not use
outdoors.
4. Do not operate any appliance with a damaged power cord or plug, or after the appliance malfunc-
tions or is dropped or damaged in any manner.
5. Only connect the appliance to an earthed power socket.
6. The use of accessory attachments is not recommended by the appliance manufacturer as it may
cause electrocution and / or damage the appliance.
7. Do not operate this appliance with an external timer.
8. Always place the appliance on a stable surface and then plug into the electrical socket.
9. Do not allow the power cord to hang over the edge of surfaces. Place the power cord in a safe
manner to avoid tripping and falling.
10.Do not allow the power cord or plug to come in contact with water as it can cause an electric
shock or damage the appliance.
11.Do not place the appliance near any flammable materials and very close to electrical sockets.
12.Place cables in a safe manner to avoid Slips, trips and falls.
13.Do not remove or lift the appliance while the power cord is connected to the power socket.
14.Make sure the appliance is in OFF position before plugging to or unplugging from an electric
socket.
15.Remove the plug from the power socket when the appliance is not in use.
16.Do not attempt to dismantle the product. Unauthorized handling/repairing of the device may
result in an electrical shock or damage to the device and will void your warranty.

4
HOW TO OPERATE
TIMER
MODE
OFF
SWING
LAMP
ON/SPEED
A
B
D
C E
Fig.8
Remote Controller (Fig.8)
1. ON/OFF BUTTON
The ON button “A” is for switching on the fan.The fan will be started
at low speed. Press the OFF button “B” to switch off the fan.
2. SPEED
When the fan is working, press the SPEED button “A” repeatedly,
to increase the fan speed.
3. TIMER
Press the TIMER button “C” continuously to set the desired time. The time to be set for air delivery
increased step by step of each 0.5 hour and sums to 7.5 hours in 15 steps. For instance, if the
fan operation is required to be set for 5.5 hours, this key must be touched repeatedly so that the
pilot lamps for 0.5, 1 and 4 hours lighten together. It means that the set time is 0.5+ 1+ 4= 5.5
hours. The time setting indicated by the pilot lamp will decrease gradually by a unit of 0.5 hour.
Don't press the TIMER key when the fan is required to operate continuously. At the moment all
pilot lamps don't light.
4. SWING
After the fan is started, press the swing button “D” to oscillate the fan, and stop the oscillation at
desired direction by pressing again. By rotating the fan head by hand, you can get wider oscilla-
tion angle.
5. MODE
Press the Mode button “E” to select mode. When pressed repeatedly or continuously, the fan will
operate in normal mode, natural mode and sleep mode. The light will indicate mode state. For
normal air flow press the "mode" button to select the normal air flow, then press the "speed"
button repeatedly choose speed. For natural air flow press the "mode" button to select the natu-..
ral air flow, then press the "speed" button repeatedly to choose speed. For sleep air flow press
the "mode" button to select the sleep air flow, then press the "speed" button repeatedly to choose
speed.
REMOTE CONTROLLER OPERATION
Point the remote controller at the receptor on body of the fan and press the desired button. The
remote controller will work at distances of up to roughly five meters and the angle of 30 degree
included between right and left from the receptor.

CARE AND MAINTANANCE
5
• Turn off and unplug the unit prior to cleaning.
• To clean the blade and grille assembly, first remove the safety grille, unscrew the locknut and
remove the blade from the Pedestal Fan. Wipe them clean with a slightly damp sponge.
• Clean the motor housing and body assembly with a clean, damp cloth and wipe dry.
• Never spray with liquids or submerge the Pedestal Fan in water or any other liquid.
• Do not use flammable liquids, chemicals, abrasive creams, steel wool or scouring
pads for cleaning.
Storage
• Switch off and unplug the fan.
• Coil the cable loosely. Do not kink or pull the cable tight.
• Store your fan in a cool, dry location.
TROUBLE SHOOTING
The FAN does
not work
The appliance is not plugged in.
You have not switched the
FAN On (O).
The cord is loosely connected to
the FAN
Put the main plug in an
earthed wall socket.
Press the On (O) Button
Tighten the Cord to the
base or to the FAN
Problem Possible cause Solution
AFTER SALES SERVICE / CUSTOMER CARE
DISPOSAL
Environmental Protection
This appliance should not be disposed off with household waste. Please recycle
where facilities exist. Check with your Local Authority or retailer for recycling advice.
If you find something wrong with this appliance even after the trouble shooting, contact the nearest
agent of MIKA products or contact the customer care center. The customer care contacts are
provided on the warranty card and our website www.mikaappliances.com.
This manual suits for next models
1
Table of contents
Other MIKA Fan manuals
Popular Fan manuals by other brands

Euramco Safety
Euramco Safety UB20 Series owner's manual

LTG
LTG VFC Instructions for installation, use and maintenance

Ebmpapst
Ebmpapst W3G350-CG03-30 operating instructions

Three Sixty
Three Sixty Arumi AC Series Owner's and installer's manual

Xpelair
Xpelair XHR150PC installation instructions

MSW Motor Technics
MSW Motor Technics MSW-FFF-01 user manual