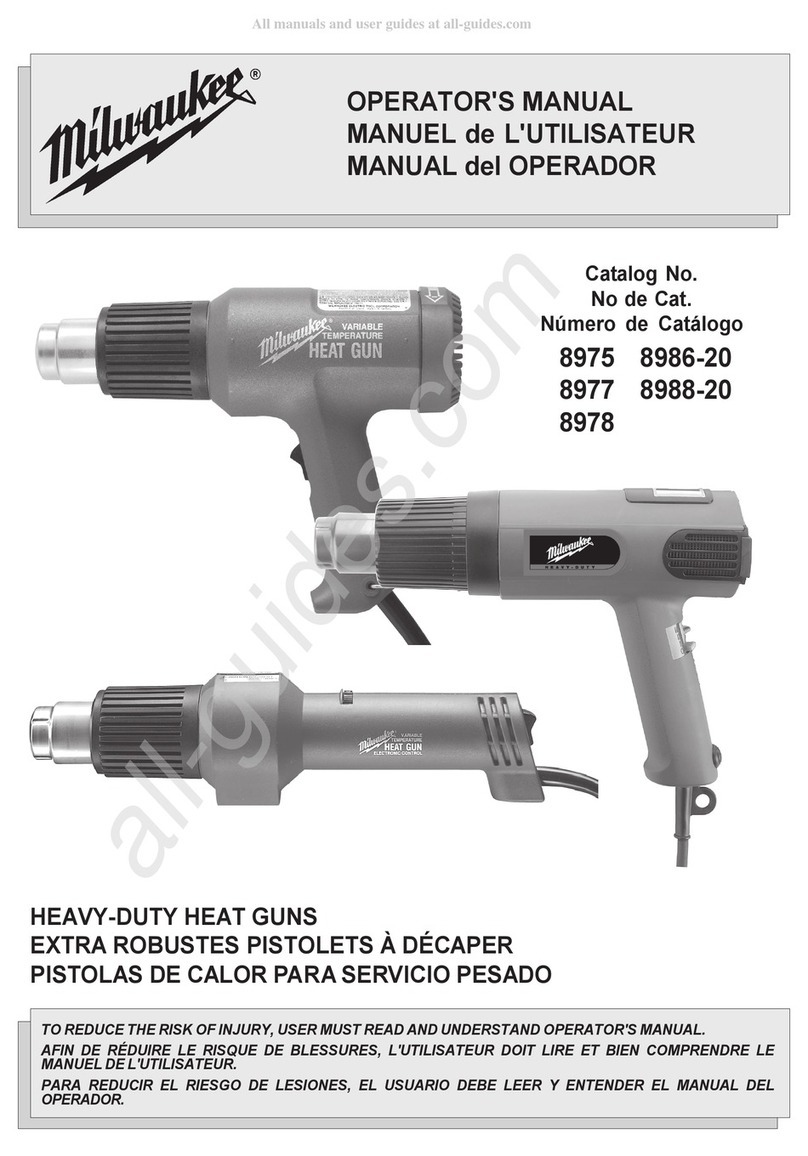
Milwaukee M18 0801-20 User manual

Cat. No. / No de cat.
0801-20, 0801-20C
M18™ 70,000 BTU FORCED AIR PROPANE HEATER
CHAUFFERETTE AU PROPANE À AIR PULSÉ DE 70 000 BTU
M18™
CALENTADOR DE GAS PROPANO DE AIRE FORZADO DE
70 000 BTU M18™
OPERATOR'S MANUAL
MANUEL de L'UTILISATEUR
MANUAL del OPERADOR
WARNING To reduce the risk of injury, user must read and understand operator's manual.
AVERTISSEMENT An de réduire le risque de blessures, l'utilisateur doit lire et bien
comprendre le manuel.
ADVERTENCIAPara reducir el riesgo de lesiones, el usuario debe leer y entender el manual.
WARNING To reduce the risk of injury, user must read and understand operator's manual.
AVERTISSEMENT An de réduire le risque de blessures, l'utilisateur doit lire et bien
comprendre le manuel.
ADVERTENCIAPara reducir el riesgo de lesiones, el usuario debe leer y entender el manual.

2
GENERAL POWER TOOL SAFETY WARNINGS
GENERAL HAZARD WARNING:
FAILURE TO COMPLY WITH THE PRECAUTIONS AND
INSTRUCTIONS WITH THIS HEATER, CAN RESULT IN
DEATH, SERIOUS BODILY INJURY AND PROPERTY LOSS
OR DAMAGE FROM HAZARDS OF FIRE, EXPLOSION, BURN,
ASPHYXIATION, CARBON MONOXIDE POISONING, AND/OR
ELECTRIC SHOCK.
ONLY PERSONS WHO CAN UNDERSTAND AND FOLLOW THE
INSTRUCTIONS SHOULD USE OR SERVICE THIS
HEATER.
IF YOU NEED ASSISTANCE OR HEATER INFORMATION SUCH
AS AN INSTRUCTIONS MANUAL, LABEL, ETC. CONTACT THE
MANUFACTURER.
WARNING: FIRE, BURN, INHALATION, AND EXPLOSION
HAZARD. KEEP SOLID COMBUSTIBLES, SUCH AS BUILDING
MATERIALS, PAPER, OR CARDBOARD, A SAFE DISTANCE
AWAY FROM THE HEATER AS RECOMMENDED BY THE
INSTRUCTIONS. NEVER USE THE HEATER IN SPACES
WHICH DO OR MAY CONTAIN VOLATILE OR AIRBORNE
COMBUSTIBLES, OR PRODUCTS SUCH AS GASOLINE,
SOLVENTS, PAINT THINNER, DUST PARTICLES OR
UNKNOWN CHEMICALS.
WARNING: NOT FOR HOME OR RECREATIONAL VEHICLE
USE.
The heater is designed and approved for use as a construction heater in accordance with the Standard
for Gas-Fired Construction Heaters ANSI Z83.7 • CSA 2.14. CHECK WITH YOUR LOCAL FIRE SAFETY
AUTHORITY IF YOU HAVE QUESTIONS ABOUT APPLICATIONS.
local authority can advise you about these.

3
WARNING
Read all safety warnings, instruc-
tions, illustrations and specica-
tions provided with this power tool. Failure to
follow all instructions listed below may result in
Save all
warnings and instructions for future reference.
The term "power tool" in the warnings refers to your
mains-operated (corded) power tool or battery-oper-
ated (cordless) power tool.
WORK AREA SAFETY
•Keep work area clean and well lit. Cluttered or
dark areas invite accidents.
•Do not operate power tools in explosive atmo-
spheres, such as in the presence of ammable
liquids, gases or dust. Power tools create sparks
which may ignite the dust or fumes.
•Keep children and bystanders away while operat-
ing a power tool. Distractions can cause you to lose
control.
ELECTRICAL SAFETY
•Power tool plugs must match the outlet. Never
modify the plug in any way. Do not use any
adapter plugs with earthed (grounded) power
tools.
reduce risk of electric shock.
•Avoid body contact with earthed or grounded
surfaces, such as pipes, radiators, ranges and
refrigerators. There is an increased risk of electric
shock if your body is earthed or grounded.
•Do not expose power tools to rain or wet condi-
tions. Water entering a power tool will increase the
risk of electric shock.
•Do not abuse the cord. Never use the cord for
carrying, pulling or unplugging the power tool.
Keep cord away from heat, oil, sharp edges or
moving parts. Damaged or entangled cords increase
the risk of electric shock.
•When operating a power tool outdoors, use an
extension cord suitable for outdoor use. Use of
a cord suitable for outdoor use reduces the risk of
electric shock.
•If operating a power tool in a damp location is
unavoidable, use a ground fault circuit interrupter
(GFCI) protected supply. Use of a GFCI reduces
the risk of electric shock.
PERSONAL SAFETY
•Stay alert, watch what you are doing and use
common sense when operating a power tool. Do
not use a power tool while you are tired or under
the inuence of drugs, alcohol or medication. A
moment of inattention while operating power tools
•Use personal protective equipment. Always
wear eye protection. Protective equipment such
as a dust mask, non-skid safety shoes, hard hat or
hearing protection used for appropriate conditions
•Prevent unintentional starting. Ensure the switch
is in the o-position before connecting to power
source and/or battery pack, picking up or carrying
the tool.
the switch or energizing power tools that have the
switch on invites accidents.
•Remove any adjusting key or wrench before
turning the power tool on. A wrench or a key left
attached to a rotating part of the power tool may
•Do not overreach. Keep proper footing and
balance at all times. This enables better control
of the power tool in unexpected situations.
•Dress properly. Do not wear loose clothing or
jewelry. Keep your hair and clothing away from
moving parts.
can be caught in moving parts.
•If devices are provided for the connection of
dust extraction and collection facilities, ensure
these are connected and properly used. Use of
dust collection can reduce dust-related hazards.
•Do not let familiarity gained from frequent use
of tools allow you to become complacent and
ignore tool safety principles. A careless action can
POWER TOOL USE AND CARE
•Do not force the power tool. Use the correct power
tool for your application. The correct power tool
it was designed.
•Do not use the power tool if the switch does not
turn it on and o. Any power tool that cannot be
controlled with the switch is dangerous and must be
repaired.
•Disconnect the plug from the power source and/
or remove the battery pack, if detachable, from
the power tool before making any adjustments,
changing accessories, or storing power tools.
Such preventive safety measures reduce the risk of
starting the power tool accidentally.
•Store idle power tools out of the reach of children
and do not allow persons unfamiliar with the
power tool or these instructions to operate the
power tool. Power tools are dangerous in the hands
of untrained users.
•Maintain power tools and accessories. Check
for misalignment or binding of moving parts,
breakage of parts and any other condition that
may aect the power tool’s operation. If damaged,
have the power tool repaired before use. Many
accidents are caused by poorly maintained power
tools.
•Keep cutting tools sharp and clean. Properly
maintained cutting tools with sharp cutting edges
are less likely to bind and are easier to control.
•Use the power tool, accessories and tool bits
etc. in accordance with these instructions,
taking into account the working conditions and
the work to be performed. Use of the power tool
result in a hazardous situation.
•Keep handles and grasping surfaces dry, clean
and free from oil and grease. Slippery handles and
grasping surfaces do not allow for safe handling and
control of the tool in unexpected situations.
BATTERY TOOL USE AND CARE
• Recharge only with the charger specied by the
manufacturer. A charger that is suitable for one type
with another battery pack.
•Use power tools only with specically designated
battery packs. Use of any other battery packs may

4
• Know the signs of CO and CO2 poisoning.
• Headaches, stinging eyes;
• Dizziness, disorientation;
• Proper ventilation air exchange (OSHA 29 CFR
1926.57) to support combustion and maintain
acceptable air quality shall be provided in ac-
cordance with OSHA 29 CFR Part 1926.154,
ANSI A10.10 Safety Requirements for Tempo-
rary and Portable Space Heating Devices and
Equipment used in the Construction Industry or
the Natural Gas and Propane Installation Codes
CSA B149.1.
• Periodically monitor levels of CO, CO2, and
NO2 existing at the construction site –at the
minimum at the start of the shift and after 4
hours.
• Provide ventilation air exchange, either natural
or mechanical, as required to maintain accept
able indoor air quality.
USA 8-Hr time
weighted
average
(OHSA 29 CFR
1926.55 App A)
Canada 8-hr time
weighted average
WorkSafe BC OHS
Guidelines Part 5.1
and Ontario
Workplaces Reg 833
CO 50 ppm 25 ppm
CO5000 ppm 5000 ppm
3 ppm (Reg 833)
USA - Ceiling
Limit (Short
Term Exposure
Limit =
15 minutes)
Canada STEL (15
minutes Reg 833/1
hour WSBC)
WorkSafe BC OHS
Guidelines Part 5.1
and Ontario
Workplaces Reg 833
CO 100 ppm
15000 ppm (WSBC)
30000 ppm (Reg 883)
5 ppm 1.0 ppm (WorkSafeBC)
5.0 ppm (Reg 833)
• Ensure that the ow of combustion and ventila-
tion air exchange cannot become obstructed.
• As the building "tightens up" during the con-
struction phases ventilation may need to be
increased.
•Not for use with ductwork.
ELECTRICAL SAFETY
•Make sure your extension cord is in good con-
dition. When using an extension cord, be sure
to use one heavy enough to carry the current
your product will draw. If in doubt, use the next
heavier gauge. The smaller the gauge number,
the heavier the cord.An undersized cord will cause
a drop in line voltage resulting in loss of power and
overheating.
•To reduce the risk of personal injury and electric
shock, the product should not be played with or
placed where small children can reach it.
•To reduce the risk of electric shock, do not ex-
pose to water or rain.
•Never attempt to power the device with a battery
pack and extension cord at the same time.
•When battery pack is not in use, keep it away
from other metal objects, like paper clips, coins,
keys, nails, screws or other small metal objects,
that can make a connection from one terminal
to another. Shorting the battery terminals together
•Under abusive conditions, liquid may be ejected
from the battery; avoid contact. If contact ac-
cidentally occurs, flush with water. If liquid
contacts eyes, additionally seek medical help.
or burns.
•Do not use a battery pack or tool that is dam-
aged or modied.
•Do not expose a battery pack or tool to re or
excessive temperature. -
perature above 265°F (130°C) may cause explosion.
•Follow all charging instructions and do not charge
the battery pack or tool outside the temperature
range specied in the instructions. Charging
range may damage the battery and increase the risk
SERVICE
• Have your power tool serviced annually by a
qualified repair person using only identical
replacement parts. This will ensure that the safety
of the power tool is maintained.
• Never service damaged battery packs. Service
of battery packs should only be performed by the
manufacturer or authorized service providers.
CARBON MONOXIDE
•
WARNING
Propane heater exhaust contains
high levels of carbon monoxide
(CO), a poisonous gas you cannot see or smell.
If you can smell the propane heater exhaust, you
are breathing CO. But even if you cannot smell the
exhaust, you could be breathing CO.
•The heater is only intended for use in the tem-
porary heating of a building or structure under
construction, alteration, or repair.
•Never use a propane heater inside homes,
garages, crawlspaces, recreational vehicles,
or other partly enclosed areas. Deadly levels of
carbon monoxide can build up in these areas.
•Even when you use a propane heater correctly,
CO may leak into the home. ALWAYS use a
battery-powered or battery-backup CO alarm in
the home.
•If you start to feel sick, dizzy, weak, or experience
a headache after the propane heater has been
running, move to fresh air RIGHT AWAY. See a
doctor. You could have carbon monoxide poisoning.
•Do not sleep while propane heater is operating.
•Not for home or recreation vehicle use.
•
WARNING
Air Quality Hazard:
•Do not use this heater for heating human living
quarters.
•
environment can result in exposure to levels of
CO, CO2, and NO2, considered to be hazardous
to health and potentially life threatening.
• Do not use in unventilated areas.

5
WHEN USING PROPANE
• DANGER: If you smell propane gas, shut o
propane to the heater at the propane cylinder.
If odor continues, keep away from the heater and
immediately call your propane gas supplier or your
•Fire, burn, inhalation, and explosion hazard. Do
not place over compustible materials such as
building materials, wood, paper, or cardboard
or materials subject to disintegration due to
expansion, such as concrete.
•Use the heater only with propane and the regula-
tor/valve assembly supplied.
•The hose assembly shall be protected from
trac, building materials, and contact with hot
surfaces both during use and while in storage.
•Check for leaks prior to heater operation. Do
this even if this heater was assembled at the store.
•Do not operate the heater if there is a gas leak
present.
•Never use a ame to check for gas leaks.
• Inspect the hose for damage before each use. If
it is evident there is excessive abrasion or wear,
or the hose is cut, it must be replaced prior to
the product being put into operation. The replace-
manufacturer.
•Propane gas is not natural gas. Do not try to
convert this heater to natural gas as it will void
the warranty and is extremely dangerous.
•Place dust cap on cylinder valve outlet whenever
the cylinder is not in use. Only install the type of
dust cap on the cylinder valve outlet that is provided
with the cylinder valve. Other types of caps or plugs
may result in leakage of propane.
•Do not store propane cylinders, gasoline, or
other ammable liquids in the vicinity of the
heater.
•Shut down the heater and allow to cool for ve
minutes before changing the propane cylinder.
•Do not smoke when attaching or removing the
propane cylinder.
• This propane product must be installed in accor-
dance with the latest local codes. In the absence
of local codes, use the:
• United States:
- National Fuel Gas Code, ANSI Z223.1/NFPA
54
• Canada:
- Natural Gas and Propane Installation Code,
CSA B149.1
- Propane Storage and Handling Code, CSA
B149.2.
• Always turn o gas at the propane cylinder
(liquid propane also called liquid petroleum gas)
when the product is not in use. Disconnect the
cylinder before storage.
•Before storing, allow the product to cool for 30
minutes and remove propane cylinder from the
unit. Do not store a propane cylinder attached
to or near the product. If not followed exactly, a
• This heater must be located on stable and level
surface and located away from combustible
surfaces by no less than 7' from the front, 4' from
the sides, and 6' from the top of the heater.
•Keep heater 10' from propane gas containers. Do
not aim heater at propane gas containers within
20'.
•Keep heater 10' from canvas, tarps, or similar
coverings. Secure coverings to prevent apping
or movement that could impact the heater.
•The heater has been shipped from the factory
set up for operation on propane gas.
FUEL GAS ODOR - FUEL LEAKS
•
WARNING
LP gas and natural gas have man-
made odorants added specically
for detection of fuel gas leaks. If a gas leak oc-
curs you should be able to smell the fuel gas.
Since propane (LP) is heavier than air you
should smell for the gas odor low to the oor.
ANY GAS ODOR IS YOUR SIGNAL TO TAKE IM-
MEDIATE ACTION!
•Do not take any action that could ignite the fuel
gas. Do not operate any electrical switches. Do not
disconnect any power supply or extension cords. Do
not use your telephone.
•Get everyone out of the building and away from
the area immediately.
•Close all propane (LP) gas tank or cylinder fuel
supply valves, or the main fuel supply valve located
at the meter if you use natural gas.
•Propane (LP) gas is heavier than air and may
settle in low areas. When you have reason to
suspect a propane leak, keep out of all low areas.
•Use your neighbor’s phone and call your fuel
gas supplier and your re department. Do not
re-enter the building or area.
•Stay out of the building and away from the area
until declared safe by the reghters and your
fuel gas supplier.
•FINALLY, let the fuel gas service person and the
reghters check for escaped gas. Have them air
out the building and area before you return. Properly
trained service people must repair any leaks, check
for further leakages, and then relight the appliance
for you.
ODOR FADING - NO ODOR
DETECTED
•Some people cannot smell well. Some people
cannot smell the odor of the man-made chemical
added to propane (LP) or natural gas. You must
determine if you can smell the odorant in these
fuel gases.
•Learn to recognize the odor of propane (LP) gas
and natural gas. Local propane (LP) gas dealers
will be more than happy to give you a scratch and
fuel gas odor.
•Smoking can decrease your ability to smell.
Being around an odor for a period of time can
aect your sensitivity to that particular odor.
Odors present in animal connement buildings
can mask fuel gas odor.
•The odorant in propane (LP) gas and natural gas
is colorless and the intensity of its odor can fade
under some circumstances.
•If there is an underground leak, the movement
of gas through the soil can lter the odorant.
•Propane (LP) gas odor may dier in intensity
at dierent levels. Since Propane (LP) gas is
heavier than air, there may be more odor at
lower levels.

6
•Always be sensitive to the slightest gas odor. If
you continue to detect any gas odor, no matter how
small, treat it as a serious leak. Immediately go into
action as discussed previously.
•
WARNING
ATTENTION - Critical Points to
Remember!
•Propane (LP) gas has a distinctive odor. Learn to
recognize these odors. Reference Fuel Gas Odor
and Odor Fading sections above.
•Even If you are not property trained in the service
and repair of the heater, ALWAYS be consciously
aware of the odors of propane (LP) gas and
natural gas.
•If you have not been properly trained in repair
and service of propane (LP) gas then do not at-
tempt to light heater, perform service or repairs,
or make any adjustments to the heater on the
propane (LP) gas fuel system.
•A periodic sni test around the heater or at the
heater’s joints; i.e. hose, connections, etc., is
a good safety practice under any conditions. If
you smell even a small amount of gas, CONTACT
YOUR FUEL GAS SUPPLIER IMMEDIATELY. DO
NOT WAIT!
PROPANE CYLINDERS
• Never ll the propane cylinder beyond 80 per-
cent full.
is a hazard due to possible gas release from the
•Only use a propane cylinder that includes a col-
lar to protect the cylinder valve.
•If a leak is detected at any time, get away from
the propane cylinder and call the re department.
•Do not use the product until leak-tested.
• Propane cylinders must be stored outdoors out
of reach of children and must not be stored in a
building, garage, or any other closed in area.
• Propane cylinder must be located outdoors dur-
ing operation except during construction or ren-
ovation of buildings not occupied by the public.
• Do not operate in altitudes above 2000'.
• Always use common sense and be cautious when
using tools. It is not possible to anticipate every
situation that could result in a dangerous outcome.
Do not use this tool if you do not understand these
operating instructions or you feel the work is beyond
your capability; contact Milwaukee Tool or a trained
professional for additional information or training.
•Maintain labels and nameplates. These carry
important information. If unreadable or missing,
contact a MILWAUKEE service facility for a free
replacement.
SPECIFICATIONS
Cat. No.....................................0801-20, 0801-20C
Battery Type .................................................M18™
Charger Type................................................M18™
Recommended Ambient
Operating Temperature...................... 0°F to 80°F
Volts................................................18 DC / 120 AC
Amps ..................................................1.7 A / 0.25 A
Hz ........................................................................60
Output Rating .......................... 30,000-70,000 BTU
Regulator Output ...........................................10 psi
Min./Max. Supply Pressure............. 20 psi - 200 psi
Fuel Source ....................................... Propane (LP)
FUNCTIONAL DESCRIPTION
3
7
8
4
11
2
5
6
1
9
10
12
1. ON/OFF switch
2. Handle
3. Heat outlet
4. Ignition button
5. Temperature control
knob
6. Hose wrap cleat
7. Fan
8. Battery bay
9. Power cord inlet
10. Propane (LP) inlet
11. Hang tag
12. Propane (LP) hose
and regulator

7
SYMBOLOGY
Volts
Direct Current
Alternating Current
HHertz
Safety Alert Symbol
Read Operator's Manual
Do not expose to rain or use in damp
locations
Risk of asphyxiation. Use this product
only in a well-ventilated area.
combustibles.
Hot Surface and Exhaust
GROUNDING
WARNING
Improperly connecting the ground-
ing wire can result in the risk of
electric shock. Check with a qualied electrician
if you are in doubt as to whether the outlet is
properly grounded. Do not modify the plug pro-
vided with the tool. Never remove the grounding
prong from the plug. Do not use the tool if the
cord or plug is damaged. If damaged, have it
repaired by a MILWAUKEE service facility before
use. If the plug will not t the outlet, have a
proper outlet installed by a qualied electrician.
Double Insulated Tools (Two-Prong Plugs)
Tools marked “Double Insulated” do not require
grounding. They have a special double insulation
complies with the applicable standards
Fig. B Fig. C
of Underwriters Laboratories, Inc., the
Canadian Standard Association and
the National Electrical Code. Double
Insulated tools may be used in either
of the 120 volt outlets shown in Figures
B and C.
EXTENSION CORDS
Grounded tools require a three wire extension
cord. Double insulated tools can use either a two
or three wire extension cord. As the distance from
the supply outlet increases, you must use a heavier
gauge extension cord. Using extension cords with
inadequately sized wire causes a serious drop in
voltage, resulting in loss of power and possible tool
damage. Refer to the table shown to determine the
required minimum wire size.
The smaller the gauge number of the wire, the greater
the capacity of the cord. For example, a 14 gauge
cord can carry a higher current than a 16 gauge cord.
When using more than one extension cord to make
up the total length, be sure each cord contains at
least the minimum wire size required. If you are using
one extension cord for more than one tool, add the
nameplate amperes and use the sum to determine
the required minimum wire size.
Guidelines for Using Extension Cords
•If you are using an extension cord outdoors, be sure
indicate that it is acceptable for outdoor use.
•Be sure your extension cord is properly wired and in
good electrical condition. Always replace a damaged
person before using it.
excessive heat and damp or wet areas.
Recommended Minimum Wire Gauge
For Extension Cords*
Nameplate Amps
Extension Cord Length
25' 50' 75' 100' 150'
0 - 2.0
2.1 - 3.4
3.5 - 5.0
5.1 - 7.0
7.1 - 12.0
12.1 - 16.0
16.1 - 20.0
18
18
18
18
16
14
12
18
18
18
16
14
12
10
18
18
16
14
12
10
--
18
16
14
12
10
--
--
16
14
12
12
--
--
--
of the rated amperes.
READ AND SAVE ALL INSTRUCTIONS
FOR FUTURE USE.
ASSEMBLY
WARNING
Only use accessories specically
recommended for this product.
Others may be hazardous.
Attaching the Handle
Attach the handle to the unit by screwing in the 4
screws with a Phillips screwdriver.
NOTE:
side closest to the ON/OFF switch of the unit.

8
SET UP
WARNING
The heater is only intended for use
in the temporary heating of a build-
ing or structure under construction, alteration,
or repair.
Never use propane heater inside homes, garages,
crawlspaces, recreational vehicles, or other
partly enclosed areas. Deadly levels of carbon
monoxide can build up in these areas.
Placement
WARNING
Risk of re. Never position heater
at a downward angle or towards
combustible materials. This heater must be lo-
cated away from combustible surfaces by no less
than 7' from the front of the heater, 4' from the
sides of the heater, and 6' from the top of the
heater. Heater must be placed on a level surface
and the ow of combustion and ventilation air
not be obstructed.
Position the heater properly before use. Locate
heater on stable and level surface if heater is run-
ning and at least 10' (3 m) from and not directed
toward propane containers within 20'.
1. Provide adequate ventilation.
2. Maintain minimum clearance from combustibles:
Front 7' (2 m), Sides 4' (1.2 m), Top 6' (1.8 m),
Tank 10' (3 m).
3. Make sure the power source is disconnected from
the heater.
4.
(LP) hose to the heater inlet. Tighten securely.
5.
of the hose to the propane (LP) tank valve. Check
that the connection is not cross-threaded, and
tighten securely by hand.
6. Insert the battery pack or connect the power cord.
Using Propane (LP)
unexpectedly when mixed with air. The propane
(LP) cylinder used with this heater must meet the
following requirements:
1. Constructed and marked in accordance with the
Department of Transporation (D.O.T.) or the
National Standard of Canada, CAN/CSA-B339,
Cylinders, Spheres, and Tubes for Transportation
of Dangerous Goods; and Commission.
2. Measurements: 12" diameter x 18" tall with 20 lb.
maximum capacity.
3. Cylinder valve must have:
• Cylinder connection device (Type 1) compatible
with the connector for the heater
• Safety relief valve
•
(OPD). This OPD safety feature is
identified by a unique triangular
handwheel. Use only propane (LP) cylinders
with this type of valve.
4. Arranged for vapor withdrawal and include collar to
protect propane (LP) cylinder valve. Always keep
propane (LP) cylinder in upright position during
use, transport, or storage.
Testing the Propane (LP) Cylinder
1. Make sure the propane (LP) cylinder is discon-
nected from the propane (LP) hose and regulator.
2. Usingacleanpaint brush
and a 50/50 mixture of
mild soap and water,
brush soapy solution
over areas indicated by
arrows in the figure
shown.
3. “Growing” bubbles indi-
cate a leak. Do not use
or move the propane
(LP) cylinder. Contact a
department!
4. If you see, smell, or
hear the hiss of escap-
ing gas from the propane (LP) cylinder:
• Move away from propane (LP) cylinder
• Do not attempt to correct the problem yourself
5. If no leaks are present, you may proceed to install
and connect the propane (LP) cylinder.
Connecting the Propane (LP) Cylinder
WARNING
To avoid serious personal injury,
always check for gas leaks any
time the propane cylinder is connected.
Inspect the hose for damage or leaks before each
use. Ensure the propane (LP) hose is securely
tightened before each use. If the hose is dam-
aged, exposing the inner mesh, replace immedi-
ately. The replacement hose assembly shall be
that specied by the manufacturer.
To connect:
1.
(not provided), screw the
open end of the propane (LP)
hose to the propane (LP)
inlet on the heater. Tighten
securely.
NOTE: Retain the rubber
cap and reinstall to prevent
damage to the propane (LP)
inlet and when storing the heater.
Handwheel
Cylinder Valve
Nipple
Regulator
Cap
Coupling nut
2. Make sure the handwheel on the propane (LP)
cap from the cylinder valve.
3.
the cylinder valve.
NOTE: Nipple must be centered in the cylinder
valve.

9
4. Holding coupling nut and regulator as shown,
turn coupling nut counterclockwise and tighten by
hand, taking care not to cross-thread the connec-
tion. Do not use tools.
NOTE: The regulator threads are left handed. The
regulator will seal in the cylinder valve resulting
in some resistance. An additional one-half to
three-quarters turn is required to complete the
connection. If you cannot complete the connec-
tion, disconnect and repeat the above two steps.
If you still cannot complete the connection, DO
NOT use this regulator!
5. Inspect valve connection port and regulator. Look
for any damage or debris. Remove any debris.
Inspect hose for damage. Never attempt to use
damaged or plugged equipment. See your local
propane dealer for repairs.
To disconnect:
1. Follow the steps to STOP the heater.
2. Allow to cool 5 minutes.
3.
clockwise to remove.
4. Place cap on cylinder valve outlet whenever the
cylinder is not in use.
NOTE: Only install on the cylinder valve outlet the
type of cap that is provided with the cylinder valve.
Other types of caps or plugs may result in leakage
of propane (LP).
Testing Valves, Hose, and Regulator
for Leaks
DANGER
DO NOT smoke or use an open
ame during leak test. If a leak is
present, the gas could ignite and result in serious
personal injury.
WARNING
To avoid serious personal injury,
always check for gas leaks any
time the propane cylinder is connected.
1.
2. Make sure the regulator is properly connected to
the propane (LP) cylinder.
3. Turn handwheel counterclockwise to open the
cylinder valve. WARNING! If you hear a rushing
-
nection. Correct the problem before proceeding.
4. Using a clean paint brush and a 50/50 mixture of
mild soap and water, brush soapy solution over
along the hose, and at the propane (LP) cylinder.
5. “Growing” bubbles indicate a leak. Close the cyl-
inder valve then retighten all connections.
WARNING! If a leak does not stop, do not use the
heater.
6. If you are not using the propane (LP) heater im-
mediately after the leak test, close the cylinder
valve by turning the valve clockwise.
OPERATION
Installing/Removing Power Cord
1. Insert the female end of
the power cord into the
product as shown.
2. Connect the male end
of the cord to the power
source.
3. Make sure the cord
is secured before
beginning operation.
WARNING
Recharge only with the charger
specied for the battery. For spe-
cic charging instructions, read the operator’s
manual supplied with your charger and battery.
Removing/Inserting the Battery
To remove the battery, push in the release buttons
and pull the battery pack away from the product.
WARNING
Always remove the battery pack
any time the product is not in use.
To insert the battery, slide the pack into the body of
the product. Make sure it latches securely into place.
Starting, Stopping the Heater
WARNING
To avoid serious personal injury,
always check for gas leaks any
time the propane cylinder is connected.
Inspect the hose for damage or leaks before each
use. Ensure the propane (LP) hose is securely
tightened before each use. If the hose is dam-
aged, exposing the inner mesh, replace immedi-
ately. The replacement hose assembly shall be
that specied by the manufacturer.
The heater should be inspected before each use,
To start:
1. Insert the power cord or battery.
2. Open the propane (LP) valve.
3. Press the switch to ON (I). Turn the temperature
control knob to HIGH.
4. The fan will go on. Wait for an audible click from
the ignitor before continuing. The click should
happen within 2-3 seconds of the fan turning on.
5. Press and hold the ignition button. Once the heater
is ignited, continue to hold for 15 seconds.
6. Use the temperature control knob to control the
temperature.
To stop:
1. Close the propane (LP) cylinder valve securely.
2. Press the switch to OFF (O).
3. Wait 5 minutes for all gases to clear and heater
to cool down. Remove the regulator and propane
(LP) hose from the propane (LP) cylinder and
replace the rubber cap on the cylinder.
4. Remove the power source from the unit.
To restart:
1. Follow the steps to STOP the heater.
2. Wait 5 minutes for all gases to clear and heater
to cool down.
3. Repeat the steps to START the heater.
Temperature Control
1. To increase the temperature, turn the temperature
control knob clockwise.
2. For a lower temperature, turn the temperature
control knob counterclockwise.

10
Auto Shut O
of the following conditions:
Flame out - If the propane (LP) tank is empty or the
Over temperature - If the temperature inside the
Low voltage - Such as a power outage, low battery,
or if the battery is fully discharged.
Slow fan or blocked intake --
comes blocked or the fan moves too slowly, the unit
Troubleshooting
Problem Possible Cause Possible Correction
Heater
will not
light
Heater needs to
cool down.
Propane (LP)
valve might be
closed.
Propane (LP)
tank might be
empty.
Battery might be
depleted.
Power source
might not be
working or
connected.
Wait 5 minutes to cool
down and try starting
again.
Check the propane
(LP) valve and make
sure it's open. Turn
the handwheel
counterclockwise to
open the valve.
Replace the propane
(LP) tank.
Check battery life.
If low or depleted,
recharge battery or
use another battery
pack.
Check the power
source connection.
Replace the power
source if not working.
Heater
will not
stay lit
Propane (LP)
tank might be
empty.
Thermocouple is
not hot enough.
Replace the propane
(LP) tank.
Hold the valve button
down longer while
lighting. 10 to 20
seconds.
Heater
is still
clicking
when lit
Once the heater
is ignited, it is
designed to
click for up to 15
seconds.
No corrective action is
needed.
Smelling
gas Leak at a
connection or
hose.
Stop use. For more
information, see the
"Testing Valves, Hose,
and Regulator for
Leaks" section of this
manual.
Gradual
heat
reduction
Propane (LP)
tank is running
low.
Propane (LP)
tank is icing
over.
Replace the propane
(LP) tank.
N
ormal propane (LP)
tank operation: Wait
15 minutes before
relighting. Do not
direct heater towards
propane (LP)
containers within 20
feet.
For any technical, service/repair, or warranty questions
please contact 1-800-SAWDUST (1.800.729.3878) or visit
www.milwaukeetool.com.
WIRING DIAGRAM
MAINTENANCE
WARNING
To reduce the risk of injury, always
unplug the charger and remove the
battery pack from the charger or tool before
performing any maintenance. Never disassemble
the tool, battery pack or charger. Contact a
MILWAUKEE service facility for ALL repairs.
Maintaining Tool
The heater should be inspected before each use,
Inspect hose for damage. Never attempt to use dam-
aged or plugged equipment. See your local propane
(LP) dealer for repairs.
Keep your tool, battery pack and charger in good
repair by adopting a regular maintenance program.
Inspect your tool for issues such as undue noise,
misalignment or binding of moving parts, breakage
tool operation.
WARNING
To reduce the risk of personal in-
jury and damage, never immerse
your tool, battery pack or charger in liquid or
allow a liquid to ow inside them.
Cleaning
Clean dust and debris from any vents. Keep tool
clean, dry and free of oil or grease. Use only mild
soap and a damp cloth to clean, since certain clean-
ing agents and solvents are harmful to plastics and
other insulated parts. Some of these include gasoline,
turpentine, lacquer thinner, paint thinner, chlorinated
cleaning solvents, ammonia and household deter-
combustible solvents around tools.
Storage
WARNING
Before storing, allow the product
to cool for 30 minutes and remove
propane cylinder from the unit. Do not store a
propane cylinder attached to or near the product.
If not followed exactly, a re causing death or
serious injury may occur.
Always remove the propane (LP) cylinder, propane
(LP) hose and regulator, battery pack, and/or power
cord from the unit when storing. Reinstall the rub-
ber protector cap to the propane (LP) inlet to avoid
damage and prevent debris or insects from entering
the gas line. Always store the unit indoors. Propane
(LP) cylinders must be stored outdoors out of reach of
children and must not be stored in a building, garage,
or any other closed in area.
Repairs
For repairs, return the tool, battery pack and charger
to the nearest authorized service center.

11
ACCESSORIES
WARNING
Use only recommended accesso-
ries. Others may be hazardous.
For a complete listing of accessories, go online to
www.milwaukeetool.com or contact a distributor.
FCC
Pursuant to part 15.21 of the FCC Rules, do not
authority to operate the product. This device complies
with part 15 of the FCC Rules and ISED-Canada's
license exempt R
to the following two conditions: 1) This device may
not cause harmful interference, and 2) This device
must accept any interference received, including
interference that may cause undesired operation.
SERVICE - UNITED STATES
1-800-SAWDUST (1.800.729.3878)
Monday-Friday, 7:00 AM - 6:30 PM CST
or visit www.milwaukeetool.com
Contact Corporate After Sales Service Technical
Support with technical, service/repair, or warranty
questions.
Email: [email protected]
Become a Heavy Duty Club Member at
www.milwaukeetool.com to receive important
SERVICE - CANADA
Milwaukee Tool (Canada) Ltd
1.877.948.2360
Monday-Friday, 7:00 AM - 4:30 PM CST
or visit www.milwaukeetool.ca
LIMITED WARRANTY
USA & CANADA
This MILWAUKEE power tool* is warranted to the original purchaser
from an authorized MILWAUKEE distributor only to be free from
MILWAUKEE will repair or replace any part on this power tool which,
after examination, is determined by MILWAUKEE to be defective in
material or workmanship for a period of one (1) year after the date
of purchase unless otherwise noted. Return of the power tool to a
MILWAUKEE factory Service Center location or MILWAUKEE Autho-
rized Service Station, freight prepaid and insured, is required.A copy of
the proof of purchase should be included with the return product. This
warranty does not apply to damage that MILWAUKEE determines to
be from repairs made or attempted by anyone other than MILWAUKEE
authorized personnel, misuse, alterations, abuse, normal wear and
tear, lack of maintenance, or accidents.
Normal Wear: Many power tools need periodic parts replacement and
service to achieve best performance. This warranty does not cover
repair when normal use has exhausted the life of a part including,
but not limited to, chucks, brushes, cords, saw shoes, blade clamps,
o-rings, seals, bumpers, driver blades, pistons, strikers, lifters, and
bumper cover washers.
*This warranty does not cover battery packs or all power tools. Refer
to the separate and distinct warranties available for those products.
The warranty period for the LED in the LED Work Light (49-24-0171)
and the LED Upgrade Bulb (49-81-0090) is the lifetime of the product
Upgrade Bulb fails, the part will be replaced free of charge.
Warranty Registration is not necessary to obtain the applicable war-
ranty on a MILWAUKEE power tool product. The manufacturing date
of the product will be used to determine the warranty period if no proof
of purchase is provided at the time warranty service is requested.
ACCEPTANCE OF THE EXCLUSIVE REPAIRAND REPLACEMENT
REMEDIES DESCRIBED HEREIN IS A CONDITION OF THE CON-
TRACT FOR THE PURCHASE OF EVERY MILWAUKEE PRODUCT.
IF YOU DO NOT AGREE TO THIS CONDITION, YOU SHOULD NOT
PURCHASE THE PRODUCT. IN NO EVENT SHALL MILWAUKEE BE
LIABLE FOR ANY INCIDENTAL, SPECIAL, CONSEQUENTIAL, OR
PUNITIVE DAMAGES, OR FOR ANY COSTS, ATTORNEY FEES,
EXPENSES, LOSSES OR DELAYS ALLEGED TO BE AS A CON-
SEQUENCE OF ANY DAMAGE TO, FAILURE OF, OR DEFECT IN
ANY PRODUCT INCLUDING, BUT NOT LIMITED TO, ANY CLAIMS
FOR LOSS OF PROFITS. SOME STATES DO NOTALLOW THE EX-
CLUSION OR LIMITATION OF INCIDENTAL OR CONSEQUENTIAL
DAMAGES, SO THEABOVE LIMITATION OR EXCLUSION MAY NOT
APPLY TO YOU. THIS WARRANTY IS EXCLUSIVE AND IN LIEU
OF ALL OTHER EXPRESS WARRANTIES, WRITTEN OR ORAL.
TO THE EXTENT PERMITTED BY LAW, MILWAUKEE DISCLAIMS
ANY IMPLIED WARRANTIES, INCLUDING WITHOUT LIMITATION
ANY IMPLIED WARRANTY OF MERCHANTABILITY OR FITNESS
FOR A PARTICULAR USE OR PURPOSE; TO THE EXTENT SUCH
DISCLAIMER IS NOT PERMITTED BY LAW, SUCH IMPLIED WAR-
RANTIES ARE LIMITED TO THE DURATION OF THE APPLICABLE
EXPRESS WARRANTY AS DESCRIBED ABOVE. SOME STATES
DO NOT ALLOW LIMITATIONS ON HOW LONG AN IMPLIED WAR-
RANTY LASTS, SO THE ABOVE LIMITATION MAY NOT APPLY TO
YOU, THIS WARRANTY GIVES YOU SPECIFIC LEGAL RIGHTS,
AND YOU MAY ALSO HAVE OTHER RIGHTS WHICH VARY FROM
STATE TO STATE.
This warranty applies to product sold in the U.S.A. and Canada only.
Please consult the ‘Service Center Search’ in the Parts & Service sec-
tion of MILWAUKEE’s website www.milwaukeetool.com or call 1.800.
SAWDUST (1.800.729.3878) to locate your nearest service facility
for warranty and non-warranty service on a MILWAUKEE power tool.

12
RÈGLES DE SÉCURITÉ GÉNÉRALES
RELATIVES AUX OUTILS ÉLECTRIQUES
AVERTISSEMENT DE RISQUES GÉNÉRAUX :
LE NON-RESPECT DES PRÉCAUTIONS ET DES DIRECTIVES
FOURNIES AVEC CET APPAREIL DE CHAUFFAGE PEUT
CAUSER LA MORT, DES BLESSURES GRAVES ET DES DOM-
MAGES OU PERTES MATÉRIELS À CAUSE DE RISQUES
D’INCENDIE, D’EXPLOSION, DE BRÛLURE, D’ASPHYXIE,
D’EMPOISONNEMENT AU MONOXYDE DE CARBONE OU DE
DÉCHARGE ÉLECTRIQUE.
SEULEMENT LES PERSONNES QUI PEUVENT COMPRENDRE
ET SUIVRE LES INSTRUCTIONS DEVRAIENT UTILISER OU
UTILISER CE CHAUFFAGE.
SI VOUS AVEZ BESOIN D’INFORMATIONS D’ASSISTANCE
OU DE CHAUFFAGE COMME MANUEL D’INSTRUCTIONS,
ÉTIQUETTE, ETC. CONTACTER LE FABRICANT.
AVERTISSEMENT: RISQUES D’INCENDIE, DE BRÛLURE,
D’INHALATION ET D’EXPLOSION. GARDEZ LES MATÉRIAUX
COMBUSTIBLES TELS QUE LES MATÉRIAUX DE CON-
STRUCTION, LE PAPIER OU LE CARTON À UNE DISTANCE
SÉCURITAIRE DE L’APPAREIL DE CHAUFFAGE TEL QU’ON LE
RECOMMANDE DANS LES DIRECTIVES. N’UTILISEZ JAMAIS
L’APPAREIL DE CHAUFFAGE DANS DES ESPACES QUI CON-
TIENNENT OU PEUVENT CONTENIR DES COMBUSTIBLES
VOLATILS OU AÉROPORTÉS, OU DES PRODUITS TELS QUE
DU GAZ, DES SOLVANTS, DU DILUANT, DES PARTICULES DE
POUSSIÈRE OU DES PRODUITS CHIMIQUES INCONNUS.
AVERTISSEMENT: N’UTILISEZ PAS L’APPAREIL DE
CHAUFFAGE DANS UNE MAISON OU DANS UN VÉHICULE
RÉCRÉATIF.
DE SÉCURITÉ INCENDIE LOCALE AU CAS OÙ VOUS AVIEZ DES QUESTIONS CONCERNANT LES
APPLICATIONS.

13
AVERTISSEMENT
Lire toutes les consignes
de sécurité, consignes,
illustrations et spécications fournies avec cet
outil électrique. Ne pas suivre l’ensemble des rè-
un incendie ou des blessures graves. Conserver
les règles et les instructions à des ns de ré-
férence ultérieure. -
SÉCURITÉ DU LIEU DE TRAVAIL
• Veillez à ce que l’aire de travail soit propre et
bien éclairée.
favorisent les accidents.
• Ne pas utiliser d’outils électriques dans des at-
mosphères explosives, par exemple en présence
de liquides, gaz ou poussières inammables. Les
• S’assurer que les enfants et les curieux se trou-
vent à une bonne distance au moment d’utiliser
un outil électrique. Les distractions peuvent causer
une perte de contrôle.
SÉCURITÉ ÉLECTRIQUE
• Les ches des outils électriques doivent cor-
respondre à la prise secteur utilisée. Ne jamais
modier la che, de quelque façon que ce soit.
Ne jamais utiliser d'adaptateurs de che avec
des outils mis à la terre.
•Éviter tout contact avec des surfaces mises à
la terre comme des tuyaux, des radiateurs, des
cuisinières et des réfrigérateurs. Le risque de
• Ne pas exposer les outils électriques à l'eau ou
l'humidité.
•Ne pas maltraiter le cordon d'alimentation.
Ne jamais utiliser le cordon d’alimentation
pour transporter l’outil électrique et ne jamais
débrancher ce dernier en tirant sur le cordon.
Garder le cordon à l'écart de la chaleur, de
l'huile, des objets tranchants et des pièces en
mouvement.
• Pour les travaux à l’extérieur, utiliser un cordon
spécialement conçu à cet eet. Utiliser un cordon
• Si l’utilisation d’un outil électrique est inévitable
dans un endroit humide, utiliser une source
d’alimentation munie d’un disjoncteur de fuite
de terre.
SÉCURITÉ INDIVIDUELLE
•Rester attentif, prêter attention au travail et faire
preuve de bon sens lors de l'utilisation de tout
outil électrique. Ne pas utiliser cet appareil en
cas de fatigue ou sous l’inuence de l’alcool,
de drogues ou de médicaments. Un moment
peut entraîner des blessures graves.
• Porter l’équipement de protection individuel
requis. Toujours porter une protection oculaire.
Selon les conditions, porter aussi un masque anti-
• Empêcher les démarrages accidentels. S’assurer
que la gâchette est en position d’arrêt avant de
brancher l’outil à une source de courant, d’insérer
la batterie, de le ramasser ou de le transporter.
le doigt sur la gâchette ou de mettre sous tension
de marche favorise les accidents.
• Retirer les clés de réglage avant de mettre l’outil
en marche.
de l’outil peut causer des blessures.
• Ne pas travailler hors de portée. Toujours se tenir
bien campé et en équilibre.
• Porter une tenue appropriée. Ne porter ni vête-
ments amples, ni bijoux. Garder les cheveux et
les vêtements à l’écart des pièces en mouvement.
mouvement.
• Si les outils sont équipés de dispositifs de
dépoussiérage, s'assurer qu'ils sont connectés
et correctement utilisés. L’utilisation d’un collecteur
la poussière.
• Ne pas laisser la familiarité avec l'outil acquise
par une utilisation fréquente vous rendre susant
et vous amener à ignorer les règles de sécurité.
grave en une fraction de seconde.
UTILISATION ET ENTRETIEN
DE L’OUTIL ÉLECTRIQUE
• Ne pas forcer l'outil électrique. Utiliser l'outil
électrique approprié pour l'application. Un outil
• Ne pas utiliser l'outil électrique si le commutateur
ne permet pas de le mettre en marche ou de
l'arrêter.
• Débrancher l'outil et/ou retirer le bloc-piles, si
possible, avant d’eectuer des réglages, de
changer d’accessoire ou de remiser l’outil. Ces
• Entreposer l’outil électrique hors de la portée des
enfants et interdire à quiconque de l’utiliser si la
personne ne connaît pas bien le produit ou les
instructions.
dans les mains d’utilisateurs novices.
• Entretenir les outils électriques et les acces-
soires. Vérier qu'aucune pièce mobile n'est mal
alignée ou bloquée, qu'aucune pièce n'est brisée
et s'assurer qu'aucun autre problème risque
d'aecter le bon fonctionnement de l'outil. En
cas de dommages, faire réparer l’outil avant de
l’utiliser.
produits mal entretenus.

14
• Garder les outils bien aûtés et propres. Des
outils correctement entretenus et dont les tranchants
• Utiliser l’outil électrique, les accessoires, les
embouts etc. conformément à ces instructions
en tenant compte des conditions de travail et de
la tâche à eectuer.
pour des applications pour lesquelles il n'est pas
• Garder les poignées et les surfaces de préhen-
sion sèches, propres et exemptes d’huile ou de
graisse.
glissantes ne permettent pas de manipuler et de
UTILISATION ET ENTRETIEN
DE LA BATTERIE
• Pour recharger le bloc-piles, utiliser seulement
le chargeur spécié par le fabricant. Un chargeur
avec un autre type de bloc-piles.
• N’utiliser l’outil électrique qu’avec une batterie
recommandée. L’utilisation de tout autre bloc-piles
• Lorsque le bloc-piles n’est pas utilisé, le tenir
éloigné des objets en métal tels que les trom-
bones, les pièces de monnaie, les clés, les clous,
les vis ou d’autres petits objets métalliques qui
pourraient connecter les bornes. Le court-circuitage
ou un incendie.
• Éviter tout contact avec le liquide pouvant être
éjecté de la pile en cas de manutention abusive. En
cas de contact accidentel, rincer immédiatement
les parties atteintes avec de l’eau. Si le liquide
entre en contact avec les yeux, consulter un
médecin.
• N’utiliser aucun bloc-piles ni aucun outil ayant été
endommagé ou modié.
explosion ou le risque de blessures.
• Ne pas exposer le bloc-piles ou l’outil aux ammes
ou à une température excessive. Une exposition
130°C (265°F) peut causer une explosion.
•Suivre toutes les instructions de charge et ne
pas charger le bloc-piles ou l’outil en dehors de
la plage de température spéciée. Une charge
le risque d’incendie.
ENTRETIEN
• Les réparations de l’outil électrique doivent
être conées à un technicien qualié, utilisant
exclusivement des pièces identiques à celles
d’origine.
• Ne jamais eectuer la réparation d’un bloc-piles
endommagé.
MONOXYDE DE CARBONE
•
AVERTISSEMENT
L’échappement de la
chauerette au propane
contient de hauts niveaux de monoxyde de
carbone (CO), un gaz toxique que vous ne pou-
vez ni voire ni sentir. Si vous pouvez sentir le gaz
-
-
sible que vous soyez en train d’aspirer du CO.
• La chauerette n’a été conçu que pour une utili-
sation destinée à chauer temporairement un bâ-
timent, un édice ou une structure en construc-
tion, en cours de modication ou de réparation.
• Ne jamais utiliser la chauerette au propane à
l’intérieur des maisons, des garages, des vides
sanitaires, des véhicules récréatifs ou d’autres
espaces partiellement fermés. Il est possible que
des niveaux dangereux du monoxyde de car-
bone s’accumulent à l’intérieur de ces espaces.
• Bien que vous utilisiez une chaufferette au
propane correctement, le CO pourra pénétrer la
maison. TOUJOURS utiliser une alarme de CO à
batteries ou à batterie de secours chez vous.
• Si vous commencez à se sentir mal, étourdi,
faible ou à avoir mal à la tête après avoir démar-
rée la chauerette au propane, quittez l’endroit
où vous vous trouvez IMMÉDIATEMENT pour
aspirer de l’air frais.
est probable que vous aviez de l’intoxication au
monoxyde de carbone.
• Ne pas s’endormir pendant que la chauerette
au propane est allumée.
• Ce produit n’a été conçu pour être utilisé ni à la
maison, ni dans les véhicules récréatifs.
•
AVERTISSEMENT
Danger de la qualité d’air:
•
•-
• Reconnaissez les signes de l’intoxication au CO
et au CO2.
•
(OSHA 29 CFR 1926.57) prenant en charge de
-
de la norme OSHA 29 CFE Section 1926.154,
de la norme ANSI A10.10 Exigences concernant
codes concernant l’installation du gaz propane
et du gaz naturel CSA B149.1.
après.
•

15
Moyenne
pondérée dans
le temps sur
8 heures,
États-Unis
(OSHA 29 CFR
1926.55 App A)
Moyenne pondérée
dans le temps sur
8 heures, Canada
Directives SST de
WorkSafe BC partie 5.1
et Règlement
sur les milieux de
travail en Ontario 833
CO 50 parties par
million 25 parties par million
CO5 000 parties
par million 5 000 parties par million
3 parties par million
(Reg 833)
É.-U. -
Limite de
plafond (limite
d’exposition à
court terme =
15 minutes)
Directives de SST
Canada STEL (15
minutes Rég. 833 / 1
heure WSBC) de
WorkSafe BC partie 5.1
et Règlement sur
les milieux de travail en
Ontario 833
CO 100 parties par million
15 000 parties par
million (WSBC)
30 000 parties par
million (Reg 883)
5 parties par
million 1,0 parties par million
(WorkSafeBC)
5,0 parties par million
(Reg 833)
• Veuillez s’assurer que la circulation de la com-
bustion et de la ventilation à échange d’air ne
devienne pas bloquée.
• Alors que le bâtiment ou l’édice devienne « plus
fermé » durant les étapes de la construction, il
sera nécessaire d’augmenter la ventilation.
• Ne pas utiliser sur les conduits d’aération.
SÉCURITÉ ÉLECTRIQUE
•S’assurer que le cordon prolongateur est en
bon état. Si un cordon prolongateur est utilisé,
s’assurer que sa capacité est susante pour
prendre en charge le courant de fonctionnement
de l’outil. En cas de doute, utiliser un cordon
du calibre immédiatement supérieur. Moins le
numéro de calibre est élevé, plus la capacité du
l est grande.
causera une baisse de la tension de la ligne, menant
• An de minimiser le risque de blessures phy-
siques et de décharge électrique, le produit doit
être mis hors de la portée des enfants, car il n’est
pas un jouet.
• An de minimiser le risque de décharge élec-
trique, ne l’exposer ni à la pluie, ni à l’eau.
• Ne jamais essayer de démarrer l’appareil si le
bloc-piles et le cordon prolongateur ont été
reliés en même temps.
LORS DE L’UTILISATION DU GAZ
PROPANE
•DANGER : Si vous sentez du gaz propane, fer-
mez la bouteille de propane pour que le propane
ne passe plus vers la chauerette. Si l’odeur
et appelez tout de suite votre fournisseur de gaz
• Risque d’incendie, de brûlure, d’inhalation et
d’explosion Ne pas le mettre sur des matériels
combustibles, tels que les matériels de con-
struction, du bois, du papier ou du carton, ou
bien encore des matériels qui sont enclins à la
désintégration par expansion, comme le béton.
• Utiliser la chauerette uniquement au propane
et à l’ensemble de régulateur / soupape fourni.
• L’ensemble de tuyauterie doit être protégé con-
tre la circulation, les matériels de construction
et le contact avec des surfaces chaudes lors de
son utilisation et son stockage.
• Vérier la chauerette à la recherche de fuites
avant de l’utiliser.
• Ne pas utiliser la chauerette si elle a une fuite
de gaz.
• Ne jamais utiliser des ammes pour détecter des
fuites de gaz.
• Vérier le tuyau à la recherche des dommages
avant chaque utilisation. S’il est évident qu’il y
a de l’abrasion ou de l’usure excessive ou que
le tuyau est coupé, il faut les remplacer avant
d’utiliser le produit. L’ensemble de tuyauterie de
• Le gaz propane n’est pas un gaz naturel. Ne
pas essayer de soumettre la chauerette à un
processus de conversion pour qu’elle prenne
en charge du gaz naturel, car ceci annulera la
garantie et le processus est tout à fait extrême-
ment dangereux.
•Mettre le capuchon antipoussière sur la sortie
de la soupape de la bouteille lorsque vous ne
l’utilisez pas. Installer uniquement le type de capu-
de la bouteille. D’autres types de capuchons ou de
• Ne pas entreposer des bouteilles au propane,
de l’essence ou d’autres liquides inammables
à proximité de la chauerette.
• Éteindre la chauerette et la laisser refroidir pen-
dant cinq minutes avant de changer la bouteille
de propane.
• Ne pas fumer lors du rechange ou de l’enlèvement
de la bouteille de propane.
•Il faut installer ce produit au propane selon les
codes locaux les plus récents. Faute de codes
locaux, utiliser plutôt :
• États-Unis :
Z223.1/NFPA 54
• Canada :
- Code d’installation du gaz naturel et du pro-
pane, CSA B149.1
- Code sur le stockage et la manipulation du
propane, CSA B149.2.

16
• Toujours fermer l’alimentation en gaz sur la
bouteille de propane (le propane liquide est
aussi connu comme gaz de pétrole liquéé)
lorsque le produit n’est pas utilisé.
la bouteille avant de la stocker.
•Avant de stocker le produit, il faut le laisser re-
froidir pendant 30 minutes et enlever la bouteille
de l’unité. Ne pas stocker le produit si la bouteille
de propane est toujours y reliée ou auprès de lui.
des blessures graves.
• Cette chauerette doit être placée sur une sur-
face uniforme et stable, éloignée des surfaces
combustibles, à une distance minimale de 2 m
(7') du front, 1,2 m (4') des côtés et 1,8 m (6') de
la partie supérieure de la chauerette.
•Maintenir une distance de 3 m (10') entre la
chauerette et les bouteilles de gaz propane.
Ne pas diriger la chauerette en direction des
conteneurs de gaz se trouvant à une proximité
de 6 m (20').
•Maintenir une distance de 3 m (10') entre la
chauerette et les toiles, les bâches et d’autres
couvertures pareilles. Fixer les couvertures pour
éviter qu’un battement ou un autre mouvement
se passent, lequel pourra frapper la chauerette.
• La chauerette a été expédiée avec la congura-
tion d’usine préétablie pour qu’elle fonctionne
au gaz propane.
ODEUR DU GAZ COMBUSTIBLE.
FUITES DE COMBUSTIBLE
•
AVERTISSEMENT
Le gaz LP et le gaz naturel
sont des odorants à fab-
rication articielle qui sont ajoutés pour dé-
tecter des fuites de gaz combustible. S’il se
produit une fuite de gaz, vous devriez sentir son
odeur. Puisque le gaz propane (LP) est plus
lourd que l’air, vous devriez s’approcher du
plancher pour sentir son odeur. SENTIR
L’ODEUR D’UN GAZ REPRÉSENTE UN SIGNAL
POUR QUE VOUS RÉAGISSIEZ TOUT DE
SUITE !
• Ne rien faire que pourra déclencher l’ignition du
gaz combustible. -
et aucun cordon prolongateur. N’allumer aucune
• Évacuer tout le monde et se tenir l’écart de l’aire
tout de suite.
•Fermer toutes les soupapes de toutes les
bouteilles et tous les réservoirs de gaz propane
(LP) ou bien encore, si vous utilisez du gaz naturel,
fermer la soupape d’alimentation principale qui se
trouve sur le compteur.
• Le gaz propane (LP) est plus lourd que l’air et
pourra bien se déposer dans les zones basses.
Si vous avez des raisons de soupçonner qu’il
s’est produit une fuite de propane, se tenir à
l’écart de toute zone basse.
• Utiliser le téléphone d’un de vos voisins pour
appeler votre fournisseur de gaz combustible
et le département de la sécurité incendie local.
Ne pas rentrer à l’édice ou à la zone.
• Se tenir loin du bâtiment ou de l’édice, éloigné
de la zone, jusqu’à ce qu’elle soit déclarée sans
risque par le département de la sécurité incendie
et votre fournisseur de gaz combustible.
• FINALEMENT, laisser que le professionnel du
service de gaz combustible et les pompiers
vérient s’il y a eu des fuites de gaz. Laisser
DISSIPATION / DISPARITION DE
L’ODEUR
• Certaines personnes ne peuvent pas bien sentir
les odeurs. Certaines personnes ne peuvent
pas sentir l’odeur quand un produit chimique
articiel s’ajoute au gaz naturel ou au gaz pro-
pane (LP). Vous devez déterminer si vous êtes
capable de sentir l’odorant ajouté à ces gaz
combustibles.
• Il faut que vous appreniez comment reconnaître
l’odeur du gaz propane (LP) ou celle du gaz
naturel. Les distributeurs locaux de gaz propane
(LP) se feront un plaisir de vous donner un pamphlet
que vous grattez et sentez. Veuillez l’utiliser pour se
familiariser avec l’odeur du gaz propane.
• Le tabagisme peut affecter votre sens de
l’odorat. Le fait de se trouver auprès d’une odeur
durant une longue période pourra aecter votre
perception de cette odeur en particulier. Les
odeurs étant présentes dans les bâtiments et
les édices agricoles pourront masquer l’odeur
des gaz combustibles.
• L’odorant dans le gaz propane (LP) et le gaz
naturel est incolore et, dans des certaines
circonstances, l’intensité de son odeur peut se
dissiper.
• S’il se produit une fuite souterraine, le déplace-
ment du gaz à travers du sol peut ltrer l’odorant.
• L’intensité de l’odeur du gaz propane (LP) peut
être différente dans des niveaux différents.
Puisque le gaz propane (LP) est plus lourd que
l’air, il est probable qu’il y ait une odeur plus
forte dans les niveaux inférieurs.
•Il faut toujours rester attentif à la moindre odeur
de gaz.
•
AVERTISSEMENT
Quelques aspects cru-
ciaux à retenir !
•Le gaz propane (LP) donne une odeur particu-
lière. Apprenez à distinguer entre ces odeurs.
Consulter les sections « Odeur du gaz combustible
• Même si vous n’avez pas reçu une formation
professionnelle en l’entretien et en la réparation
de la chauerette, soyez TOUJOURS conscient
de l’odeur qui donne le gaz propane et celle qui
donne le gaz naturel.
• Si vous n’avez pas reçu une formation profes-
sionnelle en la réparation et en l’entretien du
gaz propane (LP), n’essayez pas de démarrer la
chauerette, d’eectuer des tâches de répara-
tion ou d’entretien ou d’ajuster la chauerette
faisant partie du système de combustible de gaz
propane (LP).

17
• Une bonne mesure pratique de sécurité est
d’eectuer au quotidien un test olfactif auprès
de la chauerette et de ses joints : le tuyau, les
connexions, etc. Si vous sentez une odeur de
gaz, peu importe l’intensité, CONTACTEZ VOTRE
FOURNISSEUR DE GAZ COMBUSTIBLE TOUT
DE SUITE. N’ATTENDEZ RIEN !
BOUTEILLES DE PROPANE
• Ne jamais remplir la bouteille de propane au-delà
de 80 % de sa capacité. Une bouteille surremplie
• Utiliser uniquement une bouteille de propane
comportant un collier qui sert à protéger la
soupape.
• Si jamais vous détectez une fuite, éloignez-
vous de la bouteille de propane et contactez le
département de sécurité incendie.
• Ne pas utiliser le produit jusqu’à ce qu’il ait été
soumis à un test de fuites.
• Il faut stocker les bouteilles de propane à
l’extérieur, hors de la portée des enfants, et pas
à l’intérieur d’un bâtiment, d’un édice, d’un
garage ou d’un autre espace fermé.
• La bouteille de propane devra être mise à
l’extérieur durant les opérations, sauf s’il s’agit
de la rénovation ou de la construction des bâti-
ments qui ne sont pas occupés par le grand
public.
• Ne pas utiliser ce produit à des altitudes qui
dépassent les 600 m (2 000').
• Il faut faire toujours preuve de bon sens et
procéder avec prudence lors de l’utilisation
d’outils.
situations qui pourraient entraîner des dangers. Ne
pas utiliser cet outil si vous ne comprenez pas ces
Milwaukee Tool ou un professionnel pour recevoir
plus d’information ou de formation.
• Conserver les étiquettes et les plaques signalé-
tiques en bon état. Des informations importantes
contacter un centre de service et d’entretien
MILWAUKEE pour obtenir un remplacement gratuit.
SPÉCIFICATIONS
No de Cat.................................0801-20, 0801-20C
Type de batterie............................................M18™
Type de chargeur .........................................M18™
...........
-18°C a 27°C (0°F to 80°F)
Tension ...........................................18 CD / 120 CA
...........................................1,7 A / 0,25 A
Hertz....................................................................60
sortie....................................
...................10 psi
Pression d’utilisation min. / max ....
Source d’alimentation........................ Propane (LP)
DESCRIPTION FONCTIONNELLE
3
7
8
4
11
2
5
6
1
9
10
12
1. Commutateur
3. Sortie de chaleur
4. Touche d’ignition
5. Bouton de
commande de
6. Barette d’enveloppe
du tuyau
7. Ventilateur
8. Compartiment de
piles
9. Prise de cordon
d'alimentation
(LP)
11. Étiquette volante
de propane (LP)

18
PICTOGRAPHIE
Volts
Courant direct
Courant alternatif
HHertz
Lire le manuel d’utilisation
Risque d’asphyxie ! Utiliser ce produit
Surface et sortie chaudes
CORDONS DE RALLONGE
l’outil et la prise de courant est grande, plus le calibre
-
-
calibre 16. Lorsque vous utilisez plus d’une rallonge
pour couvrir la distance, assurez-vous que chaque
cordon possède le calibre minimum requis. Si vous
utilisez un seul cordon pour brancher plusieurs outils,
calibre minimal requis pour le cordon.
Directives pour l’emploi des cordons de rallonge
• Assurez-vous que le cordon de rallonge est cor-
avant de vous en servir.
ranchants, des sources de grande chaleur et des
Calibres minimaux recommandés
pour les cordons de rallonge*
Fiche
signalétique
Ampères
Longueur du cordon de rallonge (m)
7,6 15,2 22,9 30,5 45,7
0 - 2,0
2,1 - 3,4
3,5 - 5,0
5,1 - 7,0
7,1 - 12,0
12,1 - 16,0
16,1 - 20,0
18
18
18
18
16
14
12
18
18
18
16
14
12
10
18
18
16
14
12
10
--
18
16
14
12
10
--
--
16
14
12
12
--
--
--
LISEZ ATTENTIVEMENT CES
INSTRUCTIONS ET
CONSERVEZ-LES POUR LES
CONSULTER AU BESOIN.
MISE A LA TERRE
AVERTISSEMENT
Si le l de mise à la terre
est incorrectement rac-
cordé, il peut en résulter des risques de choc
électrique. Si vous n’êtes pas certain que la prise
dont vous vous servez est correctement mise à
la terre, faites-la vérifier par un électricien.
N’altérez pas la fiche du cordon de l’outil.
N’enlevez pas de la che, la dent qui sert à la
mise à la terre. N’employez pas l’outil si le cordon
ou la che sont en mauvais état. Si tel est le cas,
faites-les réparer dans un centre-service
MILWAUKEE accrédité avant de vous en servir.
Si la che du cordon ne s’adapte pas à la prise,
faites remplacer la prise par un électricien.
Outils à double isolation
(Deux ches à broches)
d’une double isolation conforme eux exigences de
l’OSHA et satisfont aux normes de l’Underwriters
Laboratories, Inc., de l’Association canadienne de
normalisation (ACNOR) et du « National Electrical
Fig. B Fig. C
contre Figure B et C.

19
MONTAGE DE L'OUTIL
AVERTISSEMENT
L’utilisation d’autres ac-
cessoires que ceux qui
sont spécifiquement recommandés pour cet
outil peut comporter des risques.
Installation de la poignée
REMARQUE :
CONFIGURATION
AVERTISSEMENT
La chaufferette n’a été
conçu que pour une utili-
sation destinée à chauer temporairement un
bâtiment, un édice ou une structure en con-
struction, en cours de modication ou de répara-
tion.
Ne jamais utiliser la chauerette au propane
l’intérieur des maisons, des garages, des vides
sanitaires, des véhicules récréatifs ou d’autres
espaces partiellement fermés. Il est possible que
des niveaux dangereux du monoxyde de carbone
s’accumulent à l’intérieur de ces espaces.
Placement
AVERTISSEMENT
Risque d’incendie. Ne ja-
mais mettre la chauer-
ette d’un angle descendant ou en direction des
matériels combustibles. Cette chauerette doit
être située loin des surfaces combustibles, à une
distance minimale de 2 m (7') de son front, de 1,2
m (4') de ses côtés et de 1,8 m (6') de sa partie
supérieure. La chauerette doit être située sur
une surface uniforme et la circulation de la com-
bustion et de l’air de ventilation ne doit pas être
bloquée.
Il faut bien situer la chauerette avant de l’utiliser.
Situer la chauerette sur une surface uniforme et
stable si elle tourne et à une distance minimale de
3 m (10') par rapport aux conteneurs de propane
se trouvant dans un rayon de 6 m (20'), jamais
dirigée vers eux.
1.
2.
combustibles : Front : 2 m (7') ; côtes : 1,2 m (4') ;
3. Veuillez s’assurer que la source d’alimentation
4.
Serrer fermement.
5.
6.
d’alimentation.
Utilisation du propane (LP)
son ignition pourra soudainement survenir s’il entre
en contact avec l’air. La bouteille de gaz propane
exigences suivantes :
1. -
-
Norme nationale du Canada, CAN/CSA-B339,
-
2. Mesures : 304,8 mm (12") de diamètre x 457,2 mm
maximale.
3. La soupape du cylindre doit comporter :
• Un appareil de connexion au cylindre (Type 1)
• Une soupape de surpression de
• Un dispositif de protection contre le
surremplissage (DPS) portant une
-
une manivelle triangulaire unique. Utiliser
uniquement des bouteilles de propane (LP) avec
ce type de soupape.
4.
propane (LP) en vertical durant l’utilisation, le
transport et le stockage.
Essais de la bouteille de propane (LP)
1. Veuillez s’assurer que la bouteille de propane
propane (LP).
2. À l'aide d'un pinceau
de savon doux, brosser
la solution savonneuse
sur les zones mar-
3.
pas utiliser ou bouger
la bouteille de propane
(LP). Contacter le
fournisseur de gaz ou
4. Si vous voyez, sentez ou entendez que la
• Éloignez-vous de la bouteille de propane (LP)
-
blème
local
5.
connecter.

20
Connexion de la bouteille de propane (LP)
AVERTISSEMENT
An d’éviter des blessures
physiques graves, tou-
jours conrmer qu’il ne se produit pas une fuite
de gaz à chaque fois que la bouteille de propane
est débranchée et branchée à nouveau.
Inspectez le tuyau pour des dommages ou des
fuites avant chaque utilisation. Assurez-vous
que le tuyau de propane (LP) est bien serré avant
chaque utilisation. Si le tuyau est endommagé,
exposant la maille intérieure, remplacez-le im-
médiatement. Le tuyau de remplacement doit
être celui spécié par le fabricant.
To connect:
Pour la connecter :
1.
fournie) pour visser le bout
ouvert du tuyau de propane
(LP) sur la chaufferette.
Serrer fermement.
REMARQUE : Retenir le
capuchon en caoutchouc et
de son stockage.
Manivelle
Soupape de bouteille
Embout
Capuchon
Écrou de raccord
2. Veuillez s’assurer que la manivelle sur la bouteille
enlever le capuchon de la soupape de la bouteille.
3.
dans la soupape de la bouteille.
REMARQUE :
centre de la soupape de la bouteille.
4.
connexion. Ne pas utiliser des outils.
REMARQUE :
Un
demi à trois quarts de tour supplémentaire est
nécessaire pour terminer la connexion. Si vous
5.
la recherche des dommages. Ne jamais essayer
d’utiliser l’équipement s’il est endommagé ou
branché. Contacter votre distributeur local de
gaz propane à des ns de réparation.
Pour déconnecter :
1.
2.
3.
4. Mettre le capuchon sur la sortie de la soupape de
REMARQUE : Installer uniquement le type de
capuchon fournie sur la sortie de la soupape de
la bouteille. D’autres types de capuchons ou de
Vérication des fuites dans les valves, le
tuyau et le régulateur
DANGER
Ne pas fumer ou utiliser une amme
vive pendant l’essai de vérication
de fuites. S’il y a une fuite, le gaz pourra
s’enammer et mener à des blessures physiques
graves.
AVERTISSEMENT
An d’éviter des blessures
physiques graves, tou-
jours conrmer qu’il ne se produit pas une fuite
de gaz à chaque fois que la bouteille de propane
est débranchée et branchée à nouveau.
1.
2.
3. -
pape de la bouteille. AVERTISSEMENT! Si vous
entendez un bruit sec, fermez la soupape de la
bouteille tout de suite. Ce bruit veut dire qu’il y a
une fuite importante dans la connexion. Corriger
le problème avant de continuer.
4.
savonneuse sur toutes les connexions et tous les
raccords du produit, tout au long du tuyau et sur
la bouteille de propane (LP).
5.
la soupape de la bouteille et ensuite, resserrer
toutes les connexions. AVERTISSEMENT! Si une
6.
la fermer.
This manual suits for next models
1
Table of contents
Languages:
Other Milwaukee Heater manuals