1470
V
enables
Street
V
ancouver
,
B.C.
Canada
V5L
2G7
t
+1
604
696
250
f
+1
604
685
0342
[email protected] www
.molodesign.com
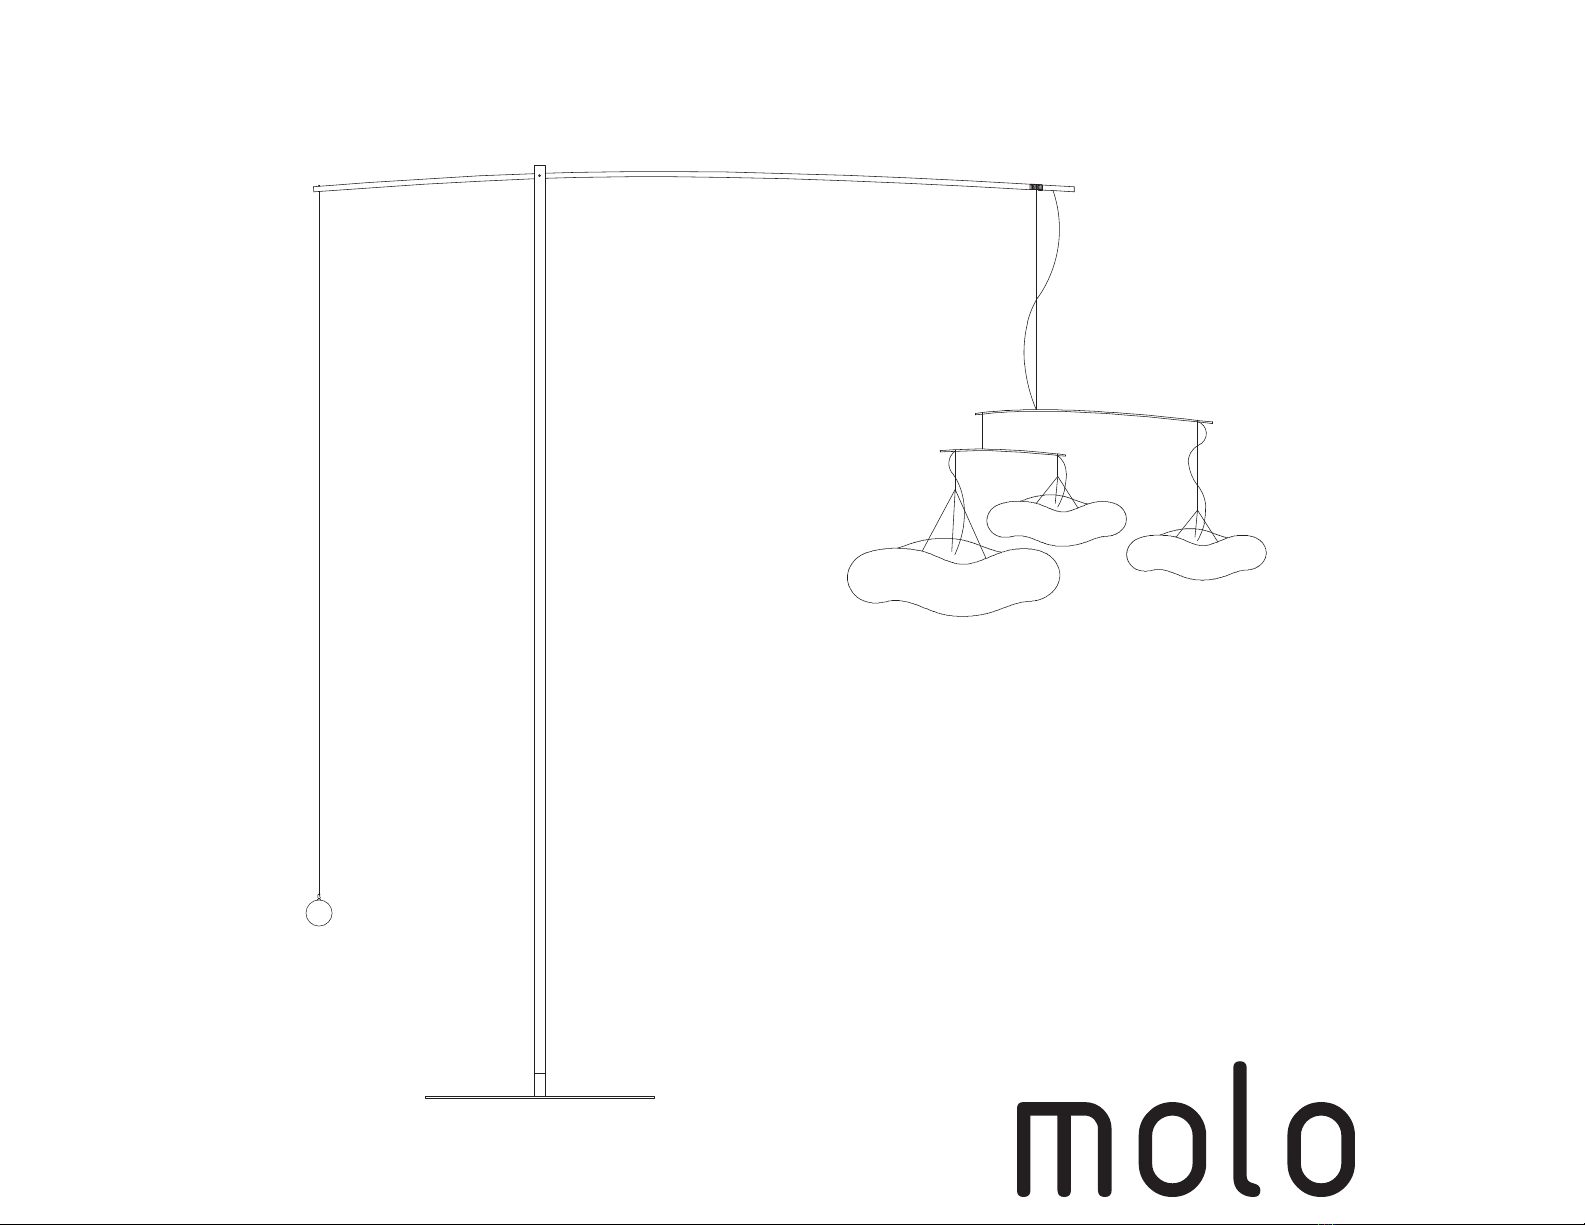
07small cloud mast assembly
step 3
step 2
step 2
step 5
step 6
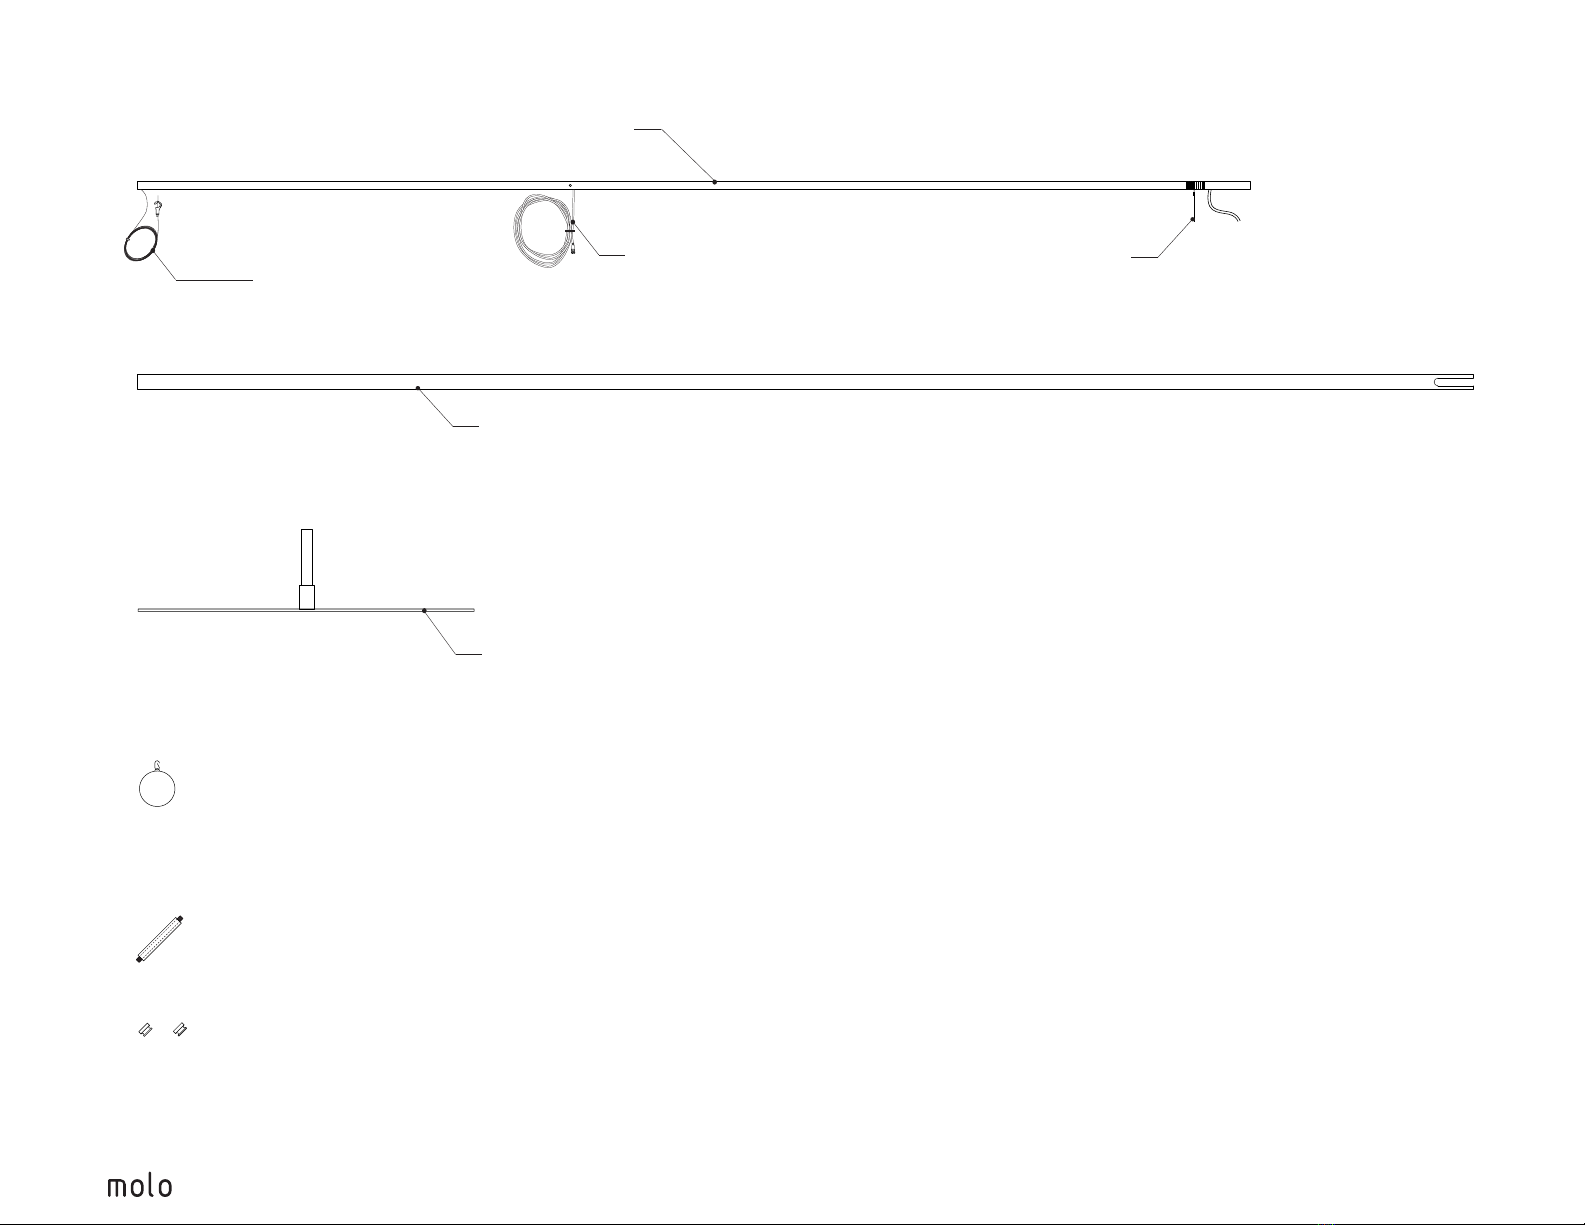
step 1: Place the mast base as close to its end position as possible and lay out all mast
parts in the position that they will be assembled (horizontal boom balance point near the
slotted top of the 3.6m (12’) vertical tube, bottom of the vertical tube near the center of the
base.) It will be possible to slide the mast a small distance once it is erected.
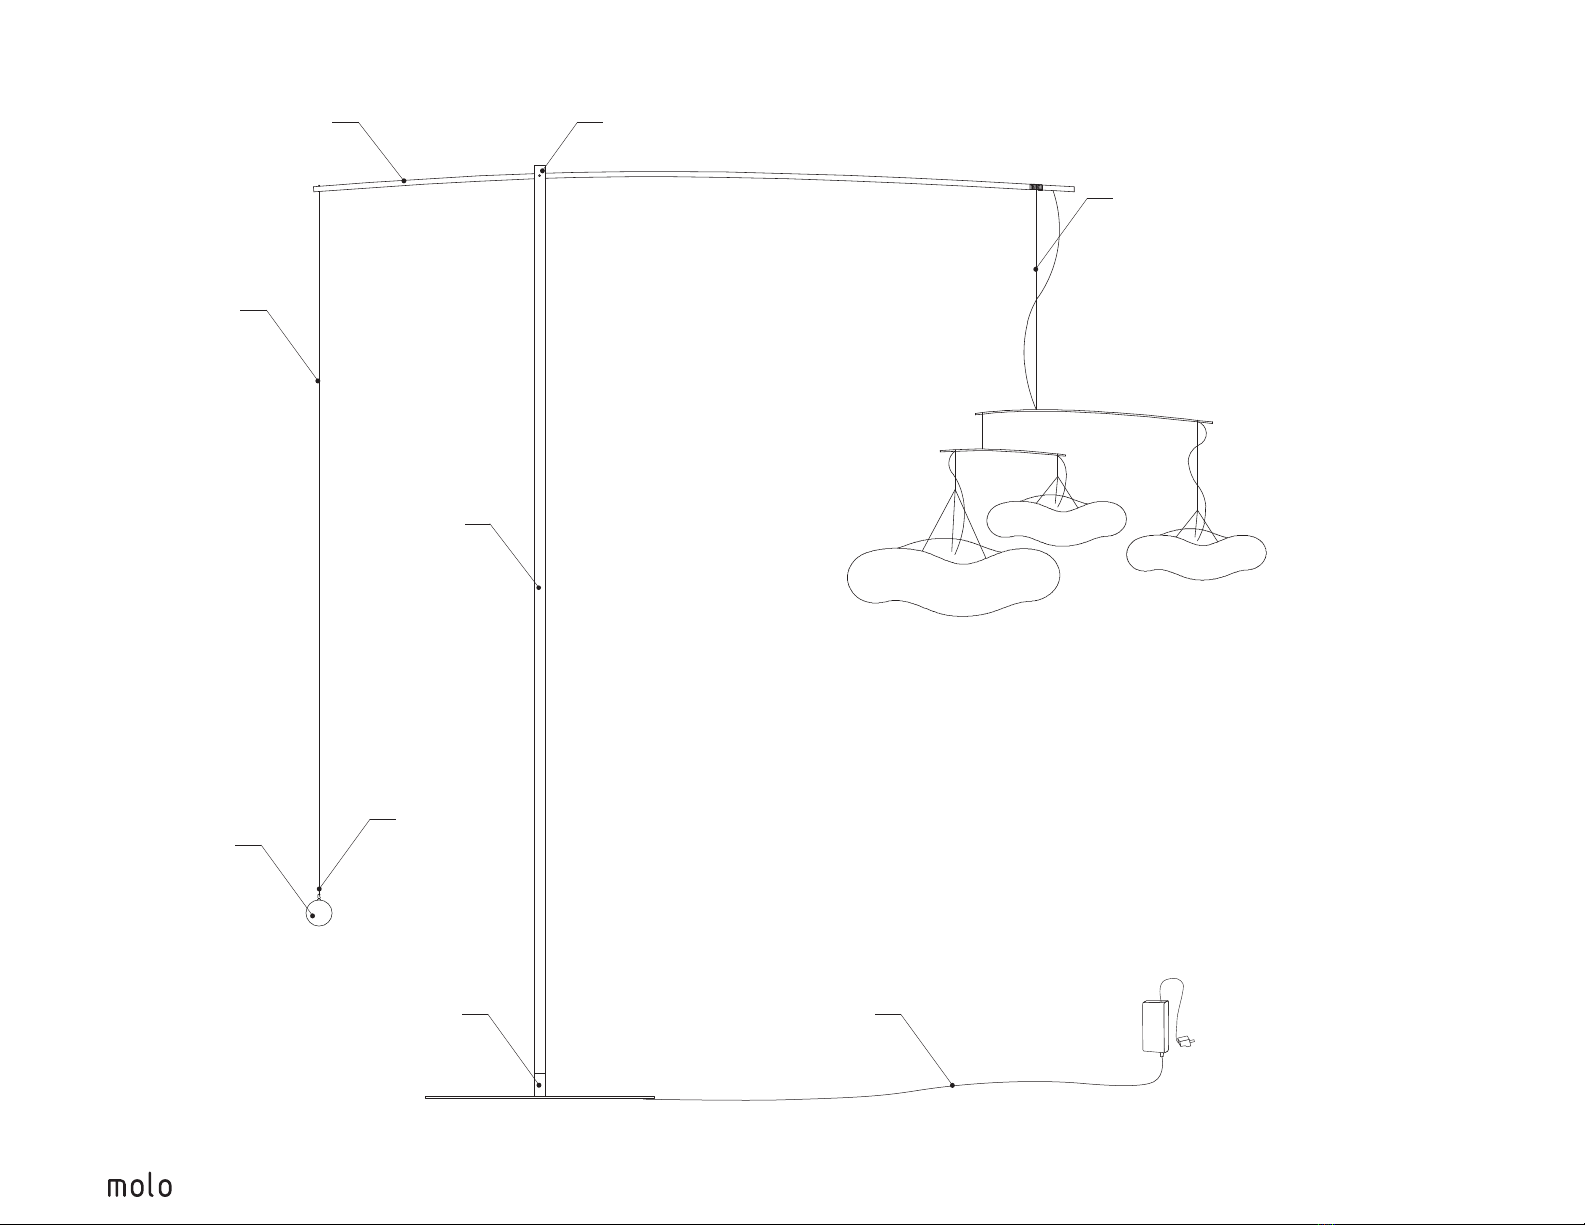
step 2: Feed the main power wire down through the 3.6m (12’) tube. Pull the slack all the
way through and then feed the end into the vertical base section and out of the bottom hole.
Pull as much slack through as possible.
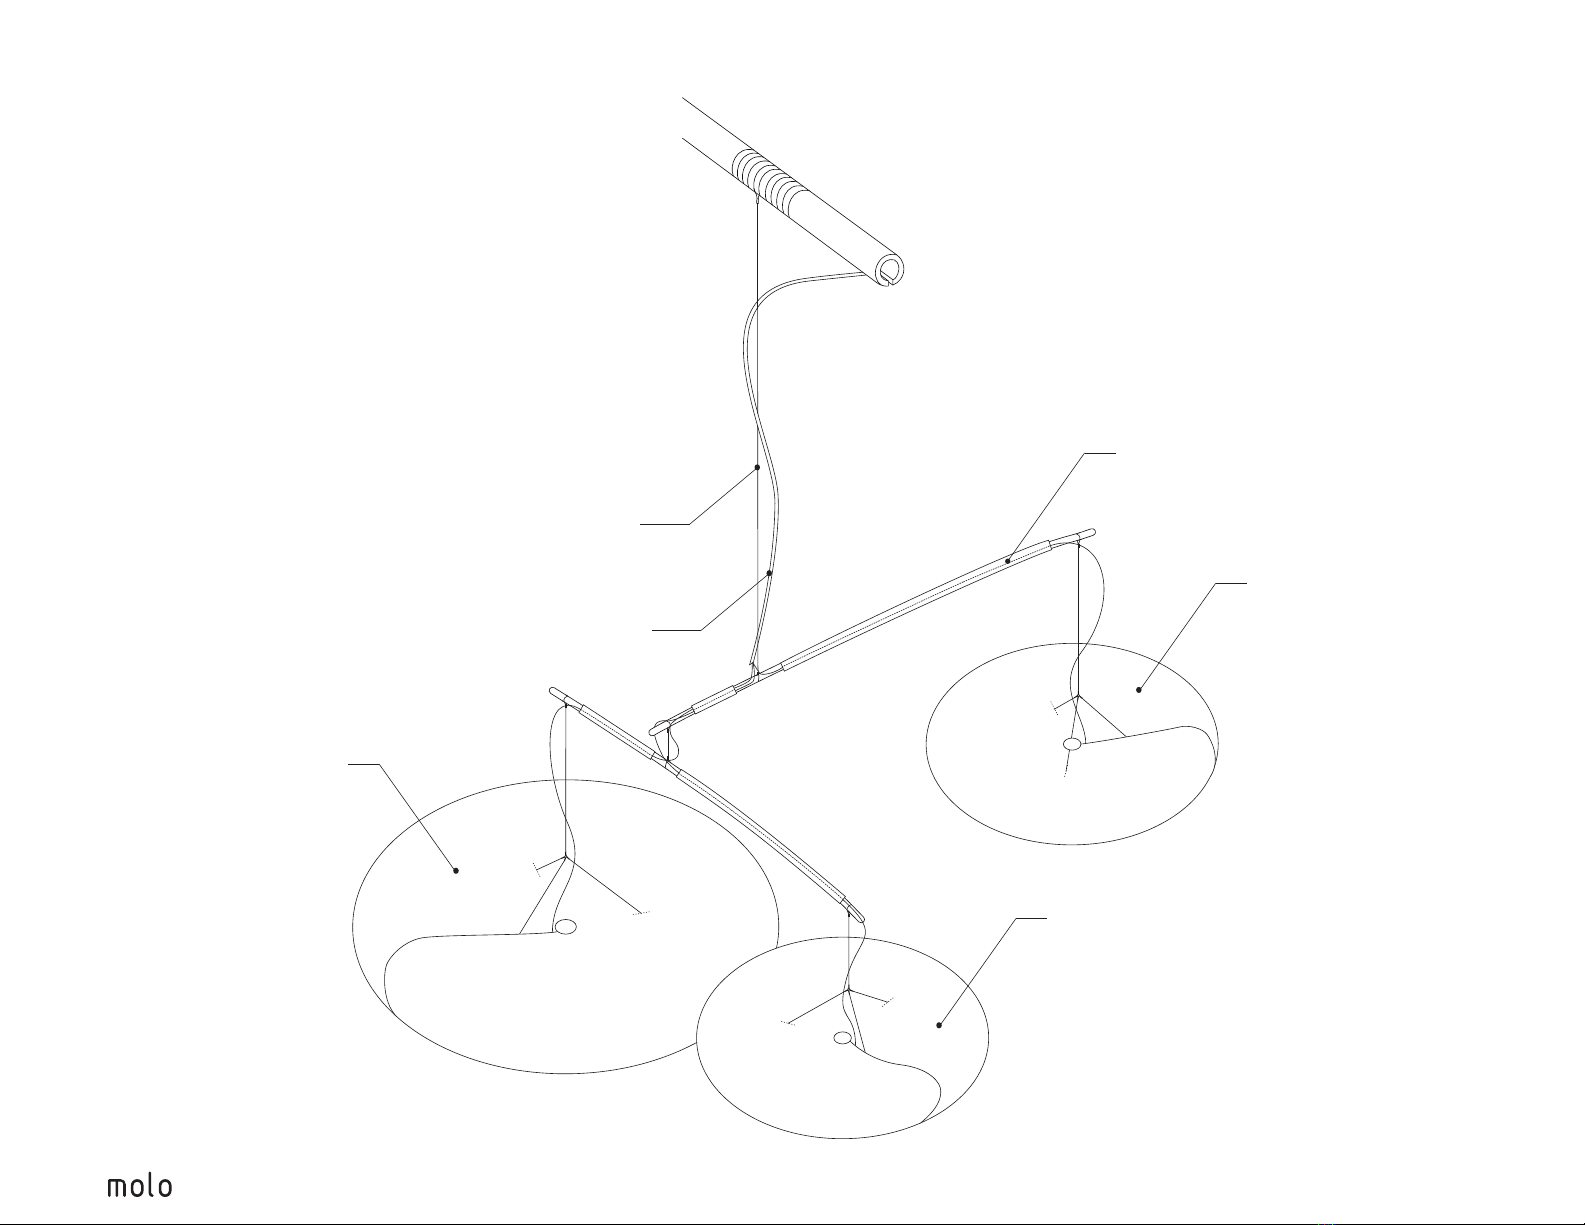
step 3: Attach the horizontal boom to the vertical mast tube by aligning the holes and
inserting the mast hinge pin, locking into place using the knurled thumb nuts provided.
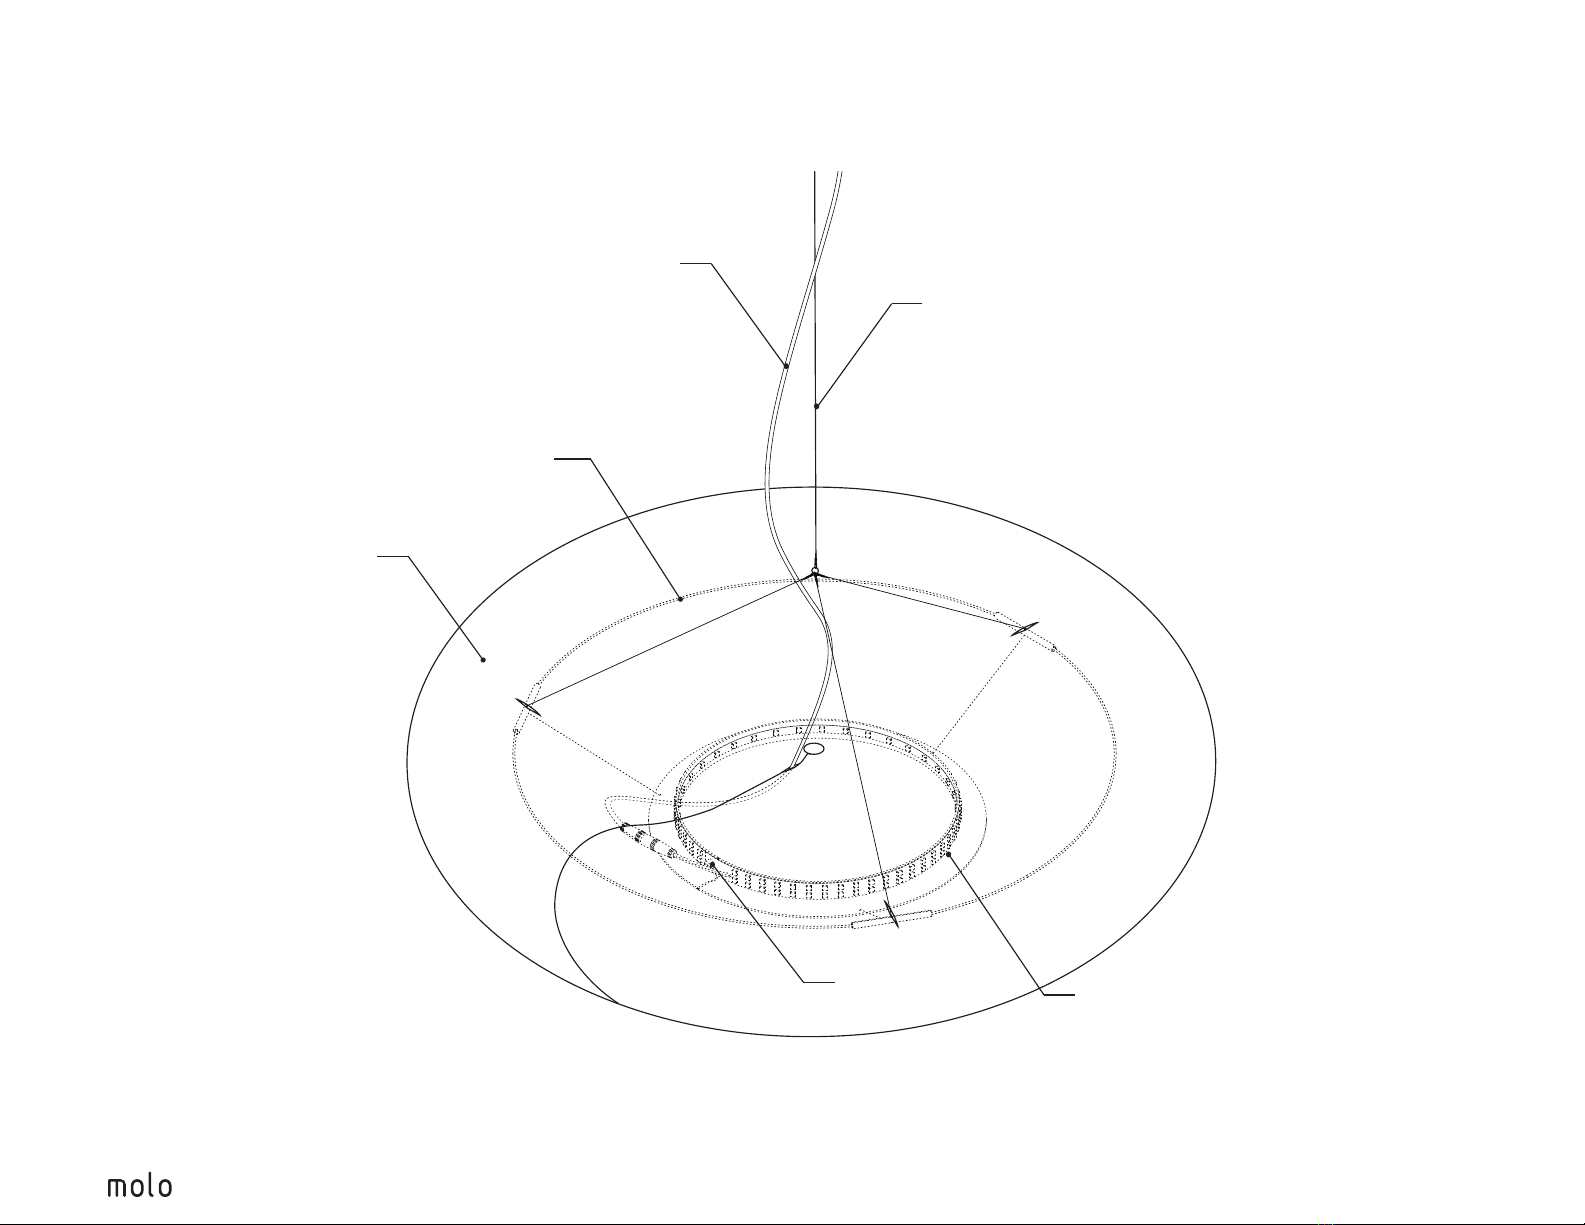
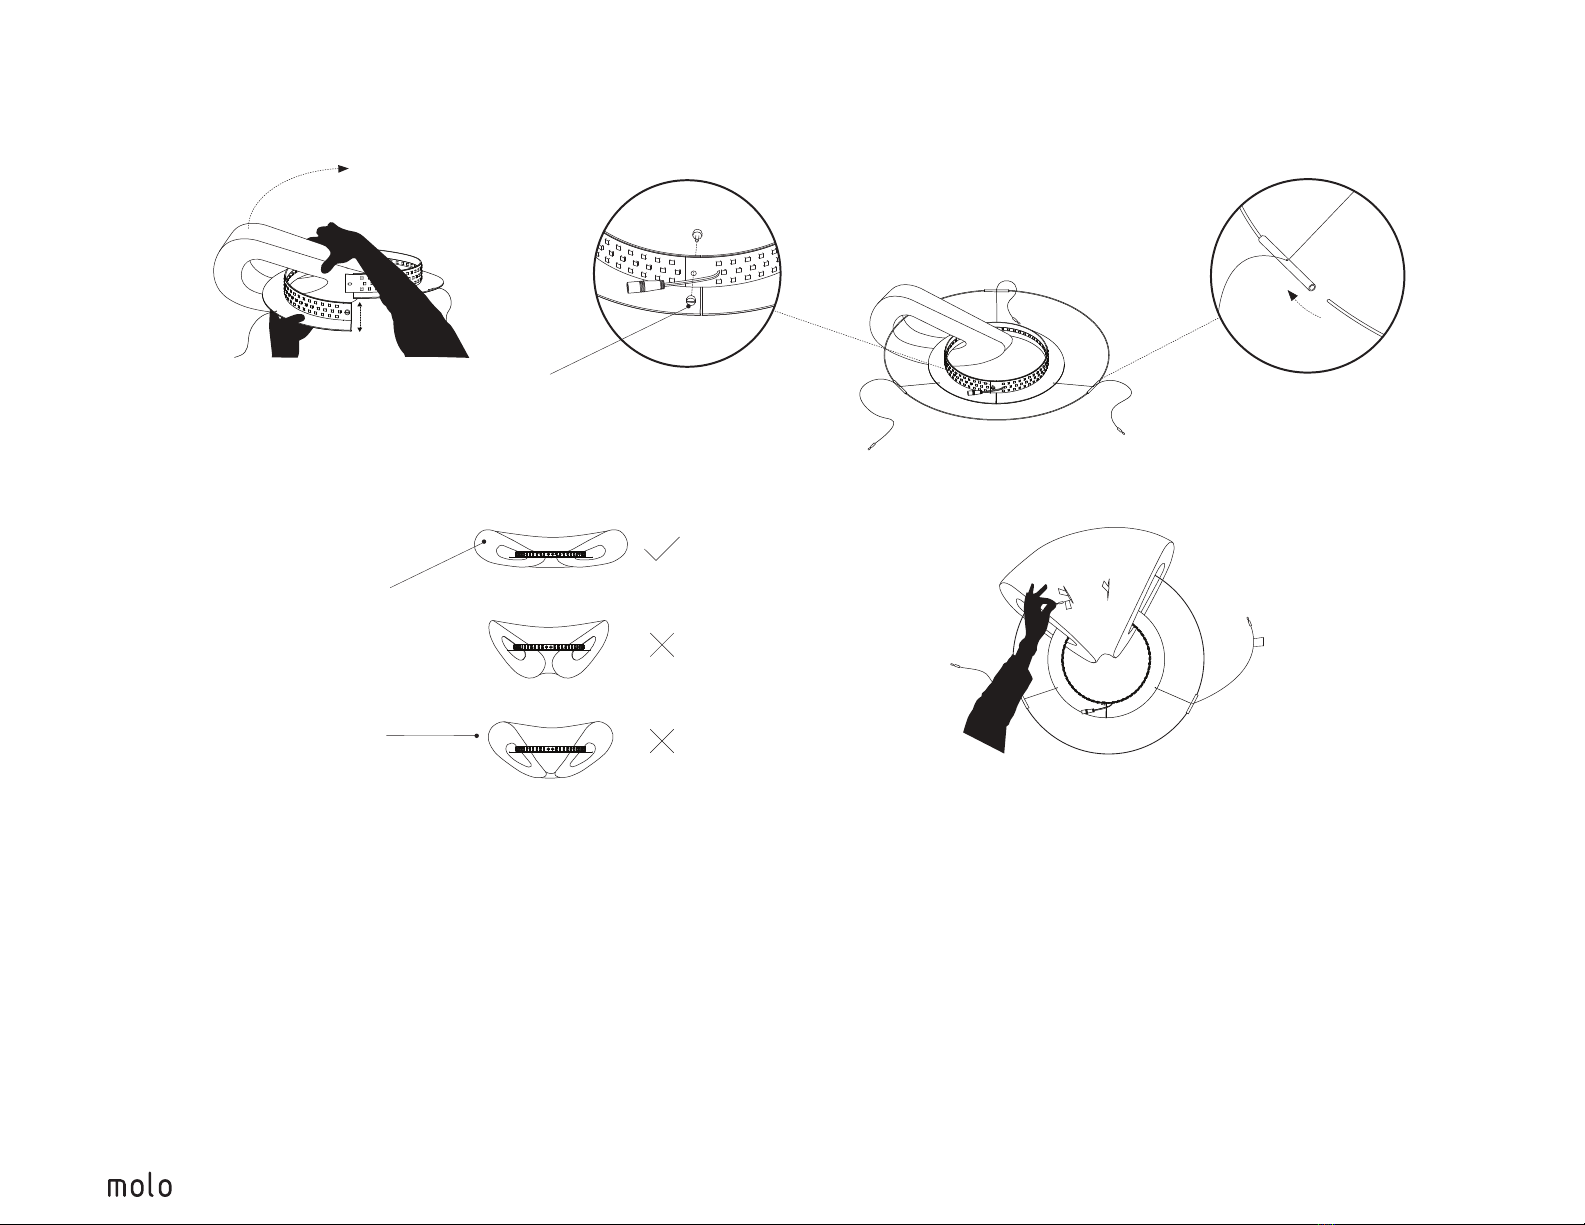
step 4: Build cloud mobile (see next 2 pages). Take care not to crush the clouds with the
aluminum armature rods or mast boom. A stool can be used to prop up the armature and
boom if necessary.
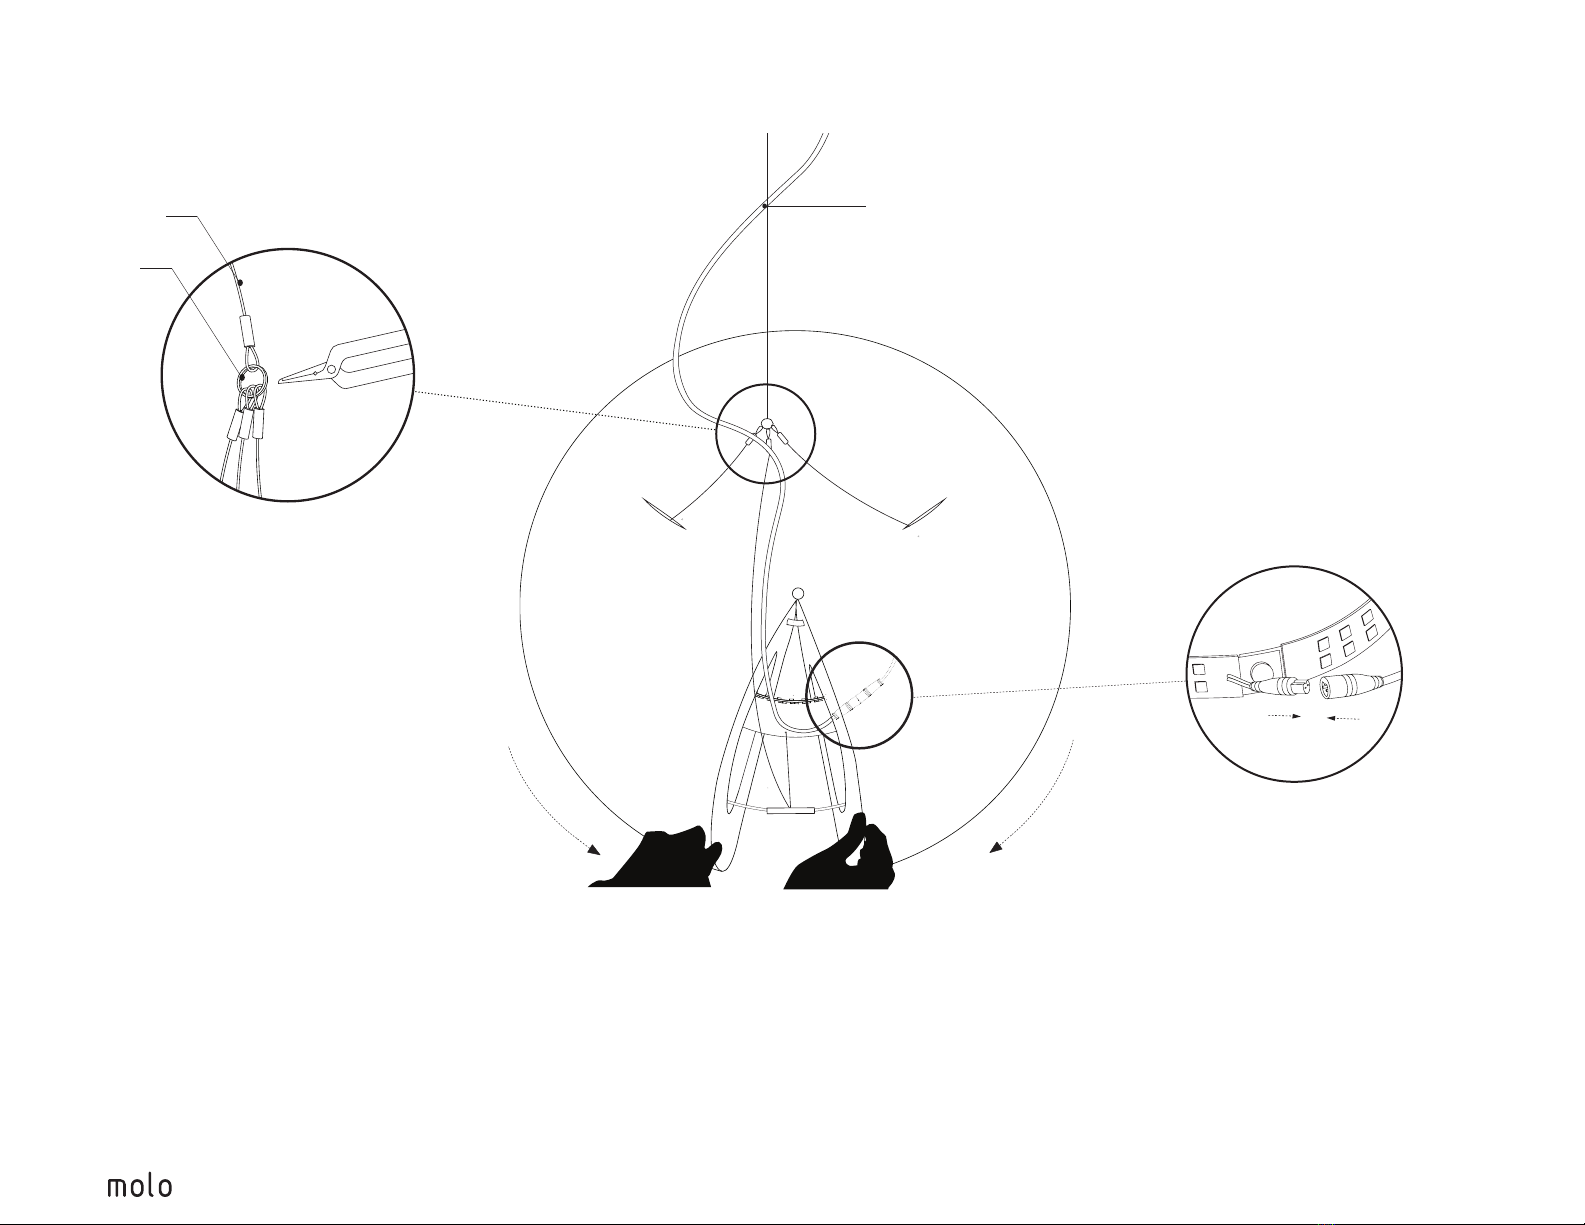
step 5: Erect the mast using three people: one person to lift the mast and boom up and onto
the base, one person to guide the vertical pipe onto the base and pull excess electrical wire
through, and one person to lift the cloud mobile while this is happening.
step 6: Once the vertical tube is fit snugly onto the base, continue to support the cloud
mobile and attach the 6.8kg (15lbs) counterweight to the support cable loop using the snap
hook provided. Ensure snap hooks are secure and release weight carefully, keeping feet
clear.
step 7: Assess resting position of mast boom and mobile armature. If necesary, use notches
provided to adjust mobile and/or pendant hang cable positions to balance mast and mobile.
step 4
main electrical wire
main support cable
anodized aluminum mobile structure
large cloud pendant
medium cloud pendant
x-large cloud pendant
step 7