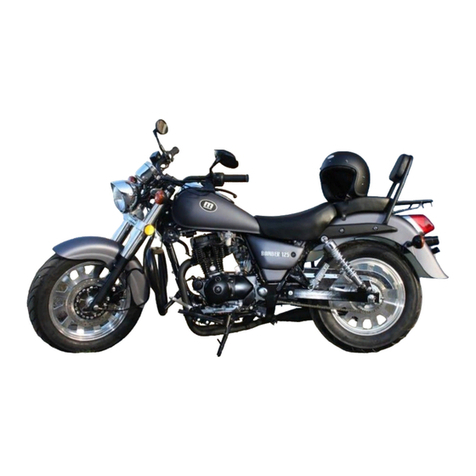
motorini SMR 125 User manual

USER’S MANUAL
Motorini SMR/SXR 125

1
Introduction
Thank you for choosing to buy a Motorini Motorcycle. This manual
explains the use, operation, basic inspection and maintenance, etc. If you
have any question about the operation and maintenance, please contact
your dealer.
To maintain your motorcycle in a good serviceable and safe condition,
please carry out the scheduled maintenance and instructions in this manual.
The following important information will appear in this manual:
Caution:
Refers to procedures that must be followed. Otherwise, your personal
safety may be endangered.
Notice:
Refers to procedures that must be followed to avoid damaging the
motorcycle.
Warning:
Refers to procedures that must be followed to avoid injury to you,
other person or the motorcycle.
Note:
Note
Our company is constantly working to improvement product design and
quality. This manual contains the latest product information at the time when it
is printed. However, it is possible that the manual may be more or less different
with your motorcycle. If you have any question, please contact your dealer.
Warning
Read this manual carefully before driving the motorcycle

2
Contents
Introduction······································································ 1
Contents ·········································································· 2
Precautions for Safe Riding················································ 4
Identification……………………………………………………………5
The Serial Number····························································· 7
Functions of Controllers ···················································· 8
Instrument Panel Indications 8
Ignition switch 11
Switches on the Handlebars 12
Brake Levers 13
Throttle Grip 14
Gear Shifting 14
Side Stand 15
Fuel Tank Cap 15
Seat Lock 16
Fuel and Oil Recommendations ········································· 17
Running-in of New Motorcycle··········································· 18
Inspection before Riding··················································· 19
Inspection the Braking effect and the free play 19
Inspection of the Tyre 19
Inspecting the Quantity of Fuel 20
Inspecting the Quantity of Engine Oil 20
Inspection of the Ignition Unit and the Lights 20
Inspecting the Rear Mirror 20
Riding Tips······································································ 21
Inspection and Maintenance·············································· 24
The first service 24
Maintenance Schedule 25

3
Engine Oil 26
Battery 27
Spark Plug 27
Air Filter 28
Carburetor 29
Tyres 30
Brake circuits 31
Fuel Hose 32
Fuse 32
Troubleshooting······························································· 33
Storage Procedures·························································· 34
Specifications·································································· 35
Circuit Diagram…..……………………………………………………37

4
Precautions for Safe Riding
Please obey local traffic regulations. It is advised to control your speed
within safe limits.
Practice before Riding
Before riding the motorcycle, practice in a spacious and traffic-free
place so that you are familiar with the motorcycle's controls. Practice is
essential to safety.
Knowing Your Safe Speed Limit
Safe speed limits varies in accordance with the road conditions, riding
skill and the weather.
Be Careful in the Rain
It is more dangerous to ride on a moist or wet road. Therefore, high
speed should be avoided and special care should be taken when turning.
Keep in mind the braking distance on a wet road is greater than in the dry.
Helmet
Wear a helmet whenever you ride, and fasten the strap whenever you
wear the helmet.
Clothing Recommendation
Hi-Viz and well-fitting clothes are recommended. Make sure that the
clothes allow the limbs to move freely.
Specialist motorcycle clothing and footwear are recommended.
Indispensable Maintenance and Inspection
The following items are indispensable:
Inspect your bike before riding.
If covering low mileage, ensure you have a half year inspection.
Adhere to the Maintenance Schedule.
Care of the Exhaust
The high temperature of the Exhaust can burn. Please park your
motorcycle where there is little chance of it touching anything.
Modification
Modification to the motorcycle may invalidate your warranty, consult your dealer
first.

5
Identification
Read the following labels carefully before using the motorcycle.
1. Rear lamp 2. Rear turning lamps 3.Exhaust 4. Seat
5. Throttle grip 6. Front turning lamps 7. Head lamp
8. Rear disc brake 9. Rear brake pedal 10. Front Suspension
①
②
③
④
⑦
⑥
⑧
⑤
⑩
⑨

6
1. Speedometer 2. Rear-view mirrors 3.Left switch
4. Carburetor 5.Air filter 6. Rear reflector 7. Side stand
8. Shift pedal 9. Side reflector 10. Front disc brake
②
④
③
①
⑤
⑨
⑥
⑦
⑧
⑩

7
The Serial Number
Engine number
The Engine number is stamped on the side of the crankcase assembly.
Note
Remember your engine number for purchasing correct spare parts
from your dealer.
Chassis number
The Chassis number is stamped on the frame.
Chassis number Engine number
Please write down the serial numbers below for future reference.
Chassis Serial No. :
Engine Serial No. :

8
Functions of Controllers
Instrument Panel Indications
1. Neutral Gear Indicator(N)
The green light will be lit when the gearshift is in the neutral mode.
2. Tachometer
The tachometer shows the engine speed bars.
For the correspondence between the bars and engine speed see the
following form.
RPM
Bars
RPM
Bars
0
0
6400~7000
10
100~1600
1
7100~7700
11
1700~2000
2
7800~8400
12
2100~2400
3
8500~9100
13
2500~2800
4
9200~9800
14
2900~3500
5
9900~10500
15
3600~4200
6
10600~10900
16
4300~4900
7
11000~11300
17
5000~5600
8
11400~11700
18
5700~6300
9
11800~
18+OVER REV
①
③
④
②
⑥
⑦
⑧
⑤

9
3. Low Voltage Indicator
If this indicator is on, it means the voltage of the battery or charging
circuit is lower than 11.5V.
4. Speedometer
The speedometer shows the speed at which you are riding in kmh or
mph.
5. Odometer
The odometer registers the total distance that the motorcycle has been
ridden.
You can press the Setting Button to set the meter, please see the list below.
5.1 Setting the diameter of the wheel
Display
Press
time
Result
TDO
>3s
enter the setting of wheel
diameter, thousands digit if flash
thousands digit if flash
>3s
hundreds digit is flash
>3s
tens digit is flash
tens digit is flash
>3s
units digit is flash
>3s
enter the speed units setting
any digit is flash
<3s
digit plus 1
5.2 Setting the speed units
Display
Press
time
Result
speed units is flash
>3s
return TDO
speed units is flash
<3s
switch between km/h and mph
5.3 Setting the time
Display
Press
time
Result
TIME
>3s
enter time setting hour-digits is flash
hour-digits is flash
<3s
hour-digits plus 1 between 0~23
hour-digits is flash
>3s
minute-digits is flash
<3s
minute-digits plus 1 between 0~59
minute-digits is flash
>3s
return to TIME
5.4 Trip distance, Time counting,Average speed return to zero

10
Display
Press
time
Result
TD
>3s
trip distance record return to zero
LAP
>3s
time counting record return to zero
AVE
>3s
average speed return to zero
6. Direction Indicator
When the turning switch lever is set to left or right, the Direction
Indicator will flash.
7. High Beam Indicator
The indicator light when the high beam is on.
8. Low Beam Indicator
The indicator light when the low beam is on.

11
Ignition switch
Rotate the key to turn power ON or OFF.
ON
The engine can be started
Possible to drive
It is impossible to pull out the key.
OFF
The engine cannot be started.
The engine is stopped
The key can be inserted or pulled out
LOCK
The handlebars can be locked to one direction.
The key can be inserted or pulled out.
When you leave the motorcycle, you may lock the handlebars to
prevent your motorcycle from being stolen.
1. Turn the handlebars to the left.
2. Insert the key (if it is not in) from OFF position. Press the key in and
turn it anti-clockwise to the LOCK position.
3. Pull out the key.
To unlock the handlebars, insert the key from the LOCK position and
turn it (without pressing it) clockwise to the OFF position.
Note
Swing the handlebars to check if they are locked.
If it is hard to lock, you may turn the handlebars slightly rightwards
and try again.

12
Switches on the Handlebars
①. Dimmer Switch
This switch is used to change the headlamp beam. When you turn the
switch to:
HIGH
The high beam is turned on.
LOW
The low beam is turned on.
②. Turning Signal Lamp Switch
This switch is used to turn on/off the left/right turning signal lamps to
show other vehicles that you want to turn left/right. When you turn the
lever to:
Right
The right signal lamps flash.
Left
The left signal lamps flash.
Center
Push in the switch at the center position to
cancel the turn-signal operation.
Please turn off the indicators when they are no longer necessary or
①
②
③
④
⑤

13
your turn is complete. Incorrect indicator display can be very dangerous.
③. Horn Button
Press this button to sound the horn.
④. High Beam Flash Button
Press this button to light the high beam temporarily.
⑤. Clutch Lever
Grip this lever to disengage drive at the time of starting the engine or
shifting the gear. Disengage the clutch by pulling the lever to the handlebar.
⑥.Stop Switch of Engine
This switch, located on the top of the control panel of the right
handlebar. When it is on the “”position, the engine can be started.
If the switch is on the “”position the engine cannot be started.
⑦.Headlamp Switch
Turn the switch to position:
: The headlamp, instrument lamp, rear lamp will be on.
: The front and rear position lamp will be on.
: The headlamp, instrument lamp, rear lamp will be off.
⑧. Starter Button
This button is used to start the engine. Turn the ignition key to ON,
squeeze the rear brake lever and press the button, the engine will start.
Brake Levers
By operating the brake levers ⑨, you can control the speed of the
⑥
⑦
⑧
⑨
⑩

14
motorcycle and even make it stop. The brake is applied by squeezing the
brake lever gently towards the grip. The brake light will be lit when the
lever is squeezed inward.
Throttle Grip
Throttle grip ⑩is used to control engine speed. Turn it towards you
to increase engine speed; Turn it away from you to decrease the engine
speed.
Gear Shifting
This model of motorcycle is equipped with a five-shift gear-in
transmission system. The working order of the gearshift is as shown in the
fig.
The lever is connected to the ratchet of the gearshift. It will return
automatically to its original position after selection of a certain gear so that
it is possible to change to the next gear. The neutral gear is located between
the first and second gears. In the neutral mode, press the lever and first gear
will be engaged, each time the lever is shifted up, a higher gear is engaged.

15
Side Stand
.
Fuel Tank Cap
The fuel tank cap is provided with a latch.
To open it:
1. Lift the protection plate of the latch.
2. Keeping the tap in the locked position turn the latch to the left side
and then, remove the cap.
Warning
The sealed cap can increase slightly the pressure in the tank, so it is normal that
you hear a noise produced by the air when it comes out.
To close it:
1. Insert the cap with the key;
2. Turn the key to the right side and remove it.

16
Seat Lock
To open and close the seat as follows:
1. The seat lock lever is under the seat, press the seat down and turn
the seat lock lever then lift the seat. The seat will be opened.
2. Push the seat gently and it will be locked automatically. Lift the seat
gently to check if it is locked.

17
Fuel and Oil Recommendations
FuelUse unleaded petrol with an octane number 90 or higher.
Engine Oil
Use of high quality 4-stroke engine oil will extend the lifetime of the
engine. Grade SE or SD engine oil of the API scale is recommended;
whose viscosity is SAE10W-40. If this oil is not available, please purchase
appropriate substitutes according to the data listed below.
Motorini recommends Global Racing Oil lubricants.
Transmission Oil
Use good quality SAE 10W-40 multi-grade motor oil.
Motorini recommends Global Racing Oil lubricants.
Grade

18
Running in of New Motorcycle
The first 1600km/1000 miles are the most important in the life of your
motorcycle. Proper running-in during this period will help ensure
maximum life and performance from your new motorcycle.
Maximum Throttle Operation Recommendations
This table shows the maximum recommended throttle operation
during the running-in period.
Initial 800km/500mls
Less than 1/2 throttle
Initial 1600km/1000mls
Less than 3/4 throttle
Vary the engine Speed
The engine speed should be varied and not held at a constant speed.
Allow the Engine Oil to Circulate before Riding
Allow sufficient idling time after cold engine start up before applying
load or revving up the engine. This allows time for the oil to reach all
critical engine components. It is also advised to allow a warm engine to
circulate oil before revving.
First Service
The 1000km/600mls service is the most important service your
motorcycle will receive. During running-in the engine components will
have bedded in and all of the parts will be seated. Adjustments will be
checked, all fasteners will be tightened, and the used oil will be replaced.
Caution
The 1000km/600mls service should be performed as outlined in the
service and warranty book supplied. Pay attention to the information and
guidance given.

19
Inspection before Riding
Before riding the motorcycle, be sure to check the following items.
Never underestimate the importance of these checks. Perform all of them
before riding the machine.
WHAT TO CHECK
CHECK FOR
Steering
1) Smoothness
2) No restriction of movement
3) No play or looseness
Brakes
1) Correct brake lever play
2) No obstruction in braking.
Tyres
1) Correct pressure
2) Adequate tread depth
3) No cracks or cuts
Fuel
Enough fuel for the planned distance
Lighting
Operate all lights —headlamp, tail lamp, brake
lamp, turning lamps
Indicators
Oil indicator and turning indicator
Horn
Correct function
Engine oil
Correct level
Throttle
1) Correct play in the throttle cable
2) Smooth operation and positive return of the
throttle grip to the closed position
Brake Inspection
Hold the brake levers until you feel resistance, measure the travel at
the lever ends. The distances should be 10~20mm.
Inspection of the Tyre
1. Tyre Pressure
Check it with a tyre pressure gauge and adjust it to the correct value.
Tyre Pressures
Front Wheel
26 psi
Rear Wheel
33 psi
This manual suits for next models
1
Table of contents
Other motorini Motorcycle manuals