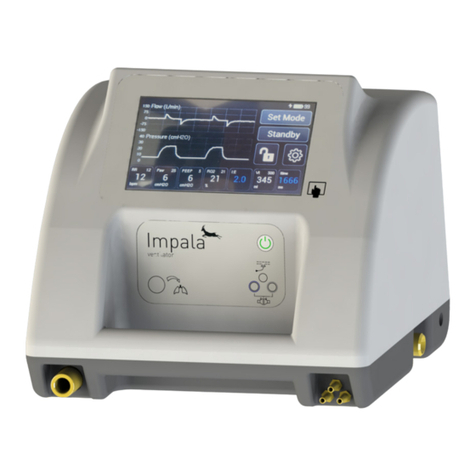
mtts Beluga-V1 User manual

Beluga User manual
User Manual
Effective date: March 2020
Issue Number: 00 Version: 03 EN
Issue Date: March 2020 www.mtts-asia.com
Beluga
ventilator
Model: Beluga - V1

V-0-03-EN
Beluga User manual
Contents
Company Information
Introduction
Device Description
Warnings
Setup
Operation
Alarm System
Cleaning
Maintenance
Explanation of Symbols
Warranty Policy
04
05
06
09
10
12
18
19
20
22
24
26
03

V-0-03-EN
Beluga User manual
Beluga Ventilator is a standalone ventilator intended to provide positive pressure
ventilation during resuscitation of infants. The device contains a built-in pump to
generate positive end-expiratory pressure (PEEP) and Peak Inspiratory Pressure
(PIP) without necessity of any external air sources. An integrated blender and oxygen
monitoring function also allows oxygen-rich (>21% O2) air with accurate Fraction of
inspired oxygen (FiO2) to be safely delivered to the patient.
Introduction
05
Company Information
04
MEDICAL TECHNOLOGY TRANSFER AND SERVICES Co., LTD
House No. 26, Alley 41, An Duong Vuong Street, Tay Ho District, Hanoi City, Vietnam
Tel: +84 24 3766 6521
Fax: +84 24 3718 8050
Email: assistanc[email protected]
www.mtts-asia.com
PROMETEO SRL
Via Mantova 9
38122 Trento
Italy
This user manual is intended for health care professionals.
manual, accessory Directions for Use, all precautionary information, and
WARNING - a warning statement refers to the conditions when the possibility
of injury to the patient or user exists if a procedure is not followed correctly.
NOTE - a note statement provides additional information intended to clarify
points, procedures or instructions.

V-0-03-EN
Beluga User manual
06
Device Description Device Description
07
Overview Control Panel
1 Power Button Touch and hold this button to turn off the device
2 Realtime Pressure Graph Plots measured pressure in realtime
The graph will be expand in look screen
3 Timer Displays Procedure Timers
4 Status Bar Displays Infomation about locking, battery charging conditions
5Pressure Measurement Displays Measured Pressure
6FiO2 Measurement Displays Measured FiO2
7 Setting Button Touch this button to enter Setting screen
8Lock Button Touch this button to lock the screen
9Up and Down Buttons Touch and hold these buttons to adjust a setpoint. The setpoint can be
selected by touching but 10, 11, or 12
Beluga Ventilator functions are controlled by touch screen.
1
2
34
6
9
7
8
10
5
1112
Front view
Side view
Mixed gas outlet
Control panel
Power button
Oxygen inlet
12VDC inlet
Hatch

V-0-03-EN
Beluga User manual
08
Device Description Warnings
09
10 PIP Setpoint Touch this button to select PIP setpoint
11 FiO2 Setpoint Touch this button to select FiO2 setpoint
12 Ventilation Rate Setpoint Touch this button to select Ventilation rate setpoint
Devices starts with PIP setpoint of 0 cmH2O. When selected, it is automati-
cally set to 20 cmH2O.
When PIP setpoint step size is set greater than 1, touching and holding the
Up/Down buttons will only increase/decrease the value once.
manual,accessory Directions for Use, all precautionary information, and speci-
oxygen-enriched environments, or nitrous oxide.
Do not modify this equipment without authorization of the manufacturer.
(19°C to 37°C) or humidity range (30%RH to 90%RH) can compromise
performance.
Do not operate the device if any of the components appear to be damaged or
broken. Damaged or broken components should be discarded and replaced.
Do not position the device in a location that reduces its ventilation.
Do not block any of the air vents on the back of the device.
The presence of electro-surgical devices, shortwave or microwave equipment
near this device could lead to electrical interference that would negatively
affect the function of the device.
Using tubing or other breathing circuit components without cleaning or disin-
fection between patients can result in infections.
result in serious injury to the patient or operator or damage to the device.

V-0-03-EN
Beluga User manual
1. Attach the T-piece circuit, gas hose
Setup
10
Setup
11
A. Attach the T-piece circuit to the mixed gas outlet in the front of the device.
B. Attach the compressed oxygen source to the CGA 1240 oxygen inlet.
2. Plug in and power up
A. The connector plugs into the side of the device and then directly into the power
outlet in the wall.
B. Press the Power Button to turn the device ON.
Only use T-piece circuit and power supply unit provided by MTTS.
The gas sources must provide pressure within the range of 10 to 60 psi
(0.7 to 4.1 bar). If the gas sources are outside of this range, the device may
not be able to produce the desired %FiO2.
Attaching the compressed oxygen will not waste any oxygen. The machine will
not use any compressed oxygen until you increase the FiO2 setpoint.

V-0-03-EN
Beluga User manual
Operation
12
Start the device
Touch PIP Setpoint to start the device.
The device will start immediately with default PIP Setpoint of 20 cmH2O.
13
Operation
Adjust parameters
B. FiO2
Select FiO2 Setpoint circle, then touch Up/Down button to adjust FiO2.
A. PIP
Select PIP setpoint circle, then touch and hold Up/Down button to adjust PIP.
The red horizontal level will move up/down according to the change.
C. Ventilation Rate (VR)
Select VR Setpoint circle, then touch Up/Down button to adjust VR.
Metronome can be disabled in Setting panel.
Ventilation rate is used by metronome only.

V-0-03-EN
Beluga User manual
Operation
14
Operation
15
Setting screen
Lock/unlock the screen
The screen can be locked by touch and hold the lock button. On the locked screen,
all setpoints will disapear and the graph will expand. To unlock the screen, touch and
hold the unlock button.
screen, touch Setting button on the unlocked screen. To return the unlocked screen,
touch the Return button on the Setting screen.
Resuscitate patient
A. Fit T-piece to resuscitation mask and place over the baby’s mouth and/or nose.
B. Resuscitate by placing and removing thumb over the PEEP cap to allow inspiration
and expiration.
Following features are available on the Setting screen:
Calibrate oxygen sensor
Goto the Device information screen

V-0-03-EN
Beluga User manual
Operation
16
Calibrate oxygen sensor
To calibrate oxygen sensor, touch the ‘O2 Calib’ button on the Setting screen. The
process will take 1-2 minutes to complete. After calibration, the FiO2 reading should
be 21%.
Disconnect oxygen source before calibration.
Oxygen sensor must be calibrated at least every 3 months. It is recommended
to calibrate the sensor before each use.
Operation
Turning off the device
17
The device can be turned off by Power button either on the screen or in front of the
device. Press and hold the button for 1.5 second.
The Setting screen and available features may vary depending on the soft-
ware version.
Enable/disable metronome
Lock/unlock autorotate function
Adjust PIP step size
Adjust alarm volume

V-0-03-EN
Beluga User manual
18
Alarm system
Alarm Cause Effect
HIGH PRESSURE Measured pressure higher than the
PIP setpoint by 4 cmH2O
Device adjusts pressure by itself
Pressure >14 cmH2O for longer
than 5 seconds
No effect
HIGH FiO2 Measured FiO2 higher than the
setpoint by 6 %FiO2
Device controls oxygen valve to regulate FiO2
PRESSURE SENSOR FAILURE Pressure sensor disconnected or
faulty
No effect
OXYGEN SENSOR FAILURE Oxygen sensor disconnected or
faulty
Oxygen valve closed
LOW BATTERY Battery remaining capacity is low No effect
List of alarms:
All the alarms listed above are conisdered MEDIUM PRIORITY (ref. IEC 60601-1-8).
In order to verify the operation of auditory and visual alarms, perform the following
procedure:
1. On the unlocked screen, set PIP to 20 cmH2O
2. Occlude the mixed gas outlet for 10 seconds.
3. Check pressure audible alarm sounds
Alarm system test
General
Cleaning
Comply with hospital, local and national guidelines for product cleaning fre-
quencies.
Ensure oxygen supply is turned off and disconnected from Beluga Ventialator
before performing cleaning procedures.
Cleaning shall be performed at ambient condictions.
Before cleaning, remove and discard all used disposable products using rec-
ommended method of disposal.
Dust all surfaces with clean damp soft cloth.
Clean all plastic surfaces with mild detergent solution (maximum 2% in wa-
ter).
Dry all the surfaces after cleaning with a clean soft cloth or paper towel.
Ensure that no part of Beluga Ventilator is immersed in any cleaning liquid or
cleaning solution.
Do not use abrasive cleaning solutions.
Ensure all Beluga Ventilator parts and accessories are checked before re-
turning the device to service.
19
The reusable resuscitation circuit includes a number of parts that must be com-
pletely disassembled and sterilized before use. These parts include:
Component Recommended sterialization method
Silicone tube Autoclaving
PEEP valve Low-temperature plasma sterilization OR
soak disinfection with 1:500 chlorine-containing disinfectant
Mask Autoclaving

V-0-03-EN
Beluga User manual
Maintenance
dures.
After the maintenance is completed, ensure the equipment is functioning cor-
Ensure only approved replacement parts are used during service and mainte-
nance procedures.
Please contact an authorised MTTS representative for further assistance with
any servicing or maintenance requirement.
20
The Beluga Ventilator includes a number of parts that must be replaced or serviced
during the lifetime of the device. These parts include:
Component Approx. Duration of Use Maintenance Information
6 months Clean or replace.
Oxygen sensor 18 months Replace if it is fauty or FiO2 control
is not accurate after calibration.
Maintenance
21
Device information screen
To better understand the device performance, device information should be checked
before opening the device. From Setting screen, touch the Info button to see this in-
formation.
Air fi lter and oxygen sensor replacement
Oxygen sensor

V-0-03-EN
Beluga User manual
Specifi cations
22
Control Settings
Set PIP
Set FiO2
Set Ventilation rate
Displays
Measured pressure display
Measured FiO2display
20 cmH2O
5 - 45 cmH2O
21 %FiO2
21 - 100 %FiO2
Disabled
30 - 60 BPM
±1 cmH2O
0 - 100 cmH2O
±5 %FiO2
21 - 100 %FiO2
Default
Range
Default
Range
Default
Range
Accuracy
Range
Accuracy
Range
Dimensions (HxWxD)
Total unit mass
Alarms
Internal pump
20 cm x 22cm x 20 cm
2.5 kg
3 pulse burst, followed by 2.5 second delay
Adjustable
Blower, 12VDC
overall
Medium Priority Audible
Medium Priority Visual
Alarm Volume
Type
Power characteristics
Off-the-shelf external power supply
Battery
60W, 100-240VAC, 47/63Hz
International medical safety approvals
(ANSI/AAMI/EN 60601-1, UL/TUV)
Class I construction is standard (ground
required)
100k hours MTBF
RoHS 2 compliant
Over voltage / over current protection
11.1V Li-ion
6 cells, 6000mAh
Type
Capacity
Operating
Transport and storage
Exclusions
Standards for Reference
EN ISO 13485:2016
EN ISO 14971:2012
EN 60601-1:2006/A1:2013
EN 60601-1-2:2015
EN 60601-1-6:2010
EN 60601-1-8:2007/A11:2017
MEDDEV 2.12-1 Rev. 8
MEDDEV. 2.7.1 Rev. 4
MEDDEV. 2.12-2 Rev. 2
Ambient temperature +18°C to +35°C
Humidity: 0% to 90% RH non condensing
Atmospheric Pressure: 70-106kPa
Ambient temperature 0°C to +50°C
Humidity: 0% to 90% RH non condensing
Atmospheric Pressure: 70-106kPa
None
Specifi cations
23

V-0-03-EN
Beluga User manual
Explanation of Symbols
Do not disassemble Beluga Ventilator unless you are an
MTTS trained technician or have been instructed to by
Device manufacturer.
Date of manufacture.
Keep out of direct sunlight.
This device should be disposed of separately from normal
household waste so that components can be recycled.
Refer to User Manual before operating this device.
Serial Number
24
Power supply polarity
12V DC 5A 12 Volt, Direct Current, 5 Ampere
25
2265
Name and address of European Authorized Representative

V-0-03-EN
Beluga User manual
Warranty Policy
General Terms
This MTTS Limited Warranty gives you, the customer,
express limited warranty rights from MTTS, the manu-
Please refer to the MTTS Website for an extensive de-
scription of your limited warranty entitlements. In addi-
tion, you may also have other legal rights under applica-
ble law or special written agreement with MTTS.
MTTS MAKES NO OTHER EXPRESS WARRANTY OR
CONDITION WHETHER WRITTEN OR ORAL AND MTTS
DITIONS NOT STATED IN THIS LIMITED WARRANTY.
DICTIONS OUTSIDE VIETNAM, MTTS DISCLAIMS ALL
ITY AND FITNESS FOR A PARTICULAR PURPOSE. FOR
ALL TRANSACTIONS OCCURRING IN VIETNAM ANY
I
ABILITY, SATISFACTORY QUALITY, OR FITNESS FOR A
PARTICULAR PURPOSE IS LIMITED TO THE DURATION
OF THE EXPRESS WARRANTY SET FORTH ABOVE. SOME
COUNTRIES DO NOT ALLOW A LIMITATION ON HOW
TIAL DAMAGES FOR CONSUMER PRODUCTS. IN SUCH
COUNTRIES, SOME EXCLUSIONS OR LIMITATIONS OF
THIS LIMITED WARRANTY MAY NOT APPLY TO YOU. FOR
CONSUMER TRANSACTION, THE LIMITED WARRANTY
TERMS CONTAINED IN THIS STATEMENT, EXCEPT TO
THE EXTENT LAWFULLY PERMITTED, DO NOT EXCLUDE,
RESTRICT, OR MODIFY BUT ARE IN ADDITION TO THE
MANDATORY STATUTORY RIGHTS APPLICABLE TO THE
SALE OF THIS PRODUCT TO YOU.
This Limited Warranty is applicable in all countries and
may be enforced in any country or region where MTTS or
its authorized service providers offer warranty service for
the same product model number (subject to the terms
and conditions set forth in this Limited Warranty)
Under this Limited Warranty, products purchased in one
country or region may be transferred to another country
or region where MTTS or its authorized service provid-
ers offer warranty service for the same product model
number. Warranty terms, service availability, and service
response times may vary from country or region to coun-
try or region. Standard warranty service response time is
subject to change due to local parts availability. If so, your
MTTS authorized service provider can provide you with
MTTS product to make it operate in a country for which
it was never intended to function for legal or regulatory
reasons. MTTS is not responsible for any tariffs or duties
that may be incurred in transferring the products.
MTTS guarantees that the product that you have pur-
chased or leased from MTTS is free from defects in ma-
terials or workmanship under normal use during Lim-
ited Warranty Period. The Limited Warranty Period starts
on the date of purchase or lease from MTTS, or from
the date MTTS completes installation. Your dated sales
or delivery receipt, showing the date of purchase of the
product, is your proof of the purchase or lease date. You
may be required to provide proof or purchase or lease as
a condition of receiving warranty service. You are entitled
to hardware warranty service according to the terms and
conditions of this document if a repair to your MTTS prod-
uct is required within the Limited Warranty Period.
Unless otherwise stated, and to the extent permitted by
local law, new MTTS product may be manufactured using
new materials and used materials equivalent to new in
performance and reliability. MTTS may repair or replace
MTTS products (a) with new or previously used products
or parts equivalent to new in performance and reliability,
or (b) with equivalent products to an original product that
has been discontinued. Replacement parts are warrant-
ed to be free from defects in material or workmanship for
ninety (90) days or, for the reminder of Limited Warranty
Period of the MTTS product they are replacing or in which
they are installed, whichever is longer.
26
Warranty Policy
MTTS will, at its sole discretion, repair or replace any
components or product that manifests a defect in materi-
als or workmanship during the Limited Warranty Period.
All component parts removed under this Limited War-
ranty become the property of MTTS. In the unlikely event
that your MTTS product has recurring failures, MTTS at
its sole discretion, may elect to provide you with (a) a
replacement unit selected by MTTS that is the same or
equivalent to your MTTS product in performance or (b)
to give you a refund of your purchase price or lease pay-
ments (less interests) instead of a replacement. This is
your exclusive remedy for defective products.
Exclusions
MTTS DOES NOT WARRANT THAT THE OPERATION OF
FREE. MTTS IS NOT RESPONSIBLE FOR DAMAGE THAT
OCCURS AS RESULT OF YOUR FAILURE TO FOLLOW THE
INSTRUCTIONS INTENDED FOR THE PRODUCT.
This Limited Warranty does not apply to expendable or
consumable parts and does not extend to any product
from which the serial number has been removed or that
gas been damaged or rendered defective (a) as a result
of accident, misuse, abuse, contamination, improper or
inadequate maintenance or calibration (if required) or
other external causes; (b) by operation outside the usage
parameters stated in the user documentation shipped
with the product; (c) by software, interfacing, parts or
supplies not supplier by MTTS; (d) improper site prepara-
tion or maintenance; (e) virus infection; (f) loss or dam-
other than (i) MTTS personnel, (ii) an MTTS authorized
service provider, or (iii) your own installation of end-user
replaceable MTTS or MTTS approved parts if available for
your MTTS product in the servicing country or region.
Limitation of Liability
I
ED ABOVE, THE MAXIMUM LIABILITY OF MTTS UNDER
THIS LIMITED WARRANTY IS EXPRESSLY LIMITED TO
THE LESSER OF THE PRICE YOU HAVE PAID FOR THE
FUNCTION IN CONDITIONS OF NORMAL USE.
EXCEPT AS INDICATED ABOVE, IN NO EVENT WILL MTTS
UCT OR THE FAILURE OF THE PRODUCT TO PERFORM,
CIAL, INCIDENTAL, OR CONSEQUENTIAL DAMAGES.
MTTS IS NOT LIABLE FOR ANY CLAIM MADE BY A THIRD
PARTY OR MADE BY YOU FOR A THIRD PARTY.
THIS LIMITATION OF LIABILITY APPLIES WHETHER
DAMAGES ARE SOUGHT, OR CLAIM MADE, UNDER THIS
TION LIABILITY CANNOT BE WAIVED OR AMENDED BY
ANY PERSON. THIS LIMITATION OF LIABILITY WILL BE
EFFECTIVE EVEN IF YOU HAVE ADVISED MTTS OF THE
POSSIBILITY OF ANY SUCH DAMAGES. THIS LIMITATION
OF LIABILITY, HOWEVER, WILL NOT APPLY TO CLAIMS
FOR PERSONAL INJURY.
THIS LIMITED WARRANTY GIVES YOU SPECIFIC LEGAL
RIGHTS. YOU MAY ALSO HAVE OTHER RIGHTS THAT MAY
VARY FROM COUNTRY TO COUNTRY. YOU ARE ADVISED
TO CONSULT APPLICABLE COUNTRY LAWS FOR A FULL
DETERMINATION OF YOUR RIGHTS.
27

V-0-03-EN
Beluga User manual
Warranty Policy
Limited Warranty Period
The Limited Warranty Period for this MTTS product is a
your sales receipt is the date of purchase unless MTTS or
your reseller informs you otherwise in writing.
Customer Responsibilities
In order to avoid the risk of charges for issues not cov-
ered by your limited warranty (issues that are not due to
defects in materials and workmanship on MTTS product),
you will be asked to assist MTTS as follows:
Contacting MTTS
If your MTTS product fails during the Limited Warranty
Period and the suggestions in the product documentation
do not solve the problem, you can receive support by do-
ing one of the following:
stall software patches, run MTTS diagnostics and
utilities;
Implement temporary procedures or workarounds
provided by MTTS while MTTS works on permanent
solution;
Cooperate with MTTS in attempting to resolve the
problem using online chat, email, or telephone. This
may involve performing routine diagnostic procedures,
installing additional software updates or patches;
of warranty service provided by MTTS and any other
actions that MTTS may reasonably request in order to
best perform the warranty support
Locate and contact your nearest MTTS service pro-
vider via MTTS website:
http://www.mtts-asia.com/support/
Call the Technical Support Centre:
+84 24 3766 6521
-
-
Before calling MTTS or an MTTS authorized service pro-
vider please have the following information available:
Product serial number and model name
Applicable error messages
Detailed questions
-
-
-
CUSTOMER IS RESPONSIBLE FOR DELIVERING THE
CATION TO THE MTTS AUTHORIZED SERVICE POINT.
28
-
-
-
-

MEDICAL TECHNOLOGY TRANSFER AND SERVICES Co., LTD
House No. 26, Alley 41, An Duong Vuong Street, Tay Ho District, Hanoi City, Vietnam
Tel: +84 24 3766 6521
Fax: +84 24 3718 8050
Email: assistanc[email protected]
www.mtts-asia.com
PROMETEO SRL
Via Mantova 9
38122 Trento
Italy
Table of contents
Other mtts Fan manuals
Popular Fan manuals by other brands

Broan
Broan QTX110SL installation guide

Envirovent
Envirovent MEV 160 installation guide

Carrier
Carrier 42TW Series Installation, Start-Up and Service Instructions

KAZE APPLIANCES
KAZE APPLIANCES SEP120 manual

Vaxcel
Vaxcel F0106 quick start guide

Monte Carlo Fan Company
Monte Carlo Fan Company Centro Max 5CQM52-L Series Owner's guide and installation manual