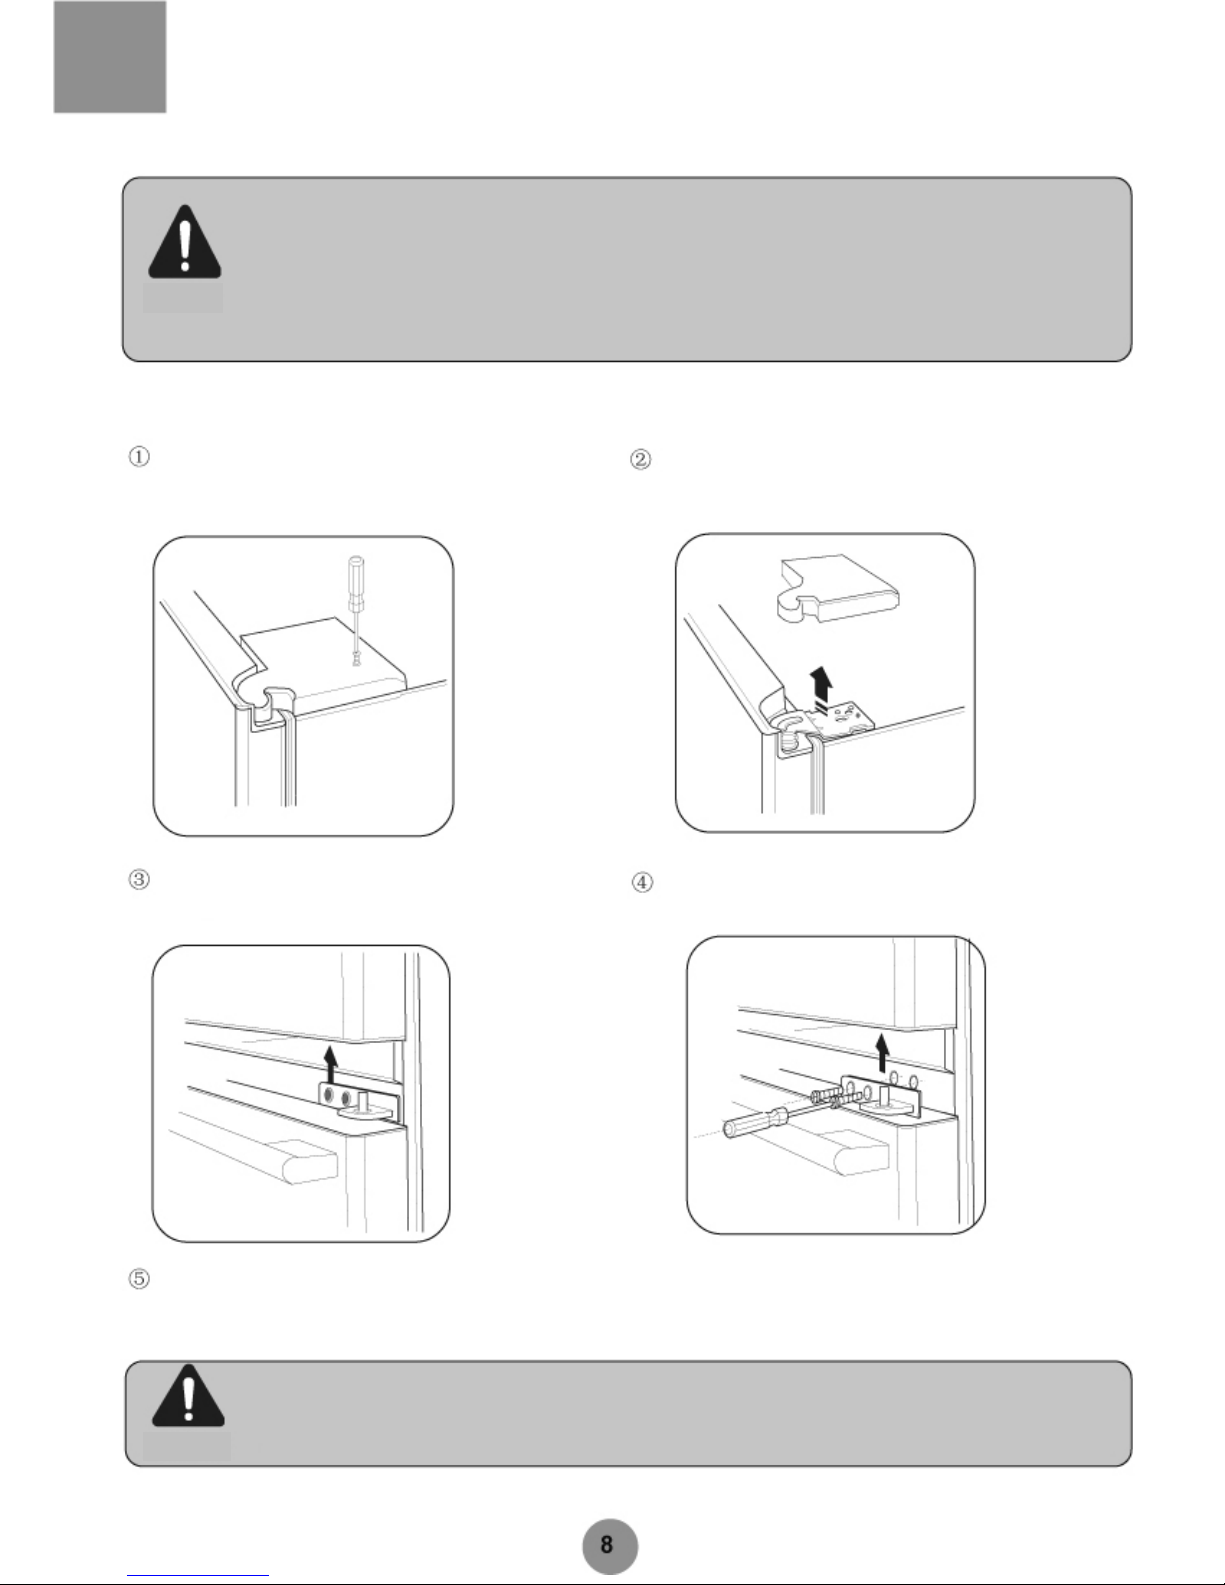
nardi HB21TSSAA User manual

Household Refrigerator / Freezer
OperationManual
Réfrigérateur / congélateur ménager
Mode d’emploi
Kühlschrank/Gefrierschrank für den
Gebrauchsanweisung
Frigorifero/congelatore per usi domestici
Manuale per l'uso
Frigorífico/Congelador doméstico
Manual de funcionamiento
Combinado doméstico
Manual de funcionamento
Haushaltsgebrauch
HB21TSSAA

Home Refrigerato
r
Table of Contents
Before Use
Features ................................................................. 1
Name of Parts ...........................................................2-3
Safety Precautions ................................................... 4-6
Location................................................................7
Removing & Replacing Door....................................8-10
Preparation ................................................................ 11-13
Initial Use....................................................................14
Functions ...................................................................15-18
Instructions for the Refrigerator Compartment
About the Refrigerator Compartment......................19-20
Storing Food in the Refrigerator Compartment......21
UsefuI Tips.................................................................22
Instructions for the Freezer Compartment
About the Freezer Compartment .............................22-23
Storing Food in the Freezer Compartment .............24
Defrosting • Cleaning • Vacation
Defrosting • Cleaning.............................................. 25
Vacation .....................................................................26-27
Troubleshooting • After-sale Services
Troubleshooting ...................................................... 28-29
After-sale Services.................................................. 30-31
Technical Data
.Circuit Diagram • Packaging List
Technical Data Circuit Diagram • Packing List -..........32-38
.
•Please read this User Manual carefully before use.
•Please keep this User Manual in a safe place.
•The appearance and color of your refrigerator may vary slightly from that
illustrated herein.

Features
Ice making
A built-in semi-automatic icemaker will produce ready-to-use ice cubes based on your
preference.
Chill compartment
The chill compartment at the bottom of the refrigerator compartment is intended for storage
of delicatessen within the temperature range from -2°C to +3°C.
Slide-out shelf for easy food access
The refrigerator compartment is equipped with slide-out shelves for easy loading and
unloading. These shelves can be removed when the door is at a right-angle.
Artificial Intelligent (AI) design
Optimum refrigeration performance is secured based on the inner and ambient temperature,
without the need for manual intervention.
Super slim, super large and super luxurious
Compact dimensions, large capacity, spacious refrigerator compartment and freezer
compartment, supreme internal and external design
CFC-free and frost-free deep freezing enabled by an efficient air cooling system
Air Curtain technology
The air curtain located at the front end of the refrigerator compartment is intended to aid food
storage by preventing invasion of warm air and facilitating equal distribution of cool air.
Cooling before defrosting to prevent thawing
A pre-cooling process will be activated based on the measured inner temperature, to avoid
the adverse impact of temperature rises on food stored in the refrigerator.
Optimized refrigeration performance and long service life of the compressor enabled by an
efficient condenser unit and fan motor
Door-open alarm, touch button and large-screen LCD display
Vitamin C technology for fresh food storage
The Vitamin C technology effectively keeps the food fresh for a longer period of time while
eliminating unpleasant odors.
Smooth and effortless drawer slide

Names of
p
arts
Refrigerator light

Names of
p
arts
Dear Customer
Thank you for purchasing a NARDI product.
NARDI products are of supreme quality and superior performance. Please read
these instructions and follow the procedures described herein.
You are enjoying a NARDI International Star Service. For any question you
may have, please contact our service centers at the telephone numbers or
addresses specified in the Letter of Warranty.
NARDI – Now, and always!
NOTE: Product specifications may change without notice due to product
improvements.

Safet
y
Precautions
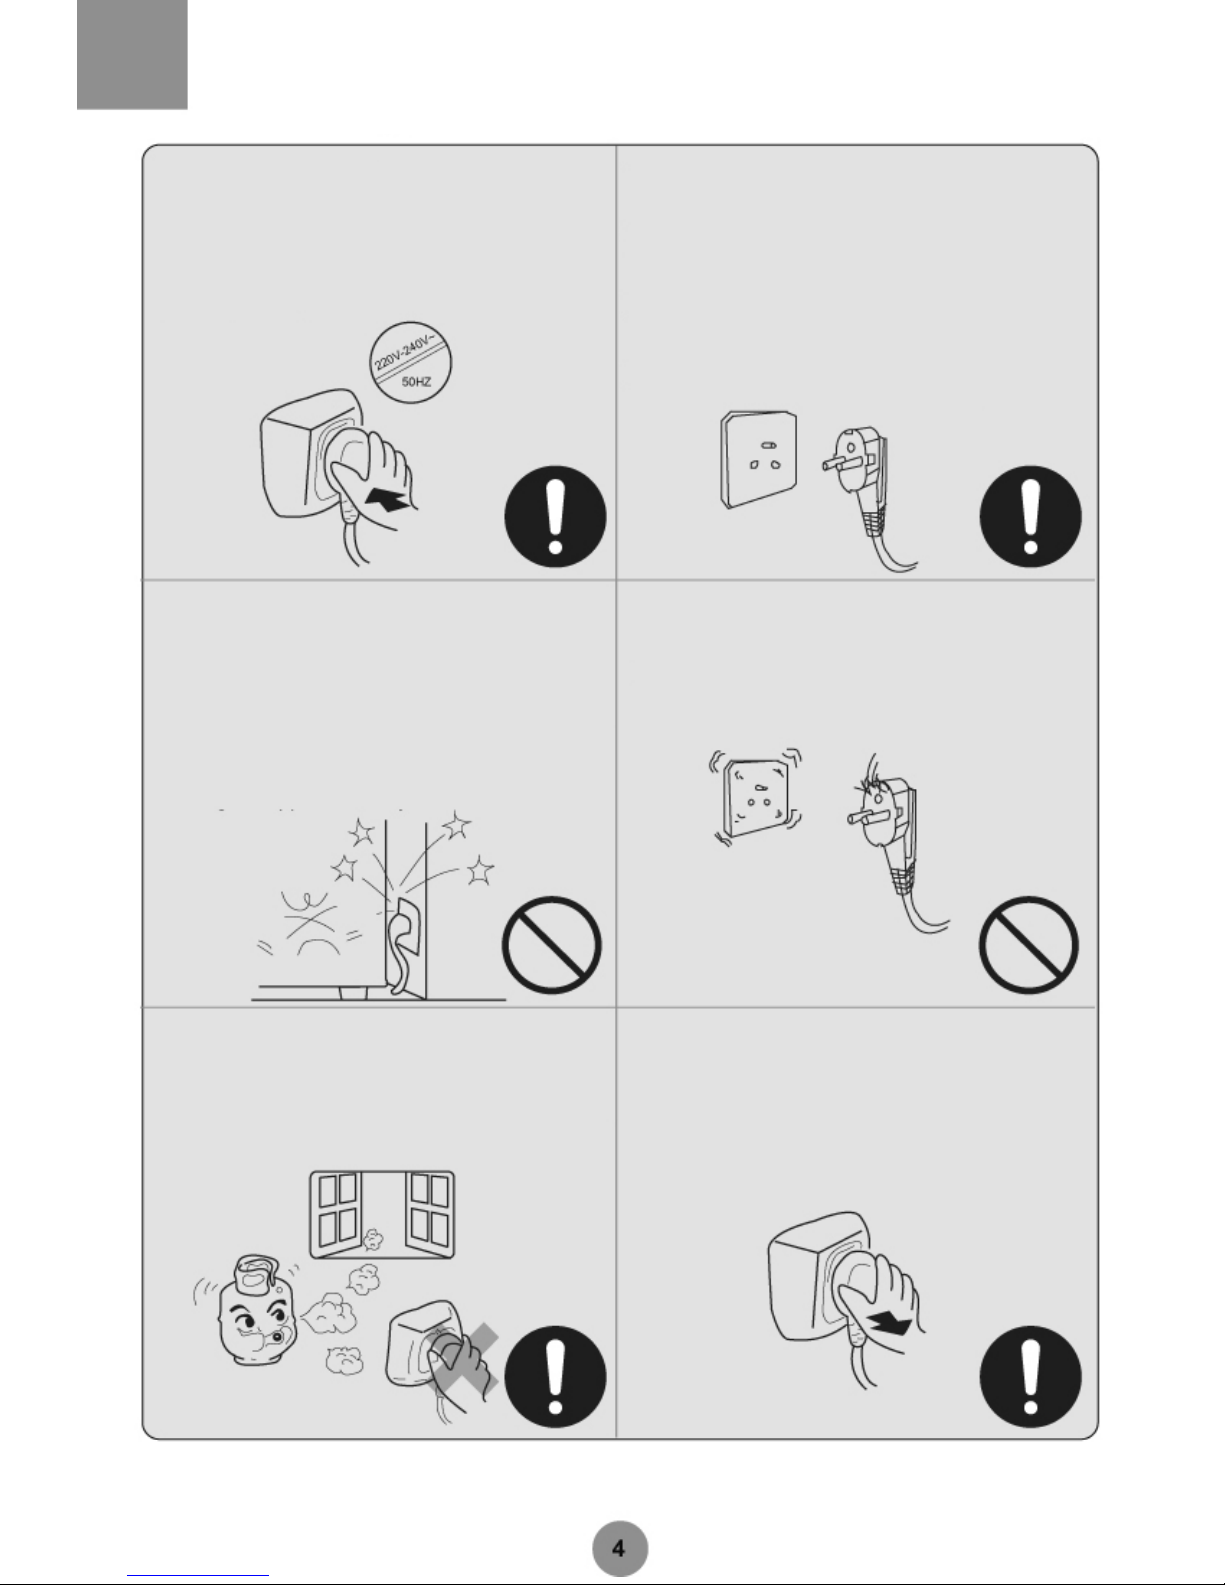
Power supply: AC 220V-240V/5OHZ
If the voltage fluctuates violently (beyond 187-
242V), it is necessary to use a voltage stabilizer of
750W or above to prevent startup failure, damage
to the control board or compressor, or unusual
noises.
The appliance must be plugged into a dedicated
outlet that is securely grounded. The power cord
of this appliance is fitted with a three-prong plug
(grounded) that complies with the standard three-
prong outlet (grounded). Never cut off or remove
the third prong. The refrigerator should be located
so that the plug is accessible. VVARNING! The
plug should be securely connected to the socket
to prevent fire hazards.
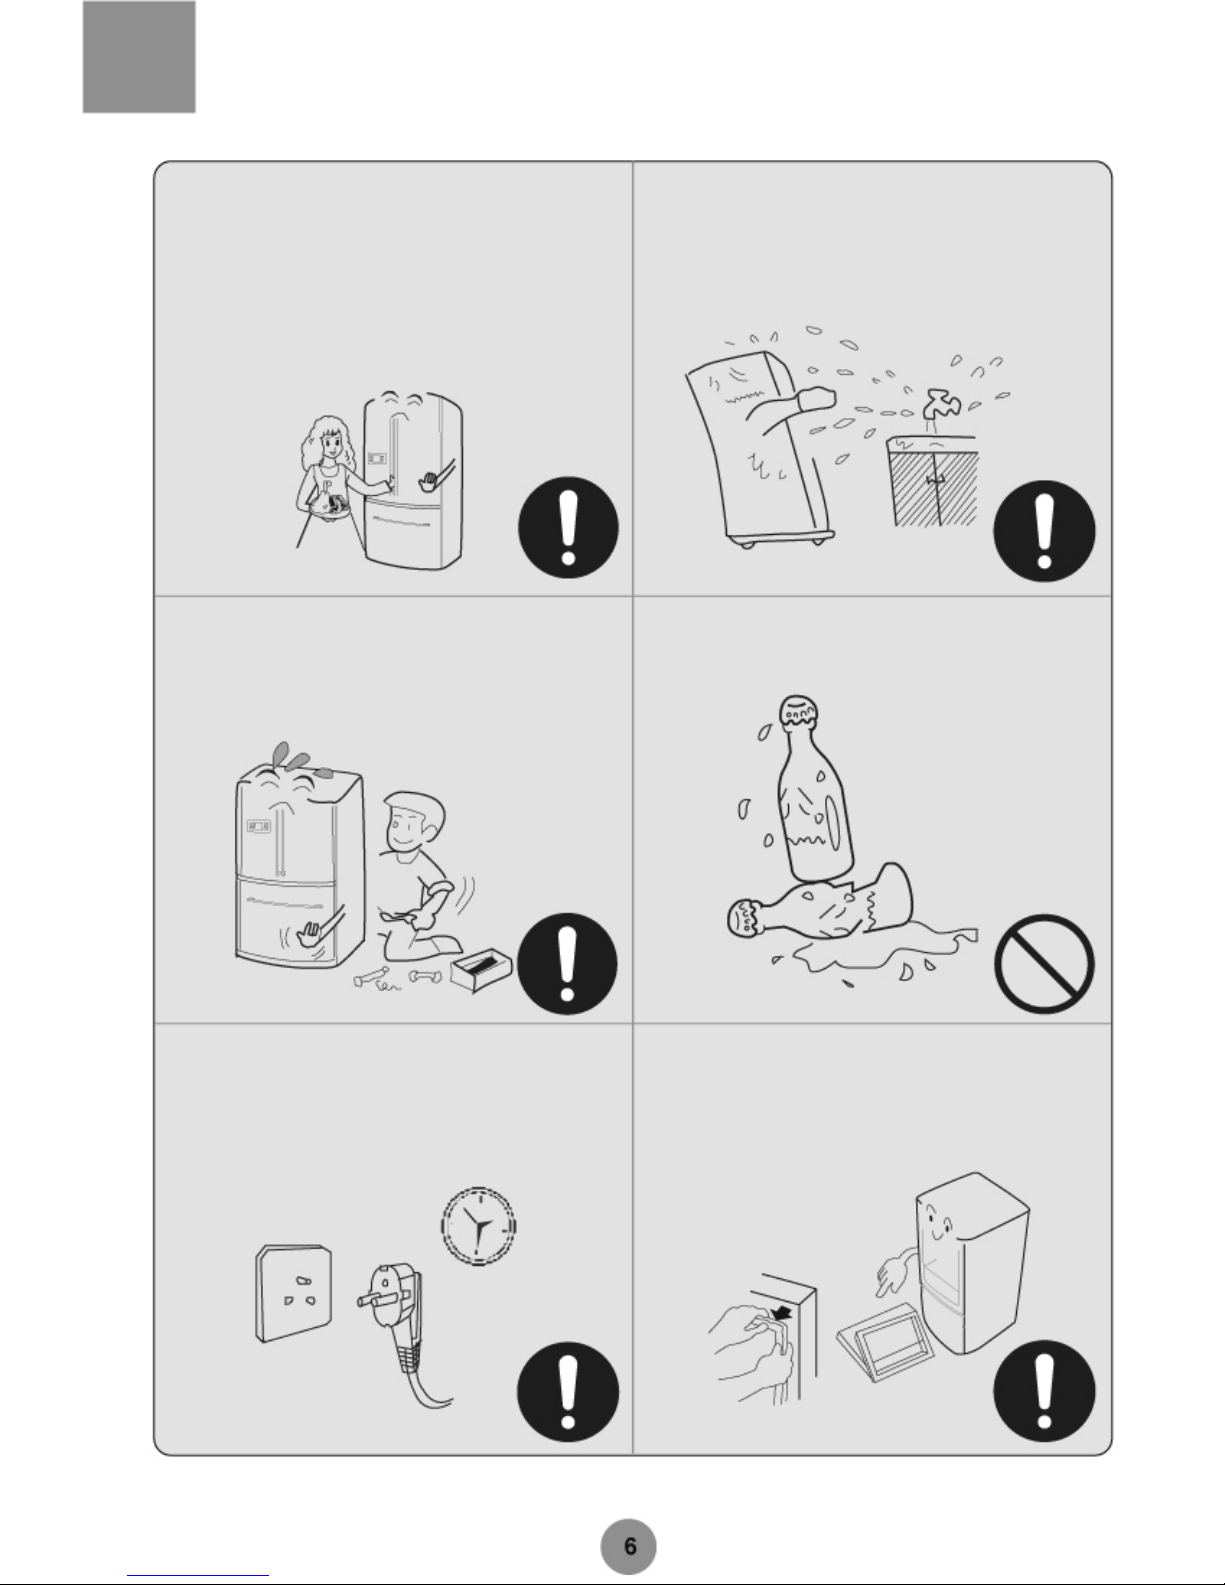
Be careful not to damage the power cord. Hold the
plug, not the electric cable, when disconnecting
the appliance from the outlet. Place the power
cord in such a way as to eliminate the risk of
damage caused by the refrigerator’s weight.
Be careful not to damage the power cord when
moving the appliance.
When the power cord is damaged
The use of a damaged cord or plug is strictly
prohibited. If the power cord is damaged, it should
be replaced at an authorized service center.
When there is a gas leak
Turn off the gas valve.
Open the doors and windows for ventilation.
Do not plug or unplug the refrigerator or other
electric appliances.
Always remember to unplug the appliance in the
following cases:
Unplug the appliance before cleaning and
reparation.
Unplug the appliance before replacing the old light
bulb to prevent electric shock.

Safet
y
Precautions
Never store inflammable or explosive items and
strong corrosive acids or alkalis in the appliance.
Mousse / Spraying agent / Gas/ Acid / Alkali
This appliance is a household refrigerator, which is
produced in accordance with the specifications of
national standards. It is intended for food storage
only, not for storage of blood, medicine and
biological products.
To prevent the risk of fire, keep the appliance
away from gasoline or any other inflammables. To prevent the risk of electromagnetic interference
or other accidents, do not place patch panels,
voltage stabilizers or microwave ovens on top of
the refrigerator or use any electric appliance
(unless recommended by the manufacturer) inside
the refrigerator.
Children must not play with the door or bottle
racks as serious injury may occur. Do not swing
on the door or cabinet when loading and
unloading the refrigerator.
The internal surface of the freezer compartment is
very cold when the appliance is running. Do not
touch the surface, especially with wet hands.

Safet
y
Precautions
Hold the door handle when opening and closing
the door. The gap between the doors and the
cabinet are very small. Ensure no children are
standing within the range of the door movement
when opening or closing the appliance doors.
Do not spray or splash the refrigerator, or place same in
a damp area to avoid adverse effects on electric
insulation performance.
Disassembly or maintenance must be authorized.
Damage to the refrigeration system is strictly
prohibited. Repairs must be carried out by
authorized personnel.
Bottled beer or beverages must not be stored in
the freezer compartment to avoid the risk of
explosion.
Unplug the appliance in the event of a power
interruption or when cleaning. Allow at least a 5
minute lapse before restarting the refrigerator, to
prevent damage to the compressor caused by
frequent startups.
Please remove the door, door seal and shelves
before disposing of the old appliance and put them
in a safe place to prevent children from being
trapped inside.

Location
Leveling Do not expose the appliance to direct sunlight or
sources of heat.
The appliance should stand firmly on a solid floor.
To support it, use firm and solid, non-flammable
pads. Never use the packaging materials for
support. Level the appliance using the adjustable
legs whenever necessary. Turn clockwise to raise
the refrigerator, and anticlockwise to lower it.
Do not expose the appliance to rain and moisture.
Keep the appliance dry and clean. To prevent the risk of injury and accidents, do not
place heavy loads and water containers on top of
the refrigerator.
The appliance should be placed in a well ventilated room. A minimum clearance of 10cm at both sides and
at the rear is required. If a built-in installation is needed, allow 25cm or more above the top surface of the
a
pp
liance and 5cm or more awa
y
from the walls
,
to enable
p
ro
p
er air circulation.

Removing & Replacing Doors
To avoid injury, property loss or damage to the refrigerator, make sure you remove all food from the door racks, remove the bottle bin(s),
unplug the refrigerator and shut off the water supply before removing and replacing a door.
To avoid injury or property loss, remove or replace the door with the help of 2 persons or more. The following instructions should be
observed.
NOTE
Removing and replacing the right hand door of the refrigerator
tt
Unscrew the upper right hand hinge cover and remove. Unscrew the upper right hand hinge and remove.
Remove the door and place it in a suitable position. Remove the middle hinge if necessary.
Replace the door in the reverse sequence.
Take care to prevent the door from falling onto you when lifting the door off the hinge.
NOTE

Removing & Replacing Doors
Removing and replacing the left hand door of the refrigerator
tt
Unscrew the upper left hand hinge cover and remove. Unscrew the upper left hand hinge by means of hexagonal
screwdriver and remove.
Remove the door and place it in a suitable position. Remove the middle hinge if necessary.
Replace the door in the reverse sequence.
Take care to prevent the door from falling onto you when lifting the door off the hinge.
NOTE
Removing & Replacing the Freezer Drawer
Pull out the freezer drawer entirely and remove it from the
refrigerator. Replace the freezer drawer in the reverse sequence.

To prevent the risk of suffocation, keep children and pets away
from the drawers, in case they get trapped within.
WARNING
Pre
p
aration
Remove all packaging materials.
Foam support and adhesive tapes should be removed.
Check the accessories and literature.
Check the accessories in accordance with the packing list. For
any doubt, contact the dealer.
Locate the appliance in a proper position. See
"Location".
Please write down the model number and serial number in the Letter of
Warranty for later reference.

Pre
p
aration
It is recommended to clean the appliance
before operation.
See Cleaning.
Standstill
To ensure optimal operation, allow the appliance to stand still for
6 hours or longer after installation and cleaning.
Installing Bottom Trim
Open the door of the refrigerator compartment and take out the
bottom trim. Fasten it to the bottom of the refrigerator with screws,
as illustrated.
Wear a pair of gloves to protect your hands when
dismantling the bottom trim and adjustable legs
of the refrigerator.
WARNING

Pre
paration
illus tra tio n 1 illus tra tio n 2

Pre
p
aration
Installing the wine shelf
Open the door of the refrigerator compartment. Take out the food shelf in the upper left
corner. Place the glass shelf downwards on a table. Then take out the wine shelf from the
delicatessen drawer at the bottom. Hold the wine shelf on both ends, attach it to the food
shelf (as shown below in Fig 1) and then push it in place (as shown below in Fig 3).
Installing the front cover of the chill compartment
Open the door of the refrigerator compartment. Remove the front cover of the chili
compartment from the crisper cover. Then place the rotary shaft at the two ends of the
chili compartment into the supporting slot of the stele guide, and turn the front cover of
chili compartment downwards.

Initial Use
Connect the appliance to the power supply.
The actual refrigerator and the freezer temperatures are shown.
The appliance has a backup memory, storing the settings prior to a power
interruption. (See Backup Memory section on Page 17 for details)
Operation Modes
Recommendation!
Once the AI mode is selected there is no need to
make any adjustment within a prescribed temperature
range, regardless of changes in
ambient temperature.
You can select one of the following operation modes.
(1) AI: Unless otherwise required, it is recommended that the AI mode is used. Tap the AI button
and the indicator will illuminate. The appliance will start an automatic operation. (See the AI
Mode section on Page 14)
(2)Manual: Alternatively, you can adjust the inner temperature by means of the temperature
control button. (See the Temperature Setting & Regulation section on Page 16)
Loading the refrigerator
The inner compartment will be cold enough and ready for food storage after a
couple of hours of non-load operation.
When the temperature setting is adjusted, it takes some time for
the desired inner temperature to be reached. The period will be
longer or shorter depending on the ambient temperature, the
amount of food in storage and how often the door is opened.
NOTE

Initial Use
Control panel
Loading the refrigerator
The inner compartment will be cold enough and ready for food storage after a
cou
p
le of hours of non-load o
p
eration.
A Refrigerator temperature control button G Refrigerator temperature display
B Fast chill button H Freezer temperature display
C Freezer temperature control button I Fast chili icon
D AI button J Lock icon
E Fast freeze button K Fast freeze icon
F Lock / unlock button L AI icon
AI Mode
The AI mode means there is no need for manual intervention and the temperature setting will change
automatically along with the ambient temperature and the inner temperature. In Unlock mode, the AI button
(D) may be tapped to display the AI icon (L) and activate the AI mode. To quit the AI mode, tap the AI
button (D) again. The AI icon (L) will disappear.
When a control or function fault is detected, the refrigerator temperature and the freezer temperature will
disappear and the fault codes will be displayed, i.e. EO, E1, E2, F 1 , F2, F3, F5, etc.
Fault Display

Functions
Lock & Unlock
In Unlock mode, the Lock / Unlock button (F) may be tapped to display the Lock icon (J) and enter into the Lock mode.
To quit the Lock mode, tap the Lock / Unlock button (F) again. The Lock icon (J) will disappear.
NOTE: Controls for selecting temperatures in the refrigerator and freezer compartments and functions such as fast
freeze, fast chill and AI (artificial intelligence) cannot be operated in Lock mode.
Fast Freeze
This function is designed to preserve the nutrients contained in food stored in the freezer, by freezing the food fully
within a short period of time.
In Unlock mode, the Fast Freeze button (E) may be tapped to display the Fast Free icon (K) and activate the Fast
Freeze mode. The Fast Freeze mode is activated and will be stopped automatically after 3 hours. To quit the Fast
Freeze mode, tap the Fast Freeze button (E) again. The Fast Freeze icon (K) will disappear.
NOTE: The Fast Freeze mode is not available in AI mode.
NOTE: When making ice, you may select Fast Freeze to speed up the ice-making process and quit Fast Freeze after
the ice-making process is completed.

Functions
Fast Chill
This function is designed to preserve the nutrients contained in food stored in the refrigerator, by chilling the food to the
desired temperature within a short period of time.
In Unlock mode, the Fast Chill button (B) may be tapped to display the Fast Chill icon (I) and activate the Fast Chill
mode. The Fast Chill mode will be stopped automatically after 3 hours.
To quit the Fast Chill mode, tap the Fast Chill button (B) again. The Fast Chill icon (I) will disappear.
Temperature Setting & Regulation
Temperature setting & regulation: This function is available only when the Al mode is deactivated. The following
instructions should be observed.
To set the refrigerator temperature: In Unlock mode (the display screen is on), the refrigerator temperature control
button (A) may be tapped. The refrigerator temperature display (G) will illuminate. Each time the refrigerator
temperature control button (A) is tapped, the display sequence is as follows:
7°C – 5°C – 3°C – 2°C – 1°C – 7°C

Functions
To set the freezer temperature: In Unlock mode (the display screen is on), the freezer temperature control button (C)
may be tapped. The freezer temperature display (H) will illuminate. Each time the freezer temperature control button
(C) is tapped, the display sequence is as follows:
-16°C – -17°C – -18°C – -20°C – -22°C – -16°C
Door-open Alarm
When the door is kept open or not properly closed, an audible alarm will be given until the door is closed.
Economic Display Control
The display screen will go dark 30 seconds after the operation of the control panel is finished. The display is restored
when any control button is tapped or any door is opened. This button operation will not change the present
refrigerator setting.
Refrigerator On / Off Control
In Lock mode, hold the refrigerator temperature control button (A) 3 seconds to turn off the refrigerator. The
refrigerator temperature display (G) will disappear while the refrigerator light will remain functional. Press the
refrigerator temperature control button (A) for 3 seconds to turn on the refrigerator. The refrigerator temperature
display (G) will illuminate and the normal operation of the refrigerator compartment will be resumed.
Backup Memory
The temperature settings will be memorized and, in the event of a power interruption, these will be restored once
power is restored.
Table of contents
Languages:
Other nardi Refrigerator manuals