6
• Assurez-vous toujours que les orifices de gonflage et de dégonflage ne sont pas obstrués avant utilisation.
• Si le tuyau est endommagé, remplacez-le immédiatement n’utilisez pas ce produit.Ne retirez pas le tuyau pendant le
gonflage. Une pression d’air élevée peut s’avérer dangereux pour les personnes à proximité.
• Faites fonctionner la pompe pendant un maximum de 20 minutes en continu, puis laissez refroidir pendant 30 minutes
avant de l’utiliser à nouveau pour éviter la surchauffe.
• Ne pas exposer la pompe à air à la pluie ou à l’eau.
• Le tuyau de gonflage ne doit jamais être dirigé vers le visage ou le corps lorsque la pompe est en cours d’utilisation.
• Ne laissez pas la pompe à air sans surveillance pendant le gonflage ou le dégonflage
• Respectez les réglementations locales en matière d’élimination des produits électriques.
2. GONFLAGE
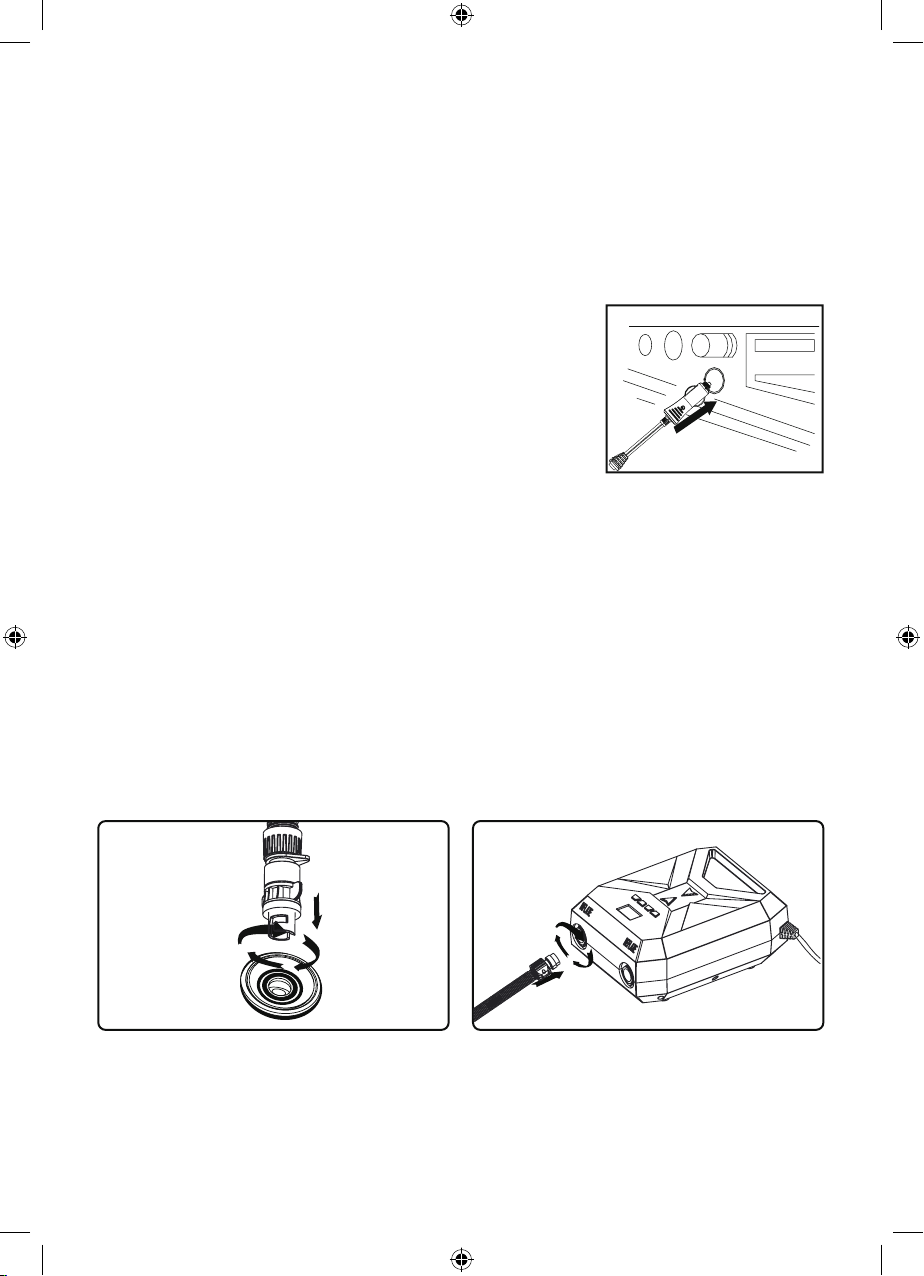
• Placez l’extrémité du tuyau dans la buse qui correspond au raccord de valve
sur l’objet à gonfler. Tourner dans le sens des aiguilles d’une montre pour la
verrouiller sur le tuyau d’air.
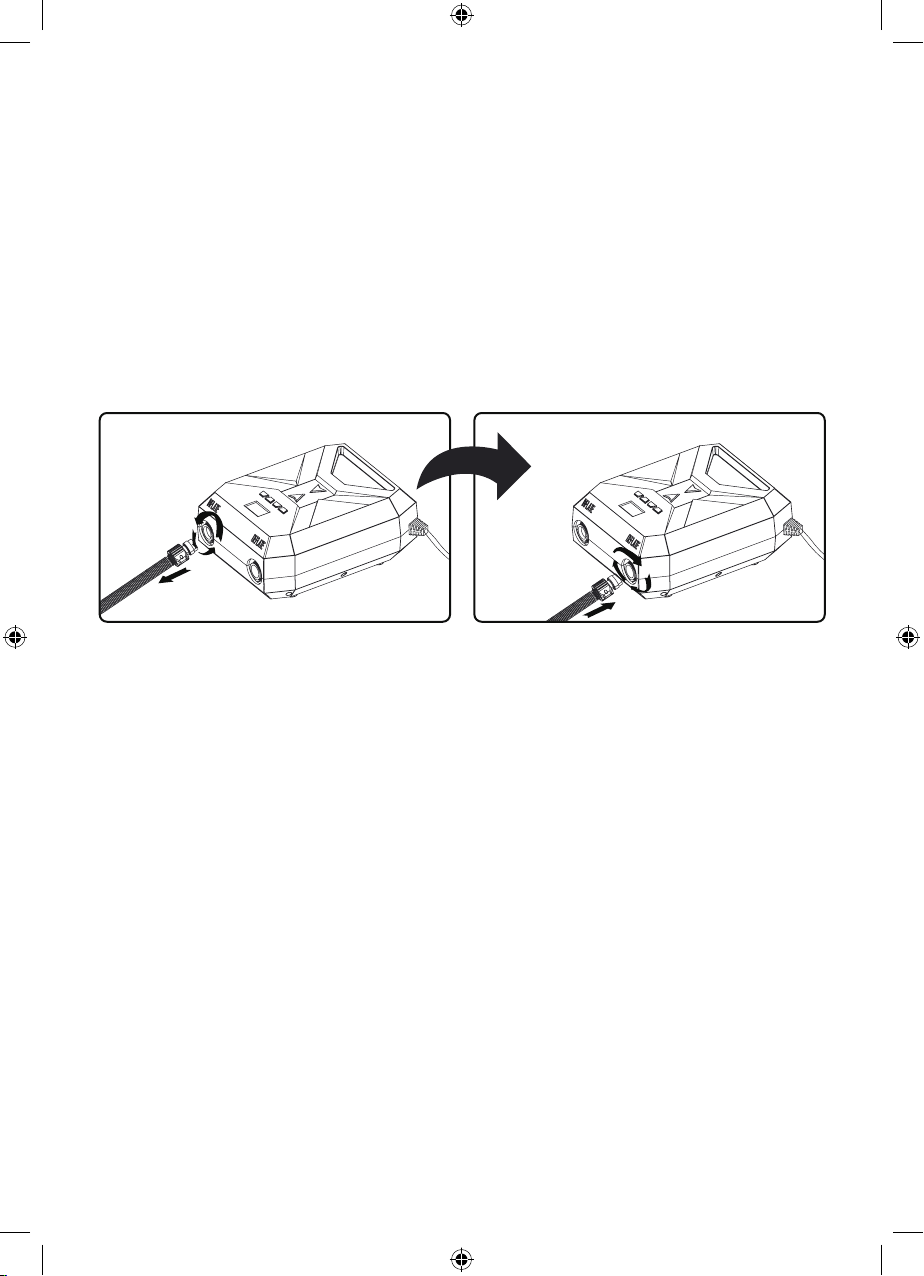
• Raccordez le tuyau et la buse à la valve et verrouillez en tournant dans le sens
des aiguilles d’une montre (FIG 1).
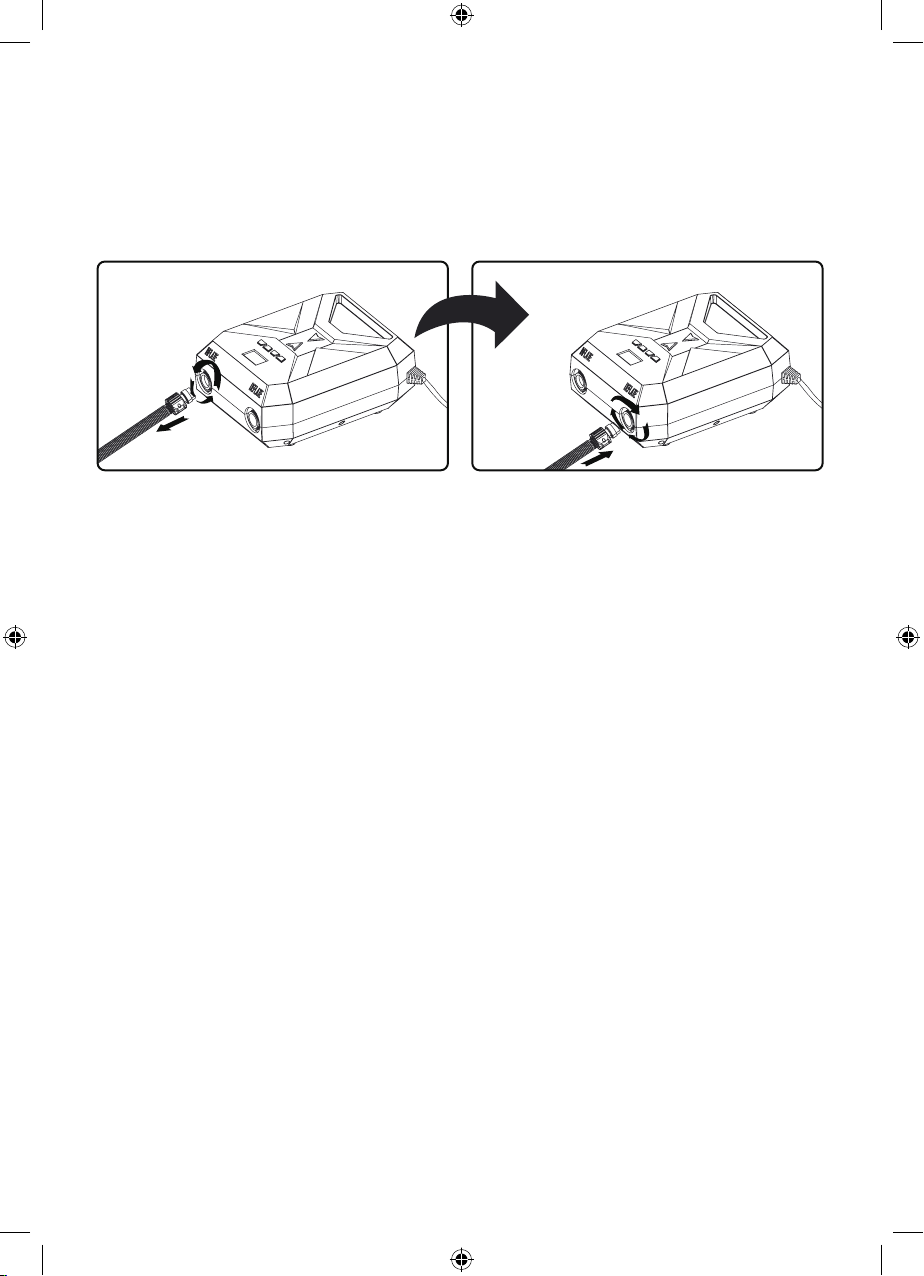
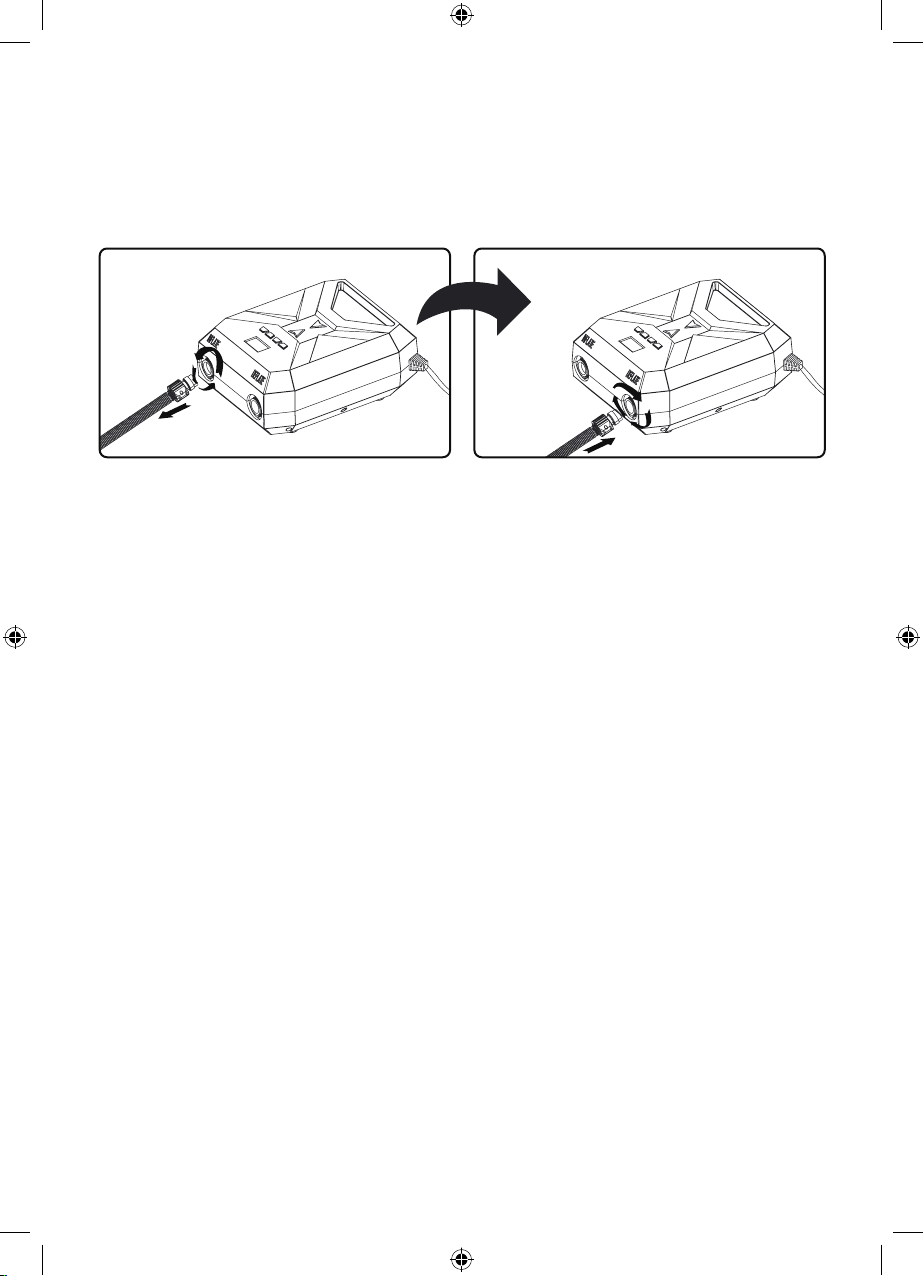
• Raccordez l’extrémité opposée du tuyau avec l’écrou à l’orifice de gonflage et
verrouillez-le en tournant dans le sens des aiguilles d’une montre. (FIGURE 2).
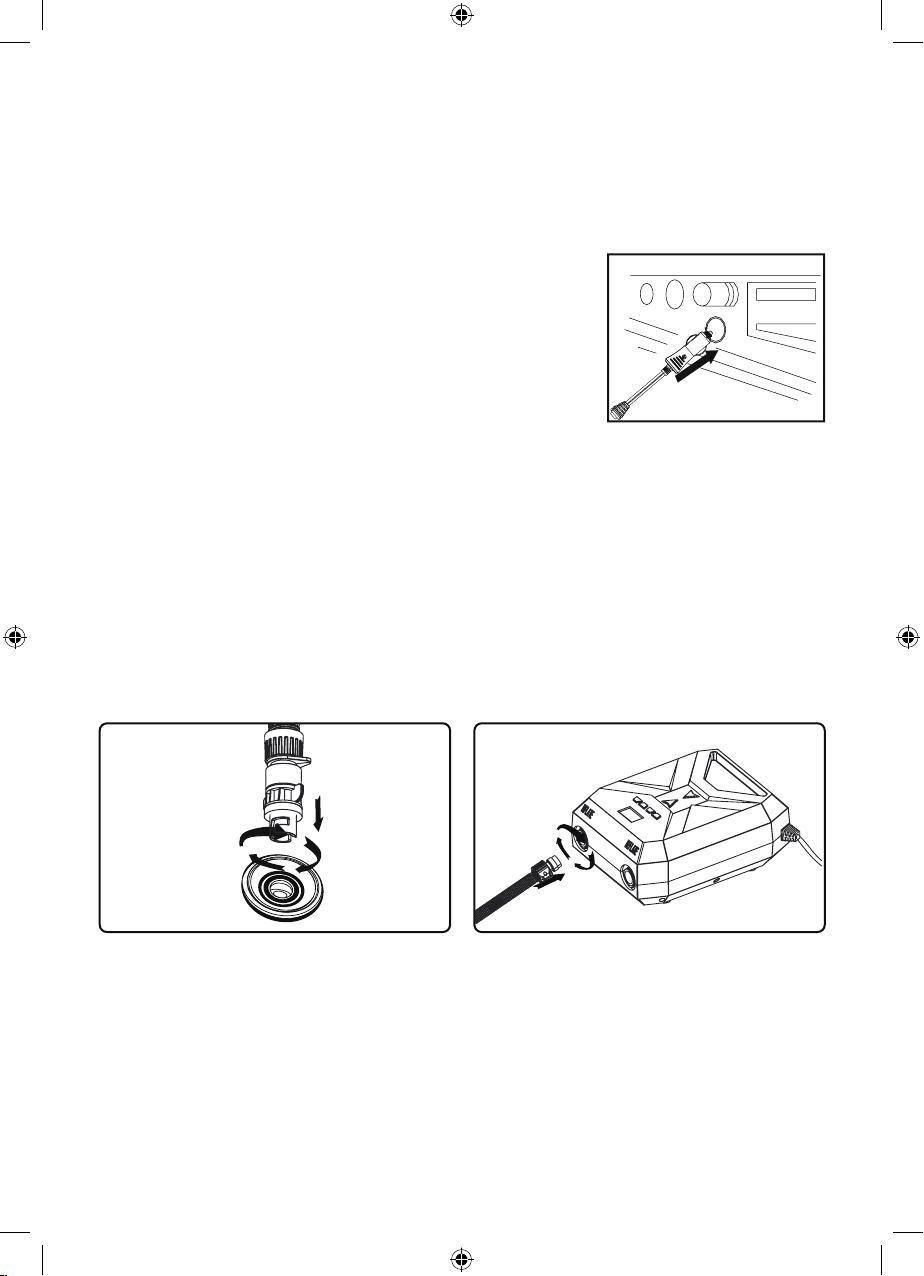
• Insérez la connexion d’alimentation de l’allume-cigare à une source d’alimen-
tation de 12 volts.
• Appuyez sur le bouton de l’unité pour sélectionner l’affichage de la pression en PSI ou BAR.
• Appuyez sur le bouton d’augmentation de la pression (+) ou sur le bouton de diminution de la pression (-) pour régler
la pression de gonflage requise de 0 à 20 psi.
• Appuyez brièvement sur le bouton d’alimentation pour commencer à gonfler.
• Lorsque la valeur de pression atteint 1PSI, la pompe à air se convertit automatiquement en gonflage à haute pression
jusqu’à ce qu’elle atteigne la valeur de pression définie.
• Pour un gonflage immédiat à haute pression, appuyez longuement (3 secondes) sur le bouton d’alimentation.
• Pendant le gonflage, la valeur de pression cible peut être augmentée ou diminuée en appuyant sur le bouton Augment-
er (+) ou Diminuer (-). Le bouton d’unité de pression PSI/BAR peut être enfoncé pour changer l’unité, et le gonflage
peut être arrêté en appuyant sur le bouton d’alimentation.
• Lorsque la pression atteint la valeur définie, la pompe à air arrête automatiquement le gonflage.
• Après le gonflage, débranchez le cordon d’alimentation de la prise 12V DC utilisée.
• Lorsqu’il n’est pas utilisé, débranchez le tuyau de la pompe à air.
• Dans de rares circonstances, des influences géographiques et environnementales peuvent entraîner des relevés de
pression incohérents. Appuyez sur le bouton de changement d’unité PSI/BAR et maintenez-le enfoncé pendant 5
secondes pour recalibrer la pompe à air..
FIG 1 FIG 2
REMARQUE
La pompe à air a une mémoire de valeur de pression. Sauf modification manuelle, la valeur de pression cible sera la
même par défaut que lors de la dernière utilisation.
Lorsque la pompe à air est sous tension et n’est pas utilisée pendant 2 minutes, elle passe en mode veille. Appuyez sur
n’importe quel bouton pour quitter le mode veille et faire fonctionner la pompe.
Boatlife Electric Air Pump Instructions.indd 6Boatlife Electric Air Pump Instructions.indd 6 19/09/2022 13:5919/09/2022 13:59