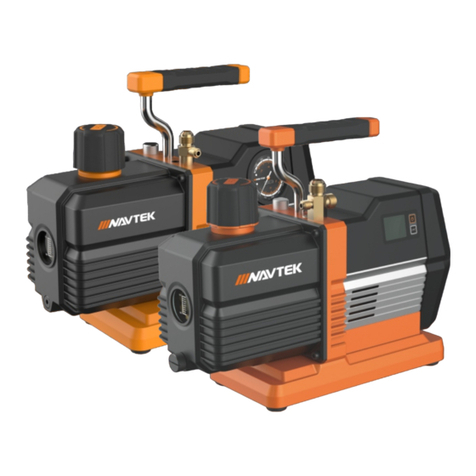
NAVTEK NP2DLM User manual

NP2DLM
NP4DLM
Cordless VacuumPump
User Manual
SAVE THIS MANUAL
FOR FUTURE REFERENCE
www.navtek.uk
www.navtek.ie
Made in China

01
01
02
02
03
03
CONTENT I. Pump Configuration, Specification, Features
Configuration
Specification
Features:
1. Integrated pump structure to get better vacuum level.
2. Forced oil lubrication ensures vane sealing, cooling, high reliability.
3. Large oil level sight glass to prevent oil shortage.
4. Ignition proof design with electronic starter.
5. DC motor to be lighter, smaller.
6. Li-ion battery to be more convenient.
Warning:
1. To prevent injuries, read and follow this manual carefully.
2. Wear goggles during refrigerant work.
3. Do not come in direct contact with refrigerant.
4. Do not touch oil tank and motor while operating.
I. Pump Configuration, Specification, Features
II. Charger Specification
III. Preparation
IV. Operation, Maintenance
V. Troubleshooting
03
VI. Dimension
Handle
Oil Fill
Inlet Ports
Battery Pack
Check Valve
Start/Stop
Rear Cover
Base Plate
Oil Drain Valve
II. Charger Specification
Input Power
Frequency
Power
Output Voltage
Output Current
Weight
Dimension
Item Parameter
100-240V
50-60Hz
180W
18V
6A
1.5 lbs
7.4”×6.1”×3.2”
Oil Tank
Oil Level Sight Glass
20 lbs
Red&G reen Fl ash-B atter y or
Charg er Abno rmal
NC2
Oil
Middle level
18V, 5Ah
18V, 9Ah
Mod el: NBP 2

03
02
IV. Operation, Maintenance
Charger Operation
1. Charge indoors.
2. For use with NAVTEK NB1,NBP2 battery pack only.
3. Battery could be charged or disconnected anytime.
4. Push battery into port until it engages with lock.
5. A tone is played when charge starts or completes.
6. When charge is complete, press the lock and pull out the battery.
7. Indicate light is on during charging.
Light Indicator
Warning
1. Don't expose charger to rain or water.
2. This charger is only for NB1,NBP2 battery. Don't charge any other type of battery.
3. Keep the charger clean.
4. Check the charger before using.
5. Do not use in a flammable environment.
6. Disconnect the power cord when not in use.
7. This charger is only for professionals to operate.
8. This charger should only be repaired by qualified individuals. Please contact Navtek for charger
service.
III. Preparation
1. Before initial use, please charge battery to full capacity.
2. Unscrew the oil fill cap. Fill oil to the middle level of sight glass. Start the pump to
run for 1 minute. Add oil if its level is low.
Note:
1. Fill oil slowly to prevent oil spill.
2. Low oil will affect performance. Too much oil will cause mist spray.
Pump Operation
1. Connect the vacuum pump to the system to be evacuated.
Open the check valve.
2. Check the seal to assure there is no leak.
3. After the evacuation work, stop pump and close the system valve.
4. Disconnect the hoses.
5. Cap the inlet ports to prevent particle falling into pump.
Note:
1. Check oil during operation, if oil is low add it immediately.
2. Pump starts at 3800 rpm and after 10 minutes it lowers to 3000 rpm.
3. When the battery is full, it’s 21V. When it lowers down to around 16V, it starts beep. It is suggested
to close the valve on the vacuum or system to hold the vacuum once the alert begins. You will have
3 minutes to close the valves once the alert begins to beep before the battery runs out.
Warning
1. Don't run pump over 3 minutes when it's open to atmosphere.
2. Recover the refrigerant before evacuation.
3/8"
Maintenance
1. Pump Oil
Oil type and condition is an important factor for the vacuum level. Change oil immediately when it
becomes cloudy or dirty.To get the best performance, it is recommended to use NAVTEK vacuum
pump oil.
2. Oil Change
2.1 If pump is cold, run pump for 1 minute.
2.2 Open the inlet when running pump, to get the oil out of the pump cylinder. Stop the pump and
then open the oil drain valve. Dispose the oil according to local regulation. Tilt the pump to
drain the residual oil.
2.3 Screw back the oil drain valve.
2.4 Open the oil fill cap to fill oil.
Check Valve
1/4"
1/2"
Red &Gree n Flash -Batt ery or
Cha rger Ab norma l
When battery is connected a sound will be heard.
A sound is heard when charging is complete.
For use with NAVAC Li-lon battery only.
NC2
3/8"
Check Valve
1/4"
NP4DLM NP2DLM

05
04
EXPLODED VIEW REPAIR PARTS LIST
1
2
3
4
5
6
7
8
9
10
11
12
13
14
15
16
Oil Tank
Handle
O-ring
Pump Cylinder Assy
Trestle
O-ring
Oil Fill
Inlet Port
Cap
Fan
Rear Cover Assy
Battery Pack
Motor
Base Plate
Controller Assy
Cover Plate

A
A1
A3 A2
H
B2
B1
H1
B
07
06
V. Troubleshooting
Malfunction
Low
Vacuum
Oil leak
Start-up
problems
Oil spray
Possible Cause
1. Secondary air inlet connection cap loose on the
air inlet port.
2. Damaged rubber o-ring inside the secondary air
inlet connection cap.
3. The volume of oil is insufficient.
4. Pump oil becomes opaque or absorbed too
many impurities.
5. The pump’s oil entry hole is clogged or the oil
supply is insufficient.
6. The pump connecting hoses, manifold or
system has a leak.
7. The pump selection is wrong.
8. The pump has been used for too long, damage
and wear to components caused increased
gaps between parts.
1. Damaged oil seal.
1. Oil temperature is too low.
2. Motor, power source or circuit board
malfunctions.
3. Foreign objects entered the pump.
4. Voltage supply is excessively low or high.
5. Overload trips.
1. Excessive oil volume.
2. Inlet port pressure is excessively high for a long
period.
2. Loose or damaged oil box connections.
Remedy
Tighten the cap.
Replace the rubber o-ring.
Add oil to the center line of the oil display.
Replace with new oil.
Clean the oil entry hole, clean the oil filter.
Inspect the connecting hose gaskets and
system, repair leaks.
Check the size of the container to be evacuated,
recalculate and select an appropriate pump
model.
Inspect and repair, or replace the pump.
Inspect and repair.
Inspect and remove.
Inspect the power source voltage.
After overload trip occurs, switch kept On.
Remove battery, wait for approximately 30
seconds before inspecting and repairing.
Replace the oil seal.
Tighten the connecting screws, replace O-rings.
Remove oil until the oil position line is reached.
Select an appropriate pump, increase the
pumping speed.
Warm up the pump.
Notes:
1. The pump is inverter driven and the motor has over-current / overload protection, please
troubleshoot after overload resets.
2. If the above methods cannot resolve your problems, please contact your nearest distributor. We will
do our best to provide you with a quick turnaround to keep you working.
Requirements For Warranty Coverage
Product warranty is provided for product quality problems for one year from date of sale. For
warranty to be valid, the following conditions must be met:
1. Products issues due to manufacturing defects confirmed by qualified agents.
2. Products which have not been maintained or dismantled by unauthorized parties.
3. Products that have been used in accordance with the User Manual. All maintenance services shall
be performed during the warranty period.
Statement: Other than repairing the defective product , the manufacturer of this product will not be
liable for any other costs, such as time spent in fixing the issue, refrigerant consumption,
refrigerant disposal costs, as well as unauthorized transportation and labor costs.
VI. Dimension
Model
NP2DLM
AA1 A2 A3 BB1 B2 HH1
9.6" 7.7" 4.9" 2.8" 3.5" 2.2" 2.4" 7.6" 5.9"
NP4DLM 12.8" 10.3" 7.4" 3.2" 4.8" 4.4" 2.8" 9.5" 7.1"
This manual suits for next models
1
Table of contents
Other NAVTEK Water Pump manuals
Popular Water Pump manuals by other brands

SPX FLOW
SPX FLOW Power Team P12 Series operating instructions

Aqua One
Aqua One Precision 2500 manual

FLORABEST
FLORABEST FTP 400 B2 translation of original operation manual

Little Giant
Little Giant 5-md-sc Insctruction manual

Little Giant
Little Giant 6EN-CIA-SFS manual

Flofab
Flofab FGC Series Operation, maintenance & installation manual

i-MO
i-MO OptiLine ACG8 Original operating manual

Flofab
Flofab 2FFSE411 Installation, operation & maintenance manual

Little Giant
Little Giant 15EC-CIA-SFS owner's manual

Waterco
Waterco Alphaflo ECO-V 100 operating guide

FLORABEST
FLORABEST FTS 1100 C3 Translation of the original instructions

Goldmedal
Goldmedal 2114E instruction manual