7
8
9
10
6
E AR P H O NE C O AX
O UT
RL
IN
C V B S / Y Pb
IN
Pr
H D MI 1
A C 1 00 - 240V~
50 /6 0 Hz
1 2 3 4 5 6
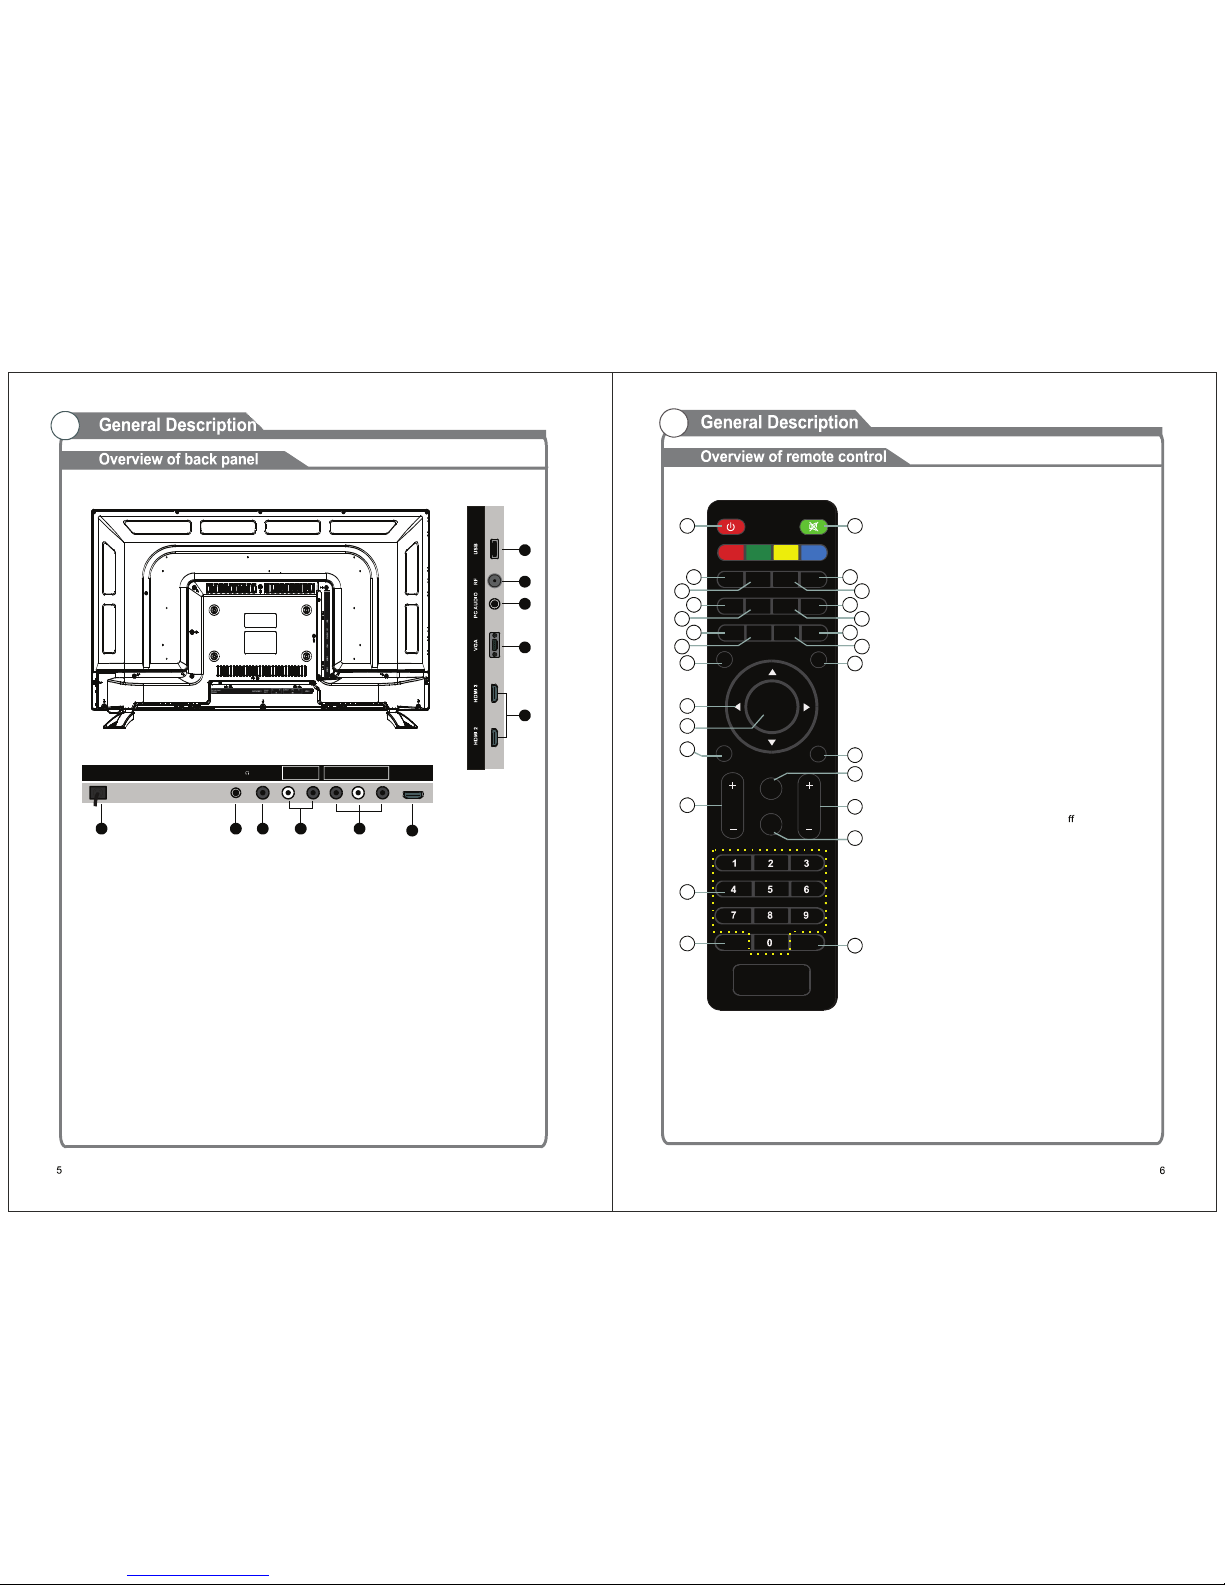
1. Power input
2. EARPHONE
Connect a set of phone for private
listening.
3. COAXIAL
Connect to a Digital Audio device.
4. AUDIO L/R
Audio input for external devices, such as
a camcorder or VCR.
5. Y(CVBS) / Pb / Pr
Connect video.
6. HDMI 1 / 2 / 3
Connect to the HDMI jack of a device
with a HDMI output.
7. VGA/PC IN
Connect to the video output jack on
your PC.
8. PC AUDIO
Audio input for external devices.
9. ANTENNA INPUT
Connect to an antenna or cable
NTSC & ATSC.
10. USB (TV)
USB input
1. POWER:
2. MUTE:
3. SLEEP:
4. FAV:
5. FAV +/-:
6. ADD:
ERASE:
7. LOCK:
8. Time:
9. LIST:
10. FREEZE:
11. EPG:
12. INFO:
13. CC:
14. MTS:
15. MENU:
16. SOURCE:
17. ARROW buttons:
18. ENTER:
19. EXIT:
20. ZOOM:
21. S.MODE:
22. VOL +/-:
23. CH+/-:
24. P.MODE:
25. Number key (0-9):
26. -/--:
27. RETURN:
Set the sleep timer.
Select fa vorite c hannels.
Pres s to watch next / previous fa vorite program.
Add this progra m to the favorite cha nnels list.
Delete this program from the favorite channels list.
Pres s to display the Lock menu.
Pres s to display current time.
Pres s to display the T V program list.
Pres s to freez e the screen image.
Pres s to display the EPG menu.
Display the channe l informa tion.
Pres s to display the closed c aption.
Pres s to s elect the audio channels.
TV system setup.
Pres s to change input source.
Use to move cursor up/down/left/right.
Validation key.
Pres s to exit a ll menu.
Pres s to ch ange the scre en s ca le.
Pres s to cyc le through the di erent
sound settings.
Pres s to increa se /decrea s e the sound level.
Pres s to scan through cha nnels.
Pre ss re pea tedly to cyc le through the
available video picture modes.
Pres s 0 -9 to s elec t a T V channel
directly when you are watching T V. T he cha nnel changes
after seve ral seconds.
Pres s this button to enter a program number for
multiple program channel such as 2-1, etc.
Re turn to the previous channe l.
0
M U TE
L OC K
IN F O MTS
S L EEP
AD D /E R A SE
CC
F RE E ZET I ME
L IS T
EPG
F AV
F AV + /-
E N T E R
E X IT
R E T U RN
V OL CH
ME NU
S OUR CE
S.MO DE
P. M O D E
-/--
ZO OM
P O W ER
VAF VAF
19
15
1 2
16
20
22 23
24
25
27
3
4
5
6
7
8
9
10
11
12
13
14
17
21
26
0
M U TE
L OC K
IN F O MTS
S L EEP
AD D /E R A SE
CC
F RE E ZET I ME
L IS T
EPG
F AV
F AV + /-
E N T E R
E X IT
R E T U RN
V OL CH
ME NU
S OUR CE
S.MO DE
P. M O D E
-/--
ZO OM
P O W ER
VAF VAF
18
19
15
1 2
16
20
22 23
24
25
27
3
4
5
6
7
8
9
10
11
12
13
14
17
21
26
Turn On/O the TV.
Press to turn On/O the audio.