2
Features
CHILD LOCK
Allows the user to set the VCR from the remote control,
so that the front panel functions become inoperative,
with the exception of the STOP/EJECT button.
1-MONTH/7-EVENT PROGRAMMABLE TIMER WITH
EVERY-DAY RECORDING
The VCR can be programmed to record automatically
up to seven TV shows in the coming month. There is
also an every-day programme timer.
Hi-Fi STEREO & BILINGUALAUDIO SYSTEM (2-HEAD)
Receives bilingual broadcasts and offers Hi-Fi stereo
recording and playback with digital audio tracking.
DOUBLE-AZIMUTH 4-HEAD SYSTEM
Assures optimum playback and recording. Also the auto-
matic head cleaning system protects the tape heads.
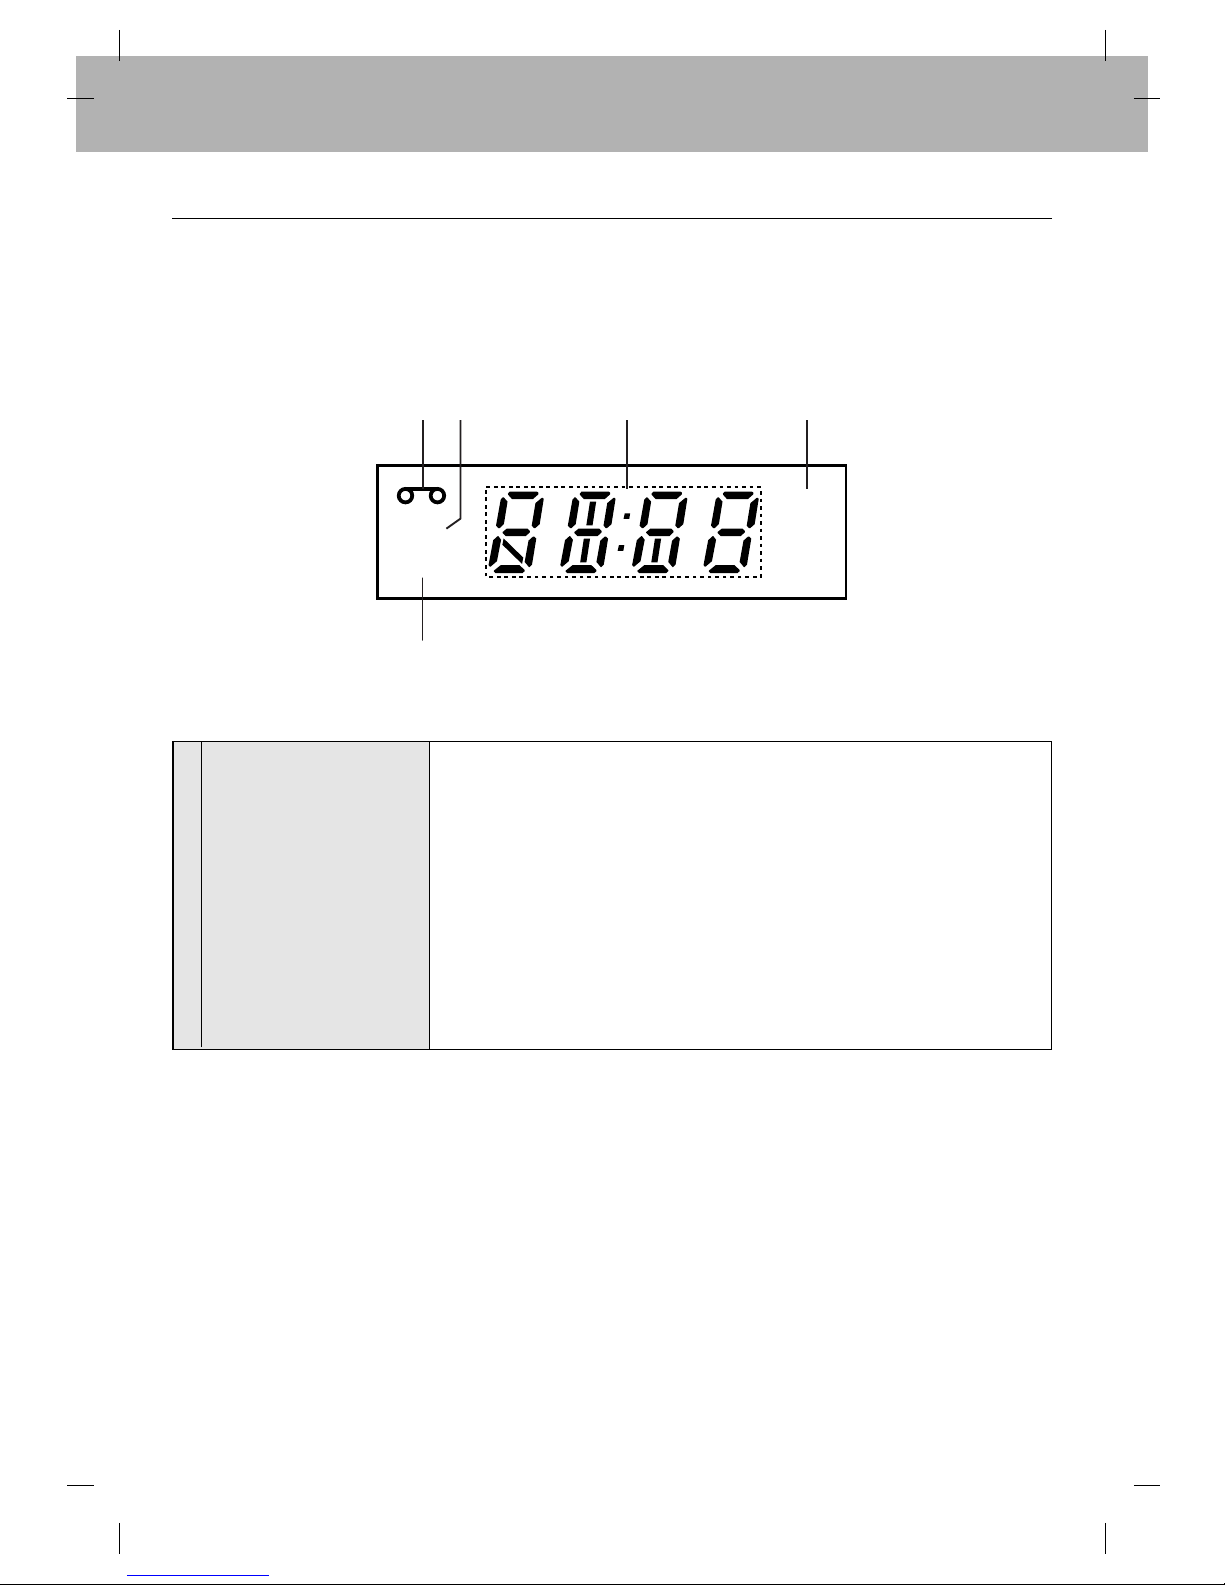
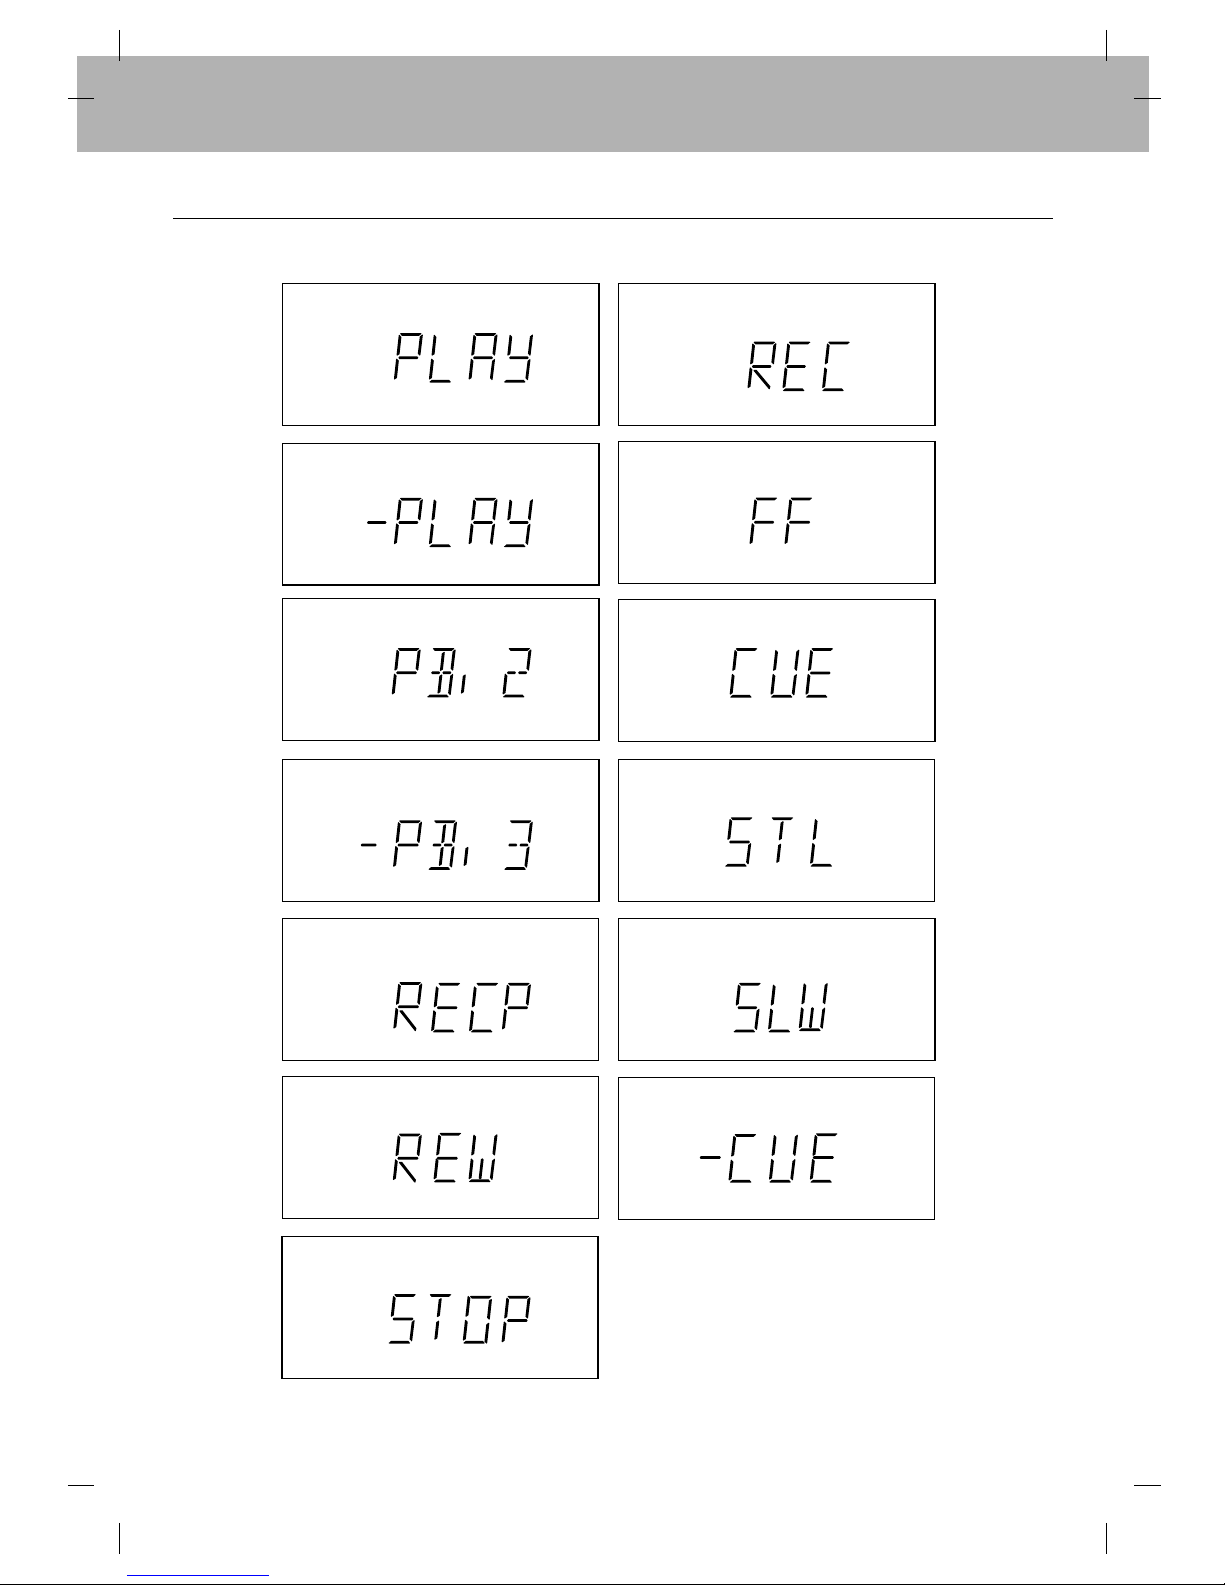
MULTI-FUNCTION DISPLAY
Shows the VCR status, such as play, record etc. on the
Multi-Function Display.
NTSC PLAYBACK ON PAL CTV
Allows you to play NTSC video tapes from overseas on
most brands of colour television receivers capable of
resolving at 60 Hz video signal.
LONG PLAY
Enables tape to travel at half speed for doubling record-
ing and playback time on your tapes.
SKIP SEARCH
Allows you to avoid unwanted part of programme quickly.
SHUTTLE CONTROL
Allows you to vary the speed of the tape from FAST
REVIEW to FAST CUE.
DIAGNOSTIC ADVISING SYSTEM
Displays an operation error message if operation fault
occurs during use.
QUICK START RECORDING (QSR)
Allows the VCR to be set to automatically stop recording
and shut the power off.
HQ (HIGH QUALITY) VIEW SYSTEM
The “High Quality”circuit improves image sharpness
and detail.
FREQUENCY SYNTHESIZED TUNER WITH
80-CHANNEL MEMORY
AUTOMATIC FEATURES
These features will function automatically as follows:
-The power of the VCR will turn on when a tape is inserted.
-The VCR starts playback when there is no safety tab
on the cassette.
-The VCR starts rewinding when the tape reaches the end.
REAL-TIME COUNTER
Shows tape travel in hours, minutes and seconds.
SPECIAL PLAYBACK FEATURES
Equipped with advanced playback features, such as
Fine Still, Frame Advance and Fixed Slow-motion.
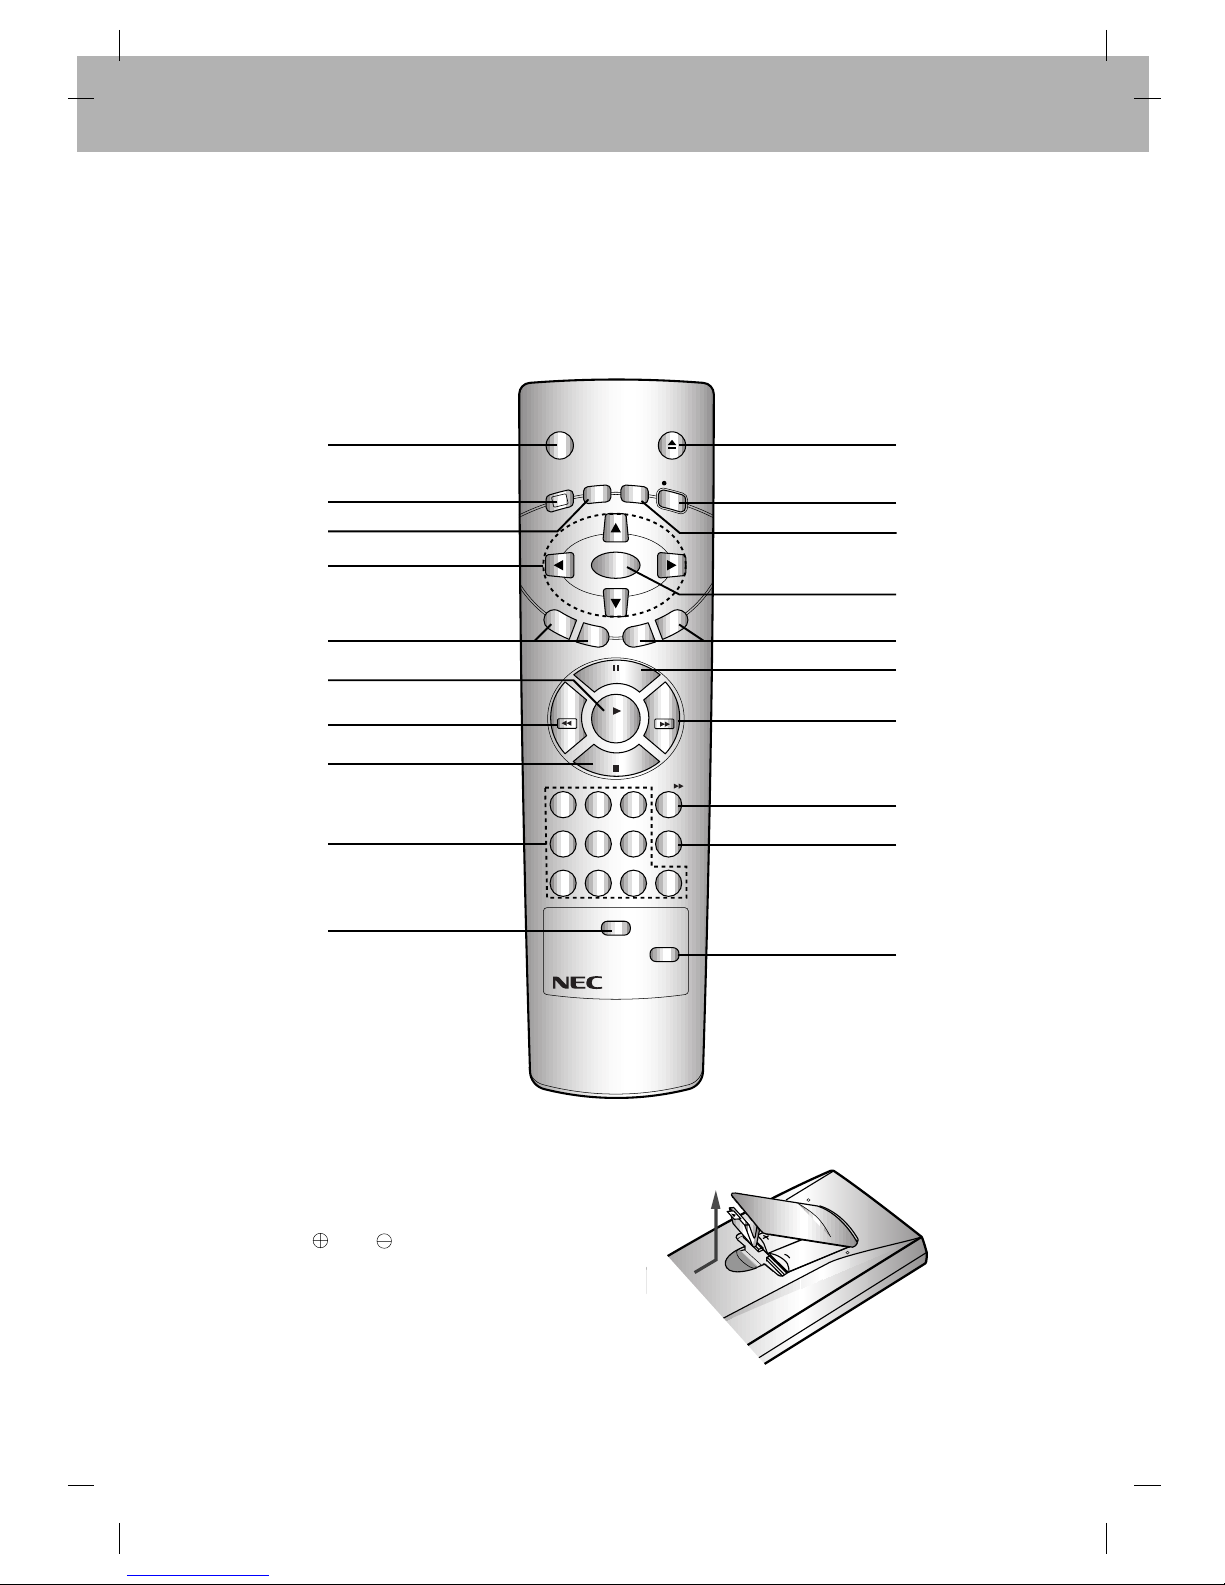
FULL-FUNCTION INFRARED REMOTE CONTROL
AUTO HEAD CLEANING
FRONT
OPERATE BUTTON
This button is used to turn the unit on and off.
When this button is pressed to ON, the VCR indicator,
channel position number and clock display will appear.
When this button is pressed to OFF, the VCR indicator
will disappear.
NOTE: To set the VCR for unattended recordings
after timer settings have been completed. When the
timer is programmed and OPERATE is turned off
“TIMER”appears on the Multi-Function Display to
indicate that the VCR is set for unattended recording
and cannot be operated manually. (To return to manual
operation, press the OPERATE button once. “TIMER”
indicator goes off).
STOP/EJECT BUTTON
Press this button to stop or eject the tape.
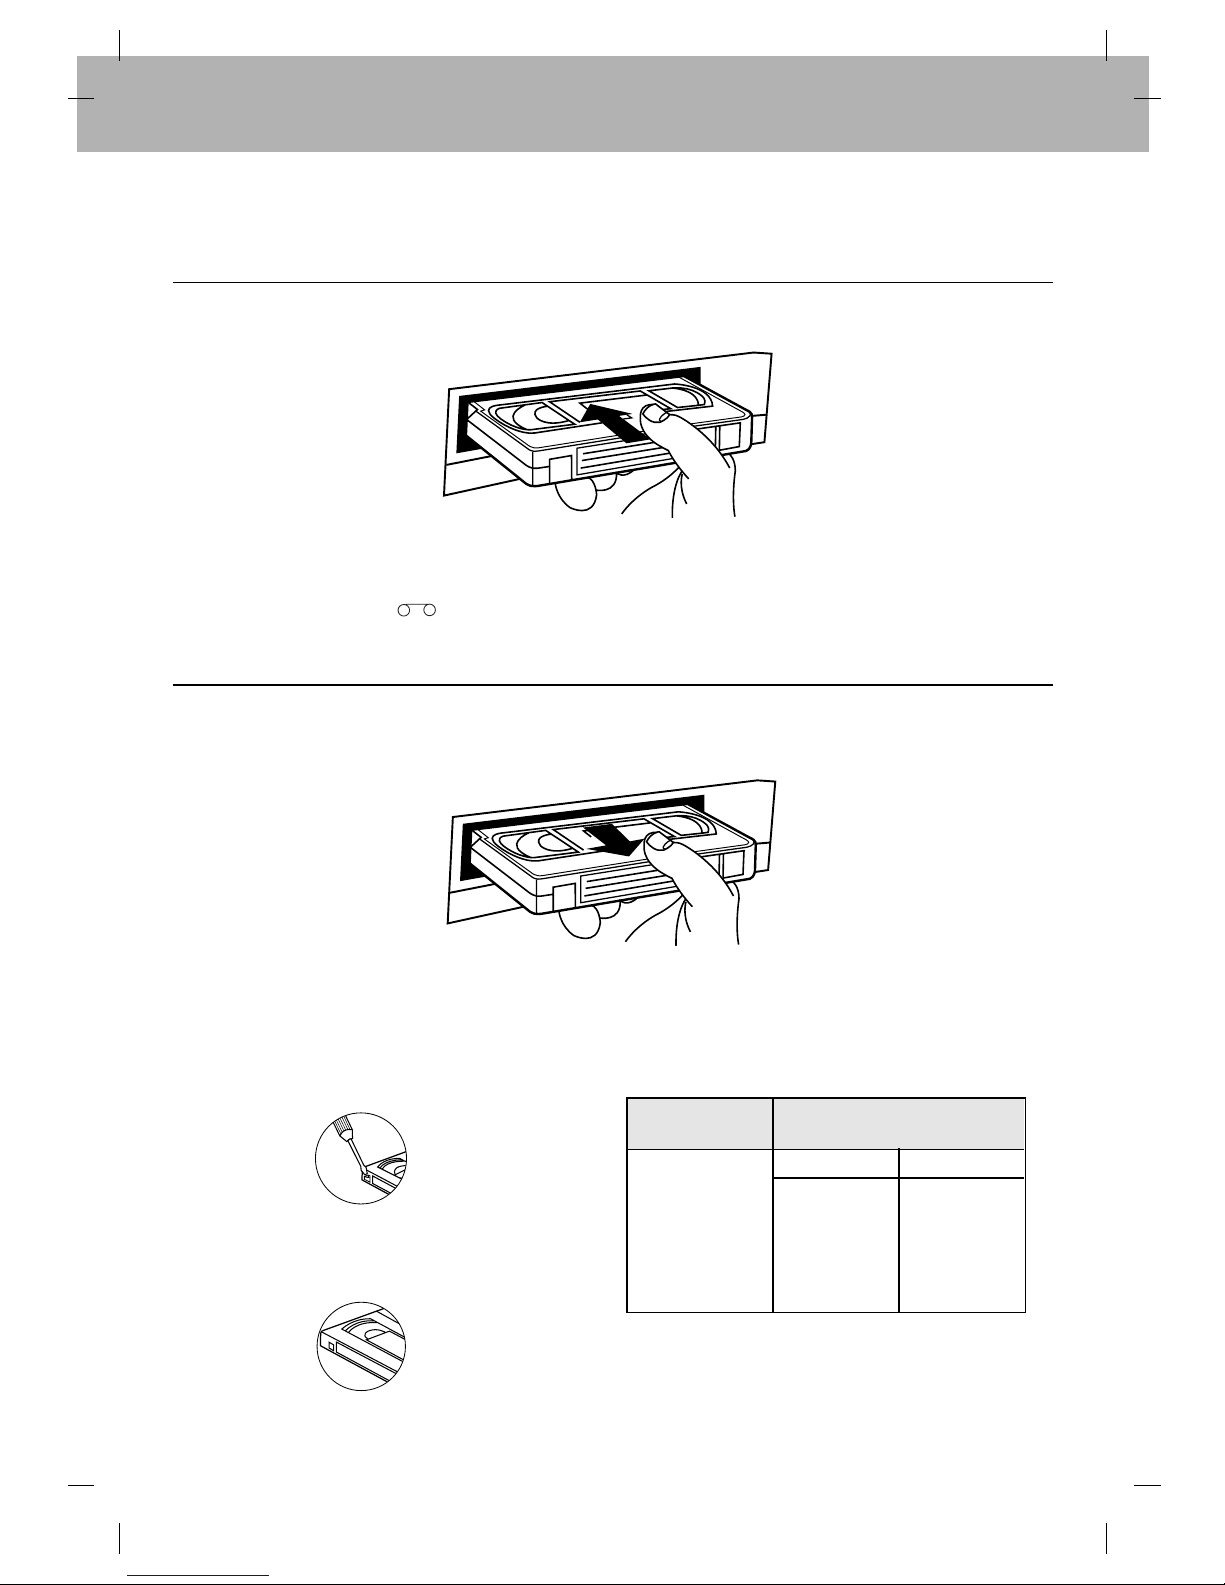
CASSETTE COMPARTMENT
Insert a cassette in the compartment, loading will be
completed automatically.
NOTE: Power is turned on automatically when the
cassette is loaded. If the cassette is loaded without
the safety tab in place, the video programme will play
automatically (FULL AUTO PLAY).
REWIND/REVIEW BUTTON
Press to start rewind.
Press this button during playback to see reverse
playback picture at high speed.
PLAY BUTTON
Press this button to playback recorded tapes.
FAST FORWARD/CUE BUTTON
Press to activate fast forward.
Press this button during playback to see forward
playback picture at high speed.
P/STILL BUTTON
Press to stop recording and to eliminate commercial breaks
or unwanted programme materials in RECORD mode.
Press to freeze the picture in PLAY mode.
RECORD/QUICK START RECORDING BUTTON
Press for recording or setting the QSR (Quick Start
Recording).
REMOTE SENSOR WINDOW
To receive signals from the remote control unit.
MULTI-FUNCTION DISPLAY
The VCR’s function will be displayed on the Multi-
Function Display variously.
CHANNEL BUTTONS (▲/▼)
Used to move up or down through programme numbers.
AUDIO IN JACKS (L/R)
Use the audio input to record audio from an external
audio source.
VIDEO IN JACK
Connect the video output from other video equipment
(such as a Camera Recorder) to this jack.
REAR
MAINS LEAD
AUDIO IN/OUT (R/L)
Used to connect the video recorder to your TV, another
video recorder or Hi-Fi system.
VIDEO OUT
Used to connect the video recorder to your TV or
another video recorder.
AERIAL INPUT
Connect the external aerial to this terminal.
RF OUTPUT
Connect this terminal to the AERIAL terminal on the
back of the TV, using coaxial RF cable (supplied).
VIDEO IN
Connect the video output from other video equipment
(such as a Video Camera) to this jack.
WARNING:
TO PREVENT FIRE OR ELECTRIC SHOCK HAZARD,
DO NOT EXPOSETHIS UNIT TO RAIN OR MOISTURE.
CAUTION:
Dangerous voltage inside. Refer internal servicing to
qualified service personnel. To prevent electric shock or fire
hazard, remove the power cord from the AC outlet prior to
connecting or disconnecting any signal lead or aerial.
Even if the VCR OPERATE button is turned off, parts of
the unit are still connected to the mains.
CAUTION:
Disconnect the power cord from the AC outlet if you will
not be using the VCR for a long period of time.
CAUTION:
Young children and infirm persons should be supervised
when using the appliance.
CAUTION:
TO AVOID RISK OF ELECTRIC SHOCK, DO NOT OPEN.
NOTE:
The rating plate is located at the rear of the unit.
1
2
3
4
5
6
7
8
9
10
11
12
13
14
15
16
17
18
19