Neostar Electronics 3244363 User manual

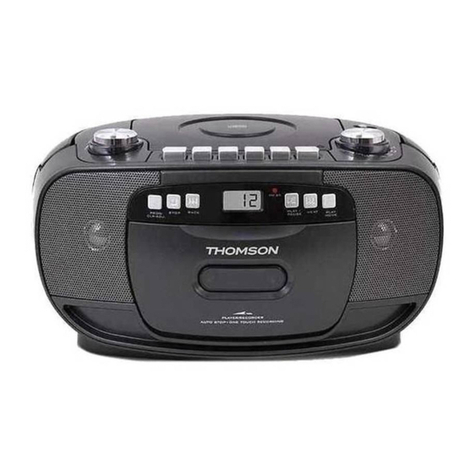
Neostar CD Radio Cassette
ProductCode:3244363
INSTRUCTION MANUAL

1 Scotts Ltd. Cotswold House, 1 Crompton Road, Groundwell, Wiltshire. SN25 5AW
Enquiries: 0344 482 9700
IMPORTANT SAFETY INSTRUCTIONS:
1. Read the instructions. All uses guidelines must be read before using the device.
2. Keep the instructions for future use.
3. Attention, use and security guidelines must be respected.
4. The device must not be used near water or be put in contact with moisture.
5. Make sure has no liquid is spilled on device and device openings.
6. Move device carefully, avoid shocks.
7. Do not block the breakdown of the device outputs.
8. Do not place the device near from a heat source (e.g. radiator). Do not expose it to the Sun.
9. Plug the device as indicate on this information form.
10. This device has a connection with overload protection. Replacement should only be done bt an
experienced technician or the device manufacturer.
11. For cleaning the device, please follow the recommendations of the notice.
12. The power cord should be unplugged when not using for a long period of time.
13. Device shall be repaired by a qualified person when:
a. the power cord is damaged,
b. objects have fallen into the apparatus or a liquid has been spilled into device,
c. device was exposes to the rain,
d. device does not work correctly without notable exterior change,
e. device is broken.
14. The user shall not try to maintain device beyond that which is described in this information form.
15. The apparatus shall not be exposed to dripping or splashing and that no objects filled with
liquids, such as vases, shall be placed on apparatus.
16. To be completely disconnect the power input, the mains plug of apparatus shall be disconnected
from the mains.” as the disconnect devices is the mains plug of apparatus.
17. The mains plug of apparatus should not be obstructed OR should be easily accessed during
intended use.
18. Battery shall not be exposed to excessive heat such as sunshine, fire or the like.
19. Excessive sound pressure form earphones and headphones can cause hearing loss.
20. Minimum distance (150-180mm) around the apparatus for sufficient ventilations;
21. The ventilation should not be impeded by covering the ventilation opening with items such as
newspaper, table-cloths, curtain etc;
22. No naked flame sources such as lighted candles should be placed on the apparatus;
23. Attention should be drawn to the environmental aspects of battery disposal;
24. The use of apparatus in moderate climates.
25. Danger of explosion if battery is incorrectly replaced.
26. Replace only with the same or equivalent type.

2 Scotts Ltd. Cotswold House, 1 Crompton Road, Groundwell, Wiltshire. SN25 5AW
Enquiries: 0344 482 9700
LOCATION OF CONTROL
1) USB socket
2) Aux in socket
3) 3.5mm headphone jack
4) Cassettebutton
5) Handle
6) FM antenna
7) CD door open/close
8) Volume knob
9) LCD display
10) Function button
11) Stop button
12) Skip / Tuning down button
13) Memory / Clock-adj button
14) Stereo/Mono/Play button
15) Cassettedoor
16) Standby LED
17) On/Off button
18) Play/pause / Band button
19) Skip / tuning up button
20) Record button
21) TS (Track Separation) button
22) AC socket
23) Battery compartment
24) Folder/ Pre up/ down button
Caution:
Usage of controls or adjustments or performance of procedures other than those specified herein may result in
hazardous radiation exposure.
This unit should not be adjusted or repaired by anyone except qualified service personnel.
Important:
Since movement of the cd mechanism and the sensitive circuitry may cause interference to the radio tuner nearby,
switch this unit off while operating other radio devices.
In the unlikely event the unit ‘hangs’ please un-plug from the main power supply to restart.
Due to the complicity of the electronics inside sometime they need ‘rebooting’, this is not a fault or
malfunction of the system.
Precautions for use
Installation
Unpack all parts and remove protective material.
Do not connect the unit to the mains before checking the main voltage and before all other connections have been
made.
Do not cover any vents and make sure that there is a space of several centimeters around the unit for ventilation.
Connection
1. Connect the one end of the detachable power cord to the AC socket (22) and the other end to the AC outlet.
2. When you first plug the unit into the mains, the unit will go into standby mode. The Standby LED will light up
3. Turn on the unit by pressing “ On/Standby “ button (17). If the LCD display (9) is on with backlighting, it means the
power supply is normal. Now the system is ready to play the music.
DC connection
For DC operation, please insert 8 pcs size C (UM-2) battery to batter compartment (23) and remove the AC plug from
AC outlet then disconnect the AC cord from AC socket

3 Scotts Ltd. Cotswold House, 1 Crompton Road, Groundwell, Wiltshire. SN25 5AW
Enquiries: 0344 482 9700
Setting the clock
1. Set unit in standby mode.
2. Press and hold the “Mem/Clk-Adj” button (13) a second, display will flash “24HR” press the Skip Up or Skip
Down button (12/19) to select the clock format between 12 or 24Hour. Then press the “Mem/Clk-Adj” button
(13) the hour digit will flash on LCD display (9) Press the Skip down (12) or Skip up (19) button to set the
correct hour. Press the “Mem/Clk-Adj” button (13) to store the hour then minute digit will flash.
3. Press the Skip down (12) or Skip up (19) button to set the correct minutes.
4. Press “Mem/Clk-Adj” button (13) to store the correct hour.
The pre-set time will be re-set completely if dis-connecting the main power supply. You are
recommended to switch the system into standby mode for convenience usage.
Listening to radio
Manual tuning
1. Turn on the unit by pressing the On/Off button (17) and then press the Function button (10) until it reach the Tuner
mode.
2. Press the Band button (18) to select FM radio.
3. Press the Skip down (12) or Skip up (19) button to tune your desired station.
4. Adjust volume knob (8) for the desired volume level.
4. Press and hold the On/Off button (17) a second to switch off the unit.
Auto tuning
1. Follow “Manual tuning” step 1-2 to select the tuner mode and FM radio
2. Press and hold the Skip down (12) or Skip up (19) button to start auto scan until radio station received.
3. Adjust volume knob (8) for the desired volume level
FM & FM-stereo reception
The unit will default the FM mode at auto status. Thus, if FM stereo signal received then will get the stereo sound
automatically. When stereo signals are weak and noisy. It is preferable to change the FM mode by Mono-ST button
(14)
Check the FM receiving mode by press Mono-ST button (14).
Hints for best reception:-
FM : the receiver has rod antenna (6) hanging at the rear cabinet. this should be totally extended for best reception.
Preset stations
You can store up to total of 20 radio stations in the memory (20-FM).
1. Set to FM mode
2. Turn to the desired radio station by “ manual ” or “ auto ” tuning method.
3. Press the “Mem” button (13) to enable memory state.
4. Press Pre-up button (24) to select the desired station memory for storage.
5. Press “Mem” button (13) again to confirm the setting.
6. Repeat step 2 to 5 to store other stations.
7. Press the Pre-up/down button (24) to recall the preset station directly.
Playing CD disc
Getting start
1. Press Function button (10) to select CD mode.
2. Open the CD door by pressing the CD door open/close (7). Put a CD disc into the compartment and close the CD
door.
3. Focus search is performance if disc is inside. Total number of tracks is read and will start to playback automatically.
Play / pause mode
1. If Play/Pause button (18) is pressed during playback, system go to pause mode and the play indicator will start
flashing at the LCD display (9). Press again to resume normal playback.
Stop mode
1. If Stop button (11) is pressed during play or pause mode. Go to stop mode and display total number of track on
the LCD display (9).
Skip mode (skip up /skip down )
1. During play mode, if skip up button (19) is pressed it will go to next track and display the track no. and then
continuous the play.
2. During play mode, if Skip down button (12) is pressed, it will go back to the beginning of the track, same track
no. is display and continuous the play mode.
3. After step 2, press skip down button (12) again, it will go to the previous track and continuous the play mode.

4 Scotts Ltd. Cotswold House, 1 Crompton Road, Groundwell, Wiltshire. SN25 5AW
Enquiries: 0344 482 9700
Repeat/Random mode
Press the “ Play mode “ button (21) during playback to select repeat and random function, a single track, or all the tracks
can be played in difference mode as follow:-
For CD
(1) Repeat 1 (2) Repeat all track (3) Random (4) Off mode
Indicator
Play mode on LCD display
Repeattrack
Repeat all ALL
Random RAN
Off mode --------------
For MP3 file
(1) Repeat 1 (2) repeat all tracks (3) repeat 1 folder
(5)Offmode (4)random
Indicator
Play mode on LCD display
Repeat single track
Repeat single folder
Repeat all tracks ALL
Random mode RAN
Off mode
Repeat play
You can listen to the desired track or whole disc repeat using this function.
Random play
You can listen to all the tracks in a random order using this function
Folder select
1. Press “Folder/ Pre-up (24)” to select the folder number.
2. Press “Skip up or Skip down ” button (19/12) to select the track number.
MP3 track format requirement:-
- Bit rate : 32 kbps~320kbps, sampling rate : 32khz, 44.1khz and 48 kHz decodable
- The performance of playing MP3 disc will vary depending on the quality of recording disc and the method of
recording. Furthermore, the searching lead-time for MP3-CD is longer than normal CD due to the format.
CD disc programming
Up to 20 tacks can be programmed for disc play in any order. Before use, be sure to press the stop button.
1. Set in CD mode.
2. Press the Memory button (23), “MEMORY“ & “P01” will appear and flashing on LCD display (9).
3. Select a desired track by using the Skip up /Skip down buttons (19/12).
4. Press the Memory button (23) to enter the track into the memory.
5. Repeat steps 3 and 4 to enter additional tracks into the memory if necessary.
6. When all the desired tracks have been programmed, press “Play/Pause “button (18) to play the disc in the
order you have programmed.
7. Press “Stop ”button (11) to terminate program play.
Press “ Stop ”button (11) at CD stop mode to cancel all programmed memory until the “ MEMORY “ indicator
disappear on LCD display (8).
For MP3 disc / file, press the “ Folder up “ button (24) to select the 1st track of next folder directly this will speed up
the song selection.
The programming mode will automatically stop if no button is being pressed in a period of about 30 seconds after
pressing the Memory button (23).

5 Scotts Ltd. Cotswold House, 1 Crompton Road, Groundwell, Wiltshire. SN25 5AW
Enquiries: 0344 482 9700
Playback of MP3 song via USB storage media
Connecting
The system is able to decode and playback all MP3 files stored on memory media with USB connecting port.
1. Set the system at standby mode first or other function except USB mode.
2. Plug-in the USB pen-drive with the face up & make sure it going into completely.
Connecting the USB upside down or backwards could damage the audio system or the storage media.
Check to be sure the direction is correct before connection.
3. Set Function button (10) to “ ” USB mode.
4. The system will start reading the storage media automatically after connecting, and LCD display (9) will show the
total number of MP3 files being detected.
5. Repeat the same playback procedure and programming as playing CD disc as above.
IMPORTANT
- The system can detect and read the files under MP3 format only in USB mode no other music file format.
- If connect the system to MP3 player via the USB socket, due to variances in MP3 encoding format, some
MP3 players may not be able to play via the USB socket.This is not a malfunction of the system.
- USB port does not support connection with USB extension cable and is not designed for communication
with computer directly
-
Encoding of CD file into MP3 file
The system is able to encode normal CD/Tuner/Aux or cassette tape file to MP3 format and record to memory media
with USB connecting port.(IE USB memory stick or flash drive)
The system will creat a music folder name – “ RIP“ for CD-DA encode, “ REC ” for Tuner, Aux, Cassette encode and
“FROMCD ” for CD-MP3 disc copy.
A) CD encoding
I) encoding 1 track / 1 disc at 1x speed
1. Perform normal playback of the CD track you want to encode & record,
2. Press “ “ button (20) during the playback of the desire track and the system will start encoding.
3. The system will show “ ” & and flashing with “ USB “ icon. Encoding is performing now.
4. After completing of recording, unit will stop playback automatically.
5. Press “ stop “ button (11) to interrupt the recording mode anytime.
6. For encode whole CD track, pls stay CD in stop mode then press “ “ button (20), then system will start to
playback CD and encoding.
II) encoding by program
1. Select the desire tracks by following “ CD disc programming “ procedures and start program playback.
2. Press the “ “ button (20) and the unit will display ” “ & flashing with “USB “ icon. Encoding is now
performing.
3. After completing of encoding according to the preset program, unit will stop playback automatically.
Remark:-
- The recording speed is 1:1
- The recording format is preset at – mp3 bit rate : 128 kbps, sampling rate : 44.1khz
- Press “ stop
“ button (11) to interrupt the recording mode at any time.
B) Copying of MP3 file
If putting a MP3 disc instead of a CD-disc, the system will copy the files to the USB if press the “ “ button (20).
The operation procedures is same as cd encoding as stipulate on above, and the system will switch to copying mode
only if MP3 file being read.
C) Tuner encoding
1. Operate tuner mode refer above listening to radio section to receive the station you would like to encode.
2. Press the “ “ button (20) and the unit will display ” “ & flashing with “USB “ icon. Encoding is now
performing.
3. After finish of recoding, press“ stop “ button (11) until the symbol “ USB “ & “ “ disappear.
D) Cassette/Aux encoding
1) Plug in the usb pen drive for recording (make sure it has enough empty space).
2) Set the function button (10) to “ tape “ mode or Aux and then press the “ “ button (20).
3) The LCD display (9) with show the “ “ and flashing with “ USB “ icon. Now the system is starting the
encoding mode.
4) Start playback of cassette tape or your external Aux device which the track you prepare to encoding to mp3 format.
5) After finish of recoding, press“ stop “ button (11) until the symbol “ USB “ & “ “ disappear.

6 Scotts Ltd. Cotswold House, 1 Crompton Road, Groundwell, Wiltshire. SN25 5AW
Enquiries: 0344 482 9700
E) track separation
You can divide the recording music from tape or Aux in to USB track by track during encoding. Every time when press
the “ “ (track separation) button (21) during encoding from tape or Aux in, the system will generate a new track
and continue the recording. The text “ TAPE“ or “ AUX “ at LCD display will flash once, to indicate the unit has created a
new track successfully.
Removing of USB
To remove the USB / memory card, turn off the power or switch the function mode to CD, AUX or Tuner first. Next
carefully pull/unplug the device from the USB port.
Deleting of MP3 files
The system has no delete function of the MP3 files. Please manage the erasing of the MP3 files by computer or
other device.
Listing to tape
General operation
Stop / eject key press to stop all deck operation. Press again to open the cassette door.
Fast forward key & press to start rapid tape winding in either forward or revers
Fast rewind key direction. Press stop / fast rewind key eject keys when the cassette spools stop turning.
Play key press to start playing tape.
Pause key press to stop tape operation temporarily. Press again to resume play.
Record key press together with play key to start tape recording.
Playback
Select “ Tape ” by Function button (10)
Put in the cassette tape.
Press play key to active playback
Adjust the Volume up/down control (8) to the desired level.
Use pause key when you want to stop playback temporarily.
Press stop / eject key when finished.
Recording
The cassette deck can record in all function modes (CD/Tuner/USB/Aux) using the following procedures:-
Select the function which you want to record to cassette tape.
Insert a blank cassette tape in cassette deck.
Press “ record” & “ play “ key to start recording.
Start the playback of the music source which you want to record to tape
Press “pause ” keys and then “stop/eject ” key at cassette deck when finish.
Should you require any further assistance using your device please contact Scotts Customer Service team who
will be happy to help.
To help reduce power consumption the unit will switch to standby mode
automatically if no music is played for over 15 minutes. Press the power button to
switch the unit back on.
*DESIGN AND SPECIFICATIONS - SUBJECT TO CHANGE WITHOUT NOTICE
The crossed-out Wheelie Bin logo is used to highlight electrical products that should not be
disposed of with normal household waste. Scotts Ltd has contributed to the funding of an
alternative network of UK recycling facilities. Please visit www.recycle-more.co.uk to find where
your nearest recycling point is and recycle this product at the end of its life.
MadeinChinaforScottsLtd
Table of contents
