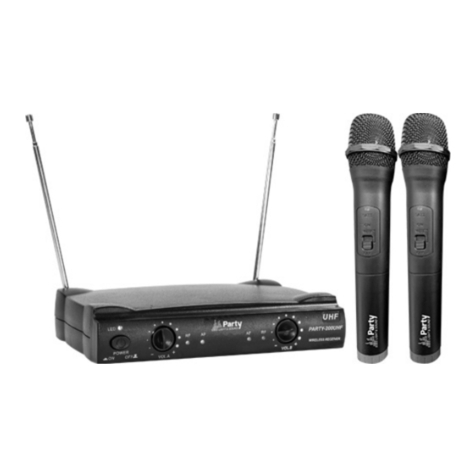
Netronics NetStream 5x100 User manual

Broadband Wireless
Transmission System
User Manual
Version 2.1

1HW6WUHDP[8VHU0DQXDODQG,QVWDOODWLRQ*XLGH9HUVLRQL1HWURQLFV8VHU0DQXDODQG,QVWDOODWLRQ*XLGH1RWH7KLVGRFXPHQWFRQWDLQVLQIRUPDWLRQWKDWLVSURSULHWDU\WR1HW6WUHDP1RSDUWRIWKLVSXEOLFDWLRQPD\EHUHSURGXFHGPRGLILHGRUGLVWULEXWHGZLWKRXWSULRUZULWWHQDXWKRUL]DWLRQRI1HWURQLFV1HWZRUNV/WG7KLVGRFXPHQWLVSURYLGHGDVLVZLWKRXWZDUUDQW\RIDQ\NLQG6WDWHPHQWRI&RQGLWLRQV7KHLQIRUPDWLRQFRQWDLQHGLQWKLVGRFXPHQWLVVXEMHFWWRFKDQJHZLWKRXWQRWLFH1HWURQLFVVKDOOQRWEHOLDEOHIRUHUURUVFRQWDLQHGKHUHLQRUIRULQFLGHQWDORUFRQVHTXHQWLDOGDPDJHLQFRQQHFWLRQZLWKWKHIXUQLVKLQJSHUIRUPDQFHRUXVHRIWKLVGRFXPHQWRUHTXLSPHQWVXSSOLHGZLWKLW,QIRUPDWLRQWR8VHU$Q\FKDQJHVRUPRGLILFDWLRQVRIHTXLSPHQWQRWH[SUHVVO\DSSURYHGE\WKHPDQXIDFWXUHUFRXOGYRLGWKHXVHUVDXWKRULW\WRRSHUDWHWKHHTXLSPHQWDQGWKHZDUUDQW\IRUVXFKHTXLSPHQW&RS\ULJKWE\1HWURQLFV$OOULJKWVUHVHUYHG

1HW6WUHDP[8VHU0DQXDODQG,QVWDOlation GuideVersion 1.790 ii
Contacts

1HW6WUHDP[8VHU0DQXDO9ersion 2.1 iii
Regulatory Compliance
General Note
This system has achieved Type Approval in various countries around the world. This means
that the system has been tested against various local technical regulations and found to
comply. The frequency bands in which the system operates may be “unlicensed” and in these
bands, the system can be used provided it does not cause interference.
FCC - Compliance
This equipment has been tested and found to comply with the limits for a Class B digital
device, pursuant to Part 15 of the FCC Rules. These limits are designed to provide reasonable
protection against harmful interference in a residential installation. This equipment generates,
uses and can radiate radio frequency energy and, if not installed and used in accordance with
the instructions, may cause harmful interference to radio communications. However, there is
no guarantee that interference will not occur in a particular installation. If this equipment
does cause harmful interference to radio or television reception, which can be determined by
turning the equipment off and on, the user is encouraged to try to correct the interference by
one or more of the following measures:
• Reorient or relocate the receiving antenna.
• Increase the separation between the equipment and receiver.
• Connect the equipment into an outlet on a circuit different from that to which the
receiver is connected.
Consult the dealer or an experienced radio/TV technician for help.
Changes or modifications to this equipment not expressly approved by the party responsible
for compliance could void the user's authority to operate the equipment.
Indoor Units comply with part 15 of the FCC rules. Operation is subject to the following two
conditions:
(1) These devices may not cause harmful interference.
(2) These devices must accept any interference received, including interference that may
cause undesired operation.
6HFWLRQLQIRUPDWLRQWRXVHU
Warning
It is the responsibility of the installer to ensure that when using the outdoor
antenna kits in the United States (or where FCC rules apply), only those
antennas certified with the product are used. The use of any antenna other
than those certified with the product is expressly forbidden in accordance to
FCC rules CFR47 part 15.204.
Caution
Outdoor units and antennas should be installed ONLY by experienced
installation professionals who are familiar with local building and safety
codes and, wherever applicable, are licensed by the appropriate
government regulatory authorities. Failure to do so may void the product
warranty and may expose the end user or the service provider to legal and
financial liabilities. Resellers or distributors of this equipment are not liable
for injury, damage or violation of regulations associated with the installation
of outdoor units or antennas.

1HW6WUHDP[8VHU0DQXDO9ersion 2.1 iv
Any changes or modifications to this device not expressly approved by the party responsible
for compliance could void the user's authority to operate the equipment.
RF Radiation Exposure statement.
This equipment complies with FCC RF radiation exposure limits. This equipment should be
installed and operated with a minimum distance of 281.8 cm between the radiator and your
body for 5 GHz operations.

1HW6WUHDP[8VHU0DQXDO9HUVLRQY7DEOHRI&RQWHQWV1RWHL&RQWDFWVLL5HJXODWRU\&RPSOLDQFHLLL&KDSWHU,QWURGXFWLRQ:HOFRPH.H\$SSOLFDWLRQV
:L0$;DQG,3%DFNKDXO%URDGEDQG$FFHVV3ULYDWH1HWZRUNV
.H\)HDWXUHVRI1HW6WUHDP1HW6WUHDP/LQN
7KH5DGLR2XWGRRU8QLW2'87KH,QGRRU8QLW,'83RZHU2YHU(WKHUQHW3R('HYLFHV$QWHQQDV
)ODW3DQHO$QWHQQDV3DUDEROLF'LVK$QWHQQDV
/LQN0DQDJHU$FFHVVRULHV'RFXPHQWDWLRQVHWVXSSOLHGZLWK1HW6WUHDP
+RZWR8VHWKLV0DQXDO$/LWWOH7HUPLQRORJ\&RQYHQWLRQV8VHGLQWKLV0DQXDO
1RWLILFDWLRQV7\SRJUDSKLFDOFRQYHQWLRQV
*HQHUDO6RIWZDUH
:LQGRZV7HUPLQRORJ\
&KDSWHU6LWH3UHSDUDWLRQ3ODQQLQJWKH/LQN6LWH
2YHUYLHZ
7KH6LWH6XUYH\
,QWURGXFWLRQ5HFRPPHQGHG(TXLSPHQW
6WDJH3UHOLPLQDU\6XUYH\6WDJH3K\VLFDO6XUYH\
$GGLWLRQDO2XWGRRU6LWH5HTXLUHPHQWV$GGLWLRQDO,QGRRU6LWH5HTXLUHPHQWV
6WDJH5)6XUYH\&KDSWHU+DUGZDUH,QVWDOODWLRQ6DIHW\3UDFWLFHV
3UHYHQWLQJRYHUH[SRVXUHWR5)HQHUJ\*URXQGLQJ3URWHFWLRQDJDLQVW/LJKWQLQJ*HQHUDO
3DFNDJH&RQWHQWV
2'83DFNDJH&RQWHQWV,'83DFNDJH&RQWHQWV([WHUQDO$QWHQQD3DFNDJH&RQWHQWV
$GGLWLRQDO7RROVDQG0DWHULDOV5HTXLUHG
7RROVDQG0DWHULDOV&DEOHVDQGFRQQHFWRUV
+DUGZDUH,QVWDOODWLRQ6HTXHQFH2XWGRRULQVWDOODWLRQ
0RXQWLQJWKH2'80RXQWLQJH[WHUQDODQWHQQDV0RXQWLQJWKH/LJKWQLQJ3URWHFWLRQ'HYLFHV

1HW6WUHDP[8VHU0DQXDO9ersion 2.1 vi
Outdoor Connections ..........................................................................................3-8
Indoor Installation.................................................................................................. 3-8
Mounting the IDUs..............................................................................................3-8
Connecting power to the IDU ............................................................................3-11
Connecting the ODU to the IDU.........................................................................3-11
Installing a Link using PoE Devices.....................................................................3-11
Connecting User Equipment...............................................................................3-12
Connecting and Aligning ODUs / Antennas ............................................................. 3-12
Chapter 4 Link Installation: The Link Manager
Installing theLink Manager Application ..................................................................... 4-1
Minimum System Requirements ...........................................................................4-1
Installing the Software ........................................................................................4-1
Starting the Link Manager ....................................................................................... 4-2
Login Errors ........................................................................................................... 4-4
Unsupported Device............................................................................................4-4
Incorrect IP Address ...........................................................................................4-5
Incorrect Password .............................................................................................4-5
Continuing without an IP Address............................................................................ 4-5
Changing the Log On Password ...........................................................................4-6
Installing the Link: First steps.................................................................................. 4-6
Default Settings..................................................................................................4-8
Front Panel LEDs on the IDU-C............................................................................4-8
Installation Menu and Toolbar Functionality..........................................................4-9
Installing the Link: Overview................................................................................. 4-12
Installing the Link: Step 1, Start the Wizard ........................................................... 4-13
Installing the Link: Step 2, System Parameters ....................................................... 4-13
Changing the Link Password..............................................................................4-15
Installing the Link: Step 3, Channel Settings........................................................... 4-16
Installing the Link: Step 4, Tx Power and Antenna Settings ..................................... 4-18
General............................................................................................................4-19
Dual Antennas at Both Sites ..............................................................................4-19
Single Antennas at Both Sites ............................................................................4-20
Single and Dual Antennas..................................................................................4-20
Considerations for Changing Antenna Parameters ...............................................4-21
Installing the Link: Step 5, Services ....................................................................... 4-24
Installing the Link: Step 6, Installation Summary and Exit ....................................... 4-25
Chapter 5 Configuring the Link
Link Configuration: Getting Started.......................................................................... 5-1
The Main Window of the Link Manager.................................................................5-1
The Link Manager Toolbar...................................................................................5-2
The Link Manager Main Menu ..............................................................................5-3
Elements of the Link Manager Main Window.........................................................5-6
Configuring the Link: Overview.............................................................................. 5-10
Configuring the Link: Step 1, Start the Wizard ........................................................ 5-11
Configuring the Link: Step 2, System Parameters.................................................... 5-11
Configuring the Link: Step 3, Channel Settings ....................................................... 5-12
Configuring the Link: Step 4, Tx Power and Antenna Settings.................................. 5-18
Configuring the Link: Step 5, Services.................................................................... 5-20
Configuring the Link: Step 6, Configuration Summary and Exit................................. 5-21
Chapter 6 Site Configuration
Configuring the Site................................................................................................ 6-1
Editing the Configuration Parameters by Site ........................................................6-1
Functions on the left of the dialog box:......................................................................... 6-2
Functions at the top of the dialog box:.......................................................................... 6-2
Viewing Air Interface Details ................................................................................... 6-3
Changing the Transmit Power ................................................................................. 6-4
Site Management: IP Address and VLAN .................................................................. 6-4
Configuring the ODU Address ..............................................................................6-4
Configuring VLAN Settings...................................................................................6-5

1HW6WUHDP[8VHU0Dnual Version 2.1 vii
Lost or forgotten VLAN ID............................................................................................ 6-7
Setting the Date and Time ...................................................................................... 6-7
Ethernet Properties................................................................................................. 6-9
Configuring the Bridge ........................................................................................6-9
ODU Mode................................................................................................................ 6-10
IDU Aging time ......................................................................................................... 6-10
Configuring Ethernet Ports Mode .......................................................................6-11
Setting the Maximum Information Rate ..............................................................6-12
Displaying the Inventory ....................................................................................... 6-12
Security Features ................................................................................................. 6-13
Changing the Link Password..............................................................................6-14
Link Manager Community Strings.......................................................................6-14
Editing Community Strings......................................................................................... 6-15
Forgotten Community string....................................................................................... 6-16
Muting the alignment tone .................................................................................... 6-17
Setting External Alarm Inputs................................................................................ 6-17
Managing Configuration Files................................................................................. 6-18
Backup Configuration to a File ...........................................................................6-18
Restoring a Configuration File............................................................................6-19
Resetting .........................................................................................................6-19
Configuration with Telnet...................................................................................... 6-20
Chapter 7 Monitoring and Diagnostics
Retrieving Link Information (Get Diagnostics)........................................................... 7-1
Link Compatibility................................................................................................... 7-3
Reinstalling and Realigning a Link............................................................................ 7-3
The Link Budget Calculator ..................................................................................... 7-4
Performance Monitoring.......................................................................................... 7-4
The Monitor Log .................................................................................................7-4
Saving the Monitor Log................................................................................................7-4
Viewing Performance Reports....................................................................................... 7-5
Performance Monitoring Report Toolbar........................................................................ 7-9
Setting Air Interface Thresholds ................................................................................... 7-9
The Events Log ................................................................................................7-10
Link Manager Traps ..........................................................................................7-11
Setting the Events Preferences................................................................................... 7-12
Saving the Events Log ............................................................................................... 7-13
Reverting Alarm Messages ......................................................................................... 7-14
Active Alarms............................................................................................................ 7-14
Remote Power Fail Indication..................................................................................... 7-15
Troubleshooting ................................................................................................... 7-16
Replacing an ODU ................................................................................................ 7-16
Restoring Factory Setup........................................................................................ 7-17
Online Help.......................................................................................................... 7-17
Customer Support ................................................................................................ 7-17
Appendix A Technical Specifications
Configuration ........................................................................................................ A-1
Radio ................................................................................................................... A-1
Ethernet Interface ................................................................................................. A-2
Management......................................................................................................... A-2
Mechanical............................................................................................................ A-2
Power................................................................................................................... A-3
Environmental....................................................................................................... A-3
Safety................................................................................................................... A-3
EMC ..................................................................................................................... A-3
Air Interface.......................................................................................................... A-3
Appendix B Wiring Specifications
ODU-IDU Cable ..................................................................................................... B-1
User Port Connectors............................................................................................ B-1
LAN Port ........................................................................................................... B-1
IDU-C Alarm Connector...................................................................................... B-3

1HW6WUHDP[8VHU0Dnual Version 2.1 viii
Appendix C Pole and Wall Installation
ODU Mounting Kit Contents.................................................................................... C-1
MoXQWLQJ1HW6WUHDP[on a pole ..................................................................C-2
MoXQWLQJ1HW6WUHDP[on a Wall ..................................................................C-3
Mounting an External Antenna ............................................................................... C-3
Appendix D Link Budget Calculator
Overview .............................................................................................................. D-1
User Input ........................................................................................................ D-1
Link Budget Calculator Internal Data ................................................................... D-1
Calculations .......................................................................................................... D-2
EIRP ................................................................................................................. D-2
Expected RSS and Fade Margin........................................................................... D-2
Min and Max Range ........................................................................................... D-2
Service.............................................................................................................. D-2
Availability ........................................................................................................ D-2
Antenna Height ................................................................................................. D-3
Running the Link Budget Calculator ........................................................................ D-3
About the Fresnel Zone........................................................................................ D-13
Appendix E Lightning Protection and Grounding Guidelines
Grounding for Antenna Cable .................................................................................. E-1
Grounding for Indoor/Outdoor Units ........................................................................ E-2
ODU Grounding ..................................................................................................E-2
IDU Grounding ...................................................................................................E-2
External Lightning Surge Suppressors and Grounding................................................ E-3
Internal ESD Protection circuits ............................................................................... E-7
Appendix F MIB Reference
Introduction........................................................................................................... F-1
About the MIB....................................................................................................F-1
Terminology.......................................................................................................F-1
Interface API ......................................................................................................... F-1
Control Method...................................................................................................F-1
Community String...............................................................................................F-2
Private MIB Structure ............................................................................................. F-2
MIB Parameters ..................................................................................................... F-4
Supported Variables from the RFC 1213 MIB ........................................................F-4
MIB Parameters..................................................................................................F-5
MIB Traps............................................................................................................ F-17
General............................................................................................................F-17
Trap parameters...............................................................................................F-18
Link Manager Traps ..........................................................................................F-21
Appendix G External Alarms Specification
External Alarms Specification.................................................................................. G-1
Appendix H Combo Configuration Tool
What is the Combo Configuration Tool? .................................................................. H-1
Who may use the Combo Configuration Tool ........................................................... H-1
Caveat to the use of the Combo Configuration Tool ................................................. H-1
Prerequisites to using the Combo Configuration Tool................................................ H-2
Operating the Combo Configuration Tool................................................................. H-2
Before using the Combo Configuration Tool............................................................. H-2
Using the Combo Configuration Tool....................................................................... H-2
If you receive an error message ............................................................................. H-6
Appendix I Regional Notice: French Canadian
Procédures de sécurité............................................................................................ I-1
Généralités......................................................................................................... I-1
Mise à la terre .................................................................................................... I-1
Protection contre la foudre .................................................................................. I-2
Précautions de sécurité pendant le montage de ODU ............................................ I-2
Connecter la terre à IDU-C .................................................................................. I-3

1HW6WUHDP[8VHU0Dnual Version 2.1 ix
Installation sur pylône et mur.................................................................................. I-4
Contenu du kit de montage ODU ......................................................................... I-4
Montage sur un pylône ....................................................................................... I-5
Montage sur un mur ........................................................................................... I-6
Montage d'une antenne externe........................................................................... I-7
Contenu du kit de montage d'une antenne externe ............................................... I-7
Index

1HW6WUHDP[8VHU0Dnual Version 2.1 x
List of Figures
FIGURE 1-1 TYPICAL WIMAX AND IP BACKHAUL APPLICATION ....................................................1-2
FIGURE 1-2 TYPICAL BROADBAND1HW6WUHDPAPPLICATION .........................................1-2
FIGURE 1-3 PRIVATE NETWORK..........................................................................................1-3
FIGURE 1-4 EXAMPLE OF LINK ARCHITECTURE - SYSTEM COMPONENTS ........................................1-5
FIGURE 1-5 ODU FORM FACTORS.......................................................................................1-6
FIGURE 1-6 IDU-C FRONT PANEL.......................................................................................1-8
FIGURE 1-7 POEDEVICE - SHOWING THE RADIO ETHERNET PORT ...............................................1-8
FIGURE 1-8 ODU WITH INTEGRATED FLAT PANEL ANTENNA ......................................................1-9
FIGURE 1-9 FLAT PANEL ANTENNA ......................................................................................1-9
FIGURE 1-10 EXTERNAL ANTENNAS - PARABOLIC DISH.............................................................1-9
FIGURE 1-11 LINK MANAGER SCREEN.................................................................................1-10
FIGURE 1-12 SITE CONFIGURATION WINDOW WITH OPEN MANAGEMENT PANEL............................1-16
FIGURE 3-1 ODU MOUNTING KIT .......................................................................................3-3
FIGURE 3-2 CONNECTORIZED ODU - FRONT AND REAR VIEWS...................................................3-3
FIGURE 3-3 INTEGRATED ODU - FRONT AND REAR VIEWS ........................................................3-4
FIGURE 3-4 IDU-C PACKAGE CONTENTS - THE IDU-C .............................................................3-4
FIGURE 3-5 IDU-C PACKAGE CONTENTS - THE MOUNTING KIT AND DC POWER PLUGS .....................3-4
FIGURE 3-6 TYPICAL INSTALLATION DIAGRAM (WITH EXTERNAL ANTENNA)....................................3-6
FIGURE 3-7 IDU-C FRONT PANEL .......................................................................................3-8
FIGURE 3-8 IDU-C - A PERSPECTIVE VIEW ...........................................................................3-9
FIGURE 3-9 IDU-C LEDS...............................................................................................3-10
FIGURE 3-10 DU-C OWER CONNECTORS.............................................................................3-11
FIGURE 3-11 BEEP SEQUENCE FOR ANTENNA ALIGNMENT ........................................................3-13
FIGURE 4-1 LAN PORTS ON THE FRONT PANEL OF THE IDU-C ...................................................4-2
FIGURE 4-2 PINGING AN UNINSTALLED AND UNCONFIGURED LINK................................................4-2
FIGURE 4-3 LOGIN SCREEN ...............................................................................................4-3
FIGURE 4-4 LOGIN SCREEN WITH COMMUNITY OPTIONS VISIBLE.................................................4-4
FIGURE 4-5 UNSUPPORTED DEVICE MESSAGE .........................................................................4-5
FIGURE 4-6 UNREACHABLE DEVICE MESSAGE ..........................................................................4-5
FIGURE 4-7 OPENING LINK MANAGER WINDOW PRIOR TO INSTALLATION ......................................4-7
FIGURE 4-8 IDU-C FRONT PANEL LEDS..............................................................................4-9
FIGURE 4-9 LINK INSTALLATION WIZARD............................................................................4-13
FIGURE 4-10 : INSTALLATION WIZARD, SYSTEM DIALOG BOX ..................................................4-14
FIGURE 4-11 CHANGE LINK PASSWORD DIALOG BOX..............................................................4-15
FIGURE 4-12 LOST OR FORGOTTEN LINK PASSWORD RECOVERY................................................4-16
FIGURE 4-13 CHANNEL SETTINGS - AUTOMATIC CHANNEL SELECTION........................................4-17
FIGURE 4-14 CHANNEL SETTINGS - SHOWING AVAILABLE INSTALLATION RATES ............................4-18
FIGURE 4-15 TRANSMISSION POWER AND ANTENNA PARAMETERS.............................................4-19
FIGURE 4-16 ANTENNA CONFIGURATION DIALOG WITH OPENED TYPE SELECTION .........................4-22
FIGURE 4-17 ANTENNA PARAMETERS CHANGE WARNING..........................................................4-23
FIGURE 4-18 TXPOWER LIMITS .......................................................................................4-23
FIGURE 4-19 SERVICES AND RATES DIALOG.........................................................................4-24
FIGURE 4-20 INSTALLATION WIZARD EXIT SUMMARY ............................................................4-25
FIGURE 4-21 MAIN WINDOW OF THE MANAGER AFTER INSTALLATION.........................................4-26
FIGURE 5-1 MAIN WINDOW, WIRELESS LINK IS ACTIVE ..........................................................5-2
FIGURE 5-2 ETHERNET BANDWIDTH INDICATION ....................................................................5-8
FIGURE 5-3 LINK CONFIGURATION WIZARD.........................................................................5-11
FIGURE 5-4 CONFIGURATION WIZARD, SYSTEM DIALOG BOX....................................................5-12
FIGURE 5-5 CHANNEL SETTINGS DIALOG BOX - AUTOMATIC CHANNEL SELECTION .........................5-13
FIGURE 5-6 SEARCHING FOR THE BEST OPERATING CHANNEL ...................................................5-14
FIGURE 5-7 CHANNEL SETTINGS WITHOUT AUTOMATIC CHANNEL SELECTION................................5-15
FIGURE 5-8 CHANNEL FREQUENCY OPTIONS .........................................................................5-16
FIGURE 5-9 CHOOSING AN “OTHER” OPERATING CHANNEL FREQUENCY ......................................5-17
FIGURE 5-10 TRANSMISSION POWER AND ANTENNA PARAMETERS.............................................5-18
FIGURE 5-11 ANTENNA CONFIGURATION DIALOG WITH OPENED TYPE SELECTION .........................5-19
FIGURE 5-12 SERVICES AND RATES DIALOG.........................................................................5-20
FIGURE 5-13 CONFIGURATION WIZARD EXIT SUMMARY..........................................................5-21

1HW6WUHDP[8VHU0Dnual Version 2.1 xi
FIGURE 5-14 MAIN WINDOW OF THE MANAGER AFTER CONFIGURATION ......................................5-22
FIGURE 6-1 CONFIGURATION DIALOG BOX ............................................................................6-2
FIGURE 6-2 AIR INTERFACE DETAILS ....................................................................................6-3
FIGURE 6-3 CHANGING THE TRANSMIT POWER.......................................................................6-4
FIGURE 6-4 MANAGEMENT ADDRESSES - SITE CONFIGURATION DIALOG BOX..................................6-5
FIGURE 6-5 CONFIGURING MANAGEMENT TRAFFIC VLAN SETTINGS .............................................6-6
FIGURE 6-6 DATE AND TIME CONFIGURATION........................................................................6-8
FIGURE 6-7 CHANGE DATE AND TIME ..................................................................................6-8
FIGURE 6-8 DATE AND TIME CONFIGURED FROM AN NTP SERVER...............................................6-9
FIGURE 6-9 BRIDGE CONFIGURATION - SITE CONFIGURATION DIALOG BOX .................................6-10
FIGURE 6-10 INVENTORY SCREEN .....................................................................................6-13
FIGURE 6-11 AVAILABLE SECURITY FEATURES.......................................................................6-14
FIGURE 6-12 CHANGING THE COMMUNITY STRING ................................................................6-16
FIGURE 6-13 ALTERNATIVE COMMUNITY DIALOG BOX ............................................................6-17
FIGURE 6-14 EXTERNAL ALARM CONFIGURATION ..................................................................6-18
FIGURE 6-15 TELNET MANAGEMENT SCREEN .......................................................................6-22
FIGURE 7-1 GET DIAGNOSTICS DIALOG BOX .........................................................................7-2
FIGURE 7-2 PREFERENCES DIALOG BOX.................................................................................7-5
FIGURE 7-3 BASIC PERFORMANCE MONITORING REPORT ..........................................................7-6
FIGURE 7-4 A TYPICAL PERFORMANCE MONITORING REPORT .....................................................7-6
FIGURE 7-5 THRESHOLD CONFIGURATION DIALOG BOX .............................................................7-9
FIGURE 7-6 EVENTS LOG DISPLAY.....................................................................................7-10
FIGURE 7-7 PREFERENCES DIALOG BOX...............................................................................7-13
FIGURE 7-8 ACTIVE ALARMS SUMMARY ..............................................................................7-15
FIGURE 7-9 ONLINE HELP FOR WIRELESS LINK ....................................................................7-17
FIGURE B-1 EXAMPLE FOR CONNECTING THE ALARM CONNECTOR................................................ B-4
FIGURE C-4 MOUNTING ON A POLE..................................................................................... C-2
FIGURE C-5 MOUNTING ON A WALL ................................................................................... C-3
FIGURE D-1 ACCESSING THE LINK BUDGET CALCULATOR ......................................................... D-4
FIGURE D-2 LINK BUDGET SCREEN..................................................................................... D-5
FIGURE D-3 PRODUCT SELECTOR ....................................................................................... D-7
FIGURE D-4 RATE SELECTOR............................................................................................. D-8
FIGURE D-5 CALCULATION OF DISTANCE FROM SITE COORDINATES............................................ D-9
FIGURE D-6 CLIMACTIC C FACTORS.................................................................................. D-10
FIGURE D-7 CLIMACTIC C FACTOR DESCRIPTION ................................................................. D-11
FIGURE D-8 WORLD MAP SHOWING C FACTOR CONTOURS ..................................................... D-12
FIGURE D-9 FRESNEL ZONE ............................................................................................ D-13
FIGURE E-1 GROUNDING ANTENNA CABLES ............................................................................E-2
FIGURE E-2 GROUNDING A TYPICAL POLE INSTALLATION ...........................................................E-3
FIGURE E-3 GROUNDING A TYPICAL WALL INSTALLATION...........................................................E-4
FIGURE E-4 ODU SURGE SUPPRESSOR AND GROUNDING ..........................................................E-4
FIGURE E-5 TRANSTECTOR’SSURGE SUPPRESSOR ...................................................................E-5
FIGURE E-6 SURGE SUPPRESSOR AND GROUNDING AT BUILDING ENTRY POINT................................E-7
FIGURE F-1 TOP LEVEL SECTIONS OF THE PRIVATE MIB...........................................................F-3
FIGURE I-4 MONTAGE SUR UN PYLÔNE ................................................................................. I-5
FIGURE I-5 MONTAGE SUR UN MUR ..................................................................................... I-6

1HW6WUHDP[8VHU0Dnual Version 2.1 xii
List of Tables
TABLE 1-1 AVAILABLE ODU PRODUCTS - RELEASE 2.1 ............................................................1-7
TABLE 1-2 RELEASE 2.1 IDU-C PRODUCTS...........................................................................1-7
TABLE 3-1 COMPONENTS OF AN IDU-C FRONT PANEL ..............................................................3-9
TABLE 3-2 IDU-C FRONT PANEL LEDS..............................................................................3-10
TABLE 4-1 PC REQUIREMENTS FOR THE LINK MANAGER APPLICATION..........................................4-1
TABLE 4-2 LINK MANAGER: OFFLINE FUNCTIONALITY ..............................................................4-6
TABLE 4-3 DEFAULT SETTINGS...........................................................................................4-8
TABLE 4-4 FRONT PANEL LEDS..........................................................................................4-9
TABLE 4-5 LINK MANAGER MAIN MENU FUNCTIONALITY ..........................................................4-10
TABLE 4-6 LINK MANAGER TOOLBAR ................................................................................4-11
TABLE 4-7 LINK INSTALLATION WIZARD .............................................................................4-12
TABLE 4-8 WIRELESS LINK TRANSMISSION RATES .................................................................4-21
TABLE 5-1 LINK MANAGER TOOLBAR ..................................................................................5-3
TABLE 5-2 LINK MANAGER MAIN MENU FUNCTIONALITY ............................................................5-4
TABLE 5-3 LINK DETAILS ..................................................................................................5-6
TABLE 5-4 LINK SITE DETAILS, SITE A AND SITE B .................................................................5-7
TABLE 5-5 STATUS BAR INDICATORS....................................................................................5-9
TABLE 5-6 LINK CONFIGURATION WIZARD ..........................................................................5-10
TABLE 6-1 ODU MODE CONFIGURATION FOR COMMON ...........................................................6-11
TABLE 6-2 TELNET COMMANDS ........................................................................................6-20
TABLE 7-1 GET DIAGNOSTICS DATA AND DESCRIPTION............................................................7-2
TABLE 7-2 LINK COMPATIBILITY TRAP MESSAGES ...................................................................7-3
TABLE 7-3 EXPLANATION OF PERFORMANCE DATA....................................................................7-8
TABLE 7-4 ACTION OF THE TOOLBAR BUTTONS.......................................................................7-9
TABLE 7-5 LINK MANAGER TRAP MESSAGES ........................................................................7-11
TABLE 7-6 ACTIVE ALARMS COMMAND BUTTONS ...................................................................7-15
TABLE 7-7 LED FAULT INDICATORS ...................................................................................7-16
TABLE 7-8 TROUBLESHOOTING .........................................................................................7-16
TABLE B-1 ODU-IDU CONNECTOR PINOUT.......................................................................... B-1
TABLE B-2 FAST ETHERNET CONNECTOR PINOUT................................................................... B-2
TABLE B-3 IDU-C ALARM CONNECTOR (DRY-CONTACT) ......................................................... B-3
TABLE B-4 TERMINAL BLOCK 3-PIN -48VDC ........................................................................ B-4
TABLE C-1 BILL OF MATERIALS: ODU MOUNTING KIT............................................................. C-1
TABLE F-1 SUPPORTED RFC 1213 VARIABLES .......................................................................F-4
TABLE F-2 PRIVATE MIB PARAMETERS .................................................................................F-5
TABLE F-3 MIB TRAPS...................................................................................................F-18
TABLE G-1 OUTPUT ALARMS PINOUT .................................................................................. G-1

1HW6WUHDP[8VHU0Dnual Version 2.1 1-1
Chapter 1
Introduction
Welcome!
WeOFRPHWRWKH1HW6WUHDP[radio series, designed for the IP and WiMAX
Backhaul, Private Networks and Broadband Access global markets. The
1HW6WUHDP[series is an innovation in high-capacity carrier-grade sub-6GHz
radios, and designed to meet the requirements of current and next-genera-
tion markets and applications.
7KH1HW6WUHDP[radio series offers unmatched performance and carrier-
class quality with the following features:
• Superior spectral efficiency at 20MHz channel
• High Ethernet capacity (50Mbps full duplex net throughput)
• Combo frequency products for maximum flexibility
• Advanced air-interface based on MIMO, built-in diversity and OFDM
technologies
• Superior range performance
• Simple installation and management
• High Tx power of 25dBm
7KH1HW6WUHDPradio series supports the 4.9 - 5.8 GHz spectrum bands,
and complies with international standards and regulations (FCC, IC Canada,
WPC India and MII China).
Key Applications
WiMAX and IP Backhaul
7KH1HW6WUHDPradio series offers WiMAX operators and ISPs a unique,
highly scalable and cost-effective backhaul solution. Designed to suit a wide
raQJHRIWRSRORJLHV1HW6WUHDP[is easy to install and maintain, enabling
operators to quickly and efficiently expand their networks and introduce
new services to a growing subscriber base.

Broadband Access Chapter 1
1HW6WUHDP[8VHU0Dnual Version 2.1 1-2
Figure 1-1: Typical Wimax and IP Backhaul application
Broadband Access
:LWK1HW6WUHDP, service providers can quickly and efficiently expand their
networks, and provide high-capacity services that meet the increasing
demand for high-quality, high-speed broadband.
Figure 1-2: Typical Broadband Access application
Private Networks
1HW6WUHDPis the ultimate solution for private networks such as enter-
prises, education, government and utility organizations that wish to own
and manage their own networks and eliminate the costly recurring charges
from service providers.
1HW6WUHDPcost-effective solution enables a variety of organizations to
connect geographically dispersed sites at raQJHVRIXSWRNPmiles).

.H\)HDWXUHVRI1HW6WUHDPChapter 1
1HW6WUHDP[8VHU0Dnual Version 2.1 1-3
Figure 1-3: Private Network
.H\)HDWXUHVRI1HW6WUHDPSome of the outstanding features of thH1HW6WUHDPradio series are as
follows:
• High Capacity
7KH1HW6WUHDPsystem provides a high-capacity link of 50Mbps
net throughput in full duplex.
• Superior Spectral Efficiency
Built on advanced MIMO and OFDM technologies, the1HW6WUHDPsystem provides a high-capacity link at channel bandwidth of
20MHz. This channel bandwidth supports high robustness of the air
interface under interference and harsh conditions. In countries
where applicable, narrow channel bandwidth reduces the cost of the
spectrum license.
• Combo Frequency Products
Every1HWURQLFVCombo Frequency radio supports multiple fre-
quency bands. For example the 1HW6WUHDP[radios support the four
bands: 5.725 - 5.850 GHz, 5.150 - 5.350 GHz, 5.470 - 5.725 GHz
and 4.940 - 4.990 GHz. The 1HWURQLFVCombo Frequency prod-
ucts support the regulations of FCC, IC Canada, WPC India and MII
China.
• Advanced Air Interface
7KH1HWURQLFVsystem provides an advanced air-interface based
on MIMO, built-in diversity and OFDM technologies, resulting in an
exceptionally robust air interface.
Using the following technologies, the 1HWURQLFVair interface is
designed to ensure nonstop, high quality transmission, even under
interference and harsh conditions:
• Automatic Adaptive Rate (AAR) is a mechanism that dynami-
cally adapts the air interface rate by changing both the signal
modulation and coding.

.H\)HDWXUHVRI1HW6WUHDPChapter 1
1HW6WUHDP[8VHU0Dnual Version 2.1 1-4
• Automatic Channel Selection (ACS) chooses the best channel by
monitoring the available radio channels and dynamically select-
ing a channel which is best suited for transmission at any given
time.
• Automatic Repeat Request (ARQ) is a mechanism for error con-
trol during data transmission. When the receiver detects an
error in the received information, it automatically requests the
transmitter to resend the information. This process is repeated
until the transmission is error free or the error continues
beyond a predetermined number of maximum transmissions.
Wireless Link's ARQ mechanism is optimized for time-critical
traffic.
• Forward Error Correction (FEC) with very low overhead and
algorithms specifically designed for the varying conditions of
license-exempt frequency bands, ensuring fast, robust and
error-free communications.
• High transmission (Tx) power of 25dBm
7KH1HW6WUHDPsystem supports high Tx power, compliant with
radio regulations. High Tx power increases the system's availability
and range, and enables the high performance with smaller anten-
nas, thus reducing the total cost of the solution (lower CAPEX),
installation and tower rent costs (lower OPEX).
• Superior range performance
7KH1HW6WUHDPsystem supports high capacity at superior ranges.
The Link Budget Calculator (appendix D) is used to determine the
capacity and range according to the choice of product, antenna,
type of service and environmental conditions.
• Simple installation and management
1HW6WUHDPsystems are extremely simple to install and maintain.
They are typically up and running in less than an hour.
The Link Manager application has full local and remote management
capabilities. The user-friendly SNMP based management tool pro-
vides full end-to-end configuration, event logging, and performance
monitoring capabilities.
• Enhanced Security
The security features RI1HW6WUHDPinclude:
1HW6WUHDP[AES 128-bit integrated advanced encryption
support provides enhanced air interface security for carriers and
private networks. It ensures user data protection with one of
the most sophisticated commercially available combined
encryption and authentication techniques, CCM/AES. This tech-
nique combines message authentication (preventing anti-spoof-
ing and replay protection) with commercial encryption, and
complies with the IEEE 802.11i (phase iii) security recommen-
dations.
CCM/AES uses a symmetric 128-bit encryption key (EK), and a
nonce, and provides both message encryption and authenticat-

1HW6WUHDPLink Chapter 1
1HW6WUHDP[8VHU0Dnual Version 2.1 1-5
ing signature. The nonce mechanism enables the receiver to
remember already received genuine messages and reject all
replayed messages.
• Initial encryption and authentication is based on a user-defined
master key (Link Password). While standard Wireless LAN
encrypts only the Ethernet Payload, the AES encrypts both the
source and destination MAC addresses.
• In addition to normal login access, Read or Write Community
access is available at login
1HW6WUHDPLink
7KH1HW6WUHDPpoint-to-point solution is a wireless communication link.
Typically each side of the link is comprised of an Outdoor Unit (ODU) and
antenna and an Indoor Unit (IDU) or PoE device as shown in figure 1-4
below.
The link is managed by the SNMP-based Link Manager application.
The IDU and the ODU are connected by a CAT5e cable that carries the ser-
vice traffic and power.
Figure 1-4: Example of Link Architecture - System Components
The Radio Outdoor Unit (ODU)
The ODU is the radio transceiver of thH1HW6WUHDP[system. It supports
two radios for MIMO operation. It is available with an integrated antenna
(
Integrated Antenna ODU
) or with connectors for an external antenna
(
Connectorized ODU
).
The ODU may be mounted on a pole or a wall, and connects to the IDU or
PoE device using a CAT5e cable.

The Radio Outdoor Unit (ODU) Chapter 1
1HW6WUHDP[8VHU0Dnual Version 2.1 1-6
The ODU comes in two form factors as shown in figure 1-5 below:
Figure 1-5: ODU Form Factors
• Integrated Antenna ODU
This ODU has an integrated 370mm (1.2ft) flat panel antenna, with
a gain of 23dBi. The ODU contains both the radio and the antenna
as a single unit housed in a weatherproof case.
• Connectorized ODU
This ODU has 2x N-type connectors for connecting an external
antenna.
a. Connectorized ODU -
Front
b. Connectorized ODU -
Rear
c. Integrated Antenna ODU
- Front
d. Integrated Antenna ODU
- Rear

The Indoor Unit (IDU) Chapter 1
1HW6WUHDP[8VHU0Dnual Version 2.1 1-7
The ODU products available in release 2.1 are shown below:
The external antenna choices are:
• Single bipolar antenna
• Two monopolar antennas
• Single monopolar antenna
For further information, see page 4-19,Installing the Link: Step 4, Tx
Power and Antenna Settings.
The Indoor Unit (IDU)
The IDU has the service ports and provides aggregation of these services
towards the ODU that transports them over the air. The IDU also provides
power to the ODU.
The IDU-C is a carrier-class 19 inch, 1U unit, providing two Ethernet ports,
dry contact alarms and indication leds. It has two DC power feed connec-
tors. An AC to DC converter is available for powering the IDU-C from an AC
source. The IDU-C is designed to be rack mounted.
One IDU-C product are available in release2.1:
Table 1-1: Available ODU Products - Release 2.1
Part Number
Description
Form Factor Frequency Bands and Regulations
B/FC/50-0I50 Integrated antenna FCC/IC 5.725 – 5.850 GHz (default)
Universal 5.470 – 5.725 GHz
Universal 5.150 – 5.350 GHz
Universal 4.940 – 4.990 GHz
China MII 5.725 – 5.850 GHz
India WPC 5.825 – 5.875 GHz
B/FC/50-0E50 Connectorized for external
antenna (2x N-type)
B/IN/50-0I50 Integrated antenna
India WPC 5.825 – 5.875 GHz
B/IN/50-0E50 Connectorized for external
antenna (2x N-type)
Table 1-2: Release 2.1 IDU-C Products
Part Number Ethernet
ports Power Form
factor
7/C/00-B000 2Dual DC feed,
-20 to -60VDC 19" 1U
Table of contents


