netta FE-45F Installation instructions

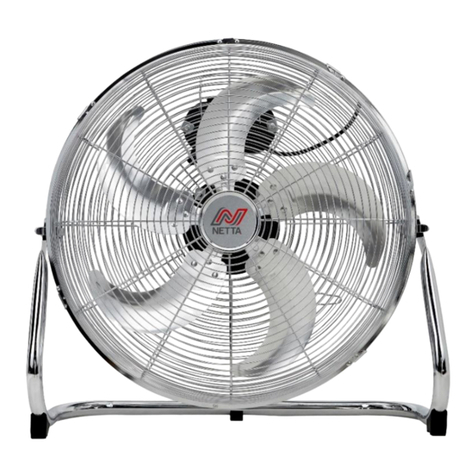
16” METAL
STAND FAN
---------------------------------------------------------
EN USER INSTRUCTION & OPERATION MANUAL
ES MANUAL DE INSTRUCCIONES Y OPERACIONES PARA EL USUARIO
DE BENUTZERANLEITUNG & BETRIEBSANLEITUNG
FR MANUEL D'UTILISATION ET D'UTILISATION
IT ISTRUZIONI PER L'USO E MANUALE OPERATIVO
ADJUSTABLE
HEIGHT
RATED POWER
50W
OSCILLATION
60 DEGREES
SPEED SETTINGS
THREE
EN

Thank you for purchasing this NETTA product.
Please read the user manual carefully before operating this appliance.
We will update our instruction manuals if necessary.
For the most up-to-date user manual, please visit our official website:
www.nettadirect.com.
You can download a copy of up to date user manuals at any time in
electronic format. We do not supply you with a paper-based user manual
after each revision.
Require a larger version of this Instruction
Manual?
Please download electronically from our
website and use PDF reader on your
device to enlarge the text if needed.
www.nettadirect.com

SAFETY & WARNINGS...
INTENDED USE
NETTA Design is for domestic and indoor use
only. This product is not intended for use by
people who have lack of experience and
knowledge or have reduced ability, or sensory
and metal capabilities. Keep supervised when
groups of people use this item.
GENERAL CAUTIONS
•Use the fan only for the specific purpose outlined in this instruction manual.
•Do not operate fan until fully assembled.
•Ensure the correct voltage is being used prior to plugging in the fan.
•Place the fan on a stable surface to avoid it being tipped over.
•Do not operate the fan directly adjacent to curtains, plants, etc. to avoid
accidental entanglement.
•To avoid potential fire hazards, never place your fan or its electrical cord
under rugs or carpet.
•Insert and remove the plug from the outlet by grabbing the plug by hand.
Do not pull on the cord.
•Never operate the fan near an open flame or in the presence of explosive
or combustible gas or fumes.
•Should the fan or electrical cord ever become damaged, discontinue use
until a certified repair.
•Do not expose fan to excessive heat or humidity
•Never cover the fan whilst it is working.
•Do not block air inlets or outlets in any manner. Check the openings
occasionally to remove dust.
•Do not adjust the fan tilt angle when the fan is moving. Switch the fan off
before adjusting.
•Once the fan is assembled, the rotor blade guard should not be removed.
REGULAR CHECKUPS
•Check cables every time
before plugging into a socket,
make sure power cables are
not burst or snapped and that
the power-plug has no
damage.

RISK OF PERSONAL INJURY
•To protect against electric shock, do not place fan on windowsill or
allow it to come into any contact with water.
•To reduce the risk of shock, this plug is intended to fit the outlet. If the
plug does not fit fully in the outlet, contact a qualified electrician.
•Turn off and unplug the fan from the outlet when not in use, when
moving the fan from one location to another, and before cleaning.
•Do not operate the fan in the presence of explosives and/or flammable
fumes.
•Do not place the fan or any parts near an open flame, cookers, or other
heating appliances.
•Do not operate fan with a damaged cord or plug, or if the product
malfunctions, or if dropped or damaged in any manner.
•Avoid contact with moving fan parts.
•The use of attachments not recommended by the manufacturer may be
hazardous.
•Place the fan on a dry and level surface.
•Do not hang or mount the fan on a wall or ceiling.
•Do not operate if the fan housing is damaged.
•Place the electrical cord away from busy areas to avoid accidental
tripping and contact.
•Keep fan out of reach of children and pets.
•Do not expose children or seniors to prolonged periods of direct cold
air.
•Never insert fingers, pencils, or any other objects through the grill when
the fan is running.
•Do not use the fan near windows as rain may create an electrical
hazard.
•This product is for indoor, household use only.

COMPONENTS
A SCREWDRIVER IS NEEDED TO ASSEMBLE THIS FAN
1. Front Grill
2. Securing Screw
3. Fan Blade
4. Screw for Fan Blade
5. Securing Screw for Rear Grill
6. Rear Grill
7. Handle
8. Motor Shaft
9. Speed Control Knob
10. Oscillation Knob
11. Motor Housing
12. Fan Head Neck
13. Telescopic Rod
14. Adjustable Height Knob
15. Stand Feet
16. Round Base
17. Stand Feet Weight
18. Washer
19. Locking Lever

ASSEMBLY
Assembly of telescopic rod holder with stand feet.
1. Turn the locking level (19) from the base of the stand feet (15).
2. Insert the lower end of the stand feet into the round base (16).
3. Place the stand feet weight (17) under the round base and connect all
the parts with the washer (18) and the locking lever.
4. Make sure that all the parts are connected to each other.
5. Loosen the adjustable height knob (14) to adjust the telescopic rod
(13).
6. Pull the telescopic rod until it stops and tighten the adjustable height
knob firmly.
ATTENTION! The adjustable height knob must be fully fastened
before starting the assembly of the motor section with the
stand.
Assembly of motor housing with telescopic rod holder.
1. Place the motor housing (11) on the upper end of the telescopic rod
(13) and fix the motor housing to the telescopic rod with the mounting
screw (23) and the lock nut (24) and with the setting screw (21) and the
adjusting screw (20).
20. Adjusting Screw
21. Setting Screw
22. Holding Fixture
23. Lock Nut for Mounting Screw
24. Mounting Screw

2. The position of the fan head can be changed by loosening the setting
screw (21) and then fixing again.
Check for a firm and proper fixing.
Before starting this assembly, please
check whether there is a protective
plastic sleeve on the motor shaft (8).
Should it be present, remove it by
pulling it forward.
1. Loosen the four screws from the
front of the motor housing (11) with a screwdriver (Fig. 2)
2. Place the rear grill (6) on the motor shaft (8) and fasten the rear grill
onto the motor with four screws.
3. Make sure the rear grill fits securely against the motor housing and that
the handle (7) is at the top.
4. Loosen the securing screw (4) on the fan blade (3). Slide the fan blade
onto the motor shaft (8) with the shaft sleeve facing the motor.
5. Align the securing screw with the flat groove in the motor shaft and
tighten with a screwdriver.
6. Ensure the fan blade (3) is fixed on the motor shaft (8).
7. Remove the small securing screw from the front grill. Open the grill
clamps on the front grill (1) and set the front grill with the fixed holder
of the rear grill (6). Mount the front grill to the rear grill and fix both
grilles with the clamps. Use a screwdriver for fixing the screw and nut
(Fig. 4).

OPERATION
•Ensure the fan is always placed on a flat and stable surface when
in use.
•Plug the appliance into the mains.
•Press the control panel to:
Position 0 = Off
Position 1 = Minimum Speed
Position 2 = Medium Speed
Position 3 = Maximum Speed
Oscillation
Push and pull the oscillating control knob (10) to switch between
having the function on or off.
Adjustments
•To adjust the angle of the fan head, loosen the setting screw (20)
and move the fan head to the desired angle. Firmly tighten the
knob to secure into place.
•The height of the fan can be adjusted by loosening the height
adjustment knob.
Switch the Fan Off
•The fan is ready to operate if connected to the mains supply and
plugged in.
•To completely switch the fan off, turn the rotary knob to 0 and pull
the power plug from the socket.
•Always disconnect the mains plug from the socket outlet when the
fan is not in use.

CLEANING & MAINTANENCE
This fan requires little maintenance. Do not fix it by yourself. Refer it to
a qualified service person if service is required.
•Before cleaning and assembling, the fan must be unplugged.
•To ensure adequate air circulation to the motor, keep vents at the
rear of the motor free of dust. Do not disassemble the fan to remove
dust.
•Use a dry cloth to remove dust and fluff
•Do not use any abrasive detergent or solvents to avoid scratching
the surface. Do not use gasoline or thinner as a cleaning agent.
•Do not allow water or any other liquid into the motor housing or
interior parts.
CLEANING:
•Ensure to unplug the product from the electrical supply source
before cleaning.
•Plastic parts should be cleaned with a soft cloth moistened with mild
soap. Thoroughly remove remaining soap with a dry cloth.

SPARE PARTS/REPAIR
We hope our products will last as long as possible to reduce the build-up of
electrical waste in the world.
If any consumable parts need replacing, please check our website for stock
availability and purchase.
If our website does not have the parts listed, but you still need consumable parts,
please contact our customer support to check availability and process your order.
To order replacement parts, please go to www.nettadirect.com/parts.
You will need PDC information from your product, user manual or carton box.
Alternatively, go to our website and use search bar to find the parts available.
You can also find this code on the back of this User Manual.
For our Repair Service, please contact our customer support with email on
support@nettadirect.com they will provide with more details of repair service with
NETTA.
DISPOSAL OF PRODUCT
IMPORTANT INFORMATION FOR CORRECT DISPOSAL OF THE PRODUCT IN
ACCORDANCE WITH EC DIRECTIVE 2002/96/EC.
DISPOSAL:
Please dispose of this product responsibly. This item cannot be disposed
of with general waste. Please contact your local council authority for more
information on how to dispose this product. If this product is disposed of
with general waste, it will end up in a landfill and will leak hazardous
substances into the groundwater –effecting our food chain.

YOUR WARRANTY
If you purchased with NETTADIRECT, or one of our authorised resellers, you will
automatically enrol your warranty for 1 (ONE) year. You do not need to register
again for your warranty. All warranties will be carry out our terms and conditions
include warranty conditions you will find out from our website at
www.nettadirect.com.
PLEASE NOTE: Consumable parts will not be covered by warranty. If a consumable
part needs replacing, you need purchase separately from our website.
Please quote with your original proof of purchase (invoice) and name or delivery
address, postcode, so we can locate you when you contact us for warranty.
NOTES:
You may need fill following details after your purchase.
I purchased this product with ____________________
(Name of Authorised Reseller/Distributor)
Purchase Date: ______/_______/_______
The order number from Authorised Reseller is:
Initial order delivery address is:
_________________________________
_________________________________
_________________________________
_________________________________

COPYRIGHTS
NETTA and its logo including images and contents in this manual and website is
copyrighted. All intellectual property rights belong to NETTA owner CONSUMABLE
DIRECT LIMITED.
ANY UNAUTHORISED USE, MODIFICATION or DISTRIBUTION of the NETTA logo,
website image, and its contents (from website, manuals) will violate worldwide
copyright, trademark, and associated laws.
We reserve the right to proceed with lawsuits to anyone who is found breaching
our copyrights policy. For more details, please check our website copyright policy
for more information.
PRODUCT DEPENDENCY CODE (PDC)
Your PDC is below:
NETTA is a registered trademark of CONSUMABLE DIRECT LIMITED.
Product Produced for CONSUMABLE DIRECT LIMITED M32 0JT U.K.
Printed in China
PDC: FE-45F
SKU: 103772
This manual suits for next models
1
Table of contents
Other netta Fan manuals
Popular Fan manuals by other brands

AERMEC
AERMEC Omnia UL P Use and installation manual

Vivax
Vivax FS-40TB user manual

Fresh Ventilation
Fresh Ventilation DF 100 manual

Dimplex
Dimplex DCTFE97 instruction manual

Vilpe
Vilpe ECo 200P/500 FLOW Installation, Operating and Maintenance Instruction

Helios
Helios gx 225 Installation and operating information