New Horizon GD 2 User manual
New Horizon - Viale Tiberina, 75 - 06059 Todi (PG) - ITALIA - tel +39 075 8948087 - www.newhorizonaudio.com
Owner Manual
Rev.2
Dear customer thank you for purchasing a New Horizon record player wich will give you an endless listening pleasure!
Package contents:
- turntable, Owner Manual (this one), cartridge alignment sheet;
- dust cover, platter, silicone belt;
- power supply, interconnection signal cable;
- two counterweights, anti-skating weight.
Please read this page carefully before operating your unit.
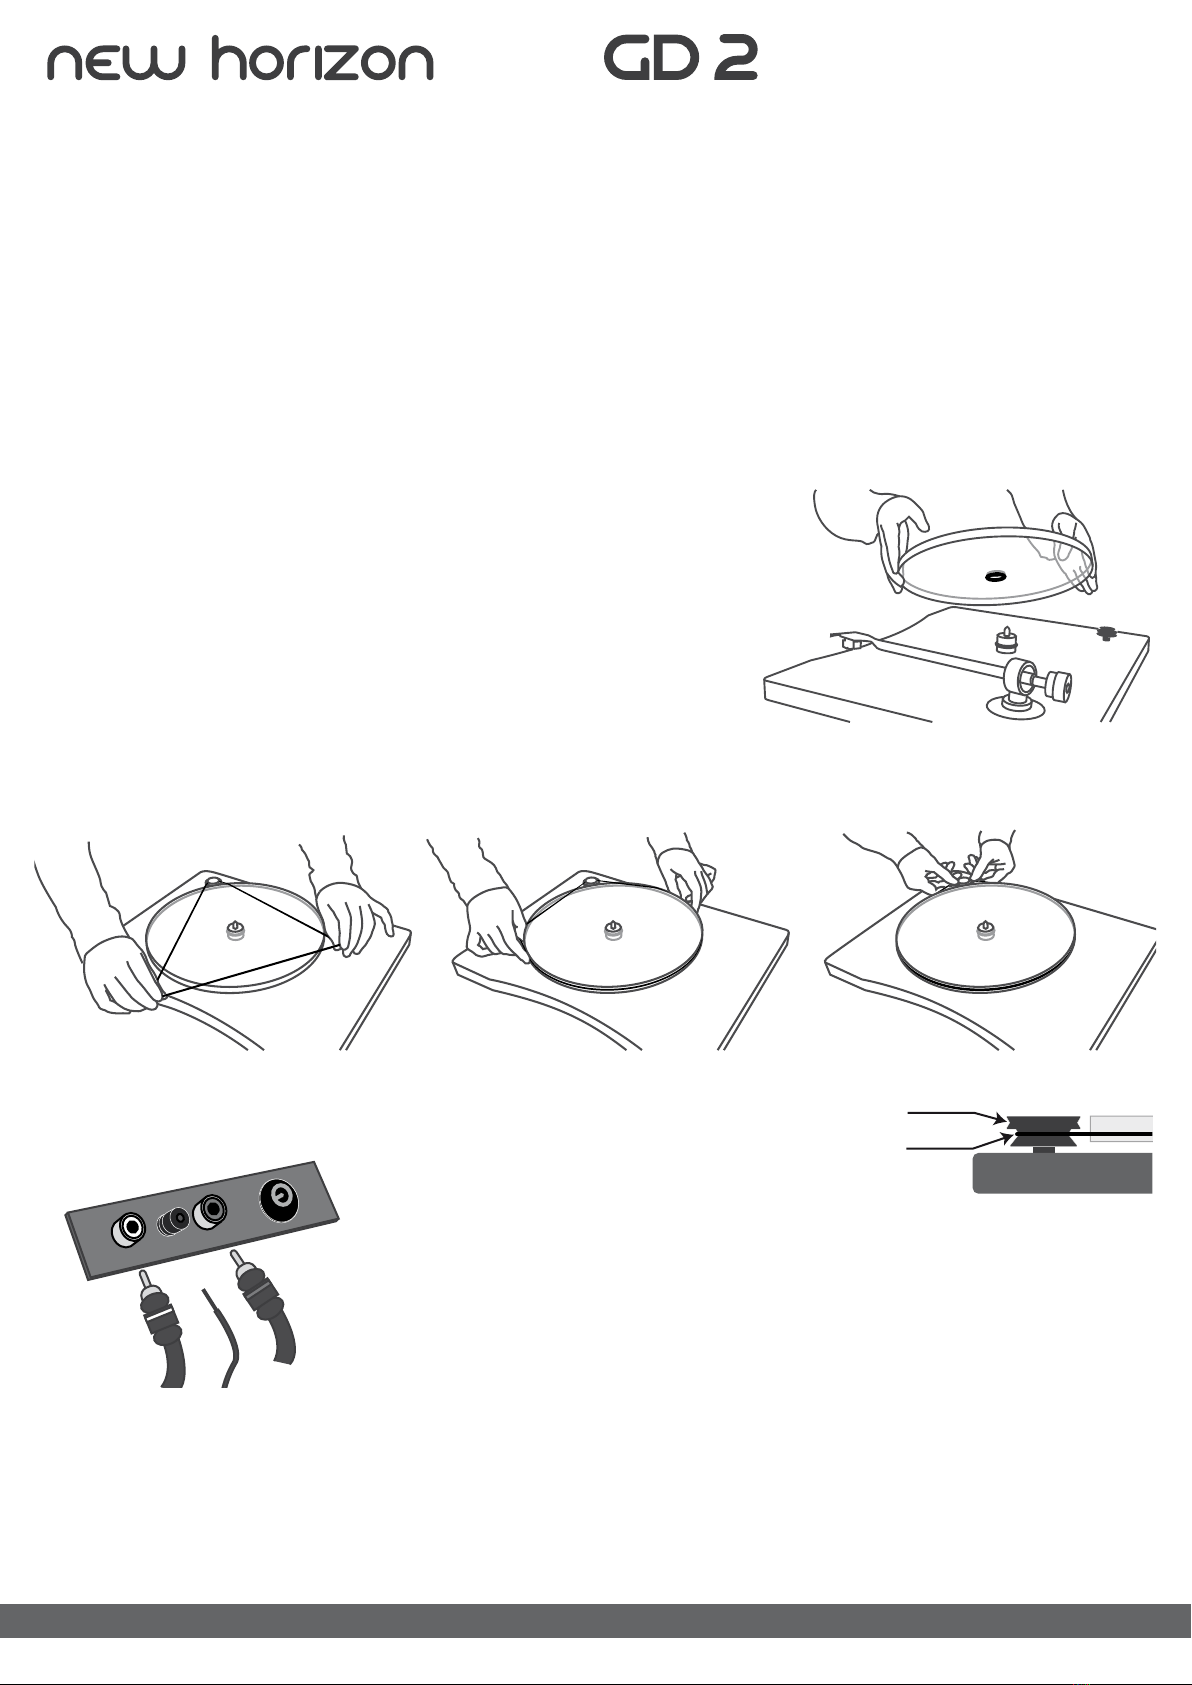
The deck is supplied partially disassembled and carefully packaged for safe transport.
Carefully remove all parts from the transport packaging. Please keep the packaging for future transport.
WARNING: DON’T TURN UPSIDE DOWN THE TURNTABLE !
Dust Cover: Remove the protective plastic lms slowly and gently. You can
place the cover over the turntable and lock it plugging in the two pins of
the cover into the corresponding holes in the plinth.
Use only a smooth cloth to clean the surface. Do not use abrasive and/or
aggressive cleaning products.
Platter: Pull out the platter from the bottom of the box and remove the
protective plastic lms by hands, slowly and gently, to avoid any damage
to the methacrylate platter.
NOTE: Introduce the centre hole on the bearing with its countersink side at
the bottom.
Transmission belt: switch the motor off. Fit the drive belt around the platter and the smaller diameter part of the motor
pulley (33 1/3 rpm) or the bigger diameter of it (45 rpm).
Interconnection Cables: the record player has gold plated female RCA phono sockets.
Take care to connect the left and right channels correctly. The right channel is usually
marked red, the left channel black or
white. The naked earthing wire should be
connected to the earth terminal on your
amplier.
Main Power: Switch Off the turntable. Check the label above the power
supply before connecting it to ensure compliance with the mains rating in
your house. Connect the low voltage plug from the power supply to the
socket on the rear of the record player and then connect the power supply
to the mains.
Tuning tonearm and cartridge: The full sound quality of the record player can only be achieved if the tonearm and the
cartridge are correctly adjusted. Following instruction may help.
Take the greatest care in order to avoid damaging the cartridge.
If you are, in any way, unsure of the necessary steps and precautions to be taken or not well acquainted with the
adjustment, please you are advised to call upon the willing help of your New Horizon dealer to accomplish this task for
you.
New Horizon - Viale Tiberina, 75 - 06059 Todi (PG) - ITALIA - tel +39 075 8948087 - www.newhorizonaudio.com
Owner Manual
and
45 rpm
331/3 rpm
RCA white mark
Left Channel RCA red mark
Right Channel
Ground
cable
Power Supply IN
Vite per la regolazione dell’azimut contrappeso
ghiera graduata
asticella dell’anti-skating
passante
del supporto esterno
New Horizon - Viale Tiberina, 75 - 06059 Todi (PG) - ITALIA - tel +39 075 8948087 - www.newhorizonaudio.com
Fixing and connecting the cartridge: All cartridges with standard 1/2 inch mounting holes can be tted. Leaving
the needle’s protection cover on, x the cartridge to the headshell using the screws supplied with the cartridge.
Do not tighten the nuts yet.
Connect the tonearm wires to the cartridge pins as follows:
white wire - left channel positive (L+)
red wire - right channel pos. (R+)
green wire - right channel return (R -)
blue wire - left channel return (L -)
Cartridge Alignment: Please use the New Horizon alignment tool in order to accomplish this job properly.
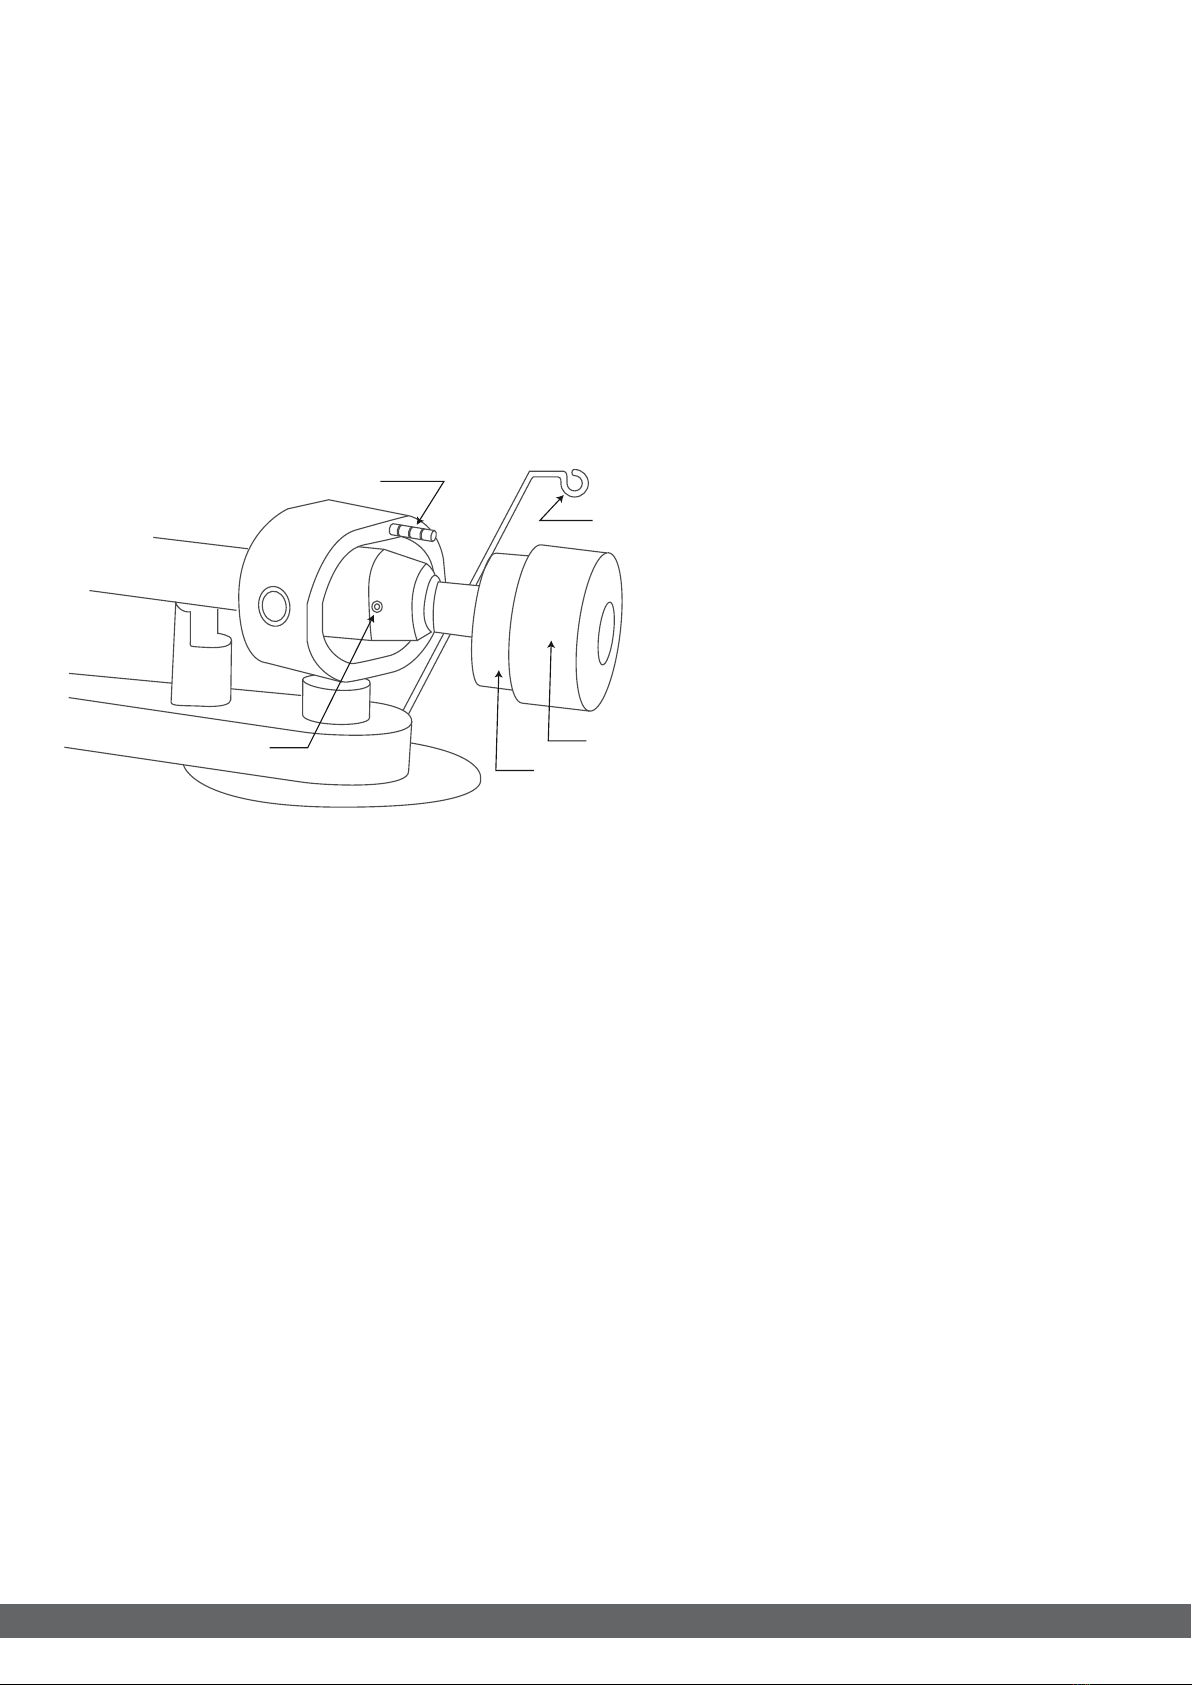
Cartridge downforce adjustment: The counterweights supplied are suitable for cartridges weighting between
4,5 - 8,5g. No counterweight are already equipped on GD’s tonearm.
Take the counterweight and, pushing carefully, turn the counterweight onto the rear end of the tonearm
tube so that the downforce scale shows towards the front of the player. If you need to change it, turn the
counterweight out of the rear end of the tonearm and pull gently.
Cartridge has to be already xed correctly on the headshell, don’t install the anti-skating weight.
Lower the armlift and position the cartridge
in the space between arm rest and platter.
Remove the cartridge protection cap if
tted.
Carefully rotate the counterweight until
the armtube correctly balances out.
Take your time. Hold the counterweight
without moving it, and gently revolve the
downforce scale ring until the zero is in line
with the anti-skating stub. Check whether
the arm still balances out.
Rotate the counterweight counter
clockwise (seen from the front) to adjust
the downforce according to the cartridge
manufacturer’s recommendations.
One mark on the scale represents 1 mN (=
0,1g / 0,1 Pond).
Anti-skating force adjustment: The anti-skating force must be adjusted following the suggestion of the
characteristics provided by the cartridge manufacturer, corresponding to the downforce as follows:
Downforce Groove in the stub
10 - 14 mN 1st groove from bearing rings
15 - 19 mN 2nd groove from bearing rings
> 20 mN 3rd groove from bearing rings
To set the correct anti-skating force, slip the loop of the anti-skating weight’s thread over the groove of the stub
and then feed the thread through the loop of the wire support.
Adjusting the azimuth: The cartridge needle must be vertical in the record groove in order to trace the groove
wall modulations correctly. With the aid of a good magnifying glass, put the cartridge on the grooves and have
a look. (Correct: your needle has to be exactly perpendicular to the cartridge body and perpendicular to the
record’s surface)
There’s a small screw at the bearing end of the arm, with the proper tool, slacken off the screw just enough to
be able to revolve the arm tube without applying force. Do not remove the screw completely!
When you are satised that the needle is vertical retighten the screw carefully.
Please note: Under no circumstances should the arm tube be adjusted with the needle still in the record
groove! Irreparable damage may be caused to the cantilever suspension! The arm must be lifted to make
each adjustment and lowered afterwards to check it.
Playing a record: place the vinyl disc on the platter, start the turntable then engage the tonearm lift by lifting its lever,
position the pick-up cartridge over the run-in groove or the desired track and lower the tonearm lift.
Enjoy your listening!
New Horizon - Viale Tiberina, 75 - 06059 Todi (PG) - ITALIA - tel +39 075 8948087 - www.newhorizonaudio.com
Owner Manual
and
45 rpm
331/3 rpm
RCA white mark
Left Channel RCA red mark
Right Channel
Ground
cable
Power Supply IN
Vite per la regolazione dell’azimut contrappeso
ghiera graduata
asticella dell’anti-skating
passante
del supporto esterno
Table of contents
Other New Horizon Turntable manuals


