NextDesk SOLO PLUS User manual

Assembly Instructions
Solo Plus

Preface
Preface
We are delighted that you have chosen NextDesk. Congratulations,
you have selected the most advanced and sophisticated
power-adjustable workstation available today. Our bodies weren’t
meant to sit or stand for hours at a time. Now you have the choice
to sit or stand with the press of a button.
This user manual gives basic instructions for NextDesk Solo Plus
model. We are sure that your NextDesk will provide you with many
years of enjoyment. Should you ever experience a problem with any
our products, please contact us.
Thank you for choosing Nextdesk. We hope you enjoy your
NextDesk for many years!
~NextDesk Team

Table of Contents
Safety Instructions..............................................................Page 1
Unpacking, Preparation, Tools Needed..................................Page 3
System Components List & Parts List.....................................Page 4
Components Diagram..........................................................Page 5
Step 1 : Connecting Lifting Columns to Desktop......................Page 6
Step 2 : Connecting Floor Supports to Columns.....................Page 7
Step 3 : Connecting Cables..................................................Page 8
Step 4 : Initializing Desk.....................................................Page 9
Step 5 : Cable Management................................................Page 10
Operating Controller..........................................................Page 11
Anti-Collision Feature........................................................Page 12
Maintenance & Description.................................................Page 13
Troubleshooting & Repair....................................................Page 14
Warranty Information.........................................................Page 15
Table of Contents
1
WARNING! FAILURE TO COMPLY WITH OR OBSERVE ALL ASSEMBLY
SAFETY AND OPERATING INSTRUCTIONS AND WARNING REGARDING
THE USE OF THIS PRODUCT MAY RESULT IN SERIOUS BODILY INJURY.
The safety of NextDesk clients and users is our primary concern. To ensure safe
operation:
SAFETY INSTRUCTIONS
Read and understand this manual before attempting to install
or operate the NextDesk
Verify that everyone who uses the NextDesk is informed of the contents
of this manual. This is the responsibility of the purchaser.
Leave this manual near the NextDesk and if possible, permanently
affixed to the desk.
Safe use of the system is possible only when the operating instructions are read
completely and the instructions contained are strictly observed.
Failure to comply with instructions marked with the ”NOTE” symbol may result in
serious damage to the system or one of its components. Persons who do not
have the necessary experience or knowledge of the NextDesk must not use the
product. Persons with reduced physical or mental abilities must not use the
NextDesk, unless they are under supervision or they have been thoroughly
instructed in the use of the apparatus by a person who is responsible for the
safety of these persons.
QUICK TIP: IS YOUR FLOOR UNLEVEL?
NextDesk is intended for use on level floors. If you determine that your floor is
unlevel, you may wish to order floor supports with leveling screw pads.

2
Before Installation, Reinstallation, or Troubleshooting:
Stop the NextDesk.
Switch the power supply and pull out the main power supply plug.
Relieve the NextDesk of any loads, which may be released when unexpected.
Before Start-up:
Make sure the NextDesk has been installed as specified in this manual.
System Connection - the individual parts must be connected before the
control box is connected to the main power supply.
If the control box makes unusual noises or has an odor, switch off the main
power supply immediately.
Make sure the cables are not damaged.
SAFETY INSTRUCTIONS (cont.)
Children must remain under close supervision to ensure that they do not play
with the product.
It is important for everyone who is installing or using the NextDesk to
have the necessary information and access to this User Manual.
If there is visible damage on the product it must not be installed.
The NextDesk is not intended for use by young children or for those
persons who require supervision.
Children should be supervised to ensure that they do not tamper or play
with the NextDesk.
3
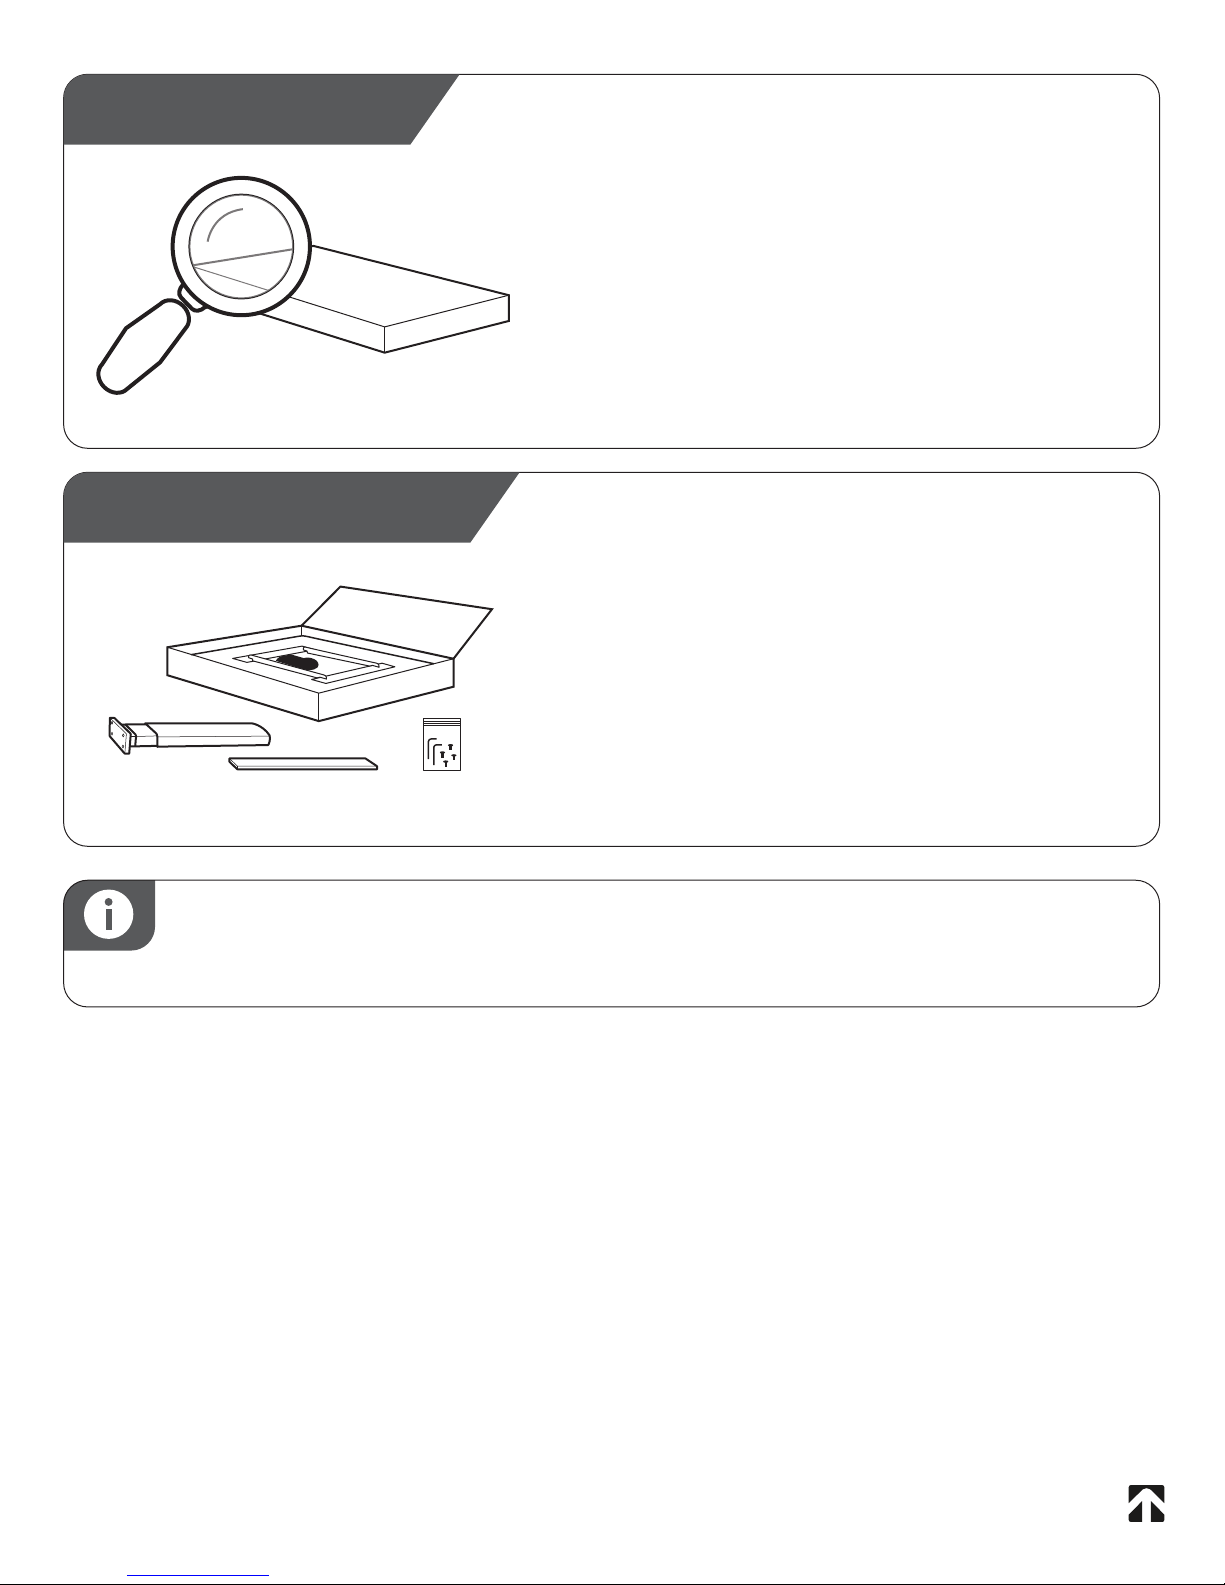
PREPARATION:
It is recommended to leave desktop in
the original box for steps 1-6 to preserve
the destop finish. Remove all other parts
from the box.
QUICK TIP: INSTALLING SCREWS
DO NOT over tighten screws during installation
UNPACKING:
Carefully remove the packaging from the
NextDesk and then inspect all
components for any shipping damage.
Report any damage to the shipping
company and fill out a concealed
damage report.
4
SYSTEM COMPONENTS LIST
1- Desktop (control box, cable, controller, mounting plate, any accessories attached)
1- Lifting Column
1 - Bottom Support Footing
1- 10’ AC Chord
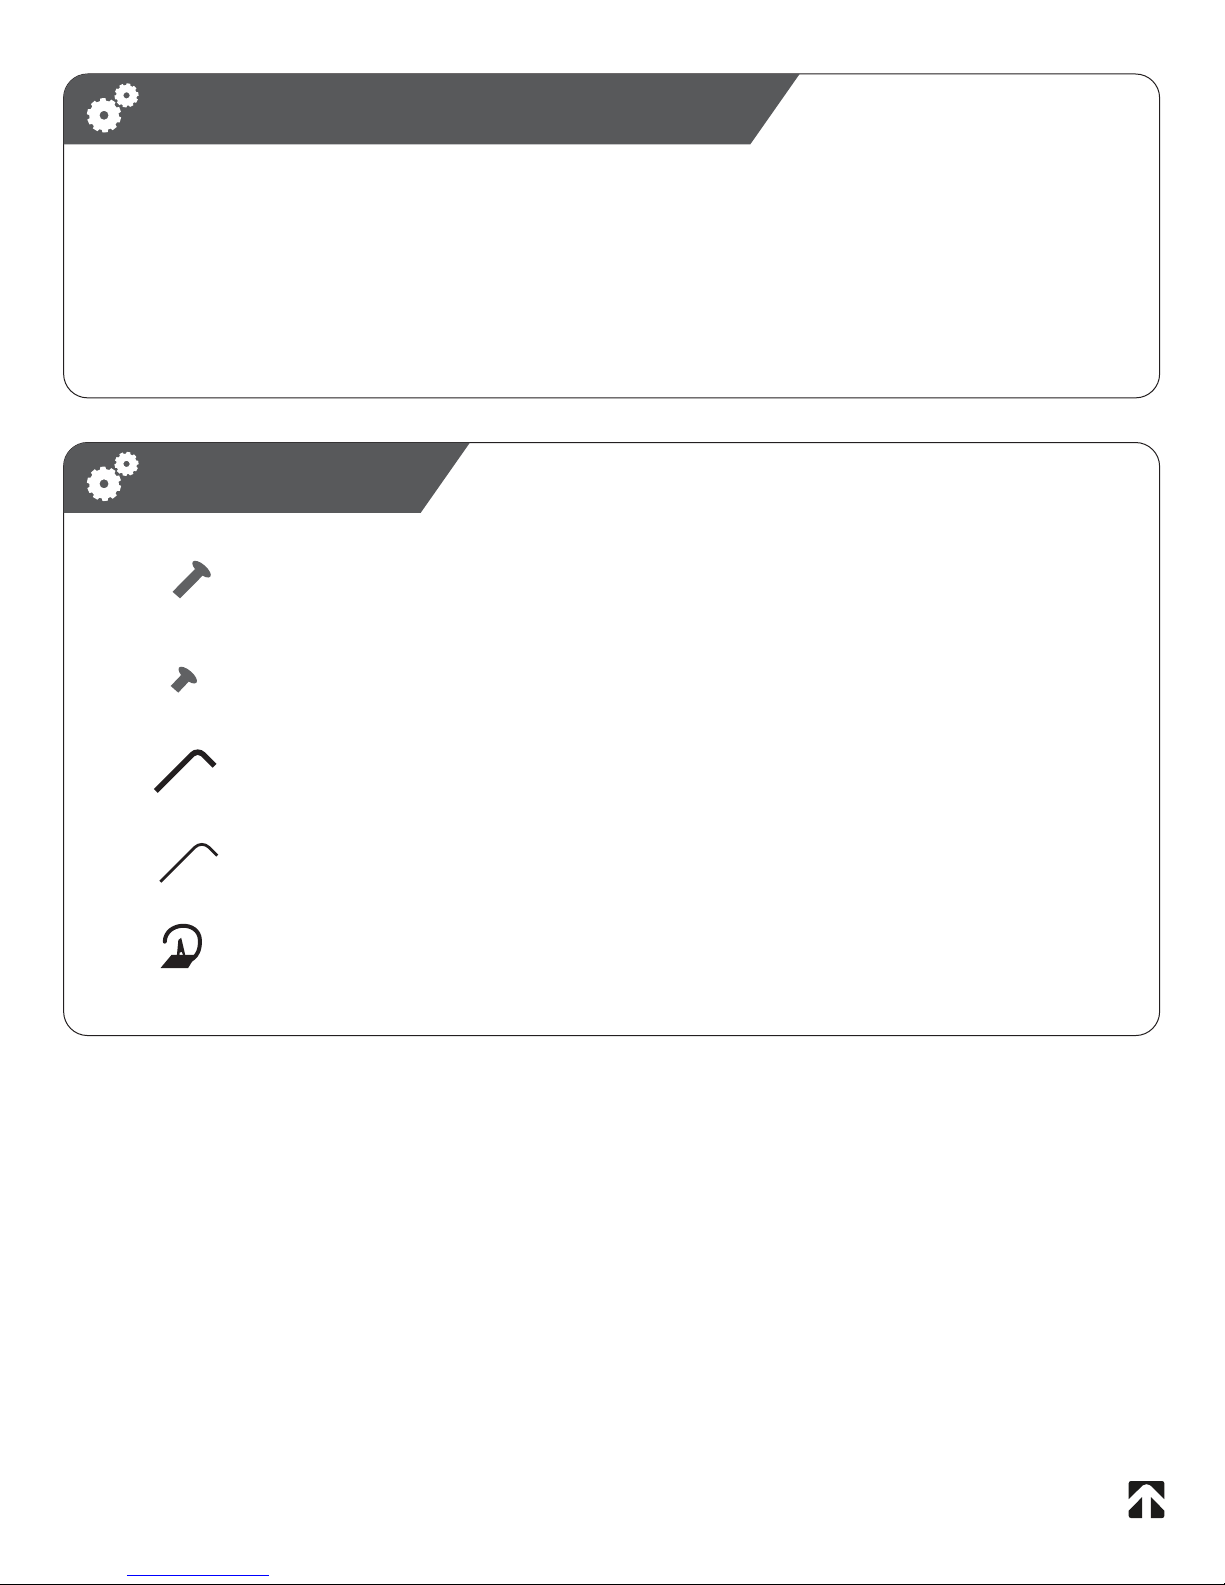
PARTS LIST
4 - M6 - 25mm Machine Screw (Long)
6 - Lift Mounting Screws 10mm (Short)
1 - Allen Wrench / Hex Key (5/32)
1 - Allen Wrench / Hex Key (1/8)
5 - Adhesive Zip Ties
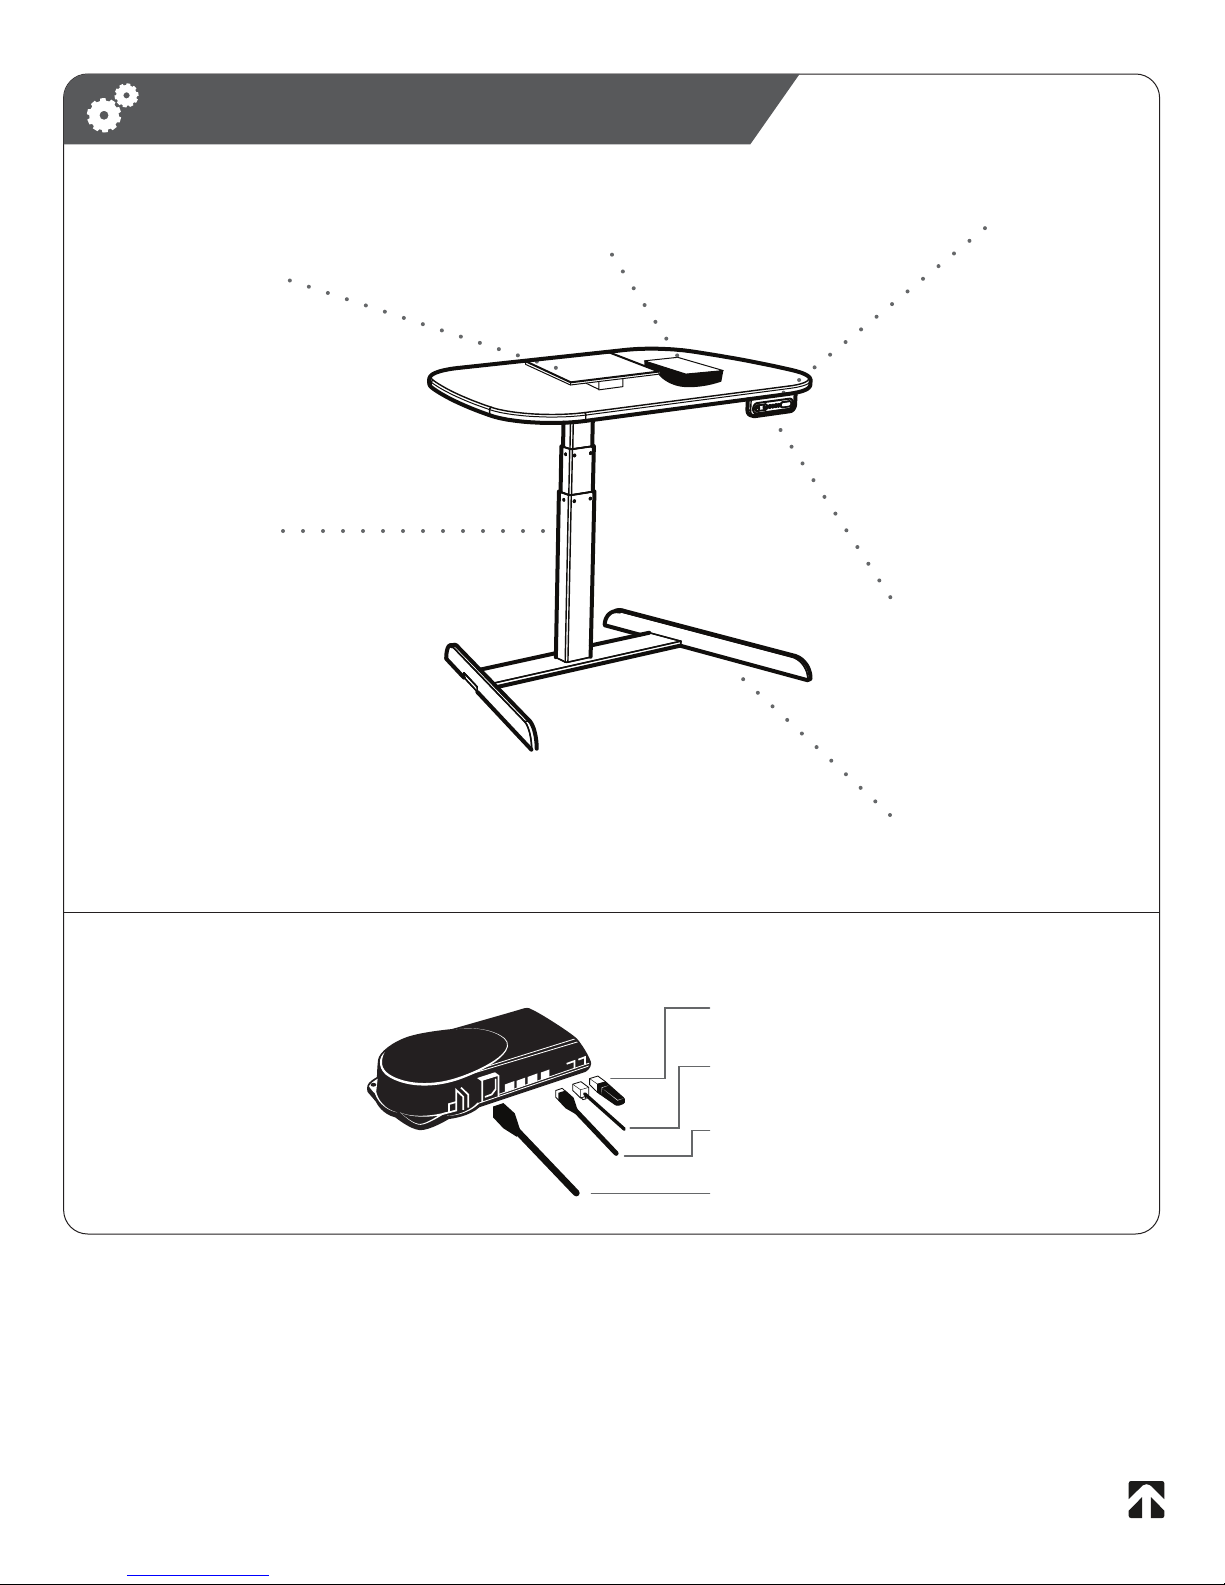
Upper Support
Microprocessor Control Box
(reference detail below)
Desktop
Digital Controller
Base Support
COMPONENTS DIAGRAM
Microprocessor Control Box
(Top View)
5
Power Cable
Lifting Column
Connector
Anti-Collision
Dongle
Lifting Column
Controller Cable

IMPORTANT:
Cable must face back of desk
Step
1CONNECT LIFTING COLUMN
TO DESKTOP
CABLE TO BACK
6
Hardware Required
6x - 10mm Allen Screws

IMPORTANT:
Countersink holes should
face up.
Step
2CONNECT FLOOR SUPPORT
TO COLUMN
7
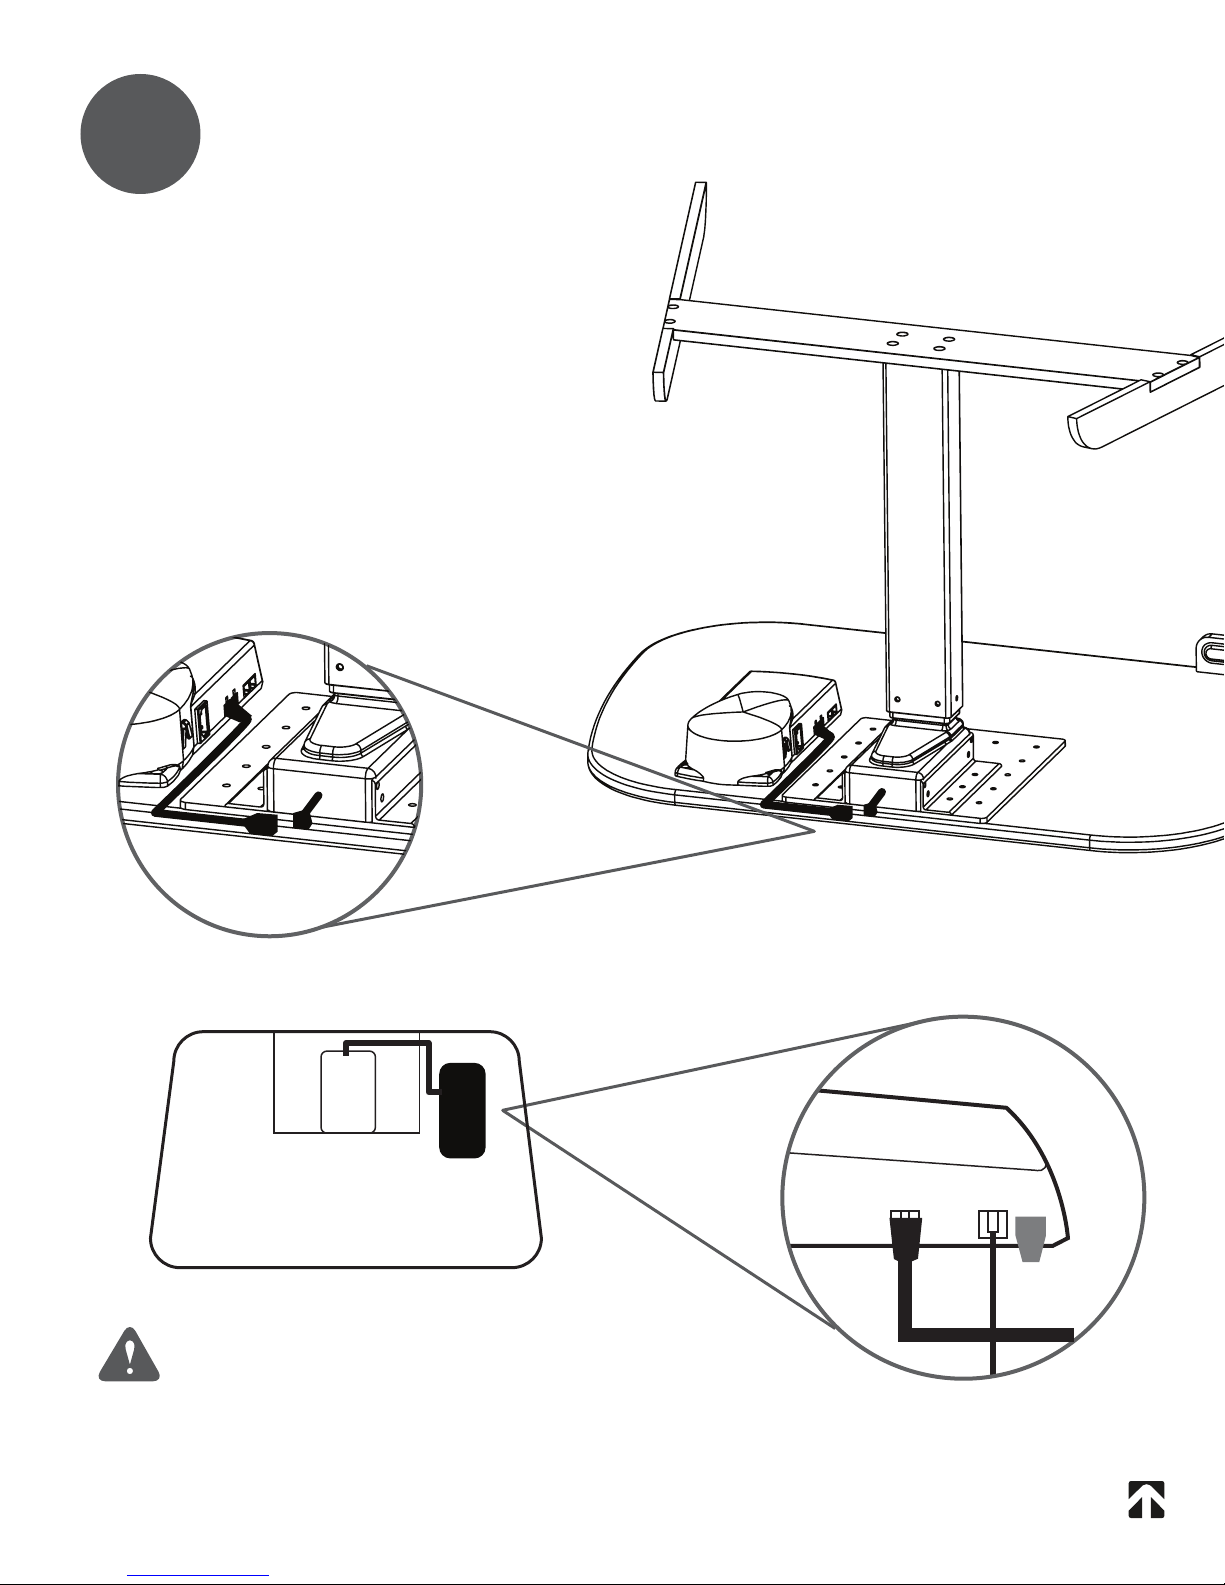
Step
3CONNECT CABLES
Motor cables are pre-mounted to
desktop and pre-wired to the
control box. Plug each motor
cable into the cable leading to the
control box.
1
IMPORTANT:
DO NOT plug desk into power outlet at
this time.
8
1

Step
4INITIALIZE DESK
IMPORTANT:
Carefully turn desk upright on level floor.
Desk is NOT complete.
DO NOT put weight or load on desk.
Use proper lifting techniques when lifting. Failure
to do so could result in serious back injury.
9
A. Connect power cord to standard wall outlet. For
desks with Power Management, the power cord is factory
attached. For desks without Power Management, plug
power cord into the control box prior to connecting to
wall outlet.
B. Press and hold the ( ) button until the lifting
columns have completely retracted and continue to hold
for 5 seconds after all movement stops.
C. Once the columns are completely retracted, they will
automatically run approximately 5 mm out again and then
slowly run in again. Do not release the ( ) button until
5 seconds after all movement has completely stopped.
Note: It is sometimes necessary to press the ( )
button twice to start initialization. There may be a short
delay before movement begins.
Note: If the ( ) button is released before the
sequence is complete then initialization is interrupted and
the process must be started again from the beginning.
s

Step
5
11
CABLE MANAGEMENT
• Straighten and untangle cables. Connect loose cables into a bundle
• Group the main cables running to your desk into a bundle
(main power cable/network cable/printer cable)
• Group the cables between your PC and desktop into a bundle
(monitor/speakers)
• Cover bundles with NextFlex expandable cable cover
• Attach the self-adhesive zip ties underneath NextDesk and secure
cables and bundles
• Consider the optional NextDesk Vanity Cover/Cable Raceway for
even easier cable management (available in matching aluminum)
Maintain the sleek lines of NextDesk. Spend a few minutes to tidy
up all visible cords and cables and then cover with NextFlex.

12
s
Adjust Up Adjust Down Store Memory
OPERATING CONTROLLER
Memory 1 / 2 / 3
Up and Down ( )
Press either the up or down button for parallel drive and the system will
drive until the button is released again or the system reaches end position.
Programmable Memory
The four small buttons are used for memory drive/storing memory.
Store Memory Presets
a. Raise or lower the desk to the height you wish to store as a preset.
b. Press and release the ( ) button.
c. Within these two seconds, press a memory button ( or or ).
The panel will acknowledge by showing "1 ", "2" or "3 " in the display
depending on chosen position.
Using Memory Presets
Press one of the memory buttons and the system will start driving to the
preprogrammed memory position. Keep the button pressed until the
position is reached.
Display Function
Shows the actual height
s
Display
13
OPERATING CONTROLLER (cont.)
Other Functions:
Adjusting Initial Height
It may be necessary to adjust the displayed height due to different
thicknesses of desktops. The control will display 24.5 inches as the default
desk height.
Procedure:
a. Press ( ) and ( ) keys at the same time and keep them pressed
for 5 seconds. This allows the initial height to be adjusted. Until the initial
height is adjusted, the display will show three minuses(---). Hereafter the
display will revert to showing the height.
b. The height can then be adjusted by either ( ) or ( ) until desired
height has been reached. The system will return to normal operation (and
give a short blink) after 5 seconds of inactivity on the keys.

14
ANTI-COLLISION FEATURE
Method of operation
The control box monitors the electric consumption on each lifting column. If the
electric consumption on one channel is increased more than a predefined slope, a
collision is assumed. All channels are stopped immediately and all desk legs will start
to run in the opposite direction (approximately 50 mm). The anti-collision sensitivity is
different in upward and downward direction. Upwards the force is approximately 20
kg. Downwards the load will be approximately 40 kg + the load on the desk lifting
column (the desk + what is on top of the desk).
Situations where the anti-collision does not work
These situations are:
• If the collision happens during the initialization phase
• If the collision happens within the first 1000 milliseconds or after the control
button has been released
• If the collision happens between the floor and the table, and the load on the
desk, plus the weight of the legs are lower than 40 kg
• If the collision happens over too long of a time, e.g. if the collision is with
a soft object
TM
NextDesk offers an anti-collision feature that can
limit material damages to a desk if a collision with a
solid object should occur.
Enabling the anti-collision
To enable the anti-collision function, a dongle must
be mounted on one of the two control ports of the
control panel on the underside of NextDesk. The
function is only active when the dongle is mounted.
If you remove the dongle the anti-collision function is disabled.
Inspect NextDesk prior to use to determine if the anti-collision dongle
is properly inserted. Do not use NextDesk if the anti-collision dongle
has been removed.
Anti-Collision
Dongle
15
Maintenance
Clean dust and dirt on the outside of the NextDesk and other components
at regular intervals and inspect them for damage and breaks. Inspect the
connections, cables, and plugs and check for correct functioning as well
as the security of the connection points.
The cleaners and disinfectants must not be highly alkaline or acidic
(pH value 6-8).
WARNING! The NextDesk systems do not withstand oil.
Description of the NextDesk
Each NextDesk actuator/lifting column is equipped with a motor, and
synchronicity is ensured by means of software that also takes account of
an oblique load on the desk. Soft start and stop are also part of this
software, which ensures a soft start and stop when adjusting the desk.
Maximum Duty Cycle:
Irrespective of the load, the duty cycle of 10% (6 min./ hour) or
maximum 2 min. at continuous use must NOT be exceeded, as this will
result in overheating of the motor and control box. Exceeding the duty
cycle will result in a dramatic reduction of the life of the system.

Repairs:
In order to avoid the risk of malfunction, all NextDesk repairs must be
carried out by authorized NextDesk repair centers as special tools and
gaskets must be used.
WARNING! If any of the NextDesk products are opened, there will be a risk of
subsequent malfunction.
Troubleshooting and Repairs:
Error Codes
Below are the possible error codes which may be displayed
on the controller
Error Code Description
E01
E02
E03
E16
Lifting columns are in an
unknown position
Overload in upwards
direction has occurred.
Overload in downwards
direction has occurred.
Illegal keys are pressed
Solution
Initialize or Reinitialize -
Refer to Page 10
Reduce the weight on NextDesk
Remove objects that prevent
downward movement
Release all buttons & press a valid
button or button combination
16

Limited Warranty
SCOPE OF WARRANTY
Next Technologies, Inc. (“NextDesk”) warrants to the original purchaser its
new desks (except for components not warranted under “Exclusions”)
manufactured by NextDesk to be free from defects in material and
workmanship under normal use and service. NextDesk’s obligation under
this warranty is limited to the repair or replacement, at NextDesk’s option,
of the parts or the products the defects of which are reported to NextDesk
within the applicable warranty period and which, upon examination by
NextDesk, prove to be defective.
APPLICABLE WARRANTY PERIOD
The applicable warranty period, measured from the date of delivery to the
original user, shall be five (5) years for all warranted desks.
EXCLUSIONS
This warranty does not cover and NextDesk shall not be liable for the
following:
(1) repairs and replacements because of misuse, abuse, negligence,
alteration, accident, freight damage, or tampering; (2) products which are
not installed, used, and properly cleaned as required in the NextDesk
“Installation” and or “Installation / Operation Manual for this applicable
product. (3) products considered to be of a consumable nature; (4)
Shipping to or from repair center; (5) accessories or parts not
manufactured by NextDesk; (6) charges by anyone for adjustments,
repairs, replacement parts, installation, or other work performed upon or
in connection with such products which is not expressly authorized in
writing in advance by NextDesk.
17

EXCLUSIVE REMEDY
NextDesk’s only obligation under this warranty is the repair or
replacement of defective parts. NextDesk shall not be liable for any
direct, special, indirect, incidental, exemplary, or consequential damages
or delay, including, but not limited to, damages for loss of profits
or loss of use.
NO AUTHORIZATION
No person or firm is authorized to create for NextDesk any other
obligation or liability in connection with the products.
THIS WARRANTY IS NEXTDESK’S ONLY WARRANTY AND IS IN LIEU
OF ALL OTHER WARRANTIES, EXPRESS OR IMPLIED. NEXTDESK
MAKES NO IMPLIED WARRANTIES OF ANY KIND INCLUDING ANY
WARRANTIES OF MERCHANTABILITY OR FITNESS FOR ANY
PARTICULAR PURPOSE. THIS WARRANTY IS LIMITED TO THE
REPAIR OR REPLACEMENT OF DEFECTIVE PARTS.
18
Table of contents
Popular Indoor Furnishing manuals by other brands


Opendesk.ch
Opendesk.ch STEELFORCE PRO 570 SLS Assembly manual

Home Decorators
Home Decorators 181-935-OTTO2 Use and care guide

WIEMANN
WIEMANN 992 077 Assembly instructions

Geuther
Geuther Cottage 1178HR Instructions for assembly and use

IKEA
IKEA FORHOJA KITCHEN CART 39 3/8X16 7/8" instructions

Gautier Office
Gautier Office 210 Assembly instructions


