NGS Odysea 4 User manual

odysea 4
USER’S MANUAL
www.ngs.eu
English iFrançais iEspañol i Deutsch iItaliano i Português iPolski i
ΕΛΛΗΝΙΚΑ
All manuals and user guides at all-guides.com
all-guides.com

odysea 4
PACKAGE CONTENTS
1. ODYSEA 4
2. AC adapter
3. Earphones
4. USB cable
5. Quick start guide
6. Battery
7. Screen protector
DEVICE OVERVIEW
1. Power key: power Your phone on and off. Suspend and
activate it
2. Headset and microphone jack: plug in headphones or a
microphone
3. Volume keys: adjust the volume of the device
4. Micro USB port: connect optional accessories and a
charger
5. Microphone: allows other callers to hear when You are
speaking to them
6. Back key: step backwards when navigating a menu or
a web page
7. Menu key: access submenus with additional options
8. Front facing camera: take pictures and shoot videos
with the front camera
9. Rear facing camera: take pictures and shoot videos
with the rear camera
10. External speaker: allows You to hear the caller
11. Settings
All manuals and user guides at all-guides.com

ENGLISH
3
8
3
4
9
11
61075
1 2
All manuals and user guides at all-guides.com
USER’S MANUAL
4
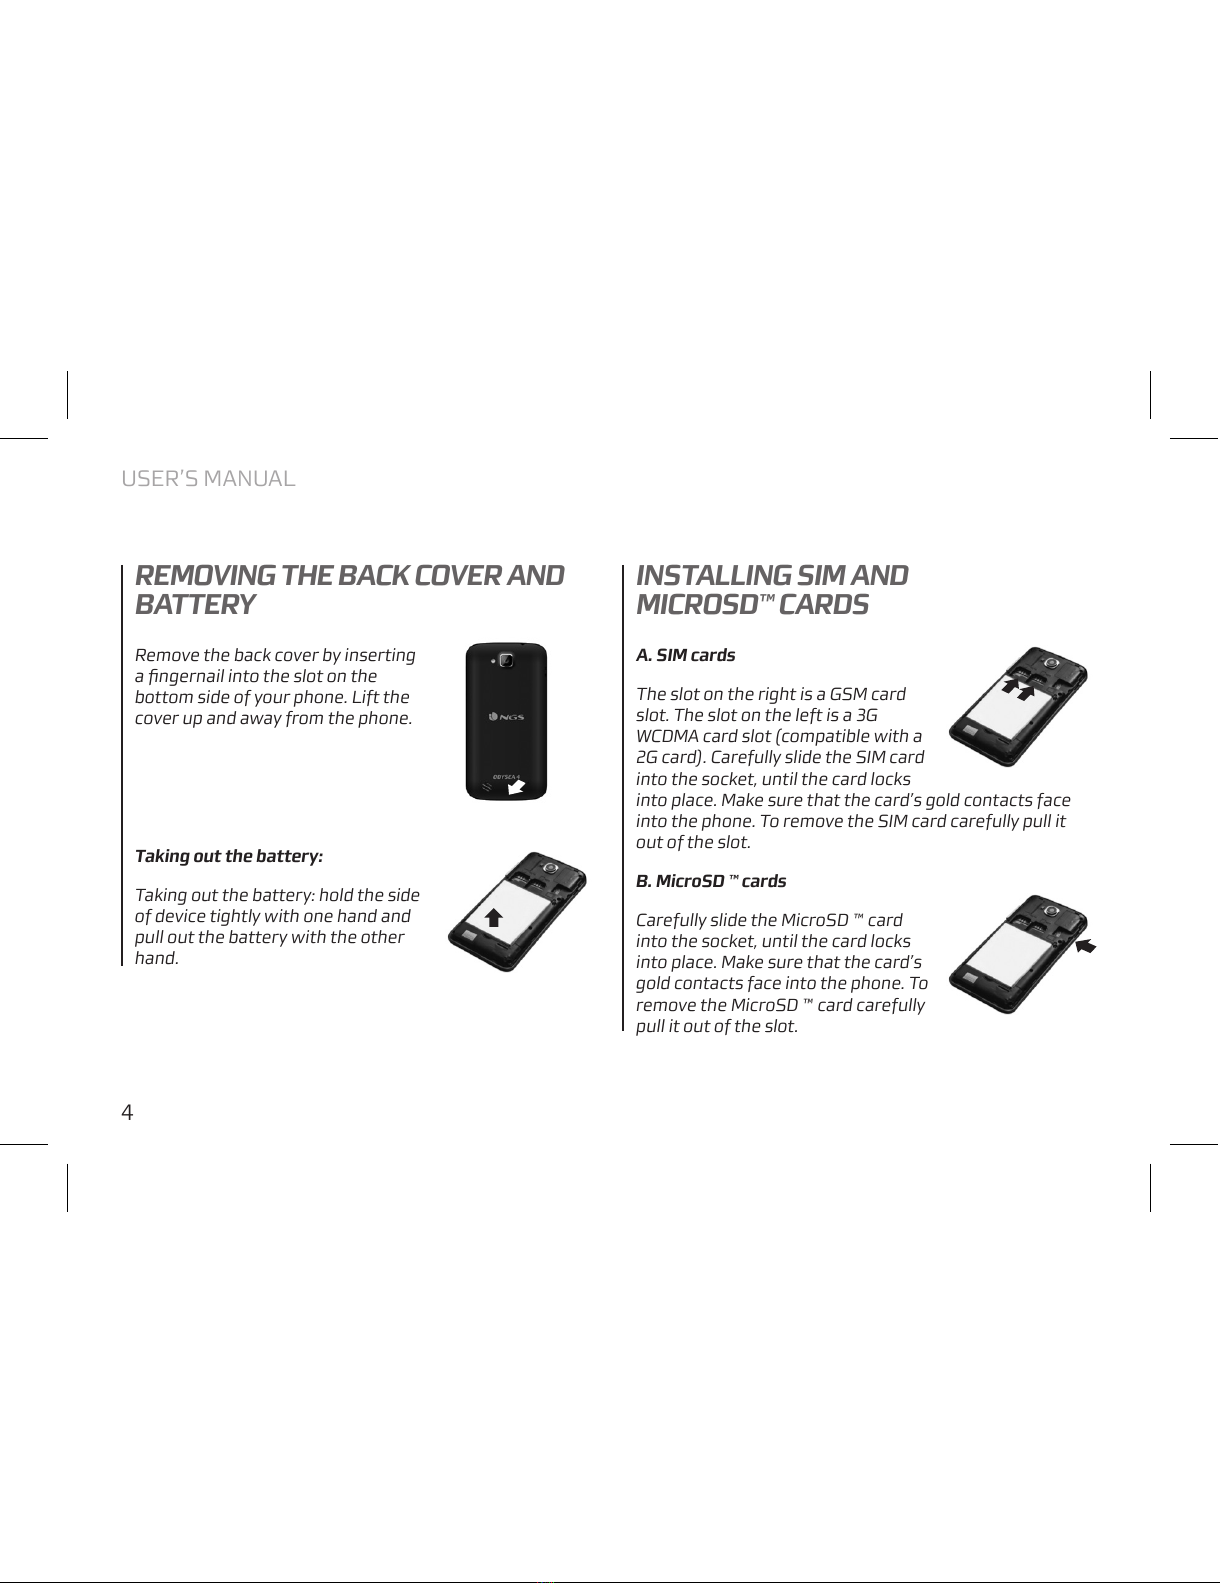
REMOVING THE BACK COVER AND
BATTERY INSTALLING SIM AND
MICROSD™ CARDS
Remove the back cover by inserting
a fingernail into the slot on the
bottom side of your phone. Lift the
cover up and away from the phone.
Taking out the battery:
Taking out the battery: hold the side
of device tightly with one hand and
pull out the battery with the other
hand.
A. SIM cards
The slot on the right is a GSM card
slot. The slot on the left is a 3G
WCDMA card slot (compatible with a
2G card). Carefully slide the SIM card
into the socket, until the card locks
into place. Make sure that the card’s gold contacts face
into the phone. To remove the SIM card carefully pull it
out of the slot.
B. MicroSD ™ cards
Carefully slide the MicroSD ™ card
into the socket, until the card locks
into place. Make sure that the card’s
gold contacts face into the phone. To
remove the MicroSD ™ card carefully
pull it out of the slot.
All manuals and user guides at all-guides.com
ENGLISH
5
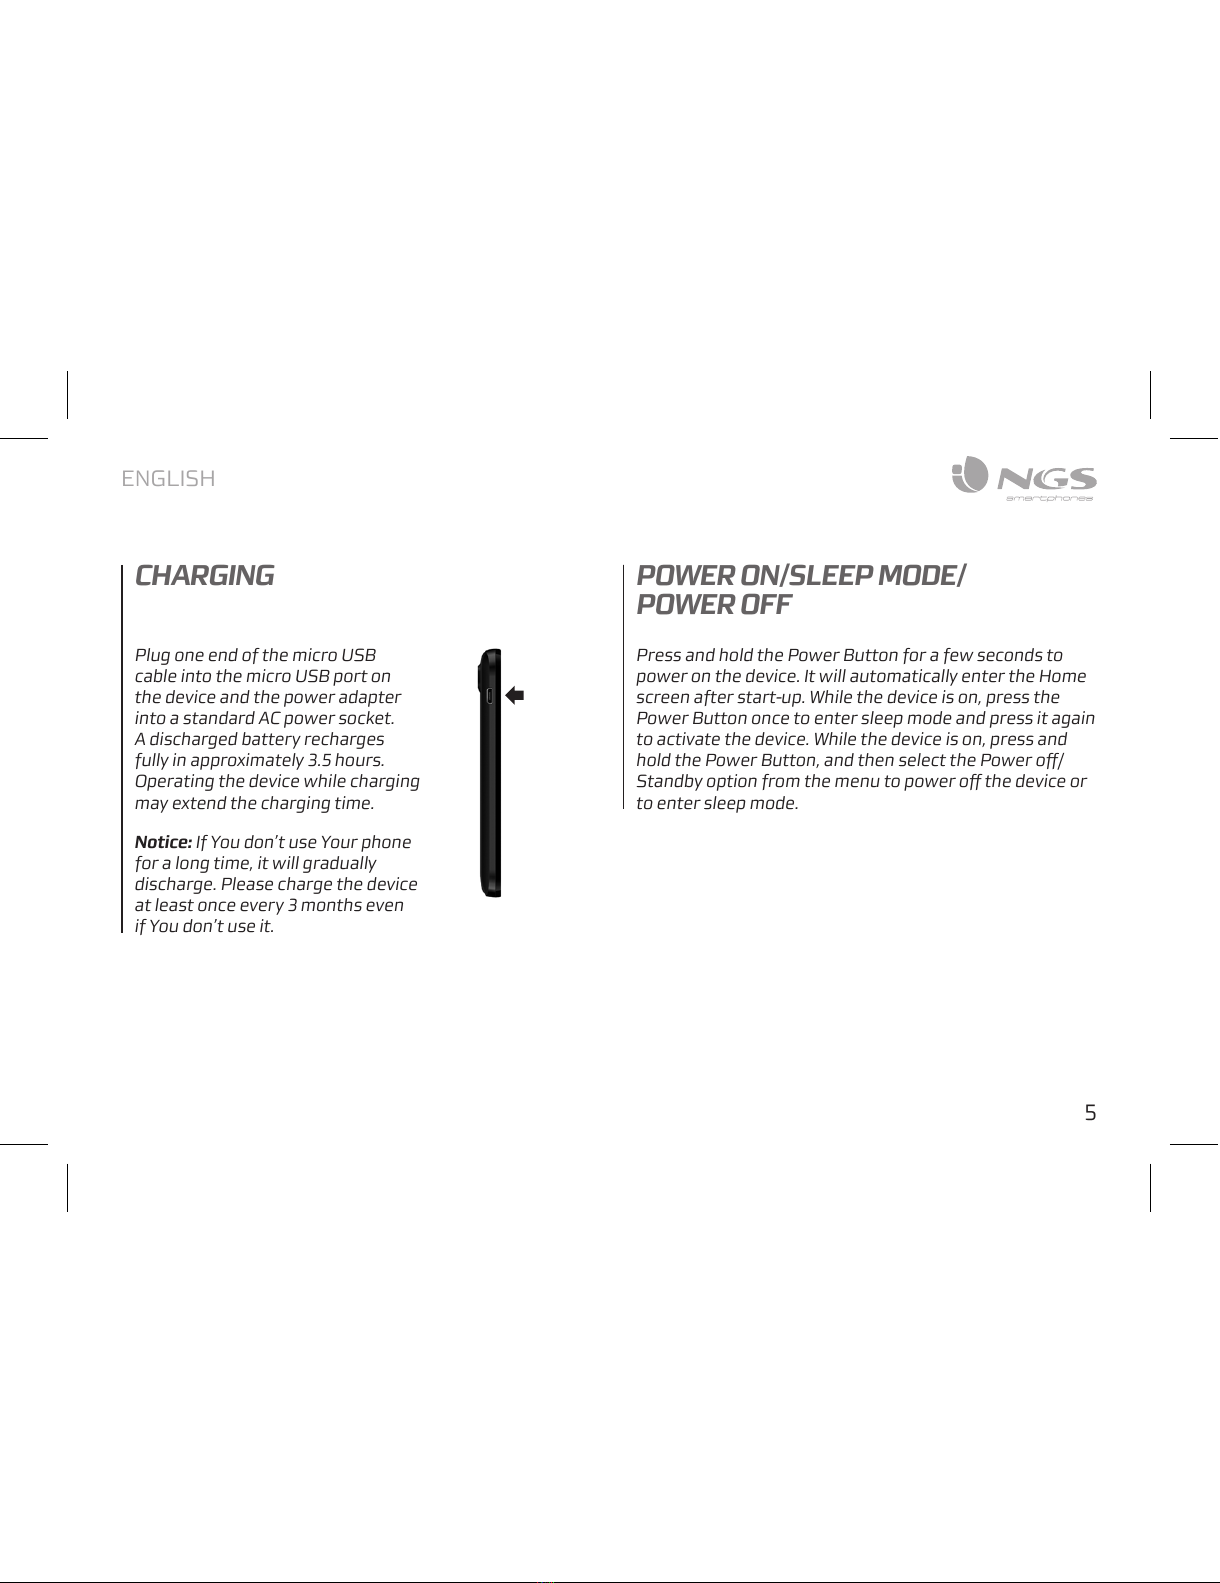
CHARGING
Plug one end of the micro USB
cable into the micro USB port on
the device and the power adapter
into a standard AC power socket.
A discharged battery recharges
fully in approximately 3.5 hours.
Operating the device while charging
may extend the charging time.
Notice: If You don’t use Your phone
for a long time, it will gradually
discharge. Please charge the device
at least once every 3 months even
if You don’t use it.
POWER ON/SLEEP MODE/
POWER OFF
Press and hold the Power Button for a few seconds to
power on the device. It will automatically enter the Home
screen after start-up. While the device is on, press the
Power Button once to enter sleep mode and press it again
to activate the device. While the device is on, press and
hold the Power Button, and then select the Power off/
Standby option from the menu to power off the device or
to enter sleep mode.
All manuals and user guides at all-guides.com

USER’S MANUAL
6
DISPLAY
SIZE 4’’
RESOLUTION 800x480
TECHNOLOGY IPS LCD multi-touch
PROCESSOR
CPU MediaTek MT6572 1.2GHz
(Cortex A7)
TYPE OF CHIPSET DualCore
GPU Mali400MP2
SYSTEM
OPERATING SYSTEM Android 4.2
MARKET Market with apps
MEMORY
RAM 512MB DDR2
FLASH 4GB eMMC
NETWORK
WI-FI WiFi b/g/n
3G Built-in 3G and 2G
FREQUENCY BAND GSM 850/900/1800/1900MHz
UMTS 900/2100MHz
HSPA+ (aero2)
BLUETOOTH Bluetooth 4.0
CONNECTORS
SD CARD READER microSD up to 32GB
SIM CARD SLOT Dual Sim (3G and 2G)
USB microUSB 2.0 (charging and data
transfer)
AUDIO OUT 3.5mm audio and mic jack
CAMERA
FRONT 0.3 MPix
BACK 5.0 MPix with a flash light
ADDITIONAL FUNCTIONS
SENSORS Light sensor, G sensor,
Proximity sensor
GPS Built-in GPS receiver
FM RADIO Built-in FM radio
BATTERY
CAPACITY 1500 mAh
PHYSICAL SPEC
DIMENSIONS 125 x 64 x 12 mm
WEIGHT 124 g
COLOUR White / Black
IN THE BOX
ACCESSORIES Wall charger, USB cable, earphones,
screen protector
SPECIFICATIONS
All manuals and user guides at all-guides.com
all-guides.com

ENGLISH
7
CERTIFICATE OF CONFORMITY
Lurbe Grup S.A. hereby declares under our sole
responsibility that the product ODYSEA 4 is in conformity
with the essential requirements of the following
Directives is declared:
EMC DIRECTIVE 2004 / 108 / EC
LVD DIRECTIVE 2006 / 95 / EC
R&TTE DIRECTIVE 1999 / 5 / EC
This product has been certified as RoHS Compliant
If at any time in the future you should need to
dispose of this product please note that:
Waste electrical products should not be
disposed of with household waste. Please
recycle where facilities exist.
Check with your Local Authority or retailer for
recycling advice.
(Waste Electrical and Electronic Equipment
Directive)
All manuals and user guides at all-guides.com

odysea 4
CONTENU DE L’EMBALLAGE
1. Téléphone ODYSEA 4
2. Chargeur
3. Casque
4. Câble de connexion USB
5. Mode d’emploi abrégé
6. Batterie
7. Protecteur d’écran
APERÇU
1. Touche Marche/Arrêt. Mode veille, activation
2. Prise audio : branchement du casque
3. Touches de volume : réglage du volume
4. Port USB : connexion des accessoires optionnels
5 Microphone
6. Touche de retour à la page précédente
7. Touche de l’écran d’Accueil, du retour vers l’écran
d’Accueil
8. Caméscope avant
9. Caméscope arrière
10. Haut-parleurs
11. Réglages
All manuals and user guides at all-guides.com

9
FRANÇAIS
8
3
4
9
11
61075
1 2
All manuals and user guides at all-guides.com
10
MANUEL DE L’UTILISATEUR
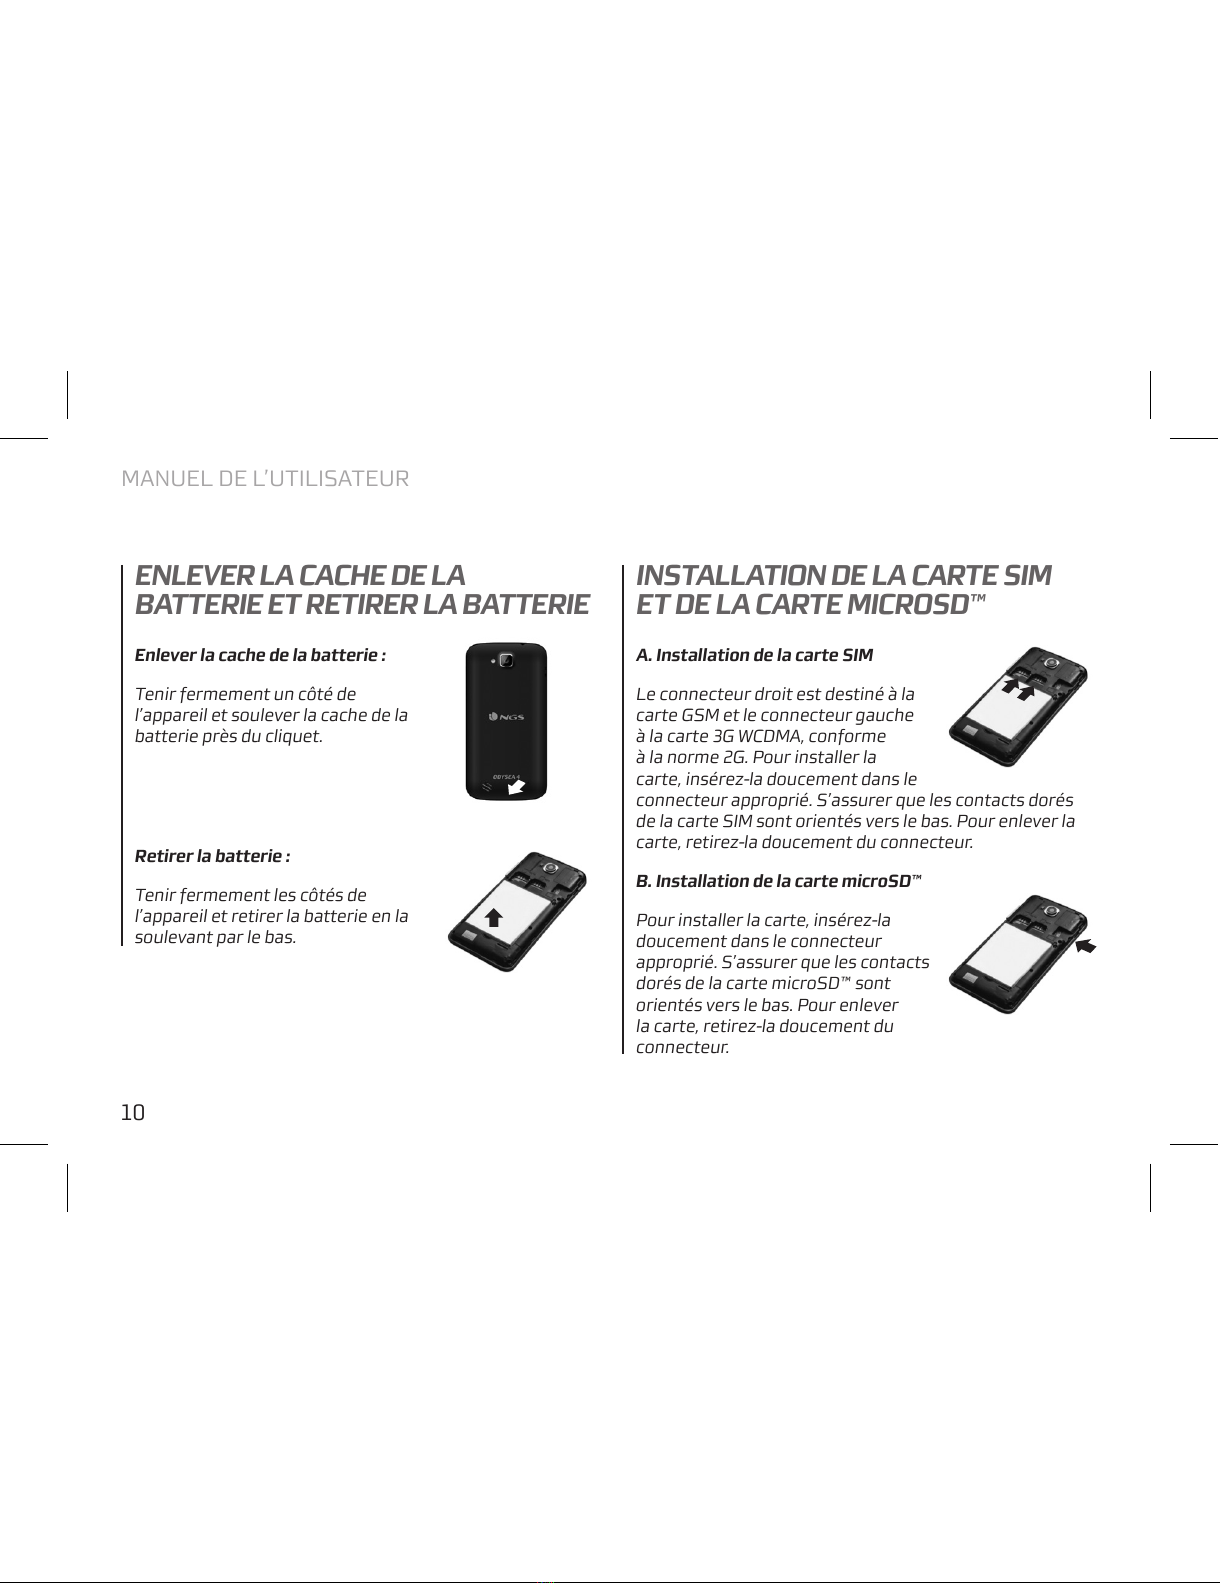
ENLEVER LA CACHE DE LA
BATTERIE ET RETIRER LA BATTERIE INSTALLATION DE LA CARTE SIM
ET DE LA CARTE MICROSD™
Enlever la cache de la batterie :
Tenir fermement un côté de
l’appareil et soulever la cache de la
batterie près du cliquet.
Retirer la batterie :
Tenir fermement les côtés de
l’appareil et retirer la batterie en la
soulevant par le bas.
A. Installation de la carte SIM
Le connecteur droit est destiné à la
carte GSM et le connecteur gauche
à la carte 3G WCDMA, conforme
à la norme 2G. Pour installer la
carte, insérez-la doucement dans le
connecteur approprié. S’assurer que les contacts dorés
de la carte SIM sont orientés vers le bas. Pour enlever la
carte, retirez-la doucement du connecteur.
B. Installation de la carte microSD™
Pour installer la carte, insérez-la
doucement dans le connecteur
approprié. S’assurer que les contacts
dorés de la carte microSD™ sont
orientés vers le bas. Pour enlever
la carte, retirez-la doucement du
connecteur.
All manuals and user guides at all-guides.com

11
FRANÇAIS
CHARGEMENT
Branchez le câble USB sur le
connecteur USB de l’appareil et
ensuite branchez le chargeur sur
une prise de courant. Une charge
complète de la batterie prend
environ 3,5 heures. L’utilisation de
l’appareil pendant la charge peut
prolonger le temps de charge.
Attention: Si le téléphone n’est
pas utilisé pendant une longue
période, la batterie est déchargée
progressivement. Chargez la
batterie avant d’utiliser l’appareil pour la première fois ou,
même lorsque le téléphone n’est pas utilisé, chargez la
batterie tous les 3 mois.
ALLUMER / ÉTEINDRE L’APPAREIL /
MODE VEILLE
Maintenez la touche Marche/Arrêt enfoncée pendant
quelques secondes. L’écran de démarrage et ensuite
l’écran d’accueil s’affichent. Pour passer au mode veille,
appuyez sur la touche une seule fois. Pour quitter ce
mode, appuyez à nouveau sur la touche Marche/Arrêt.
Pour éteindre l’appareil, maintenez la touche Marche/
Arrêt enfoncée, puis sélectionnez l’option de menu
Power off.
All manuals and user guides at all-guides.com
all-guides.com

12
MANUEL DE L’UTILISATEUR
ÉCRAN
DIMENSION 4’’
RÉSOLUTION 800x480
TECHNOLOGIE IPS LCD multi-touch
PROCESSEUR
CPU MediaTek MT6572 1,2GHz (Cortex
A7)
TYPE DE CHIPSET DualCore
GPU Mali400MP2
SYSTÈME
SYSTÈME D’EXPLOITATION Android 4.2
APPLICATIONS Boutique d’applications
MEMOIRE
RAM DDR2 512MB
FLASH eMMC 4GB
RÉSEAU
WI-FI WiFi b/g/n
3G 3G et 2G intégré
BANDE DE FRÉQUENCE GSM 850/900/1800/1900MHz
UMTS 900/2100MHz
HSPA+ (aero2)
BLUETOOTH Bluetooth 4.0
CONNECTEURS
LECTEUR DE CARTES SD microSD jusqu’à 32GB
FENTE POUR CARTES SIM Dual Sim (3G et 2G)
USB microUSB 2.0 (chargement et
transfert de données)
SOURTIE AUDIO Prise audio et micro 3,5mm
CAMÉRA
FRONTALE 0,3 MPix
ARRIÈRE 5,0 MPix avec flash
FONCTIONS SUPPLÉMENTAIRES
CAPTEURS Capteur de luminosité, capteur G,
capteur de proximité
GPS Récepteur GPS intégré
RADIO FM Radio FM intégrée
BATTERIE
CAPACITÉ 1500 mAh
PROPRIÉTÉS PHYSIQUES
DIMENSIONS 125 x 64 x 12 mm
POIDS 124 g
COULEUR Blanc / Noir
CONTENU DE LA BOITE
ACCESSOIRES Chargeur mural, câble USB,
casques, protecteur d’écran
SPÉCIFICATIONS
All manuals and user guides at all-guides.com

13
FRANÇAIS
CERTIFICAT DE CONFORMITE -
PAYS DE L’UE
Lurbe Grup S.A. déclare, par le présent, que l’appareil
ODYSEA 4 est conforme aux exigences essentielles et
autres dispositions pertinentes des directives énumérées
ci-dessous:
DIRECTIVE EMC 2004 / 108 / EC
DIRECTIVE LVD 2006 / 95 / EC
DIRECTIVE R&TTE 1999 / 5 / EC
Ce produit est soumis à la directive RoHS
Si dans l’avenir vous deviez vous débarrasser
de ce produit veuillez remarquer que:
Les déchets électriques ne doivent pas être
jetés avec les déchets ménagers. Veuillez
recycler les produits dans une déchetterie.
Consulter votre responsable local ou votre
revendeur pour un conseil sur le recyclage.
(Directive sur les déchets des équipements
électriques et électroniques)
All manuals and user guides at all-guides.com

odysea 4
CONTENIDO DEL PAQUETE
1. Teléfono ODYSEA 4
2. Cargador
3. Auriculares
4. Cable USB
5. Guía rápida
6. Batería
7. Protector de pantalla
REVISIÓN
1. Botón de alimentación: encender y apagar el aparato.
Modo de suspensión, activación
2. Conector de auriculares: conexión de auriculares
3. Teclas de volumen: regulación del nivel de volumen del
sonido
4. Puerto USB: conexión de accesorios opcionales
5. Micrófono
6. Botón para volver a la página anterior
7. Botón de la pantalla principal, volver a la pantalla
principal
8. Cámara delantera
9. Cámara trasera
10. Altavoces
11. Configuración
All manuals and user guides at all-guides.com

ESPAÑOL
15
8
3
4
9
11
61075
1 2
All manuals and user guides at all-guides.com

MANUAL DE USUARIO
16
DESMONTAJE DE LA TAPA TRASERA
Y EXTRACCIÓN DE LA BATERÍA INSERCIÓN DE UNA TARJETA SIM
Y MICROSD™
Desmontaje de la tapa trasera:
Sujetar firmemente el lado de la
unidad con una mano y levantar la
tapa trasera con la otra mano en el
picaporte.
Extracción de la batería:
Sujetar firmemente los lados
del dispositivo con una mano y
quitar la batería con la otra mano,
levantándola desde abajo.
A. Inserción de la tarjeta SIM
Ranura derecha es la ranura para
tarjeta GSM y la ranura izquierda
está diseñada para la tarjeta 3G
WCDMA, compatible con estándar
2G. Para insertar la tarjeta, hay que
meterla con delicadeza en la ranura correcta. Asegúrese
de que el área con contacto dorado de la tarjeta SIM está
orientada hacia abajo. Para retirar la tarjeta, se debe
extraerla suavemente de la ranura.
B. Inserción de la tarjeta microSD™
Para insertar la tarjeta, hay que
meterla con delicadeza en la ranura
correcta. Asegúrese de que el área
con contacto dorado de la tarjeta
microSD™ está orientada hacia abajo.
Para retirar la tarjeta, se debe extraerla suavemente de
la ranura.
All manuals and user guides at all-guides.com
all-guides.com

ESPAÑOL
17
CARGA
Meta un extremo del cable USB
en el puerto USB del dispositivo
y luego inserte el cargador de
baterías en un tomacorriente. Una
carga completa de la batería tarda
unas 3,5 horas. Uso del dispositivo
durante la carga puede prolongar el
tiempo de carga.
Atención: Si el teléfono no se usa
durante mucho tiempo, la batería
se descarga gradualmente. Cargue
la batería antes del primer uso o
cuando el teléfono no está en uso, cargue la batería cada
tres meses
ENCENDER / APAGAR EL APARATO /
MODO DE SUSPENSIÓN
Mantenga presionado el botón de alimentación durante
unos segundos. Aparece la pantalla de bienvenida, y luego
la pantalla principal. Después de pulsar el botón una vez,
el dispositivo entra en modo de suspensión. Para salir de
este modo, presione de nuevo el botón de alimentación.
Para apagar el dispositivo, mantenga pulsado el botón de
alimentación y seleccione la opción Power off del menú.
All manuals and user guides at all-guides.com

MANUAL DE USUARIO
18
PANTALLA
TAMAÑO 4’’
RESOLUCIÓN 800x480
TECNOLOGíA IPS LCD MULTI-TOUCH
PROCESADOR
CPU MediaTek MT6572 1,2GHz
(Cortex A7)
TIPO DE CHIPSET DualCore
GPU Mali400MP2
SISTEMA
SISTEMA OPERATIVO Android 4.2
APLICACIONES Tienda de aplicaciones
MEMORIA
RAM DDR2 512MB
FLASH eMMC 4GB
RED
WI-FI WiFi b/g/n
3G 3G y 2G incorporados
BANDA DE FRECUENCIA GSM 850/900/1800/1900MHz
UMTS 900/2100MHz
HSPA+ (aero2)
BLUETOOTH Bluetooth 4.0
CONECTORES
LECTOR PARA TARJETAS SD microSD de hasta 32GB
RANURA DE LA TARJETA SIM Sim dual (3G y 2G)
USB microUSB 2.0
(carga y transferencia de datos)
SALIDA DE AUDIO Clavija de audio y micrófono de
3,5mm
CÁMARA
DELANTERA 0,3 MPix
TRASERA 5,0 MPix con flash
FUNCIONES ADICIONALES
SENSORES Sensor de luz, sensor de G,
sensor de proximidad
GPS Receptor GPS incorporado
RADIO FM Radio FM incorporada
BATERÍA
CAPACIDAD 1500 mAh
CARACTERÍSTICAS FÍSICAS
DIMENSIONES 125 x 64 x 12 mm
PESO 124 g
COLOR Blanco / Negro
EN LA CAJA
ACCESORIOS Cargador de pared, cable USB,
auriculares, protector de pantalla
ESPECIFICACIONES
All manuals and user guides at all-guides.com

ESPAÑOL
19
Si en el futuro tiene que desechar este
producto, tenga en cuenta que:
Los residuos de productos eléctricos no se
tienen que tirar con la basura doméstica.
Recíclelo en las instalaciones disponibles.
Consulte a las Autoridades Locales o al
distribuidor para que le de instrucciones sobre
el reciclaje.
(Directiva sobre la eliminación de Aparatos
Electrónicos y Eléctricos)
CERTIFICADO DE CONFORMIDAD
PAÍSES DE LA UE
Por la presente Lurbe Grup S.A. declara que el aparato
ODYSEA 4 cumple los requisitos esenciales y otras
disposiciones pertinentes de las Directivas indicadas a
continuación:
DIRECTIVA EMC 2004 / 108 / CE
DIRECTIVA LVD 2006 / 95 / CE
DIRECTIVA R&TTE 1999 / 5 / CE
Este producto está sujeto a la Directiva RoHS
All manuals and user guides at all-guides.com

odysea 4
VERPACKUNGSINHALT
1. ODYSEA 4 Telefon
2. Ladegerät
3. Kopfhörer
4. USB Kabel
3. Schnelles Handbuch
6. Batterie
7. Bildschirmschutz
ÜBERPRÜFUNG
1. Einschaltentaste: Einschalten und Abschalten des
Geräts. Standby Modus, Aktivierung
2. Kopfhörer anschliessen
3. Lautstärketaste: Einstellung des Sound
Lautstärkeniveaus
4. USB Anschluss: Anschluss den optionälen Zubehören
5. Mikrofon
6. Taste für vorige Seite
7. Taste für Hauptseite, zurück zum Hauptbildschirm
8. Vordere Kamera
9. Hintere Kamera
10. Lautsprecher
11. Einstellung
All manuals and user guides at all-guides.com
Other manuals for Odysea 4
2
Table of contents
Languages:
Other NGS Cell Phone manuals


