NoDesign Parrot DIA User manual

DIA
Parrot by
NoDesign
User Guide
All manuals and user guides at all-guides.com
all-guides.com

Parrot Dia –User guide
2
Contents
Contents.................................................................................................................... 2
Getting started.......................................................................................................... 4
Presentation of the frame ........................................................................................................................ 4
Controls......................................................................................................................................... 5
Maintenance and precautions....................................................................................................... 6
Starting .................................................................................................................................................... 7
Selecting the language.................................................................................................................. 7
Using the virtual keyboard............................................................................................................. 7
Setting the time and date .............................................................................................................. 7
Viewing the system status............................................................................................................. 8
Deleting the initial slideshow......................................................................................................... 8
Wi-Fi........................................................................................................................... 9
Before starting ......................................................................................................................................... 9
Information required ...................................................................................................................... 9
Identifying the connection type...................................................................................................... 9
Setting up a wireless connection........................................................................................................... 11
Setting up a connection with SES/WPS...................................................................................... 11
Setting up a connection without SES/WPS................................................................................. 11
Setting up the connection manually ............................................................................................ 12
Enabling/Disabling the connection.............................................................................................. 12
Checking the status of the connection........................................................................................ 13
The Frame's web user interface.................................................................................................. 13
Using Wi-Fi............................................................................................................................................ 14
Receiving E-mail pictures............................................................................................................ 14
Viewing photo albums on-line ..................................................................................................... 15
Viewing photos stored on a computer......................................................................................... 17
Transferring photos to the frame using Wi-Fi.............................................................................. 18
Browsing the Web....................................................................................................................... 19
Bluetooth................................................................................................................. 21
Using the frame with a telephone via Bluetooth.................................................................................... 21
Compatibility................................................................................................................................ 21
Sending a picture by Bluetooth from a telephone....................................................................... 21
Using the frame with a computer via Bluetooth..................................................................................... 22
Sending a picture by Bluetooth from a PC.................................................................................. 22
Sending a picture by Bluetooth from a Mac ................................................................................ 22
Changing Bluetooth settings.................................................................................................................. 23
USB / SD.................................................................................................................. 24
Compatibility................................................................................................................................ 24
Transferring pictures from a USB flash drive/SD card................................................................ 24
Defining a USB flash drive/SD card as default memory ............................................................. 25
Picture management .............................................................................................. 26
Organising pictures................................................................................................................................ 26
Copying or moving pictures......................................................................................................... 26
Deleting pictures.......................................................................................................................... 27
Creating a new folder .................................................................................................................. 27
Changing the orientation of a picture .......................................................................................... 27
Setting the order pictures are to appear in.................................................................................. 28
Slideshow .............................................................................................................................................. 29
Starting a slideshow.................................................................................................................... 29
All manuals and user guides at all-guides.com

Parrot Dia –User guide
3
Define a slideshow...................................................................................................................... 29
Settings ................................................................................................................... 30
Changing the name of the frame................................................................................................. 30
Setting the alarm ......................................................................................................................... 30
Setting the luminosity.................................................................................................................. 30
Define automatic power on/off .................................................................................................... 31
Restoring default settings............................................................................................................ 31
Updating.................................................................................................................. 32
Automatic update via Wi-Fi ......................................................................................................... 32
Updating the frame manually ...................................................................................................... 32
All manuals and user guides at all-guides.com

Parrot Dia –User guide
4
Getting
started
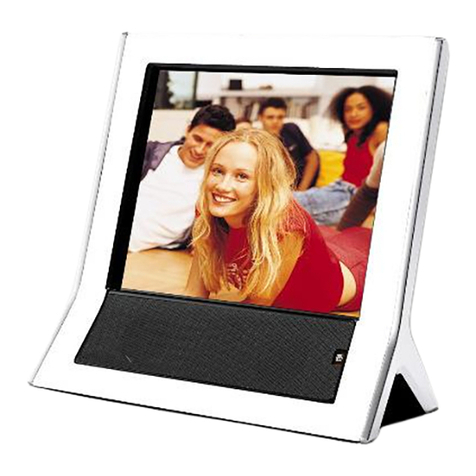
Presentation of the frame
Overall view
1 -Trackball
5 –Power cable
2 –Control panel
6 –USB key socket
3 - Speaker
4 –SD card socket
All manuals and user guides at all-guides.com

Parrot Dia –User guide
5
Controls
Button
Functions
Frame on/off switch
Note: You can also define automatic power on/off for the frame.
Access the main menu
Return to the higher level menu
Access pop-up menu
The pop-up menu lets you delete, copy or rotate a picture among
other things. It also lets you change certain slideshow settings.
All manuals and user guides at all-guides.com

Parrot Dia –User guide
6
Switching on
Adaptor
Select the correct adaptor for your country.
Connecting to the
mains
Connect the power cable to the
transformer then plug it into the
mains socket.
Switching on/off
Press the button to turn the frame on/off.
Maintenance and precautions
Only use the cloth provided to clean the frame. Avoid cleaning the frame with alcohol, chemical
products or household cleaners.
Unplug the frame if you're not using it for a long period.
Never place the frame near a naked flame or other sources of heat such as sunlight. Always
keep the frame out of the rain and away from water.
Avoid dropping the frame.
All manuals and user guides at all-guides.com
all-guides.com

Parrot Dia –User guide
7
Starting
Selecting the language
When you use the frame for the first time, a window appears asking you to select your country.
Use the trackball to select the country then press it to confirm.
If you want to change the language of the frame afterwards, select Settings > Information.
Using the virtual keyboard
The virtual keyboard appears when you need to
enter the security key to connect to your Wi-Fi
network.
It also appears if you want to change the name of
the frame or associate the frame with a new email
address.
Select a key on the keyboard using the trackball.
Press the trackball to confirm.
Setting the time and date
Automatic setting
You can enable automatic date and time setting. Synchronisation requires an
active Wi-Fi connection.
To enable this option, select Settings > System > Date/Time then Adjustment
> Internet time.
Manual setting
If you prefer to set the date and time manually:
1. Select Settings > System > Date/Time > Adjustment > Manual.
> A Window appears allowing you to set the time then the date.
2. Change the settings using the trackball.
3. Press the trackball to confirm your settings.
All manuals and user guides at all-guides.com

Parrot Dia –User guide
8
Display settings
You can choose whether or not to display the time in the frame while viewing
your photos. To do this, select Settings > System > Date/Time > Adjustment >
Display.
Note: The time is not displayed in the Holidays 2.0, Cabinet of
curiosities, RSS reader applications or when you browse the Internet.
This option also lets you display the time as background when the frame is in
standby mode.
Time display format
To select the time display format, select Settings > System > Date/Time >
Format.
Viewing the system status
Select Settings > Information to check:
-software version
-the name by which the frame will be known to other Bluetooth and Wi-Fi devices
-space available in the internal memory
-status of the Wi-Fi connection
-IP address
-MAC address (Media Access Control address)
-Bluetooth status.
Deleting the initial slideshow
If you want to delete the initial slideshow while it is running, press the key and select option
Remove initial slideshow.
All manuals and user guides at all-guides.com

Parrot Dia –User guide
9
Wi-Fi
Before starting
Information required
Identifying the name
of the Wi-Fi network
The technical name used to describe the name of the network is the SSID
(Service Set Identifier). This is generally found underneath your router. If you
have already changed the name of your Wi-Fi network, use this new name.
Reading off the
security key
If you have a secure network, read off the WEP, WPA or WPA2 key
required to set up a connection.
You will find the WEP, WPA or WPA2 key underneath your modem /
router or in the documentation provided with the system. If you have
already changed the name of your wireless network, use the new key.
WARNING:
-Network keys are case-dependent.
-If you have a WEP network, enter the WEP key without spaces.
-If your have a WPA or WPA2 network enter the key exactly as it
appears, including spaces if necessary.
Identifying the connection type
The type of connection you need to set up with the frame depends on the model of your modem or
router: you have to determine whether your modem supports SES or WPS technologies.
WPS (Wi-Fi Protected Setup) and SES (Secure Easy Setup) technologies enable secure
connections to be set up automatically between several Wi-Fi peripherals, most often by simply
pressing a button
Refer to the documentation supplied with your modem to find out whether it supports SES or
WPS technologies. If you do not have this documentation:
-your modem/router cannot support these technologies if you bought it before
2007;
-WPS modems or routers have a WPS button.
All manuals and user guides at all-guides.com

Parrot Dia –User guide
10
WARNING: Be careful not to confuse the WPS button with an association button (e.g.
Livebox).
Examples of WPS routers
► If your modem / router supports SES or WPS technology, see Setting up a connection with SES /
WPS.
► If your modem / router does not support SES or WPS technology, see Setting up a connection
without SES / WPS.
All manuals and user guides at all-guides.com

Parrot Dia –User guide
11
Setting up a wireless connection
Setting up a connection with SES/WPS
If your modem/router supports SES or WPS technology:
1. Select Settings > Wi-Fi on the frame.
> The connection window is displayed.
2. Select Configure.
> The list of available Wi-Fi networks is displayed.
3. Select Auto.
4. Press the SES or WPS button on your wireless modem or router (refer to the documentation
which came with your device for more information).
> If the connection is established, a confirmation message appears.
> Select Details to find out the IP address of the frame or other information associated with the
Wi-Fi connection. Otherwise, select OK.
Note: You can find the IP address of the frame by selecting Settings > Information.
Setting up a connection without SES/WPS
If your modem/router does not support SES or WPS technology:
1. Press the association or synchronisation button of your modem/router (refer to the
documentation that came with the device for more information).
2. Select Settings > Wi-Fi on the frame.
> The connection window is displayed.
3. Select Configure.
> The list of available Wi-Fi networks is displayed.
Note:
-If the name of your network does not appear in the list, select Refresh or set up the
connection manually.
-If only one network name appears, make sure you select it before going on to the next step.
All manuals and user guides at all-guides.com
all-guides.com

Parrot Dia –User guide
12
4. Select your Wi-Fi network.
> If your network is secure, a virtual keyboard appears.
5. If you have a secure network, enter your WEP/WPA key.
WARNING:
-Network keys are case-dependent.
-If you have a WEP network, enter the WEP key without spaces.
-If your have a WPA or WPA2 network enter the key exactly as it appears, including
spaces if necessary.
> If the connection is established, a confirmation message appears.
> Select Details to find out the IP address of the frame or other information associated with the
Wi-Fi connection. Otherwise, select OK.
Note: You can find the IP address of the frame by selecting Settings > Information.
Setting up the connection manually
1. Press the association or synchronisation button of your modem/router (refer to the
documentation that came with the device for more information).
2. Select Settings > Wi-Fi on the frame.
> The connection window is displayed.
3. Select Configure, then Manual.
4. Enter the name of your network (SSID).
5. Select Infrastructure mode.
6. If you have a secure network, select the encryption type then enter the network key.
7. Select OK.
Note: If you set up your connection manually, you can also set up a connection between the frame
and your PC without going via a Wi-Fi access point. To do this, select Ad-hoc mode.
Enabling/Disabling the connection
Once the connection has been set up, you can disable or re-enable it. To do this, select Settings > Wi-
Fi > Connection > Enable/Disable.
All manuals and user guides at all-guides.com

Parrot Dia –User guide
13
Checking the status of the connection
1. Select Settings > Information.
2. Check that the message "Connection ok" is shown in the Wi-Fi field.
Note: If the message "No web connection" appears, check that the IP address starts with "192.168".
If not, try to set up the connection again.
The Frame's web user interface
Note: The web interface of the Dia lets you use the Wi-Fi function more quickly if you want to
associate multiple e-mail addresses, RSS feeds or shared directories.
Requirements
To access the web interface of the DIA:
-Ensure your frame is connected to a Wi-Fi network
-Ensure your PC is connected to the same Wi-Fi network as the frame.
IP address of the
frame
The IP address of the frame is displayed on completion of the connection
between the frame and your wireless connection.
To find out this address, select Settings > Information.
Accessing the web
interface
Run your web browser and enter the IP address in the address bar, optionally
preceded by http://.
Note: You can also access the web interface by entering "DIA" or any new
name you may have given the frame into your browser's address bar.
Accessing the web
interface from a
telephone
If you want to access the web interface from a telephone (e.g. iPhone) add
".local" to the name assigned to the frame.
Example: dia.local
All manuals and user guides at all-guides.com

Parrot Dia –User guide
14
Using Wi-Fi
Receiving E-mail pictures
Before you start
The DIA frame is compatible with most existing e-mail servers (Gmail,
Yahoo, Free, etc).
Note: If you use the frame with a Gmail address, ensure POP protocol is
activated for all messages. To do this, when logged on to Gmail, click
Settings (on the top right), select the Transfer and POP/IMAP tab then
click Activate POP protocol for all messages.
We recommend you create a special e-mail address for the frame.
Only e-mails with one or more picture attachments will be displayed on
the frame.
Allow 3 to 5 minutes between the photo being sent by e-mail and
received on the frame.
Associating an e-
mail address using
the web interface
1. Click .
2. In the E-mail account area, click New.
3. Enter your login identifiers in the appropriate fields and click Next.
Note: Server and protocol information is entered automatically for most e-
mail servers. If this is not the case for your e-mail address, you will need to
enter these details yourself. Use the on-line help for your e-mail for more
information.
4. Click Store.
> The e-mail address you just entered now appears in the E-mail
account field.
All manuals and user guides at all-guides.com

Parrot Dia –User guide
15
Note: The Delete the messages option lets you automatically delete e-
mails containing pictures from your e-mail account while keeping the
pictures on the frame. This option is not compatible with all e-mail servers.
Associating an e-
mail address by
using the frame
1. Select Settings > E-mail > Add an e-mail account.
2. Enter your login identifiers in the appropriate fields.
Note: Server and protocol information is entered automatically for most
e-mail servers. If this is not the case for your e-mail address, you will
need to enter these details yourself. Use the on-line help for your e-mail
for more information.
3. Select OK.
Viewing pictures
received via e-mail
All pictures you receive on associated e-mail addresses may be accessed by
selecting Browse > Directory > E-mail.
Deleting an e-mail
address associated
with the frame
1. Select Settings > E-mail.
2. Select the address, then select Delete.
Viewing photo albums on-line
Before you start
An RSS (Really Simple Syndication) feed is a free content feed from Web
sites. Using RSS feeds and on-line photo management and sharing tools
such as FlickrTM or PicasaTM, you can view photo albums published on the
site.
Once the RSS feed has been associated with your frame, the photos are
updated automatically.
Note:
-You can also use a generic RSS photo feed by entering its
URL directly.
All manuals and user guides at all-guides.com

Parrot Dia –User guide
16
Using the frame
with a Flickr
account
Ensure you have at least one album on your account before
associating the frame.
Select Settings > FlickR > Add new RSS feed. Then enter your login.
If your Flickr account is not public, select Authorize the frame to see
private albums / pictures.
Using the frame
with a Picasa
account
If your feed is protected by a password, ensure the frame date is
correct.
Select Settings > Picasa > Add new RSS feed. Then enter your login
and password (if necessary).
If your identifier is a Gmail address, only enter the part in front of the
"@". If your identifier is an e-mail address from another server, enter
the full address including the part following the "@".
Note: You can also use an alias instead of your e-mail address by
changing the settings of Picasa.
Using the frame
with a MobileMe
account
Select Settings > MobileMe > Add new RSS feed. Then enter your login.
Associating an RSS
feed using the web
interface
1. Click .
2. In the Registered RSS feeds area, click New.
3. Select the type of feed, then enter your Picasa or Flickr identifiers (or
the URL of a generic feed).
Note: Identifiers and passwords are case-dependent.
4. Select the albums you want to view on the frame, then click Store.
> The RSS feed you have just entered now appears in the Registered
RSS feeds field.
Associating an RSS
feed using the
frame
1. Select Settings > RSS > Add new RSS feed.
2. Select the type of feed, then enter your identifiers.
Viewing albums on
the frame
All pictures contained in the associated albums are accessible by selecting
Browse > Directory > RSS Feed.
Deleting an RSS
feed associated
with the frame
1. Select Settings > RSS.
2. Select the feed, then select Delete.
Note: You cannot delete pictures contained in the RSS feed directory.
All manuals and user guides at all-guides.com
all-guides.com

Parrot Dia –User guide
17
Viewing photos stored on a computer
WARNING: Shared picture directories can only be viewed on the frame if your PC does not use
"Active directory" technology (installed on a number of company PCs).
Note: When you connect the frame to your Wi-Fi network, a certain amount of time elapses
(between 5 and 15 minutes) before all shared directories are displayed on the frame.
Enabling directory
sharing on the PC
Before associating the frame with your PC, you must make the directories
containing the pictures you want to view on the frame shared.
If you use Windows XP:
1. Right-click the directory and select Properties.
2. Select the Share tab then select Share this directory.
If you use Windows Vista:
1. Check that the Enable file and printer sharing and Enable network
detection options are checked.
2. Right-click the directory and select Share with > specific people.
Select Everyone then click Share.
If you use Windows 7:
1. Check that the Enable file and printer sharing and Enable network
detection options are enabled and the Password-protected
sharing option is disabled.
Note: To access these options, go to the control panel and select Network
and sharing centre > Change advanced sharing settings.
2. Right-click the directory and select Share with > Specific people
then select All.
If you use a Mac with the Snow Leopard operating system:
1. Select System preferences > Sharing.
2. Click +the select the folder you want to view on the frame.
3. Click Add then check the shared directory is available by All.
Note: To access these options, go to the control panel and select Network
and Internet > Network and sharing centre > Change advanced sharing
settings.
All manuals and user guides at all-guides.com

Parrot Dia –User guide
18
4. Check that the Share files and directories by SMB option is
enabled. To do this, select System preferences > Sharing, then
click Options.
Associating a
shared directory
using the web
interface
1. Click .
2. Click the name of your PC in the Add a share field.
> The list of shared directories on your PC is displayed.
3. Click the directory.
> The selected directory now appears in the Saved shares field.
Associating a
shared directory
using the frame
1. Select Settings > PC connection > Add a share
2. Select your PC then the shared directory.
Viewing stored
pictures in a shared
directory
All pictures contained in the shared directories associated with the frame may
be accessed by selecting Browse > Directory > Share.
Deleting a shared
directory
associated with the
frame
1. Select Settings > PC Connection.
2. Select the directory, then select Delete.
Transferring photos to the frame using Wi-Fi
Transferring
pictures to the
frame from a PC
1. Click Start > Network favourites if you use Windows XP, Start >
Network if you use Windows Vista, Computer > Network if you use
Windows 7.
2. Double click the Dia directory, then transfer your pictures to the
Internal memory directory.
Transferring
pictures to the
frame from a Mac
If you use a Mac with the Snow Leopard operating system:
1. Click Go to and select Network.
2. Double click the Dia directory, then transfer your pictures to the
Internal memory directory.
All manuals and user guides at all-guides.com

Parrot Dia –User guide
19
Browsing the Web
Opening a web page
Select Web browser to start the browser.
Press and select Favourites to access the list of pages stored
under Favourites, the list of most-visited pages or your browsing
history.
To enter an address manually in the address bar, press and select
Find.
Browsing a web
page
While browsing:
Use the trackball to browse links present on the web page. Press the
trackball to click on these links.
Select a blank field and press the trackball to bring up the virtual
keyboard. To exit the virtual keyboard, press or select the key on
the bottom left.
Press to return to the previous page.
Press and select Refresh to refresh the contents of the Web page.
Opening multiple
web pages
You can open more than one web page and move from one to the other.
To open a new window, press and select New Window.
To display the Web pages currently open, press and select
Windows.
Adding a web page
to your favourites
1. Press and select Favourites > Add to favourites
2. Enter the name of the page and change/enter the address if required.
3. Select OK.
Finding text on a
web page
1. Press and select Plus > Find in the page.
2. Enter the text you want to find.
> The corresponding text is highlighted on the Web page.
Changing the
settings
Press and select Plus > Settings to change content, confidentiality,
security and advanced settings.
All manuals and user guides at all-guides.com

Parrot Dia –User guide
20
Applications
Using the Cabinet of curiosities
Select Cabinet of curiosities to start the application.
Using the Holidays 2.0 application
Holidays 2.0 allows you to display pictures from satellite and geolocalized pictures.
Select Holidays 2.0 to start the application then press to select among
predefined trips or customized trips using geolocalized pictures in the frame
memory.
All manuals and user guides at all-guides.com
Other manuals for Parrot DIA
1
Table of contents
Other NoDesign Digital Photo Frame manuals


