Headoce: Nola Industrier AB Repslagargatan 15b Box 17701
S-118 93 Stockholm T:+46(0)8 702 19 60 F:+46(0)8 702 19 62
E: headoce@nola.se Sales/showroom: Skeppsbron 3
S-211 20 Malmö T:+46(0)40 17 11 90 Orderfax:+46(0)40 12 75 45
www.nola.se
INSTALLATION INSTRUCTIONS
Assembly & Installation/
Poured Concrete Installation/
Maintenance/
Maintenance is not normally required.
The surface can be cleaned with a mild detergent if needed.
Installation/
The bench is freestanding.
The bench can be xed to the ground by installing the legs in poured concrete.
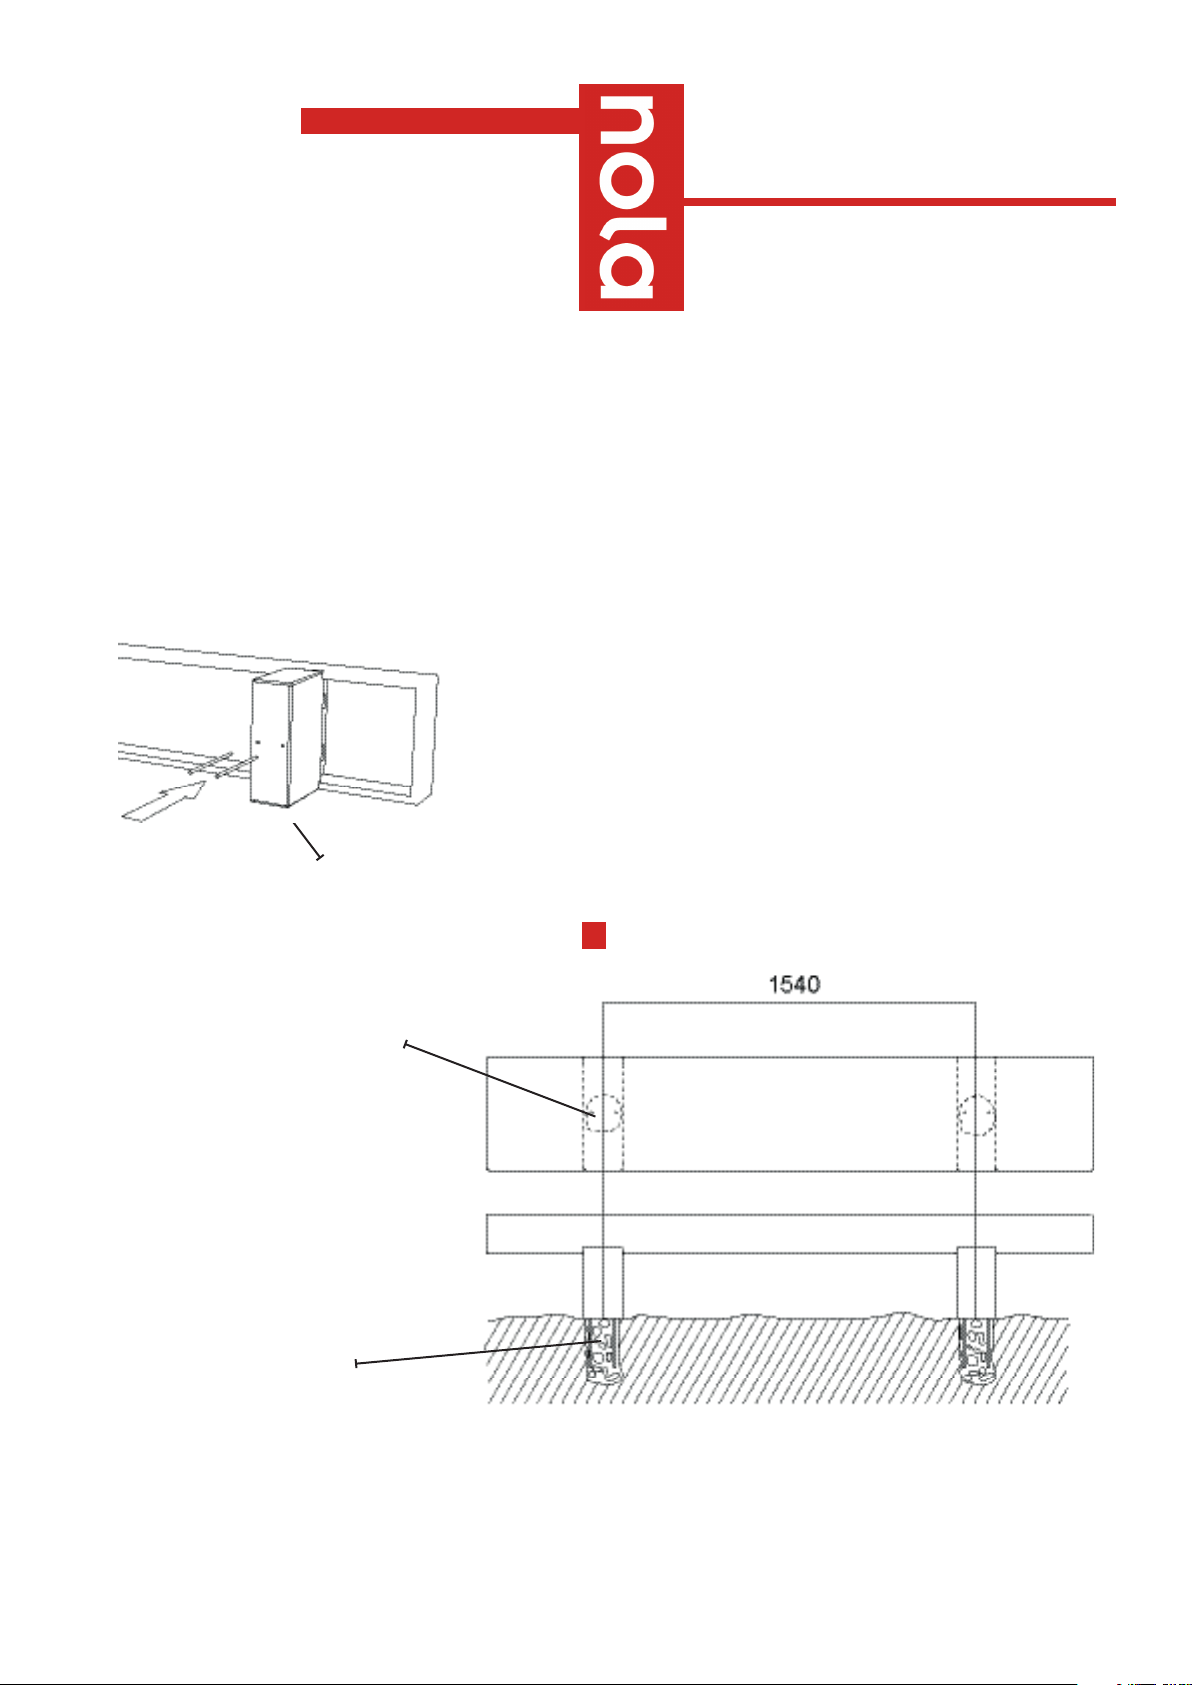
C-C
hole ca: Ø
150mm
Threaded rods
Poured concrete
The plinth is fully assembled when shipped.
No additional assembly is required on delivery.
The version for the poured concrete installation is secured to the concrete by threaded
sleeves M10 and corresponding M10 threaded rods.
The entire length of each threaded rod is 300 mm. Ensure that 210 mm of the total
length is submerged beneath the surface of the poured concrete.
1 Ensure that enough manpower is available to move the bench in a safe and
ergonomic way, or that heavy-lifting equipment is provided for the installation.
2 Prepare both ground holes ready for the poured concrete. Position the bench
alongside them ready for the threaded sleeves and rods to be attached. The
required c-c measurement (the distance between the holes) is 1540mm.
3 Ensure that the bottom surface each bench leg will rest on is level and that each
one provides the same support height for each leg.
4 Prepare the holes for the bench’s legs. Each has a diameter of 150mm and a
depth of 300mm. As stated above, the required c-c measurement is 1540mm.
5 Screw the threaded sleeves and rods into the holes in the bench legs’ under
sides.
6 Pour concrete into the ground holes ready for casting.
7 Slowly position the bench in place with the threaded rods submerged in the
poured concrete. Make sure that the bench is standing level on all sides, including
the front and back.
Plint page2/2


