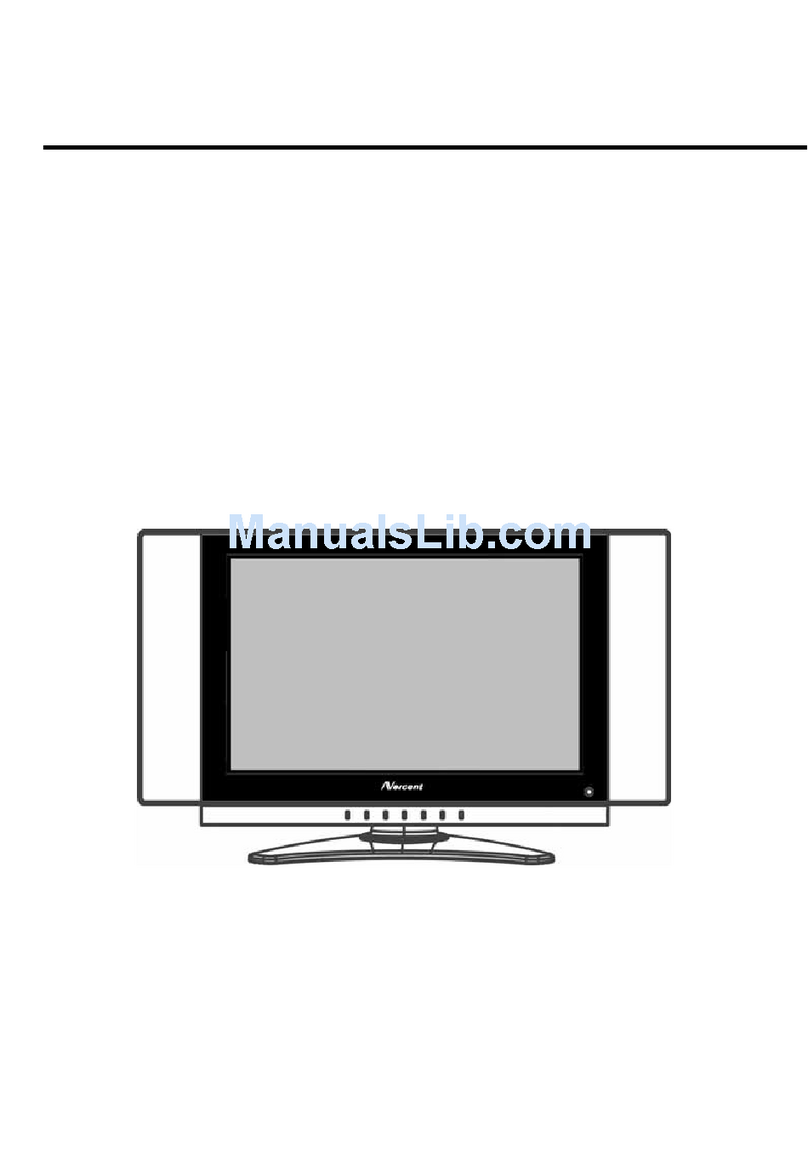
Norcent LT2722 User manual

Norcent LT2722
S
SE
ER
RV
VI
IC
CE
E
M
MA
AN
NU
UA
AL
L
LCD TV MONITOR
THESE DOCUMENTS ARE FOR REPAIR SERVICE INFORMATION ONLY. EVERY REASONABLE EFFORT HAS
BEEN MADE TO ENSURE THE ACCURACY OF THIS MANUAL; WE CANNOT GUARANTEE THE ACCURACY
OF THIS INFORMATION AFTER THE DATE OF PUBLICATION AND DISCLAIMS RELIABILITY FOR CHANGES,
ERRORS OR OMISSIONS.

Norcent LT2722
1
Revision List
Version Release Date Revision History Model Name
A00 Jan.-09-2006 Initial Release EF84MGNKB2NCTMC

Norcent LT2722
2
Table Of Contents
Revision List .............…………...............……..............................................…………........................... 1
Table Of Contents .............................................................................................………….......................... 2
1. General Specifications ................................................................................………….......................... 3
2. Operating Instructions ..................................................................................……………..………….. 4
2.1 The Use Of Remote Control ..........................................................................................…………… 4
2.2 Front Panel Control Knobs ..........................................................................................…………… 5
2.3 OSD Operating ............................................................................................................…………… 5
2.4 Safety Notice ............ ...................................................................................................…………...…. 10
3. Input Specification ..........................................................................................……………………… 13
3.1 Input Signal connector ............................................................................................................... 13
3.2 Factory Preset Display Modes............................................................................................................ 14
4. Mechanical Instructions ........……………………………………………………………………………. 15
5. Repair Flow Chart ...................................................................................................................... 21
6. White Balance, Luminance Adjustment …………………………………………………………………. 26
7. BOM List ........................................................…………………………………………......................... 28
8. PCB Layout ........................………………………………………...........................………………...…. 51
8.1 Main Board ......................……....................................................…………………………………. 51
8.2 Power Board ...................……....................................................…………………………………. 55
8.3 Key/IR Board ...................…………..........................................………………………………….. 57
8.4 Earphone Board ..........................…………........................................……………………………….. 58
9. Block Diagram .........................................................................................…………………………...... 59
9.1 Main Board ...........................………........……………………………………………………………..... 59
9.2 Power Board ...................................………………………………………………………...………..... 60
9.3 Exploded View ...........................………………………………………………………………………. 61
10. Schematic Diagram .............…………....................................................…………………………… 62
10.1 Main Board ......................……....................................................………………………………… 62
10.2 Power Board ...................……....................................................………………………………… 74
10.3 Key/ IR Board ..........................…………........................................……………………………….. 76

Norcent LT2722
3
1. General Specifications
Items Specification
Screen Size 27” TFT LCD color Panel (CMO)
Aspect Ratio 16:9
Resolution 1280 x 720 (WXGA)
Active Display Area H x V 597.12mm x 335.88mm
Pixel Pitch 0.4665mm ×0.4665mm
Display colors 16.7 million
Contrast Ratio 600:1 (Typical)
Brightness 550 cd / m²(Typical)
Viewing Angle 170°(Horizontal) / 170°(Vertical)
Response Time 16.6 ms (Typical)
Lamp Lifetime 60,000 hr
LCD Panel
Color Temperature Cool / Warm (For PC only)
TV Tuning System NTSC 181 Channel (PLL band) electronic adjustment system
Sound System MTS + SAP
TV Function
Color Systems NTSC
AV1 RCA x 1 Audio channel L/R x 1
RCA x 1
AV2 S-Video x 1 Audio channel L/R x 1
(Shared)
Component YCbCr x 1 Audio channel L/R x 1
Video Inputs
HDTV YPbPr x 1 Audio channel L/R x 1
Signal Input Analog: D-Sub 15 pin (detachable cable)
PnP compatibility DDC2B
Input frequency Analog: FH: 31.5 KHz to 80 KHz
FV: 56 Hz to 75 Hz
Recommended Analog: 1024 x 768 (60Hz)
PC Input
Input Audio Headphone Mini-jack for stereo (3.5 ø)
Speaker (built-in): Two 5 watt speakers
Headphone Mini-jack jack stereo (3.5 ø)
Audio Output Audio Output: L / R
Line Output (RCA L/R)
OSD language English, French and Spanish (default is English)
Power Supply AC 100V~240V, 50/60 Hz
Power Power Consumption <150 W
Panel Tilt Forwards/Backwards/ Rotation -5° / +20°/ ±35°
Operating Temp. +0°C ~ + 40°C
Storage Temp. -10°C ~ + 60°C
Environment
Operating Humidity 10% ~ 85%
Dimension W x H x D (with stand) 898 x 500x285(mm)
Weight With Stand 13.4Kg
Accessories D-Sub Signal Cable, AC Power cord, 3.5mmAudio cable, Remote Controller, Battery (x2),
User’s manual

Norcent LT2722
4
SLEEP
With this key you can set a
time period after which the
TV should switch itself to
standby. Press the ke
y
repeatedly to select the
number of minutes. The
counter runs from 0, 30, 60,
120 minutes. The time
r
begins to count down from
the number of minutes
selected after the display has
disappeared.
SWAP
Press to swap the two
screens when PIP o
r
POP is work
2. Operations Instructions
2.1 The Use Of Remote Control
POWER:
Press to turn on/off the TV. The TV
is never completely powered off
unless it is physically unplugged.
0~9/100 Digit buttons
To select a TV channel.
CH
Press ▲or▼to brows
through the TV channels
which are not erased. To
view a blocked channel,
use the digit buttons to
access the channel and
enter
y
our access code.
VOL
Press + or – to
adjust the volume.
SIZE
Display the graphic
in 16:9 or 4:3 mode
PIP
ON/OFF
Used to switch the PIP
function ON or OFF
MUTE
Temporarily interrupt
the sound or restore it.
DISPLAY
Press this button to
Display Channel
number on the right-top
corner.
MTS
Press this key to
activate Multichannel
Television Sound,
Stereo or Mono sound.
PRE-CH
To display the previousl
y
selected TV channel.
TV/VIDEO
Select your input source: press
TV/VIDEO and ▲, ▼, ◄, ►to
select TV,S-VIDEO, AV1, AV2,
COMPONENT,VGA(PC) or
HDTV mode, according to
where you connected your
external source.
AV1/AV2 for a VCR connected
to the AV connectors of the
TV.
S-VIDEO for a S-Video VCR
connected to the S-VIDEO
connector of the TV.
COMPONENT and HDTV
input via Y,Cb,Cr / Y,Pb,Pr on
the DVD Player or set top
box.
VGA For PC mode
CAPTION
Press this button to turn
Closed Ca
p
tion on.
MENU, ▲, ▼, ◄, ►
These buttons are used to
display or adjust the various
functionalities.When the PIP
is ON but no menus are
available, use these ▲, ▼,
◄, ►to change the position
of the PIP.
V-CHIP
Use this button to define
the movies that this TV set
can receive
PIP/POP
Press this button to
display PC input and
other input on the
screen at the same time
PIP
TV/VIDEO
Select the signal source: If you
are in main picture or HDTV
mode, you can select audio1,
audio2, S-video, color contras
t
or TV signal. Otherwise, you
can only select computer
g
ra
p
hics or HDTV.

Norcent LT2722
5
2.2 Front Panel Control Knobs
Power Key: Press to turn on or off the TV.
MENU Key: Press to show the OSD menu and exit OSD menu at the TV.
Down / Up Key: Press to perform select function and channel.
- / + Key: Press to confirm your function selection and adjustment.
Source Key: Press to select your input source.
2.3 OSD Operations
1. Press the MENU button to display or close the main menu.
2. Use the cursor up/down to select a menu item.
3. Use the cursor left/right to enter a submenu or enable/disable the function.
4. Press the MENU button to exit the menu.
5. Use the instruction bar display under the menu to assist in the operation of this equipment.
MAIN MENU
Press the MENU button into the main OSD (On Screen Display). Adjust item include PICTURE PARAMETERS,
PC PARAMETERS, AUDIO SETTINGS, PICTURE-IN-PICTURE, CHANNEL SETTINGS, PARENTAL
CONTROLS and GENERAL SETTINGS.
PICTURE PARAMETERS
BRIGHTNESS: Adjust the brightness of the image.
CONTRAST: Adjust the contrast of the image.
SATURATION: Adjust the depth of color of the image.
HUE: Adjust the red/green hue of the image.
COLOR TEMP: Adjust the color temperature to your preference: 5000°, 6500°, 9300°K or select USER R, USER G,
USER B to define your personal settings.
FLESHTONE: The flesh tone is automatically adjusted, rendering a more natural color.
SHARPNESS: Adjust the sharpness of the video image for display accordingly.

Norcent LT2722
6
PC PARAMETERS
AUTO CONFIG: Enable the automatic configuration of the optimum size of the graphic.
CLOCK: Adjust the time.
PHASE: Adjust the phase of the graphic.
POSITION: Adjust the position and angle of the graphic.
AUDIO SETTINGS
BASS: Adjust bass tone.
TREBLE: Adjust treble tone.
SRS: Switch SRS surround sound ON or OFF.
MTS: Select MONO, STEREO or SAP for bilingual setup.
MUTE: Temporarily mute the sound (can be done through remote control).

Norcent LT2722
7
PICTURE-IN-PICTURE
PIP POSITION: The PIP can be placed in any position on the screen according to one’s wishes. If there is no
menu, use the ▲, ▼, ◄, ►buttons on the remote control to change the PIP position.
PIP SIZE: Can be used to switch the PIP off (OFF) or select the size (SMALL, MEDIUM, LARGE) of the PIP.
Can also be used to select one of two types (POP, PBP) of dual graphics.
CHANNEL SETTINGS
SYSTEM: Used to choose between (ANTENNA) or (CABLE).
CHANNEL EDIT: The auto scan function searches and stores the signal of the TV station when the YES option is
selected. The ADD or DELETE function edits the TV station signal while the channel will be displayed if the
CURRENT CH function is selected.

Norcent LT2722
8
PARENTAL CONTROLS
LOCK MENU: Switch the functionality to configure ratings on or off.
MPAA RATING: Configure MPAA ratings.
TV PG RATING: Configure TVPG ratings.
PASSWORD: Change the password (default is ‘1111”). Please follow the instructions on the screen. Once
changed, please remember your own password. If you have forgotten your password, please do the following:
“POWER (OFF) MENU V-CHIP MUTE” to revert to the default password of 1111.
CAPTION
Press the “CAPTION” button on the remote to initiate the functionality list as shown on the left.
CC CONTROL: Switch the subtitles function ON or OFF.
MODE: Select mode of subtitles.
DISPLAY: Select display of subtitles.

Norcent LT2722
9
GENERAL SETTINGS
OSD POSITION: Shift the position to one’s preference.
OSD TIMEOUT: Configure the time to be displayed on screen.
OSD LANGUAGE: Configure the language (English, French or Spanish) for the menu.
OSD LOCK: Lock the selected configurations to prevent them from being overwritten.
SLEEP TIMER: Configure the time for sleep mode.
INFORMATIONS : Display the resolution and H sync, V synch for the main graphic.。
FACTORY RESET: Select YES to revert to default configurations.
TRANSPARENCY: Adjust the brightness of the background.

Norcent LT2722
10
NOTICE
WARNING:
2.4 Safety Notice
For Your Safety
Before operating the TV please read this manual thoroughly. This manual should be retained for future reference。
FCC Class B Radio Frequency Interference Statement
WARNING: (FOR FCC CERTIFIED MODELS)
NOTE: This equipment has been tested and found to comply with the limits for a Class B digital device, pursuant to
Part 15 of the FCC Rules. These limits are designed to provide reasonable protection against harmful interference
in a residential installation. This equipment generates, radiate radio frequency energy, and if not installed and used
in accordance with the instructions, may cause harmful interference to radio communications. However, there is no
guarantee that interference will not occur in a particular installation. If this equipment does cause harmful
interference to radio or television reception, which can be determined by turning the equipment off and on, the user
is encouraged to try to correct the interference by one or more of the following measures:
1. Reorient or relocate the receiving antenna.
2. Increase the separation between the equipment and receiver.
3. Connect the equipment into an outlet on a circuit different from that to which the receiver is connected.
4. Consult the dealer or an experienced radio/TV technician for help.
1. The changes or modifications not expressly approved by the party responsible for compliance could void the
user's authority to operate the equipment.
2. Shielded interface cables and AC power cord, if any, must be used in order to comply with the emission limits.
To prevent fire or shock hazard, do not expose the TV to rain or moisture. Dangerously high voltages are present
inside the TV. Do not open the cabinet. Refer servicing to qualified personnel only.
SRS, SRS and are registered trademarks of SRS Labs, Inc.
This product is designed using SRS technology with permission from SRS Labs, Inc.
SAFETY: Lamp Disposal
LAMP(S) INSIDE THIS PRODUCT CONTAIN MERCURY AND MUST BE RECYCLED OR DISPOSED OF
ACCORDING TO LOCAL, STATE OR FEDERAL LAWS. FOR MORE INFORMATION, CONTACT THE
ELECTRONIC
INDUSTRIES ALLIANCE AT WWW.EIAE.ORG.

Norcent LT2722
11
Read before operating equipment
1. Read these instructions.
2. Keep these instructions.
3. Heed all warnings.
4. Follow all instructions.
5. Do not use this apparatus near water.
6. Clean only with a dry cloth.
7. Do not block any of the ventilation openings. Install in accordance with the manufacturers instructions.
8. Do not install near any heat sources such as radiators, heat registers, stoves, or other apparatus (including
amplifiers) that produce heat.
9. Do not defeat the safety purpose of the polarized or grounding type plug. A polarized plug has two blades with
one wider than the other. A grounding type plug has two blades and third grounding prong. The wide blade or
third prong is provided for your safety. When the provided plug does not fit into your outlet, consult an electrician
for replacement of the obsolete outlet.
10. Protect the power cord from being walked on or pinched particularly at plugs, convenience receptacles, and the
point where they exit from the apparatus.
11. Only use attachments/accessories specified by the manufacturer.
12. Use only with a cart, stand, tripod, bracket, or table specified by the manufacturer, or sold with the apparatus.
When a cart is used, use caution when moving the cart/apparatus combination to avoid injury from tip-over.
13. The TV should be operated only from the type of power source indicated on the label. If you are not sure of the
type of power supplied to your home, consult your dealer or local power company.
14. Unplug this apparatus during lightning storms or when unused for long periods of time.
15. Refer all servicing to qualified service personnel. Servicing is required when the apparatus has been damaged
in any way, such as power-supply cord or plug is damaged, liquid has been spilled or objects have fallen into
apparatus, the apparatus has been exposed to rain or moisture, does not operate normally, or has been
dropped.
16. This product may contain lead or mercury. Disposal of these materials may be regulated due to environmental
considerations. For disposal or recycling information, please contact your local authorities or the Electronic
Industries Alliance: www.eiae.org
17. Damage Requiring Service – The appliance should be serviced by qualified service personnel when:
A. The power supply cord or the plug has been damaged; or
B. Objects have fallen, or liquid has been spilled into the appliance; or
C.The appliance has been exposed to rain; or
D.The appliance does not appear to operate normally or exhibits a marked change in performance; or
E. The appliance has been dropped, or the enclosure is damaged.
Tilt/Stability – All televisions must comply with recommended international global safety standards for tilt and
stability properties of its cabinets design.
Do not compromise these design standards by applying excessive pull force to the front, or top, of the cabinet,
which could ultimately overturn the product.
Also, do not endanger yourself, or children, by placing electronic equipment/toys on the top of the cabinet. Such
IMPORTANT SAFETY INSTRUCTIONS

Norcent LT2722
12
items could unsuspectingly fall from the top of the set and cause product damage and/or personal injury.
Power Lines – An outdoor antenna should be located away from power lines.
Outdoor Antenna Grounding – If an outside antenna is connected to the receiver, be sure the antenna system is
grounded so as to provide some protection against voltage surges and built up static charges.
Section 810 of the National Electric Code, ANSI/NFPA No. 70-1984, provides information with respect to proper
grounding of the mats and supporting structure grounding of the lead-in wire to an antenna-discharge unit, size of
grounding connectors, location of antenna-discharge unit, connection to grounding electrodes and requirements for
the grounding electrode. See Figure below.
EXAMPLE OF ANTENNA GROUNDING AS PER NATIONAL ELECTRICAL CODE
Note to the CATV system installer: This reminder is provided to call the CATV system installer’s attention to Article
820-40 of the NEC that provides guidelines for proper grounding and, in particular, specifies that the cable ground
shall be connected to the grounding system of the building, as close to the point of cable entry as practical.
Objects and Liquid Entry – Care should be taken so that objects do not fall and liquids are not spilled into the
enclosure through openings.

Norcent LT2722
13
3. Input Specification
3.1 Input Signal connector
This procedure gives you instructions for installing and using the LCD TV display.
Lay the display on the desired operation and plug the power cord into a convenient AC outlet. Three-wire power
cord must be shielded and is provided as a safety precaution as it connects the chassis and cabinet to the electrical
conduct ground. If the AC outlet in your location does not have provisions for the grounded type plug, the installer
should attach the proper adapter to ensure a safe ground potential.
Connect the 15-pin D-SUB color display shielded signal cable to your signal system device and lock both screws on
the connector to ensure firm grounding. The connector information is as follow:
1
6
11 15
5
10
15 - Pin Color Display Signal Cable
Pin No. Description Pin No. Description
1. Red Video 9. No Pin
2. Green Video 10. Sync Ground
3. Blue Video 11. Not Used
4. Not Used 12. Serial Data for DDC
5. Ground 13. Horiz. Sync
6. Ground-R 14. Vert. Sync
7. Ground-G 15. Serial Clock for DDC
8. Ground-B
Apply power to the display by turning the power switch to the "ON" position and allow about ten seconds for Panel
warm-up. The Power-On indicator lights "GREEN" when the display is on.
With proper signals feed to the display, a pattern or data should appear on the screen, adjust the brightness and
contrast to the most pleasing display, or press auto-adjust to get the best picture-quality.
This TV (with PC function) has power saving function following the VESA DPMS. Be sure to connect the signal
cable to the PC.
If your TV requires service, it must be returned with the power cord.

Norcent LT2722
14
3.2 Factory Preset Display Modes:
VGA MODES
Horizontal Vertical
Resolution Nominal
Frequency
(KHz)
Sync
Polarity
Nominal
Freq.
(Hz)
Sync
Polarity
720x400 31.5 N 70.1 P
640x480 31.5 N 59.9 N
640x480 37.9 N 72.8 N
640x480 37.5 N 75 N
800x600 37.9 P 60.3 P
800x600 48.1 P 72.2 P
800x600 46.9 P 75 P
1024x768 48.3 N 60 N
1280x1024 80 P 75 P

Norcent LT2722
15
4. Mechanical Instructions
Step Figure Description
Preparation
Lay the LCD-TV
on a flat, soft and
clean surface.
Remove
hinge
cover
Remove the
hinge cover as
the arrowheads.
Remove
base
Remove the six
screws

Norcent LT2722
16
Remove
cover cable
Push the clip as
the arrowheads
Remove
back cover
Remove the six
screws
Remove
cover chin
Remove the six
screws

Norcent LT2722
17
Remove
shield
Remove the total
six screws
Remove
main board
Remove the four
scres and
disconnect he
wire harnesses

Norcent LT2722
18
Remove
power
board
Remove the six
screws and
disconnect the
wire harness
Remove
main frame
Remove the
fourteen screws
Remove
speakers
and bezel
Remove the
sixteen
screws(the left
and right two
speakers)

Norcent LT2722
19
Remove
panel
Remove the four
screws
Table of contents
Other Norcent Monitor manuals
