Norge L3510PRV User manual

II_S C CANADA ONLY
Care
Instructions for your Electric Range
CONTENTS
SAFETY INSTRUCTIONS ................... 1-3 Oven racks ............................... 8
Preheating................................ 8
FEATURES ............................... 4-5 Howtosetoven............................ 9
Clockandtimer............................ 4 Common bakingproblemchart ................ 9
Continuouscleaningoven.................... 5 Howto broil .............................. 10
USINGYOUR COOKTOP ................... 6-7 MAINTENANCE ............................ 11
Surfaceelements .......................... 6Oven light ............................... 11
Signallights............................... 6 Storagedrawer........................... 11
Dripbowls ................................ 6Oven door ............................... 11
Controlknobs ............................. 6 Levelinglegs ............................. 11
Cookingtips .............................. 6 Fuses................................... 11
Cookware................................ 7
Heatsettings.............................. 7 CARE AND CLEANINGCHART ............... 12
USINGYOUR OVEN ...................... 8-10 SERVICE .................................. 13
Oven characteristics........................ 8 Troubleshooting........................... 13
Oven controls ............................. 8
Oven indicator light ......................... 8 WARRANTY ............................... 14
8113P030-60
(9/92)

SAFETY INSTRUCTIONS
STORAGE IN, ON OR NEAR APPLIANCE - De not
storeorusegasolineorotherflammablematerials,va-
porsandliquidsintheoven,nearsurfaceunitsorinthe
vicinityofthisorany otherappliance.Thefumescan
createa firehazardorexplosion.Do notusecooktop
orovenasa storagearea forfoodor cookingutensils.
Thefollowinginstructionsarebasedonsafetyconsid-
erationsand mustbe strictlyfollowedto eliminatetheDO NOT USE WATER //(l/r--_-_
potentialrisksoffire,electricshock,orpersonalinjury.ON GREASE FIRES -
Smotherfire or flame or
usedry chemical or
PROPERINSTALLATION- Besureyourapplianceis foam-type extinguisher, ,=_------_.,_F._:_"-I_
properlyinstalledandgroundedbya qualifiedtechni-if availableor sprinkle
clan. heavilywithbakingsoda.
USE ONLY DRY POTHOLDERS - Moist or damp
potholders onhot surfaces may result in burns from
NEVER USE YOUR steam. Do not let potholder touch hot heating ele-
ments. Do not use a towel or other bulky cloths.
APPLIANCE FOR
WARMING OR HEAT-
ING THEROOM. SURFACE COOKING UNITS:
USE PROPER PAN SIZE - This applianceis
equippedwithoneormoresurfaceelementsofdiffer-
ent sizes. Select utensilshavingflat bottomslarge
enoughtocoverthesurfaceelement.Theuseof un-
dersizedutensilswill exposea portionoftheheating
STORAGEABOVE RANGE-To eliminatethehazard elementtodirectcontactandmay resultin ignitionof
ofreachingoverhotsurfaceelements,cabinetstorageclothing.Properrelationshipofutensilto elementwill
shouldnot beprovideddirectlyabovea unit. If pro- also improveefficiency.
vided,storageshouldbelimitedto infrequentlyused
itemsthatcanbesafelystoredinan areasubjectedto
heat. Temperaturesmay beunsafefor someitemsNEVER LEAVE SURFACE ]_,c"_ I L
suchasvolatileliquids,cleaners,oraerosolsprays.IfUNITS UNA'n'ENDED AT
cabinetstorageis provided,installationofa rangeHIGH HEAT SETTINGS -
hoodthatprojectsat least5-inchesbeyondthebet-Believercauses smoking
tomofthecabinetwillreducethe hazardsassociated and greasyspilloversthat
withsuchstorage, mayignite.
___,WEAR PROPER
APPAREL _ TOPREVENT DAMAGETORANGE, neveroperatea
Loose-fitting or surfaceunitwithouta pan in placeand neverallowa
hanginggarmentspanto boildry.
(J_|_ _ shouldnever be
_L_'_,_ __ ,| worn while using MAKE SURE DRIP BOWLS ARE IN PLACE - Ab-
f _',,_r_ the appliance,sence ofthese bowlsduringcooking maysubjectwir-
ing or components underneath to damage.
USERSERVICING - Do notrepairor replaceany part PROTECTIVELINERS- Do not use aluminum foil to
of the appliance unless specifically recommended in linesurface unitdripbowls orovenbottoms, except as
the Use and Care Book. All other servicing should be suggested in the Use and Care Book.Improperinstal-
referred to a qualified technician. Always disconnect lation of these liners may result in a risk of electric
unit or cut-off power to unit before any servicing,shock, orfire.
-1-

SAFETY INSTRUCTIONS
GLAZED COOKING UTENSILS- Onlycertaintypes VENTILATING HOODS:
ofglass, glass/ceramic,ceramic, earthenware, or CLEAN VENTILATING HOODS FREQUENTLY -
otherglazedutensilsare suitablefor range-topsew-Greaseshouldnotbeallowedtoaccumulateonhood
icewithoutbreakingduetothesuddenchangeintern- orfilter.Whenflamingfoodsunderthehood,turnthe
perature,fan off.Thefan, ifoperating,mayspreadtheflame.
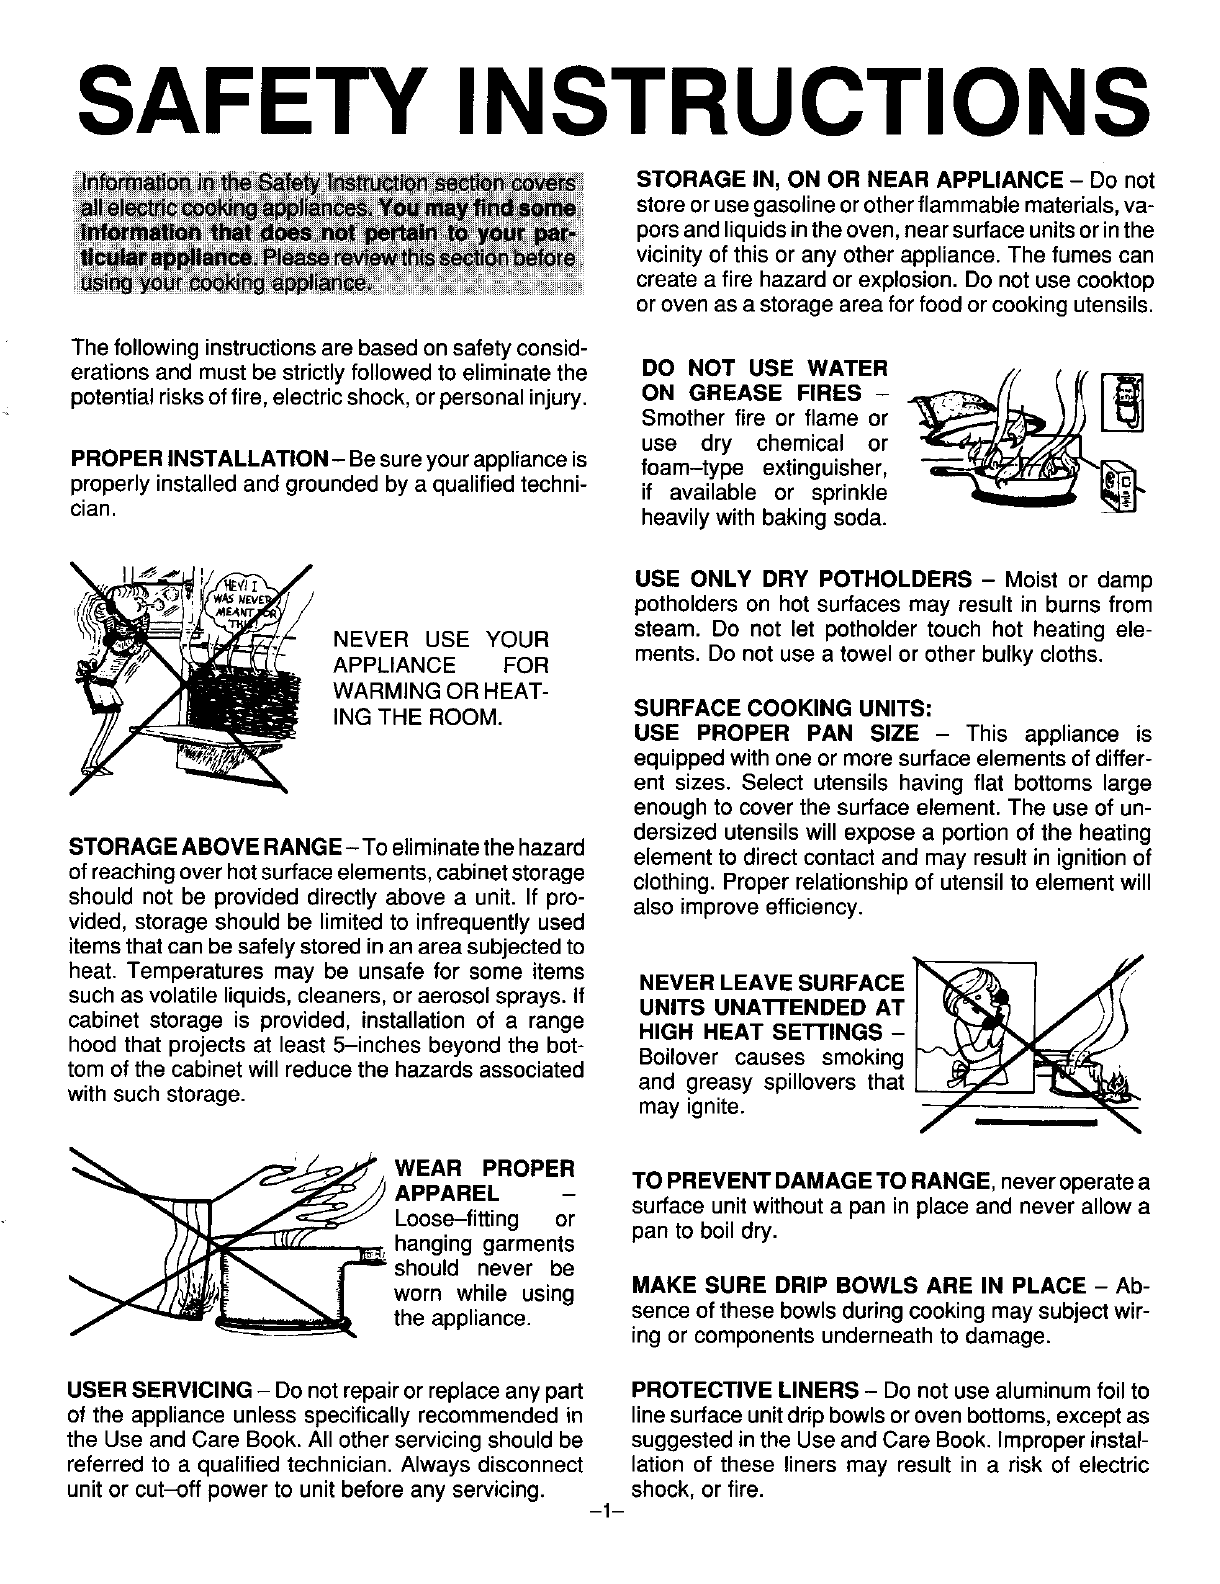
UTENSIL HANDLES IMPORTANT SAFETY NOTICE AND WARNING
=__ SHOULD BE TheCaliforniaSafeDrinkingWaterandToxicEnforce-
TURNED INWARD mentActof1986 (Proposition65) requirestheGover-
AND NOT EXTEND norofCaliforniato publisha listofsubstancesknown
OVER ADJACENT totheStateofCaliforniatocausecancerorreproduc-
SURFACE UNITS - tiveharm,andrequiresbusinessestowarncustomers
To reduce the riskofof potential exposures to such substances.
burns, ignition of flam-
mable materials,and Usersof this appliance are hereby warned that when
spillage due to unin- the appliance is engaged in the self-clean cycle there
tentional contact with the utensil,the handleof a uten- maybesome low-level exposureto someofthe listed
sil should be positionedso that it isturned inward, and substances,including carbon monoxide. Exposure to
does not extend over adjacent surface elements, these substances can be minimized by properly vent-
ingthe appliancetothe outdoorsduringthe self-clean
DO NOT SOAK REMOVABLE HEATING ELE-cycle.
VENTS - Heating elements should never beim-
mersedin water. Immersingelementin water would DEEP FAT FRYERS:
damageinsulatingmaterialinsideelement. Useextremecautionwhenmovingthegreasekettleor
OVENS: disposingofhotgrease.
USE CAREWHEN OPENINGDOOR- Let hotairor DO NOT TOUCH SURFACE ELEMENTS OR OVEN
steamescapebeforeremovingor replacingfood. ELEMENTS, AREAS NEAR ELEMENTS OR INTE-
RIOR SURFACES OF OVEN- Elementsmaybehot
DO NOT HEAT UNOPENED FOOD CONTAINERS -
Build-up of pressure maycausecontainerto burstand eventhoughtheyaredark incolor.Areasnearsurface
elements and interior surfaces of oven may become
result in injury, hot enough to cause burns. During and after use, do
PREPARED FOOD WARNING: Follow food manu- not touch or let clothing or other flammable materials
contact heating elements,areas near elements or in-
facturer's instructions.If a plastic frozen food con-
tainer and/or itsfilm cover distorts,warps, or is other- terior surfaces of oven until they have had sufficient
wise damaged during cooking, immediately discard time to cool.Among these areas are the cooktop, sur-
the food and itscontainer. Thefood could becontami- faces facing the cooktop, oven vent opening and sur-
nated, faces near thisopening,ovendoor, andoven window.
Also, do not allow aluminum foil, meat probes or any
KEEP OVEN VENT DUCTS(located under rear ele- other metal object,other than a utensil on a surface
ment; rear corner of cooktop; between oven door and element,to contact heating elements.
control panel of wall oven or on backguard) UNOB-
STRUCTED. Blockage of vent prevents proper oven ANTI-TIPBRACKET:
aircirculation and will affect oven performance. AvoidWARNING: To reduce the risk of tipping of the appli-
touching oven vent area while oven is on and for sev- ance from unusual usage or by excessive loading of
eral minutesafteroven isturned off.Some parts ofthe the oven door, the appliance must be secured by a
vent and surrounding area become hot enough to properly installed anti-tip device. To check if device is
cause burns, installed properly: Use a flashlight and look under-
neath range to seethat one ofthe rear leveling legs is
PLACEMENTOFOVEN RACKS- Alwaysplaceoven engagedinthe bracketslot.Whenremovingappliance
racks in desired location while oven is cool.If rack forcleaning, be sure anti-tip device isengaged when
mustbe movedwhile hot, usecare toavoid contactof rangeis replaced.The anti-tip device securesthe rear
potholder with oven element, leveling legto the floor,when properly engaged.
-2-

SAFETY INSTRUCTIONS
ADDITIONAL INFORMATION:
After appliance isinstalled,be certainallpackingmR-ATTENTION: NE LAISSER AUCUN ALIMENT, US-
terialsareremovedfromtheappliancebeforeoperat- TENSILE DE CUISINE, ETC., DANS LE FOUR
ingtheunit.Ifapplianceis installednear a window, DURANTLE CYCLE D'AUTONETTOYAGE.
takestepsto preventcurtainsfrom blowingoversur-
faceelementscreatinga firehazard. Onsomemodels,afanshouldbeheardduringtheself
cleancycle.Ifnot,cancelcleancycleandcalla serv-
Careshouldbe giventolocationofappliance.Besureiceman beforeself-cleaning again. (Refer to CON-
floorcoveringunderappliance,wallsadjacenttoappli- TENTSonfrontcoverforlocationofself--cleaninstruc-
ance,cabinetryadjacenttoappliance,andothermate- tionsandfan information.)
rials adjacentto appliancecan withstandprolonged
heat.Thisisa heavyapplianceandcansettleintosoft SMOOTHTOP COOKTOP:
floor coveringssuch as cushionedvinyl. UsecareDo not cook on brokencooktop. Ifcooktopshould
whenmovingrangeonthistypeoffloorcovering, break, cleaningsolutionsand spilloversmay pene-
tratethebrokencooktopand createa riskofelectric
shock. Contact a qualified technician immediately.
r_o__._.^,_r_o_ /OVEN DOOR Cleancooktopwithcaution.Ifa wetspongeorclothis
Do not place excessiveusedtowipespillsona hotcookingarea, becarefulto
weight on an open oven avoidsteam burn.Somecleanerscan producenox-
-_ P" doororstandon anopeniousfumes ifappliedto ahotsurface.
ovendoor as, in some
cases, it couldcausetheDO NOT LEAVE CHILDREN ALONE - Children
rangeto tip over, break- shouldnotbeleftaloneorunattendedin area where
ageofthedoororserious applianceisinuse.Theyshouldneverbeallowedtosit
injury, orstandonany part oftheappliance.CAUTION: Do
notstoreitemsofinteresttochildrenincabinetsabove
CIRCUIT BREAKER OR FUSE - Locateand mark an applianceoron thebackguardofa range.
breakerorfuse.Neverreplacea blownfuseorreseta
breakeruntilyouknowwhathascausedtheproblem. Children climbingon theappli- _--_ne,_F__ J
Alwaysreplacea blownfusewithoneofthecorrect antetoreachitemscouldbeseri- _._,_ _,_ /
amperage,do notusea substitute, ously injured.Children must be
taught that the applianceand
CONTROL KNOBS - Turnoffcontrolat thecomple- utensilsinoronitcanbehot.Chil-
tionof a cookingoperation, drenshouldbetaughtthatan ap-
plianceisnota toy.They should
notbeallowedto playwithcon-
SELF-CLEANING OVEN: troisorotherparts oftheunit.
Donotcleandoorgasket.Thedoorgasketisessential
foragoodseal.Careshouldbetakennottorub,dam-
age,ormovethe gasket. Do notuse oven cleaners or
oven liner protective coating of any kind in or around
any partofthe self-clean oven.Clean only parts listed
inthis booklet. Beforeself-cleaning the oven, remove
broiler pan, oven racks, and other utensils.
CAUTION: DO NOT LEAVEFOOD OR COOKING
UTENSILS,ETC., IN OVEN DURING THE SELF
CLEANINGMODE OF OPERATION. -- SAVE THESE INSTRUCTIONS -
-3-

FEATURES
ELECTRONIC
TIME-OF-DAY CLOCK
AND TIMER
If yourrange is equipped witha digital
clock and timer, itwill either bedesign
1 or design 2. Follow the instructions
for the illustration that matches the
clock on your range.
DESIGN 1 DESIGN 2
Whenrangeisfirstconnectedtopower TO SET A TIMER FOR LESS THAN
or if power is interrupted,12:00 will ONE HOUR: Pressand holdMIN but-
flashinthedisplay,tonuntildesiredtime appears in the
display. Timer will immediatelybegin O Q
TO SET CLOCK: Slide switch up tocountingdownassoon asthe MINbut-CLOCKSET MINUTETIMER
CLOCK position, tonisreleased.
HOUR CLOCK
8[ 12eefl01 _ _j_TO SET TIMER FOR ONE TO TWO 88:88willflash in the display when
HOURS: Press the HOUR button, range is first connected to power or if
(1:59willappear inthedisplay.) Select power is interrupted.
desired minutes by pressing and hoId-
MTN T.T.NERingMINbutton.Timingwillbegin when
buttonis released.Two hoursis theTO SET CLOCK: Press and hold
PressandholdHOURbuttonuntilcot- maximumtimingthatcan beset. CLOCKSET buttonwhileturningMIN-
UTETIMERknobtothecorrecttime-
recthourappearsinthedisplay, of_:lay.MINUTETIMER knobcan be
turnedineitherdirection.
Pressand holdMIN button untilthe
correctminutesappear inthedisplay. TO SET MINUTE TIMER: Turn MIN-
UTETIMERknobtotheright,tothede-
TO SET MINUTETIMER: Slideswitch siredtime,upto60:00 (1 hour).Timer
downtoTIMER position.The timerwill will begincountingdown afterafew
automaticallybegincounting down secondsdelay.Whentimehaslapsed,
from1 hourinincrementsofone min- a continualbeepwillsoundforupto 2
ute. minutes.
CLOCK
{_ _ PressCLOCKSET buttontostop beep
[ _ sounds. The correct time-of-day will
fl _ 5 reappearinthe display.
MTNTZI4E_
(0:59) will bedisplayed as soon asthe
switch is moved to the TIMER posi-
tion.)
To check time-of-day during a timing
operation, pressand holdCLOCK SET
button. Time will reappear in the dis-
play.
,-4_

FEATURES
CONTINUOUS CLEANING
OVEN (if equipped)
WHAT IS THE CONTINUOUS MANUALLY CLEANING
CLEANING OVEN? HEAVY SPILLOVERS HINTS
The finishof the ContinuousCleaning The specialfinishwillclean mostspat-Brittlecrustsorstainscan beloosened
Oven isidentifiedbyitsdarkgraycolor, ters during normal oven use unless by GENTLY tapping stain with a
whitestippleandrough,poroustexture, there isaheavybuildupofsoil.Heavy wooden or plasticutensil.Brushaway
Therough texture prevents grease spillovers such as pie or casserole any loose soilthat flakes off.Varnish
spattersfromformingbeadswhichrun boiloverswillnotclean effectivelywith-typestainsusuallyneedtobe softened
down the walls leaving unsightly out somemanual help. Thecrusty or with a smallamountof water or damp
streaks.Rather,the roughtextureab- varnish-likestainsthatformfromthese cloth.Remainingsoilwillgraduallyre-
sorbs spatters and allows them to spilloversclog the poresand prevent ducewithcontinuedovenuseat normal
spread,thusexposinga largerarea to the specialfinishfrombeingexposedto bakingtemperatures.
the hotovenair.The catalyst,whenex-the hotoven air. This greatlyreduces
posedto heat, speedsthe oxidationof the cleaningeffectivenessofthe finish.
soil.DO NOT USE ANY TYPE OF OVEN
Cleaning action automaticallybegins Thesecrustyorvarnish-likestainsmust CLEANER, POWDERED CLEANS-
whenevertheovenisturnedonforbak-eitherberemovedor brokenup before ERS,SOAP, DETERGENTOR PASTE
ingorroasting.The ovenMUSTbe"on"cleaningcan effectivelytakeplace.ON ANY CONTINUOUS CLEANING
SURFACE.ALSO, DO NOT USE ANY
forcleaningto takeplace. Nocleaning ABRASIVE MATERIALS, STEEL
wilfoccurwhentheovenisoff.Thespe- WOOL, SHARP INSTRUMENTS OR
cialcatalyticfinishmustbe exposedto TO MANUALLY CLEAN SCRAPERS FOR THEY WILL DAM-
hot oven air beforesoil will begin to HEAVYSPILLOVERS AGE THE FINISH.
graduallyreduceinsize.Brushoffheavysoilwitha nylonbrush
orplasticpad.DO NOT USEpapertow-
FACTORS AFFECTING LENGTH OF els,clothsorspongesfortheovenwalls
are porousandparticlesofthesemate-Avoidspilloversby usingutensilsthat
CLEANING TIME rialswillruboffonthe walls.Rinsearea arelargeenoughto holdfood.Acookie
The higherthe oven temperature,the withclear wateronly.
fasterthecleaningaction.The lengthof sheetorpieceofaluminumfoil,justa lit-
cleaningtimewilldependonthesefac- tielargerthanthepan,canbeplacedon
tors:Typeofsoil,amountorsizeofsoil, the rackdirectlybelowtherackholding
oven temperature andlengthof time the utensilto catchspills.
ovenisin use.Time mayvary fromafew
minutesto severalhours.Soildeposited
at theend of a cyclemay still bevisible.
This will usually fade with continued Over a period of time, wear marks may
oven use until the soil gradually disap- appearonthe embossed racksupports.
pearsor canbewiped upmanually.The This is normal and results from sliding
oven will appear presentably clean, the racks in and out of the oven. Wear
eventhough some spattersmay bepre- markswill not affect thecleaning action
sent. of the oven.
-5-

USING YOUR COOKTOP
SURFACE ELEMENTS SIGNAL LIGHTS CONTROL KNOBS
Ranges areequipped with two to four Your cooktopisequipped with control
signal lights to indicate when a surface knobs that provide an infinite choiceof
element is on. The light will remain on settings from LOW to HIGH. 3-heknob
Surfaceelementsare self-cleaning. Do until the element is turned off. After a can beset on any ofthenumbered set-
not immerse elements in water. When cooking operation,be sureelement and tingsorbetweenthe numberedsettings.
an element is turned on,itwill cycle on signal light are off. To operate push inand turnknob to the
and offto maintainthe heat setting, desiredsetting.
DRIP BOWLS COOKING TIPS
Thedripbowls,located undereach sur-Food will not cookany faster when a
face element, are designed to catch higher heatsettingis used thanneeded
To remove: Raise element WHEN spills or boilovers, to maintain a gentle boil.Water boils at
the same temperature whether boiling
COOL and carefully pull out and away gently or vigorously. If a high setting is
from the receptacle. Be sure drip bowls are in place. Ab- used, excessive spattering will occur
sence of these bowls duringcooking andfood maystick or burnontothe bot-
may subject wiring or component parts tom of the pan.
/ underneath the cooktopto damage. Use a higher heat setting to bring liquid
]
to a boil or to begin cooking,then re-
Clean after each use with soap and duce to a lower setting. Never leave
water. Remove stubborn stains with food unattended during a cooking
baking soda paste and plasticscouring operation.
pad.To preventscratchingthe finish,do
not use abrasive cleaning agents.
To replace; Insertthe terminals on the
element into the receptacle. Gently lift Rinse, dry and replace.
up on outer edge of element (opposite
terminal-side of element) while insert-
ing terminals into receptacle. Gently
press down on outer edge of element
until element sits level on drip bowl. Never let a pan boil dry as this could
damage theutensil and the appliance.
To prevent risk of electric shockor fire,
Besure drip bowland chrometrim ring donotlinedripbowlswithaluminumfoil.
areproperly installed.Notch ontrim ring
should be centered over the screw se- Drip bowls will turn blue or gold over
curing the receptacle to the maintop. If timeorifoverheated.Thistypeofdiscol-
trim ring is not installed properly and oration is permanent and will not affect
restsonthis screw,thetrimringanddrip cookingperformance.To protectfinish,
bowl will "rock". avoid using high settings for long peri-
ods of time, Reduce to a lower setting
once food begins cooking. Also, do not
use oversized utensils. Utensil should
notextend more than 2 inchesfrom the
element.
-6-

USING YOUR COOKTOP
COOKWARE
Fitthesizeofthecookwaretothesizeof A pan with a badly curved bottom will Do not use woks equipped withround
theelement.This conserves energy, not makegood contactwith the element metalrings. Thering, which isdesigned
and may not get enough heat to bring to support the wok above the element,
Cookingperformance isgreatlyaffected water to a boil. will trap heat and may damage the ele-
by the type of cookware used. Cook- mentand the cooktop.
ware SHOULD HAVE A FLAT BOT-
TOMto provideuniformcookingresults, CANNING
" fasterheatingandmoreefficientuseofWhen canning, usetheHIGH setting
energy, justuntilwatercomestoa boilor pres-
sureisreachedinthepressurecanner.
__,_/_Then, reduceto the lowestheatsetting
thatmaintainstheboilorpressure.
Prolongeduse oftheHIGHsetting,or
the useofincorrectcanning utensils
Cookware with uneven, warped, or produce excessiveheat. Excessive
grooved bottoms do not makegood heat can cause permanentdamageto
contact,will reduceheat conductivity the porcelaincooktop,surfaceelement
andresultinslower,lesseven heating. .,andthedripbowl.
SUGGESTED HEAT SETTINGS
Usethefollowingchartas a GUIDELINEuntilyou become We suggestthat you experiment to find the heat setting
morefamiliarwithyourcooktop. Keepinmindthatdifferent that best suits your particular cooking needs. Chart is
types of cookware materialsrequire different heatsettings based on heavy gauge aluminum cookware. Lower the
for the same cooking operation, heat setting if using other materials.
HITo bring liquid to a boil, blanch, preheat skillet, or bring pressure up in pressure cooker. (Note:
Always follow instructionsin pressurecookeruseand care book.)Always reducetoa lower heat
setting when liquidsjust begin to boil or food begins to cook.
I Medium I
6-5 To maintainmoderatetoslowboilforlargeamountsof liquids.
LO To keep foods warm before serving.
NOTE: Referto cookware manufacturer's recommendationsfor suggested heatsettings.Somemanufacturersdo not rec-
ommend the useof HIGH or the use of HIGH for extended cooking operations.
-7-

USING YOUR OVEN
OVEN
CHARACTERISTICS OVEN RACKS HINTS
The two ovenracksare designedwitha Ifcookingontworacks,stagger pansso
"lock-stop" position to keep racks from one is not directly over the other. Use
accidentally coming completely out of rack positions 2 and 4 or 2 and 5,when
the oven. cooking on two racks.
To remove: Be sure rack is cool.Pull _ ]
rackouttothe"lock-stop"position.Tilt
1
up and continue pulling until rack re-
OVEN CONTROLS leases.
_ Toreplace: Place rack on rack sup-
ports, tilt up and push toward rear of
oven. Pull rack out to "lock-stop" posi-
tionto besure rackiscorrectly replaced.
RACK POSITIONS:
THERMOSTAT SELECTOR RACK 1 (topof oven)usedforbroiling
thinnon-fattyfoodssuch asfish,
TheTHERMOSTATknobisusedtose-RACK 2 usedfor two-rack bakingor
lectand maintainthe oventemperature, broiling thicker cuts of meat.
Always turn this knob just TO the de-
sired temperature. Do not turn to a FIACK3usedformostone-rackbaking
higher temperature and then back. On and for roasting some meats.NEVER place pans directly onthe oven
some models,there is an indent at the bottom.
RACK4 usedfor oneortwo rackbaking
350°F setting, and roasting large meats, cooking Do not cover entire rackwith aluminum
larger foods and for baking angel food foil orplace foildirectly undercookware.
The SELECTOR knob determines the cake or pie shells.To catch spillovers,cut a piece of foil a
typeofoven operation.Turnthis knobto little largerthan the pan and place it on
desired setting. Each setting is identi- RACK5 usedfor roastingturkeyor bak- the rack below the rack containing the
fled by an indent (stop) and a "click" ing angel food cake or pie shells, pan.
sound. PREHEATING
TOturn the ovenon,both theThermo- _ __-_ Preheatingis necessaryfor baking.AI-
stat and Selector knobsmust be set. lowoventoheatfor10to15minutesbe-
TheovenwillnotoperateiftheSelector _ _il foreaddingfood. It isnotnecessaryto
knobis left in the OFF position.Toturn _ _ preheat ovenfor roasting.
the oven off, turn the selector knob to
theOFF position..._ __.__ Itisnot necessaryto preheatfor broiling
unless darker browning is desired or if
__ cooking thin (3/4-inch) steaks.Allow
OVEN INDICATOR LIGHT broil elementtopreheat3 to5 minutes.
TheOVENindicatorlight,locatedonthe /
backguard, turns on whenever the se- /
lectorknob isturnedto BAKEorBROIL. Selecting temperature higher than de-
Whenthe oven reachesthe presettam- sired will NOT preheat the oven any
perature,the indicatorlightturns offand Use racks 2 and 4 when baking layer faster. Preheating at a higher tempera-
on as the oven elements cycle off and cakes.Use racks 2 and 5 when baking ture may havea negativeeffecton bak-
on. cookies or biscuitson cookie sheets, ing results.
-8-

USING YOUR OVEN
HOW TO SET OVEN:
1. When cool, position rack in oven. 3.Turn selector knob to BAKE. 5. Checkfood fordoneness at minimum
2. Turn thermostat knobto desired tern- 4. Placefood incenter ofoven,allowing time in recipe. Cook longer ifneces-
perature, a minimum of 2 inches between uten-sary.
sil and oven walls. 6. Remove food from the oven and turn
the selector knob to OFF.
COMMON BAKING PROBLEMS AND WHY THEY "IAPPEN
Cakesare uneven. Pans touchingeach otherorCakes don't brown on top. Incorrect rack position.
ovenwalls. Temperature set too low.
Batter uneven in pans. Overmixing.
Temperature set too low or Too much liquid.
bakingtime too short. Pan size too large or too little
Oven not level, batter in pan.
Undermixing. Oven door opened too often.
Too much liquid.Excessive shrinkage. Too little leavening.
Cake high in middle. Temperature set too high. Overmixing.
Baking time too long. Pantoo large.
Overmixing. Temperature set too high.
Too much flour. Baking time too long.
Pans touching each other or Panstoo close to each other
oven walls,or oven walls.
Incorrect rack position.
Cake falls. Too much shortening or sugar. Uneven texture. Too much liquid.
Too much or too little liquid. Undermixing.
Temperature set too low. Temperature set too low.
Old or too little baking powder. Baking time too short.
Pantoo small.
Oven door opened frequently. Cakes have tunnels. Notenough shortening.
Added incorrecttype of oil to Too much baking powder.
cake mix.Overmixing or at too high a
Added additional ingredients speed.
to cake mix or recipe. Temperature set too high.
Cakes, cookies, biscuits Incorrect rack position.
don'tbrown evenly. Oven door not closed properly. Cakescrack on top. Batterovermixed.
Doorgasket not sealing Temperature set too high.
properly. Too much leavening.
Incorrect use of aluminum foil. Incorrect rack position.
Oven not preheated.
Pansdarkened, dented, warped,
or large cookie sheet. Cake not done in middle. Temperature set too high.
Pan too small.
Bakingtime tooshort.
Cakes, cookies, biscuits too Ovennotpreheated.
brown on bottom.Panstouching each other or
oven walls. Pie crust edges too brown. Temperature set too high.
Incorrect rack position. Pans touching each other or
Incorrect use of aluminum foil. ovenwalls.
Placed2 cookie sheets on one Edges of crust too thin.
rack.
Used glass,darkened, stained,
warped or dull finish metal Pies don't brown on bot- Used shiny metal pans.
pans. (Use a shiny cookie tom. Temperature set too low.
sheet.) Pies have soaked crust. Temperature too low at start of
baking.
Filling too juicy.
Used shiny metal pans.
-9-

USING YOUR OVEN
@@
Broiling is a method of cooking tender Donot use disposable broiler pans.
meats by direct heat under the element. They do not provide a separate tray.
The cooking time is determined by the Preheat broil element 5 to 10 minutes if
distance between the meat and the ele- darker browning is desired.
ment, the desired degree of doneness
and the thickness of the meat. TO BROIL: THERMOSTAT SELECTOR
Broiling requires the use of the broiler 1. Remove excess fat and slash re-4. Broiling is to be done with oven door
pan and insert. The correct position of maining fat to help keep meat from closed.
the insert in the pan is very important, curling. 5. Follow suggested times on broiling
The broiler insert should be placed in 2. Place broiler pan on the recom-chart. Meat should be turned once
the pan so grease will drain freely. Im- mended rack position. For brown ex- about half way through cooking.
proper use may cause grease fires, terior and rare interior, the meat 6. Check doneness by cutting a slit in
should be close to the element. Place meat near center for desired color.
The broilerinsert CANNOT be covered further down for well done meat.Ex- 7.Turn the selector knob to OFF after
with aluminum foil as this prevents fat cessive smoking may occur if meat is cooking.
from draining into pan below. However,placed too close to the broil element.
for easier cleaning, the broiler pan can 3. To set oven: Turn both the thermo- Broil times may need to be increased if
be lined with foil. stat and selector knobs to BROIL. range is installed on a 208-volt circuit.
BROILING CHART
BACON #2Well Done 6 to 10 minutes
i!!iiiiiiii!ii i
_iillii!ilii!!liiii!ii!ii
[
r ;
CHICKEN BROIL AT 450°F
Whole, split#3 Well Done 45 to 60 minutes
Pieces #3 WellDone 30 to 45 minutes
GROUND BEEF PA3-rlES
3/4to 1 inchthick#2 Rare 10to13 minutes
Medium 12to 15 minutes
WellDone15to 18 minutes
LAMB CHOPS
1-inch thick #2Medium 12 to 15 minutes
WellDone16 to20 minutes
11/2-inch thick #3 Medium 15 to 19 minutes
WellDone 25 to30 minutes
WIENERS, precooked
Hotdogs, smokedor Polishsausage, #2 8 to 12 minutes
Bratwurst,etc.
-10-

MAINTENANC
LIGHT REPLACEMENT OVEN DOOR LEVELING LEGS
Before replacing oven light bulb, DIS- Donot place excessive weight on an Some floors are not level. For proper
CONNECT POWER TO RANGE. Be open oven door or stand on an open baking,your rangemust belevel. Level-
surebulbis cool. Donottouchahot bulb oven door as, in some cases, it could ing legs are located on each corner of
with a damp cloth as the bulb may cause the range totip over, breakageof the base of the range.Level by turning
break, the door orserious injury, the legs.
Very carefully remove bulb with a dry When openingoven door,allowsteam
potholderto prevent possibleharmto and hotairtoescapebeforereachingin
hands.Replacewitha40wattapplianceoventocheck,addor removefood.
bulb. Reconnectpowerto range and re- To remove lift-off door:Open door to
set clock, if equipped. the "stop" position (opened about 4
inches)and graspdoorwith bothhands r_
STORAGE DRAWER at each side. Do notusedoor handle to
liftdoor.Lift upevenlyuntildoorclears
Thestoragedraweratthebottomofthe thehingearms.
rangeissafeandconvenientforstoring To preventrangefromaccidentlytip-
metal and glass cookware.DO NOT r.,,.-, /'-/ ping,range should be secured to the
store plastic, paperware, food or flam- /_ floor by sliding rear leveling leg intothe
mable material in this drawer.Remove anti-tip bracketsuppliedwith therange.
drawer to clean under range.
To remove: Empty drawer then pull
drawer out to the first stop position. Lift FUSES
upfrontofdrawer andpull tothesecond Your range is equipped with seven (7)
stop position. Grasp sides and lift up type "P"fuses. Thefuses arelocatedon
and out to removedrawer, the back wall. Remove the storage
drawer for access to the fuses.
Toreplace: Fit ends of drawer glides
onto rails.Liftupdrawer frontandgently
push into firststop position. Lift up _i J I
drawer again and continue to slide
drawer to the closed position.
To replace door:Grasp door at each
side,align slotsinthe door with the 7FUSES./
hinge arms andslide door downonto
the hinge arms until completely seated
on hinges. If part of your range does not operate,
checkto see if a fuse has blown. A gap
in the fuse strip or a darkened window
indicatesa blownfuse. Replacewith the
sametype and amperage type"P"fuse.
-11-

CARE AND CLEANING
Broiler pan & in-Soap & water. Plastic Remove from oven after use. Cool then pour off grease.Place soapy
sert scouring pad. Soap cloth over insert and pan; let soak to loosen soil. Wash in warm soapy
filled scouring pad.water. Use soap filled scouring pad to remove stubborn soil. Clean in
dishwasher if desired.
Control knobs Milddetergent & water. To removeknobs,gently pullforward.Washin milddetergentand water.
Donotuseabrasivecleaning agents.Theywill scratchfinishand remove
markings. Rinse,dry and replace.Turn each element ONto see ifknobs
have been replaced correctly.
Metal finishes: Soap &water. Paste of Washwith soap and water. Remove stubborn soil with paste of baking
Aluminum- back- baking soda & water, soda and water. Do not use oven cleaners, abrasive or caustic agents.
guard base. Theywill damage the finish.
Chrome & stainless
steel- trim parts
Plasticfinishes: Soap & water. Paste
Door handle,Trim, of bakingsoda and
Backguard trim, water. Non-abrasive
Overlay, Knobs, or plastic pad orsponge.
Endcaps with adry papertowelor cloth. Whensurface iscool
water; rinse, and dry.
-12-

SERVIC
PART OR ALL OF YOUR Isthe rangeplugdisconnectedfromtheelectricaloutlet? • Arehousefusesblown
RANGE DOES NOT OPERATE orcircuitbreakerstripped? •Istherangepluglooseorimproperlypluggedin?
Haspowersupplytoyourhomebeen interrupted? •Was ovenproperlyset?
SURFACE ELEMENTS FAIL Israngeplugdisconnectedfromtheelectricaloutlet?Checkcircuitbreakerorfuse
TO TURN ON OR HEAT FOOD boxfortrippedcircuitbreakersorblownfuses. ,, Iselementproperlypluggedinto
PROPERLY receptacle? •Was incorrectpanused?Foroptimumresults,panSHOULDHAVE
AFLATbottom.Seepages6 and7foradditionalinformation.(NOTE:Expectcook-
ingtimestoincreaseifrangeisconnectedto208 volts)..Haveservicemancheck
element.
FOOD NOT BAKINGSATIS- Are racksproperlyinplaceand in correctpositionfor whatyouarebaking? •Is
FACTORILY rangelevel? •Areyouusingtheproperpan?Isitbright,notsoiledordarkcolored?
•Haveyouusedfoilincorrectly?• Areyouusingstandardmeasuringutensils?•
Didyoupreheatif recommended? •Oventemperatureisincorrectlyset- toolow
or toohigh.SeeCommonBakingProblemchartonpage9.
OVEN DOES NOT OPERATE Istherangedisconnectedfromthe electricalpower? •WastheSelectorknob
turnedto bakeor broil?•Was ovenproperlyset?
OVEN LIGHT DOES NOT Isbulblooseor burnedout?
WORK
SERVICE
Do not attempt to service the appli-cover for locationof yourmodelandse- If youdid not receivesatisfactoryserv-
ance yourself unless directed to do rial numbers.) icethroughyourservicerorMaycoryou
so in this book. Contact the dealer may contacttheMajorApplianceCon-
sumerActionPanel by letterincluding
who soldyou the appliancefor serv-Ifyouareunabletoobtainservice,writeyour name, address,and telephone
ice. tous.Ouraddressisfoundonthe rating number,aswell asthemodelandserial
plate.See frontcoverforlocationofrat- numbersoftheappliance.
ingplate.
HOW TO OBTAIN
SERVICE Ifyou are not satisfiedwiththe local re-MajorApplianceConsumerActionPanel
When yourappliancerequiresservicesponse to your service requirements, 20NorthWackerDrive
or replacement parts, contact your callor write MAYCOR AppliancePartsChicago,IL60606
DealerorAuthorizedServicer.Useonly and ServiceCompany,240 Edwards
genuinefactory or Maycorparts ifre- Street, S.E.,Cleveland,TN 37311,
placementpartsarenecessary.Consult (615) 472-3500. Includeor have avail- MACAP (MajorApplianceConsumer
theYellow Pagesin yourtelephonedi- ablethecompletemodel and serial ActionPanel)isanindependentagency
rectoryunderappliancefor theservicenumbersoftheappliance,thenameand sponsoredby threetradeassociations
center nearestyou.Be sure to includeaddressofthe dealer from whomyou asacourt ofappealsonconsumercorn-
your name,address,and phonehum-purchasedtheappliance,thedateofplaintswhichhavenot been resolved
ber, along with themodel and serial purchaseand detailsconcerningyour satisfactorilywithina reasonableperiod
numbersoftheappliance.(See front problem, oftime.
-13-

FULL ONE-YEAR WARRANTY
DOMESTIC GAS OR ELECTRIC RANGE
4aycorApplianceParts&ServiceCompanywillrepairorreplace,withoutcharge,anypartofyourproductwhichhas
defectinmaterialorworkmanshipduringthefirstyearafterthedateoftheoriginalinstallation.Thiswarrantyextends
to anyownerduringtheone-year warrantyperiod.
LIMITED 5 YEAR WARRANTY I
,, = On electric ranges equipped with solid disc or smoothtop heating elements, and on gas ranges withsealed burners, for
an additi_nai 4 year period bey_nd the _rst year __the general ___erage _f this warrant_ _Mayc_r wilireplace any ofthe
r r ................
Isolid disc or smoothtop heating elements, or sealed burners which failto heat as a result of defective workmanship or
} }! material. Additionally, Maycor will replace any smoothtop cooking surface which cracks or breaks during normal !
householdcooking.These partsmust beinstalledby aqualified person.Any laborcharge requiredfor replacement is
inotcovered by this warranty.
HOW TO OBTAIN SERVICE I
To obtain therepairor replacementofa defectivepart underthesewarranties,youshouldcontactthedealerfrom
whomyoupurchasedtheapplianceora servicerhedesignates.
WHAT IS NOT COVERED BY THESE WARRANTIES
1. Conditionsanddamageresultingfromimproperin- 5. Any productusedforotherthan normalhousehold
stallation,delivery,unauthorizedrepair,modifica- use. It doesnotextendto productspurchasedfor
tion,ordamagenotattributabletoa defectin mate- commercialor industrialuse.
rialor workmanship. 6. Any expense incurredforservice callstocorrect in- I
2. Conditions resulting from damage,such as: (1) im- stallation errors or to instructyou on howto usethe =
........... proper maintenance, (b) misuse, abuse, accident, products.
I or (c) incorrect electricalcurrent or voltage. 7. CONSEQUENTIAL OR INCIDENTAL DAMAGES
3. Warranties arevoid iftheoriginal serial number has SUSTAINED BYANY PERSONASA RESULT OF
been removed, altered, or cannot be readilydeter- ANY BREACHOFTHESEWARRANTIESOR ANY
: " mined. IMPLIED WARRANTY. Some states do not allow
the exclusion or limitation of consequential or inci-
dental damages, so the above exclusion may not
4. Lightbulbs,apply to you.i
IADDITIONAL HELP=
Ifyouarenotsatisfiedwiththelocal responsetoyourservicerequirementsandwishto contactMaycor,pleasead- =
dressy_ur_ettert_theCuSt_merRe_ati_nsDepartment_Mayc_rParts&ServiceC_mpany_24_ EdwardsStreet_S_E__!|
Cleveland,TN37311orcall(615)472-35OO.To savetime,yourlettershouldincludethecompletemodelandserial i
numbers_fthewarrantedapp_ian_e_thenameandaddress_fthedea_erfr_mwh_my_upurchasedtheapp_iance_the
dateofpurchaseanddetailsconcerningyourproblem.
! i
Thesewarrantiesare the onlywrittenor expressedwarrantiesgivenby Maycor.Noone is authorizedtoincrease,
a_ter__ren_argeMayc_r_sresp_nsibi_ities_r_b_igati_nsunderthesewarranties_ThesewarrantiesgiVey_uspecific ....
legalrights,andyou mayalsohaveotherrightswhichvaryfrom statetostate.
8109P059-60
(6/91)
-14-
Table of contents
Other Norge Range manuals
Popular Range manuals by other brands

GE
GE Profile PGB928TEMWW Dimensions and installation information

Jenn-Air
Jenn-Air 30"GAS DOWNDRAFT SLIDE-IN installation instructions

Frigidaire
Frigidaire FGF375F Factory parts catalog

Wesco
Wesco IPGRB Manual spare parts list

Magic Chef
Magic Chef 3126SRA owner's guide

Range Master
Range Master Classic Series User's guide & installation instructions

Range Master
Range Master Excel 110 G5 Induction User's guide & installation instructions

Cadco
Cadco PHR-1C How to use

Jenn-Air
Jenn-Air Pro-Style JGR8890ADP14 parts list

Kuppersbusch
Kuppersbusch EKE9753.1 Instructions for use and installation

GE
GE PS968SPSS use and care manual

GE
GE JBS03BM Dimensions and installation information