NorthEast Monitoring DR400 User manual

DR400 Quick Start Guide - Rev B
Contact your NorthEast Monitoring distributor to purchase patches.
Copyright 2020
Last updated: May 12, 2021
NEMM049 - Rev-F - English
Download and install the PCPatch utility at
www.nemon.com before getting started.
The PCPatch Utility
•Download PCPatch at www.nemon.com and install on PC where analysis
software is installed and/or where patients are hooked up
•Note: You do not need a Bluetooth USB Adapter to use the DR400. The
adapter is only required to view ECG using the PCPatch utility
•Contact your distributor to find out more about this feature
Hook-up Guide
Prepare patient:
•Determine best location to attach the patch and lead wire
•Before attaching, prepare the patient’s skin. If patient has hair in any of the patch site, shave it
with a safety razor
•Use an alcohol pad and rub the sites briskly until the skin reddens
•
Let the skin air dry before proceeding
1-lead patch (1CH)
shown with optional lead wire (3CH)
3-lead patch (3CH)
Steps:
Description:
Steps/Hints:
1
Fully charge the DR400
•Use docking station to charge DR400 using power source
•DR400 will flash orange while charging, and flash green
every 4 seconds when fully charged
2
Install and run PCPatch
utility
•If you have not already done so, download PCPatch utility at
www.nemon.com and install on PC where analysis software
or where patients are hooked up. Start the PC Patch utility
3
Prepare DR400 for
patient
•Place DR400 into docking station and attach to PC
•Erase, Enter Patient ID and Update Settings at this time
•New with DR400 v5.22…Start recording by pressing “Start
DR400” and then remove from PC
4
Attach patch to DR400
and to patient
•Attach 1-lead electrode patch (1CH), 1-lead electrode patch
w/ lead wire (3CH) or 3-lead electrode patch (3CH) to the
DR400 recorder
•Remove backing from leads and attach firmly to patient
•Patient is good to go
5
For Holter analysis,
remove DR400 from
patient and upload data
to PC
•Remove from patient and plug DR400 into docking station
that is attached to PC. (The DR400 will stop recording after 2
minutes.)
•Save DR400 Holter data to HE/LX Analysis or LX Remote
patient directory
•Open Patient folder to view and analyze patient data or send
LX Remote file at any time
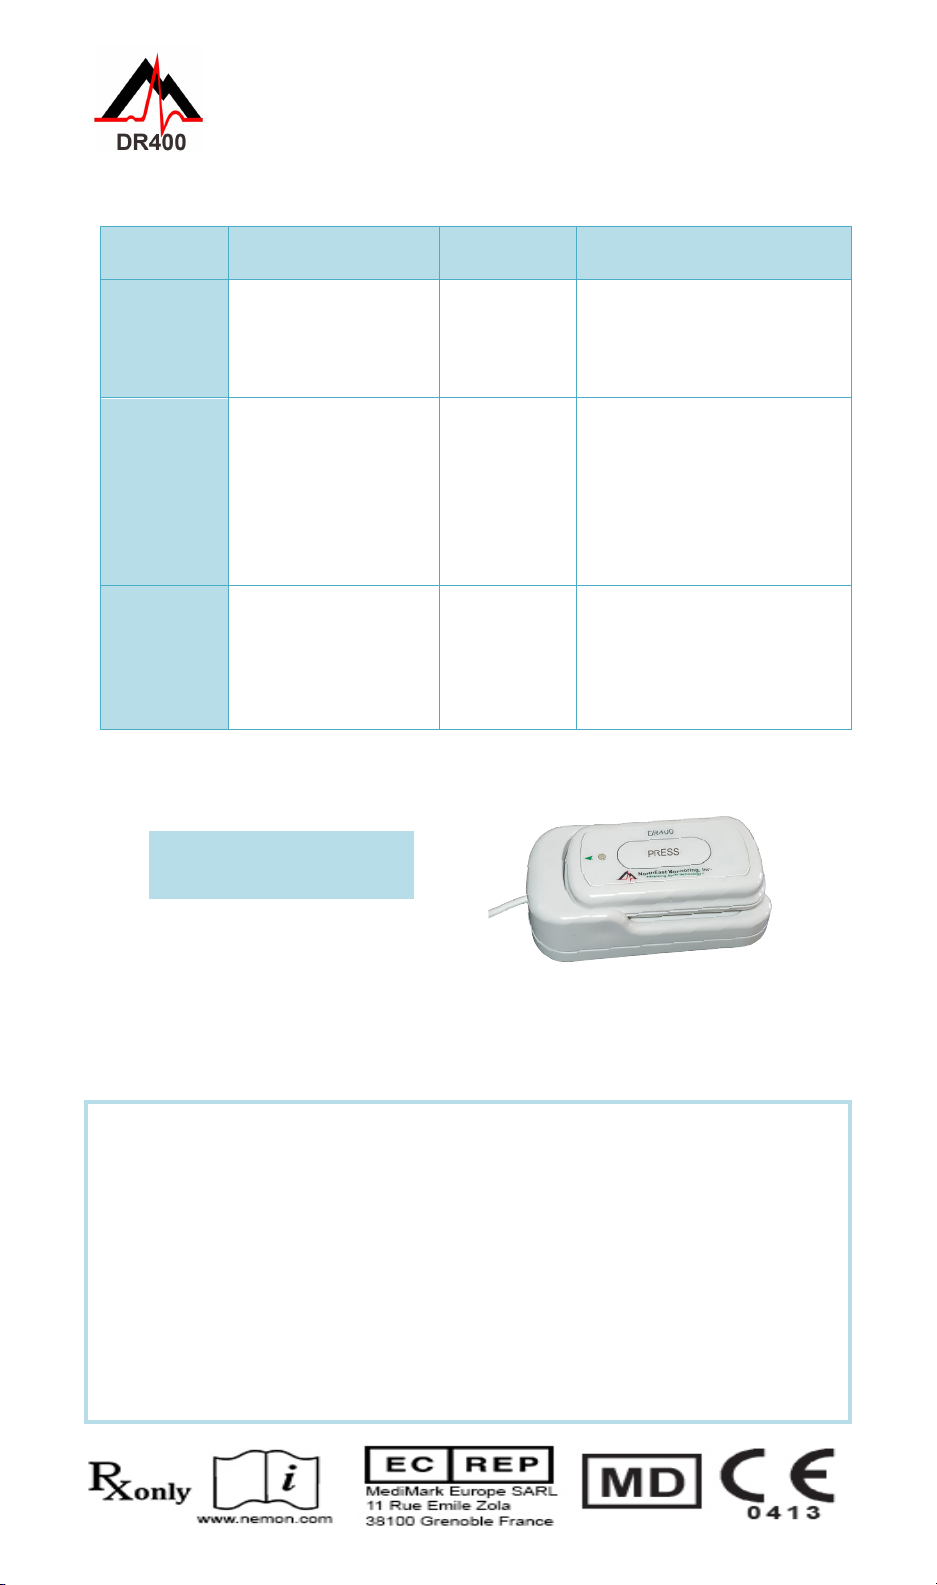
DR400 Functions and Modes
DR400 FUNCTIONS
FUNCTION DO THIS:
LIGHT
RESPONSE: MORE INFORMATION:
RECORD
EVENT
While recording, quickly
press the PRESS
button
DR400
flashes green
slowly
for several
seconds
•An event is being saved
VIEW ECG
While recording and
with PCPatch running,
hold PRESS button
down until DR400 start
flashing green
DR400
flashes green
rapidly
when
transmitting
Bluetooth data
•View ECG window will open in
a few seconds
•For this to work, the DR400
must be paired with the
NorthEast Bluetooth USB and
the PCPatch utility must be
running on PC where the
Bluetooth USB is attached
STOP
RECORDING,
SAVE ECG &
UPDATE
SETTINGS
Put DR400 into docking
station that is attached
to PC where PCPatch is
installed
DR400 starts
charging and
is ready for
PCPatch
•Use PCPatch to Preview, copy
and/or erase the flash.dat file
•Also use PCPatch to update
Settings, and pair DR400 with
Bluetooth USB and/or
Gateway (for Event)
Not sure if the DR400 is Recording or in Standby? When DR400
not connected, quickly press the button and observe:
• IftheDR400ashesgreenforabout30seconds,itisRecording.
• Iflightisgreenwhenpressed,butnoashingfollows,theDR400isin
Standby and ready for next patient.
• If the light is orange when pressed, the DR400 is not recording and
cannot be started as is. Before next use, use PCPatch to Preview, Save,
Erase and enter new patient ID. Recorder may need to be charged.
• If no light shows, the DR400 battery needs to be charged.
When the DR400 is in the docking
station and connected to PC or power:
• It is Chargingwhenthelightashesorange,or
• Fully Charged whenthelightashesgreen
• When not connected, the DR400 is either Recording or in Standby mode
DR400 Modes
Other manuals for DR400
5


