Notion Ink Cain User manual
© 2014 Notion Ink Design Labs Pvt. Ltd.
1
Quick Start Guide

© 2014 Notion Ink Design Labs Pvt. Ltd.
2

© 2014 Notion Ink Design Labs Pvt. Ltd.
3
1. Caring for your device
2. Travelling with your device
3. Device layout
4. Keyboard case layout
5. Introduction to Desktop
a) Windows 8.1 Start Screen
b) Gestures & Navigation
c) Introduction to Apps
d) Charm Menu
e) Dual Screen Application
6. Basic Operations
a) Sleep, Shut down & Restart
b) Security Management
7. Installing the 3G Ultrastick
8. Contact Us
04
05
06
07
08
08
11
12
13
14
14
15
16
Contents

© 2014 Notion Ink Design Labs Pvt. Ltd.
4
• Your device is a precision instrument. Improper usage may damage it!
• The touchscreen is the most delicate component of the device. DO NOT exert excess force on the
touchscreen as it may result in permanent damage or breakage.
• DO NOT drop your device or place heavy objects on the touch screen.
• DONOTscratchthetouchscreenwithyourngernailsoranyhard/sharpobjects.
• Place the device in a carry case to protect it from dirt, water, shock and scratches while traveling.
• Use a soft lint-free cloth to clean your device and wipe it gently in order to avoid damaging the
touchscreen.
• DO NOT clean the touchscreen with chemical solutions. Please make sure that the device is
turned off before attempting to clean it.
• Replacement with incorrect type batteries may cause an explosion. Make sure to use only original
batteries.
• Avoid using the device in strong magnetic and strong static environments as much as possible.
• Do not disassemble the Tablet PC by yourself; otherwise you will lose the right to warranty.
• The Quick Start Guide may be updated at any time. For updated versions, please visit
www.notionink.com
Other Accessories
Follow the steps below while cleaning the device and its accessories -
• Turn off the device; disconnect it and all other peripheral devices from their respective electrical
outlets.
• Use a dust blower to pump the dust out from the ports.
• Use a soft lint-free cloth to wipe the surface of the device gently.
In Case of Liquid Spillage
• TURN OFF the device immediately.
• Disconnect the power cable from the main power supply and from the device. Disconnect any
peripheral devices, if attached.
• Use soft and absorbent paper or a lint-free cloth to wipe the affected areas on the device gently.
• DO NOT expose it to any kind of heat, as high temperatures would result in severe damage to the
device.
Other Precautions
• DO NOT place the device near a heat source. High temperatures can cause the battery to swell,
leak, or malfunction.
• Backup your data as frequently as possible in order to avoid any data loss.
1. Caring For Your Device

© 2014 Notion Ink Design Labs Pvt. Ltd.
5
Here are a few steps to keep in mind if you take your device with you when you travel -
• Turn off the device.
• Disconnect all peripherals from their ports.
• Place the device in a carry case to protect it from dirt, water, shock and scratches while travelling.
• Make sure to pack your travel plug adapter when travelling abroad.
Driving Safety
Check the laws and regulations on the use of mobile devices and their accessories in the areas where
you drive. Always obey them. The use of these devices may be prohibited or restricted in certain areas.
Airplane Precautions
Check with airline personnel if you want to use your device on board an aircraft. Most airlines have
restrictions for using electronic devices. Most airlines allow electronic use only between and not during
takeoffs and landings.
2. Travelling With Your Device

© 2014 Notion Ink Design Labs Pvt. Ltd.
6
1. Volume-/Volume+.
2. Speaker.
3. Front camera: take photos, and record pictures.
4. Camera indicator: The camera indicator will turn on when the front camera is being used.
5. Windows key: Press this button to return to the Start screen.
6. Keyboardconnector:Thisinterfaceismagnetic,whichisconvenientforalignmentandrmlylock-
ing the device and the keyboard.
7. Rear camera: take photos, and record pictures.
8. 3G Ultrastick slot.
9. DC Indicator: Lights up when charging.
10. Powerbutton:Pressdowntolockorunlock(Sleep/Wake)thedevice.Pressandholdforshut
down option.
11. 3.5mm Socket for earphone.
12. Mini HDMI port.
13. Micro SD card slot.
14. Micro USB port.
15. USB3.0port:YoucandirectlyinsertUSBashdrive,mouse,keyboardetc.
16. Power DC Interface: Charge your device through DC interface.
17. Microphone.
3. Device Layout

© 2014 Notion Ink Design Labs Pvt. Ltd.
7
1. Keyboard connector: This interface
is magnetic, which is convenient
foralignmentandrmlylockingthe
device and the keyboard.
2. Keyboard: The keyboard provides
full size QWERTY keys.
3. Touchpad: Used to control the cur-
sor on the device, with the same
function as a mouse.
4. Protective case.
4. Keyboard Case Layout
4
3
2
1
© 2014 Notion Ink Design Labs Pvt. Ltd.
8
5. Introduction to Desktop
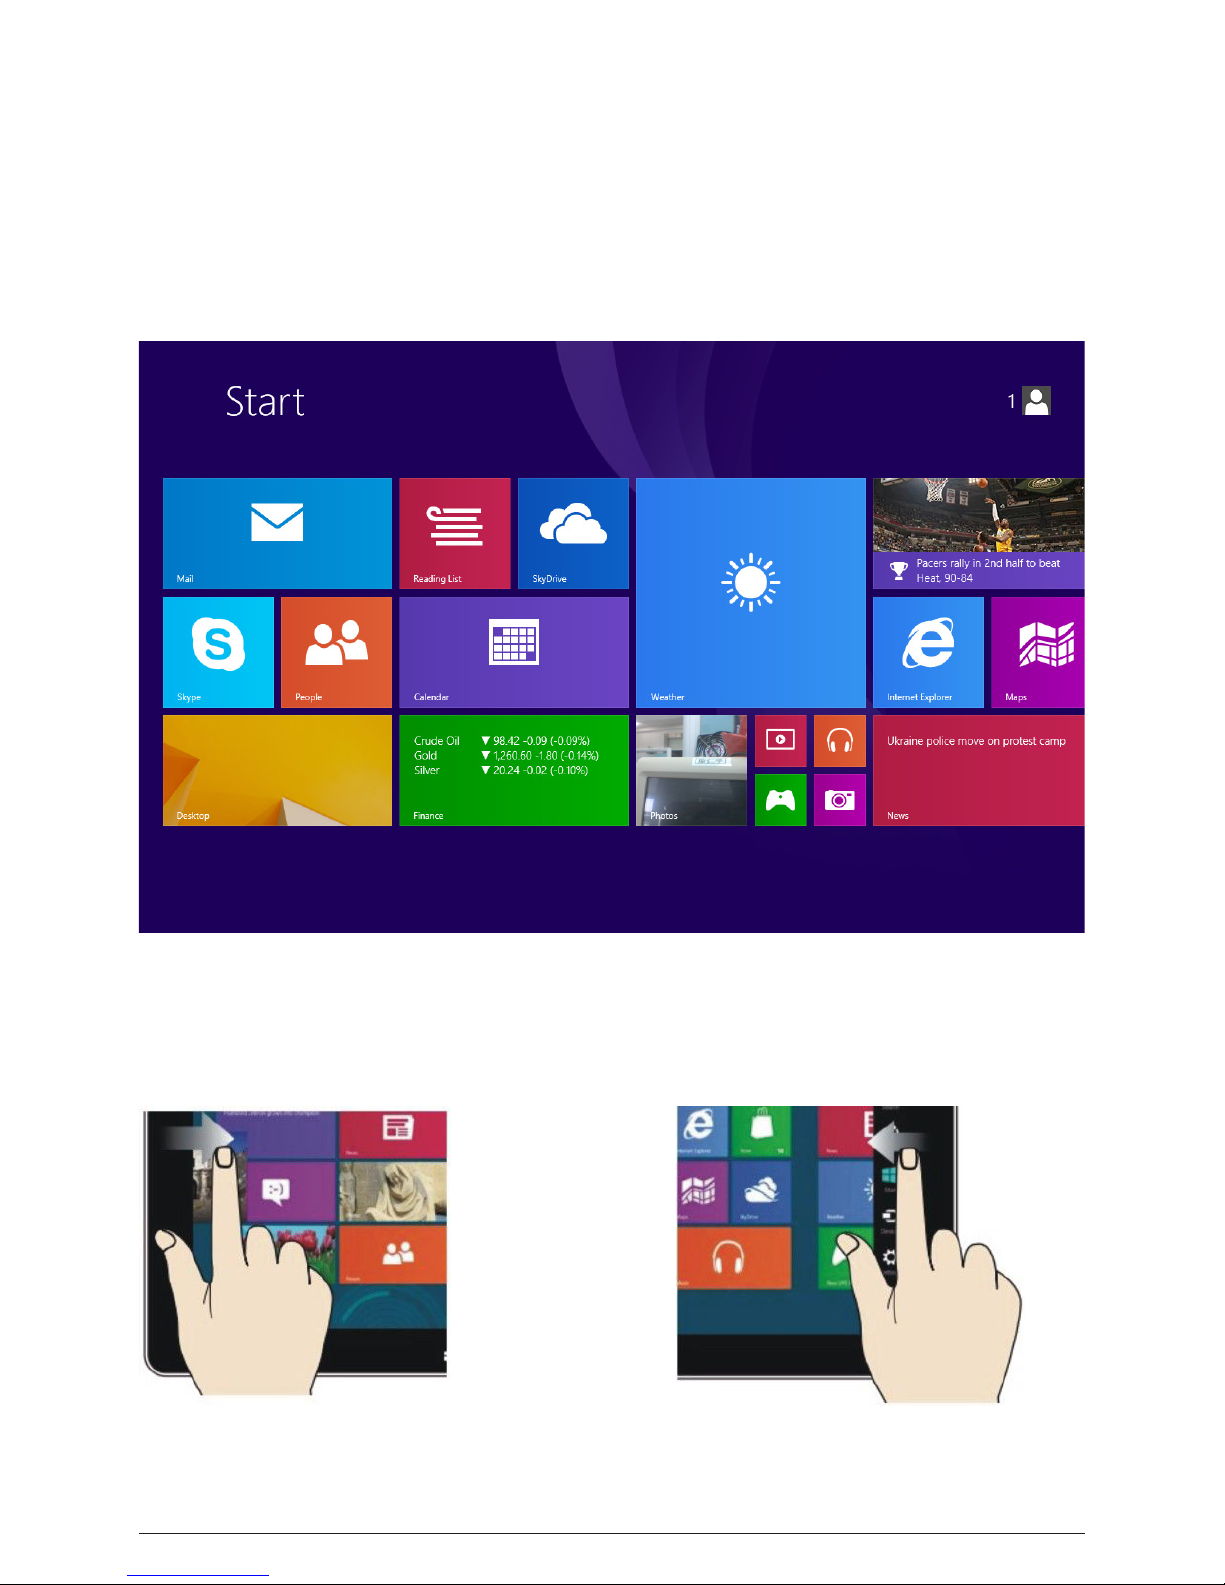
a. Windows 8.1 Start Screen
On the start screen, you can see programs as images or “Tiles”. Click on an application tile to open the
corresponding application.
Note:YouwillneedtologintoyourMicrosoftaccountontherststartofthedevice.
b. Gestures & Navigations
Slide to the right
Slide to the left from the right side of the
to screen to open previously running
applications.
Slide to the left from the right side of the
of the screen to open the Charm menu.
Slide to the left
© 2014 Notion Ink Design Labs Pvt. Ltd.
9
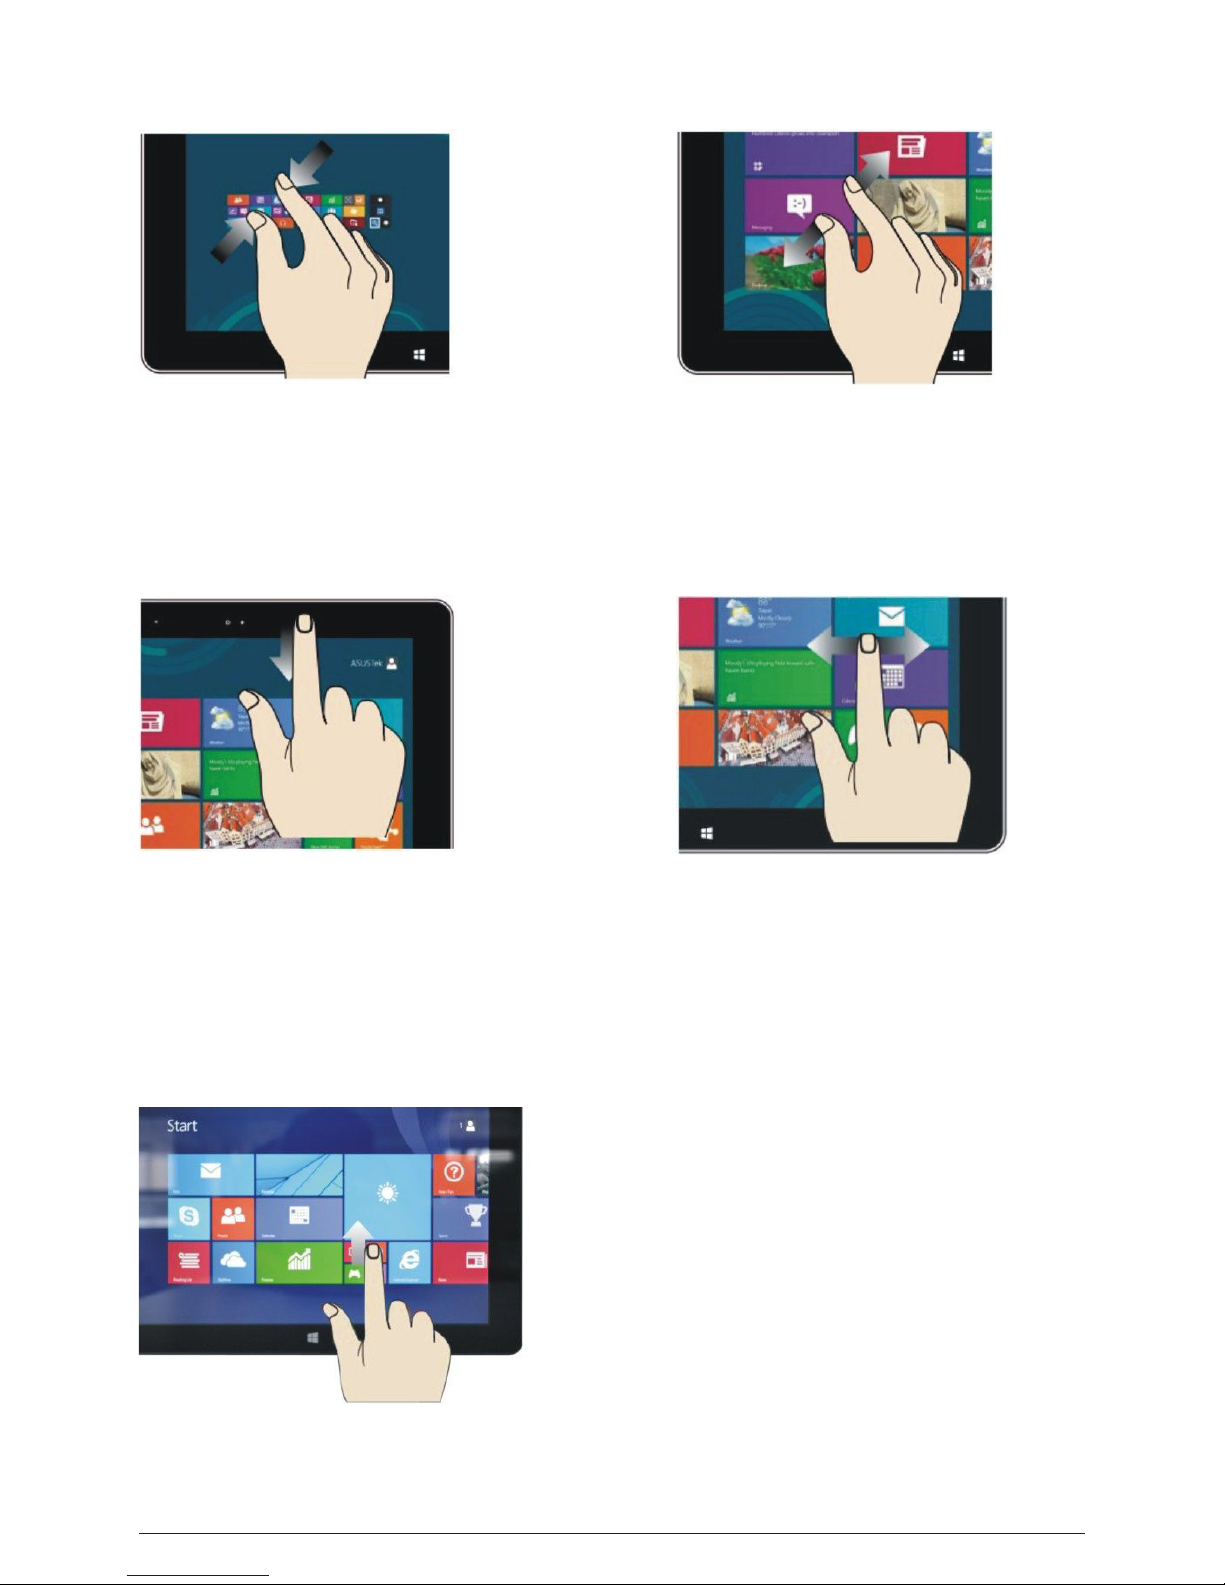
Reduce
Slide downward
Onthetouchscreen,pinchtwongersto
reduce (zoom out) the image.
Fromanyapplication,slideyourngerdown
to the bottom of the screen to close the
app.
Inthestartscreen,slideyourngerright
and left to navigate your desktop.
Onthetouchscreen,widentwongersto
enlarge (zoom in) the image.
Enlarge
Slide with ngers
Slide upward
In the start screen, slide up from the bottom
of the screen to view a list of all your installed
applications.

© 2014 Notion Ink Design Labs Pvt. Ltd.
10
Gestures & how to perform them
Gesture How to perform Description
Pan
Zoom
Rotate
Press and Tap
Touch and drag the page
with either one or two n-
gers.
To zoom out, touch two
points on the item, and
thenmoveyourngers
toward each other, as
if you’re pinching them
together. To zoom in,
touch two points on the
item, and then move
yourngersawayfrom
each other, as if you’re
stretching them apart.
Touch two points on the
item, and then move the
item in the direction that
you want to rotate it.
Press the item with one
nger,thenquicklytap
withanothernger,while
continuing to press the
itemwiththerstnger.
Use panning to see
another part of a page
that has scroll bars. For
example, you can pan
to see part of a long
document or spreadsheet
that doesn’t appear in the
window. When you pan
withonenger,dragging
yourngervertically
moves the page, while
draggingyournger
horizontally selects text on
the page.
Use zooming to make
an item on the screen
larger or smaller. With a
picture, zooming in shows
a smaller area in more
detail; zooming out shows
a larger area.
Use rotating to move a
picture or other item on
the screen in a circular
direction (clockwise or
counter-clockwise).
Use press and tap to
access the shortcut menu.
Press and tap does the
same thing as press and
hold or right-clicking an
item.

© 2014 Notion Ink Design Labs Pvt. Ltd.
11
c. Introduction to Apps
Besides the applications already on the start screen, you can also open other applications which can
be found in the list of all applications. In the start screen, slide up from the bottom of the screen to view
a list of all your applications.
If you want to add more apps to the start interface, press and hold the application icon for about one
second and then let go, and select the option to pin to the start screen.
Conversely, if you want to remove a certain application from the start screen, or uninstall it (1), press
and hold the application tile for about one second and then let it go, and select the appropriate action
(2).
© 2014 Notion Ink Design Labs Pvt. Ltd.
12
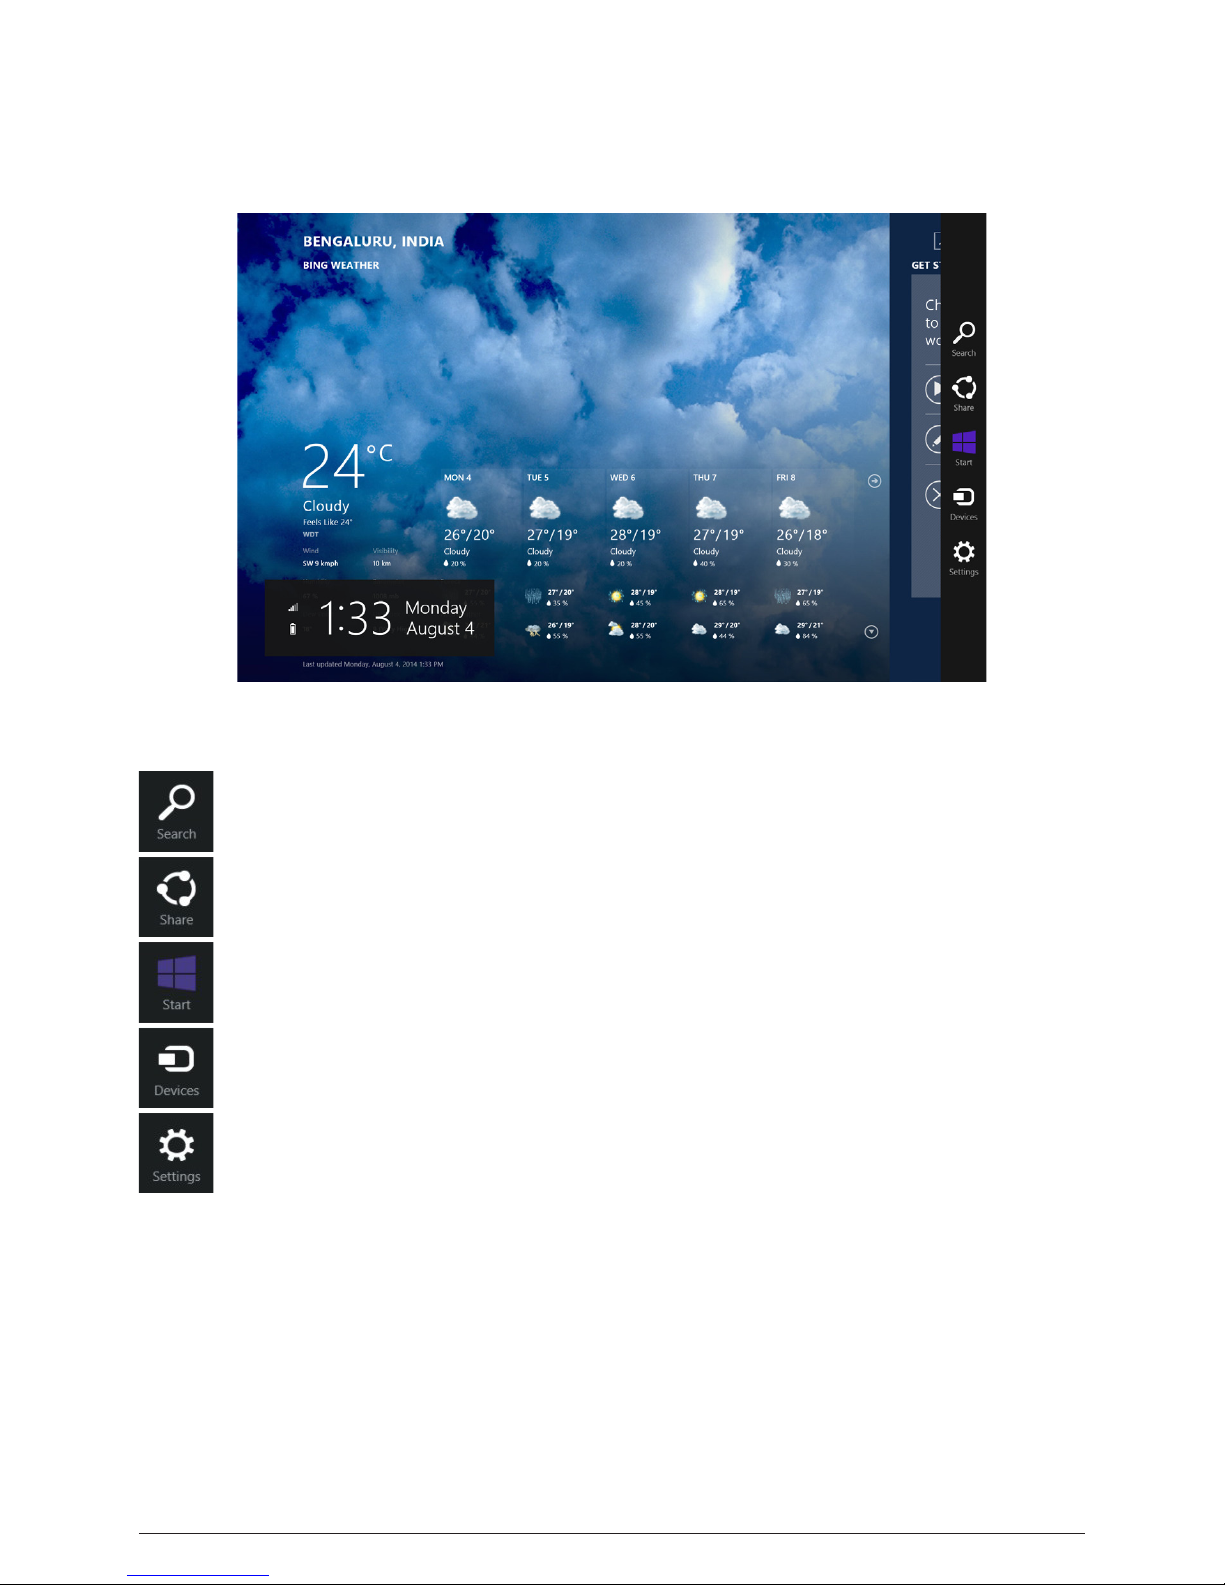
Letsyousearchthelesandapplicationprogramsonthedevice.
Lets you share the program through social media or e-mail.
Returns you to the start screen. From the start screen, you can also use this button to return
to the last program that was opened.
Letsyouread,writeandshareles,connectexternalscreensorprinterswiththedevicecon-
nected to the device.
Takes you to the settings to set up your device.
d. Charm menu
SlideyourngertotheleftfromtherightsideofthescreentostarttheCharmmenu.Thismenuincludes:
Start, Device, Settings, Share, and Search.

© 2014 Notion Ink Design Labs Pvt. Ltd.
13
Device Menu
Search Menu
Settings
Share menu
e. Dual-Screen Application
Fromyourdesktop,slideyourngerinwardfromtheleftsideofthescreenandhold.Letgowhenthe
double interface appears. As shown in the image below, press the partition button along the middle parti-
tion line and drag it right or left to change the display proportion of the dual screens.
© 2014 Notion Ink Design Labs Pvt. Ltd.
14
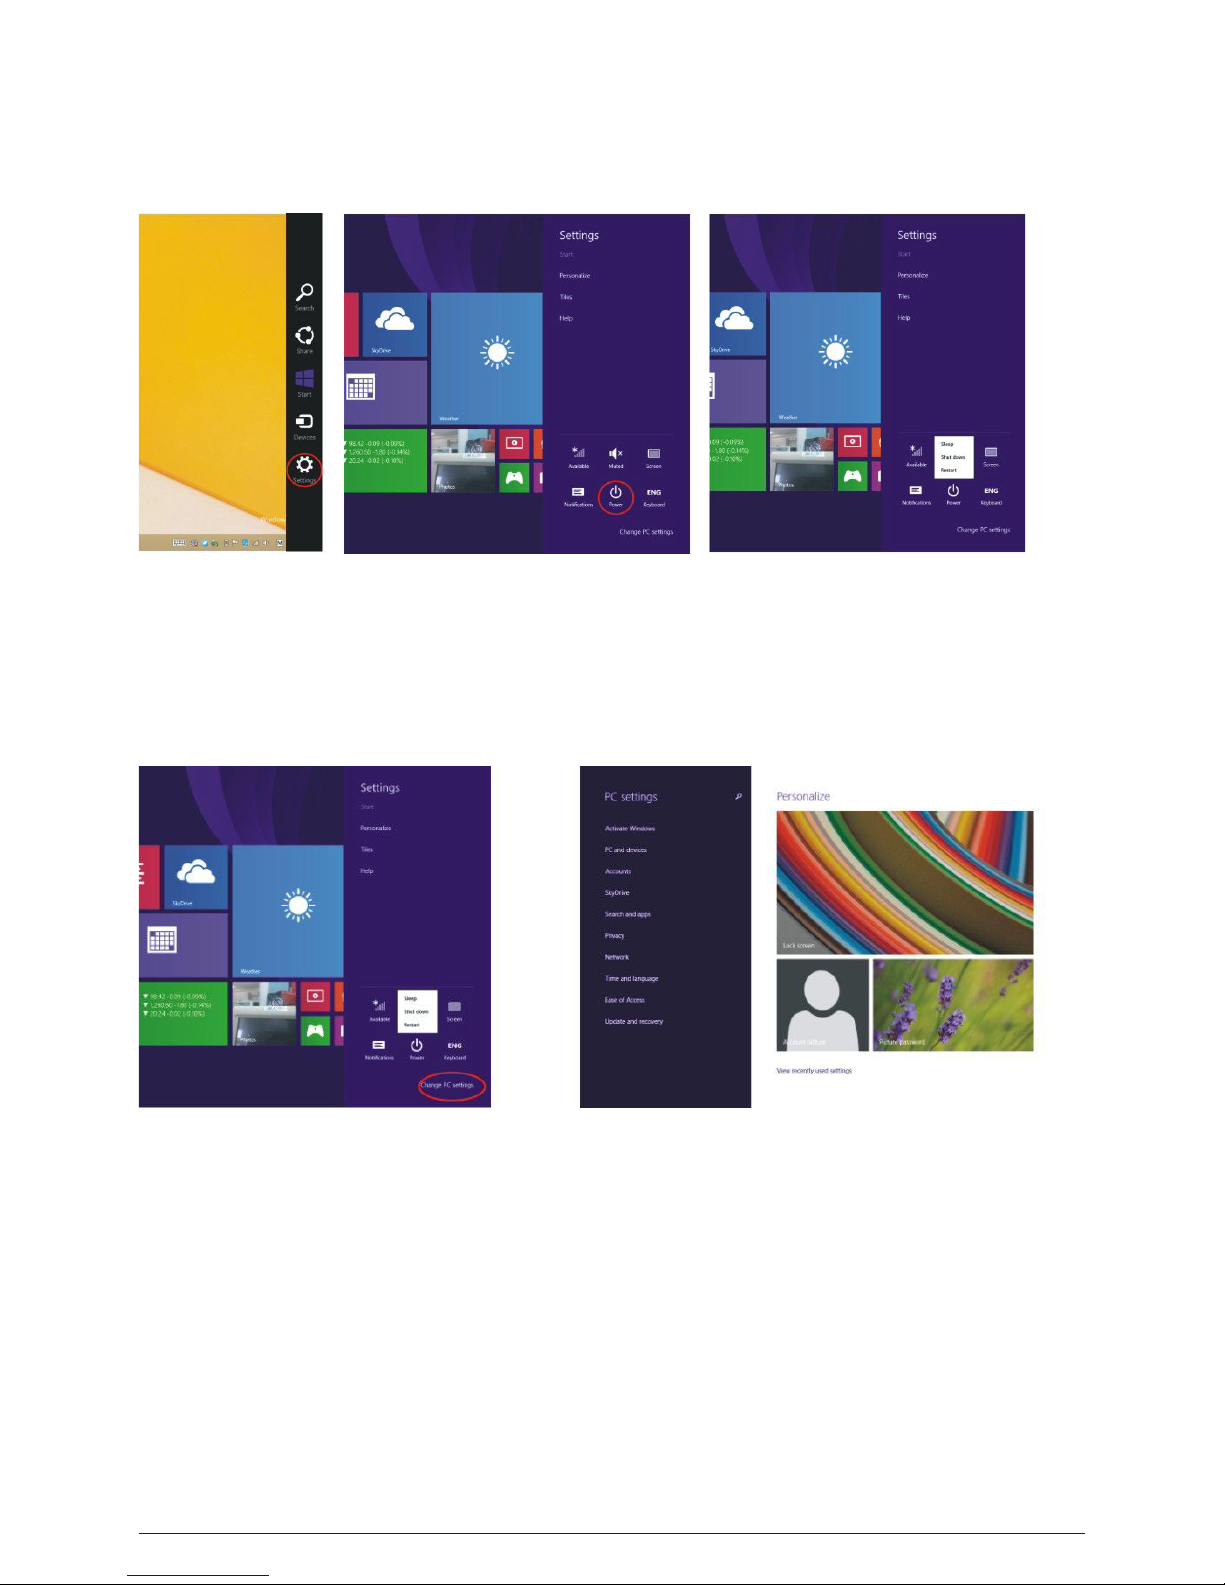
6. Basic Operations
a. Sleep, Shut Down and Restart
b. Security Management
User and password setup
Method for quick setup:
Click the “Settings” button from the “Charm” menu, and select “Change PC settings”.
Select “Accounts” on the left and click “Add an account” in “Other accounts” on the right side.

© 2014 Notion Ink Design Labs Pvt. Ltd.
15
Turn your device over so the back
plate is facing you and locate the edge
which is opposite to where the ports
are present.
1.
3.
5.
2.
4.
Locate the groove on that edge and
usingthetipofyourngers,pullgently
upwardtoremovetheap.Youwillnd
the slot where the 3G ultrastick needs
to be inserted.
Take the 3G Ultrastick modem that
you have purchased and insert your
3G enabled SIM card into it.
Now, insert the 3G Ultrastick with the
groove facing you into the slot on the
device as shown in the image.
Replacetheapandyou’regoodto
go!
7. Installing the 3G Ultrastick
If you have purchased a 3G Ultrastick, the following steps will show you how to install it on your Notion
Ink Cain
Groove

© 2014 Notion Ink Design Labs Pvt. Ltd.
16
8. Contact Us
For support questions, troubleshooting, or help with your device, please contact Customer Service.
online: www.notionink.com
e-mail: [email protected]
Disclaimer
All information contained in the documents shipped with the device and on Notion Ink’s website is
provided on an “as is” basis. Notion Ink expressly disclaims, to the fullest extent permitted by law, all
express, implied, statutory or other warranties, guarantees or representations, including but not limited
to,theimpliedwarrantiesofmerchantability,tnessforanyparticularpurpose,ornon-infringement.
Notion Ink does not guarantee the functionality or performance of any devices that were not sold by
Notion Ink or an authorized dealer of Notion Ink either directly or sold through any false representations
by employing such other indirect, illegal and false methods. Furthermore, Notion Ink reserves the right
to make changes, both in the hardware as well as the software components, of its products or to the
policies mentioned on Notion Ink’s website without any prior notice. Notion Ink shall not be responsible
for any kind of loss or damage including without limitation, indirect or consequential loss or damage, or
any loss or damage whatsoever arising from or in connection with, the use of our website or any
Notion Ink products unless the law expressly grants otherwise.
Table of contents


