OARTEC TRAINING MONITOR User manual

OARTEC TRAINING MONITOR
OPERATION MANUAL

OPERATING INSTRUCTIONS
ON/OFF
Press once to turn on or off.
Monitor will automatically turn off after 90 seconds to save battery life.
SETTING THE TIME
Turn the monitor ON.
Press the TIME button.
Time digits will flash for setting the desired time.
Program in the set Time using the arrow buttons.
When the desired workout Time is set, press the READY button.
Begin rowing and the set time will count down to zero.
At the end of the workout the Distance field will display the total distance rowed for
the programmed distance.
Just prior to beginning or while rowing, press the DIST button if wanting to view
Projected Distance (PROJ) in the Distance window.
Press DIST button again to return to Elapsed Distance mode.
SETTING THE DISTANCE
Turn the monitor ON.
Press the DIST button.
Distance Digits will flash for setting the desired Distance in meters.
Program in set Distance using arrow buttons.
When the desired workout Distance is set, press READY button.
Begin rowing and the distance will count down to zero.
At the end of the workout the Time field will display the total time taken for the
programmed distance.
Just prior to beginning or while rowing, press the TIME button if wanting to view
Projected Time in the Time window.
Press again to view Elapsed Time.

OPERATING INSTRUCTIONS
SPEED
Units of SPEED able to be displayed in the Speed field (center right) are
time/500m, m/s, km/hr, m/hr and Power in watts.
Press the SPEED button for the selection of the preferred unit of Speed.
To change the unit of Speed while rowing, simply press the SPEED button.
Start rowing to begin workout.
The speed value will be shown after the first stroke.
Speed will be calculated for every stroke and will be updated at the finish of each
stroke drive phase.

AV (Average data)
The default display does not illuminate the AV field when the monitor is turned ON.
To illuminate the AV window press the AV button and the AV window will display
the Average Speed for the currently selected Speed unit.
If wanting to display a different Average Speed unit, press the AV button until the
desired unit is shown. Eg Speed in time/500m and Average in Av km/hr
Start rowing to begin workout and an Average Speed value will be shown after the
first stroke.
Average Speed will be calculated from the beginning of the workout and will be
updated at the finish of each stroke drive phase.
STROKE COUNT
To view the STROKE COUNT for an elapsed or programmed workout press the AV
button and scroll through the units until COUNT appears on the display.

OPERATING INSTRUCTIONS
TECH (Technical data)
Technical functions that can be calculated and displayed in the TECH field are
DRIVE RATIO, AVERAGE SPM, STROKE LENGTH, DRAG, and HEART RATE.
Select the preferred TECH function by pressing the TECH button. If the HR
receiver is plugged in, it will override all other functions in this field.
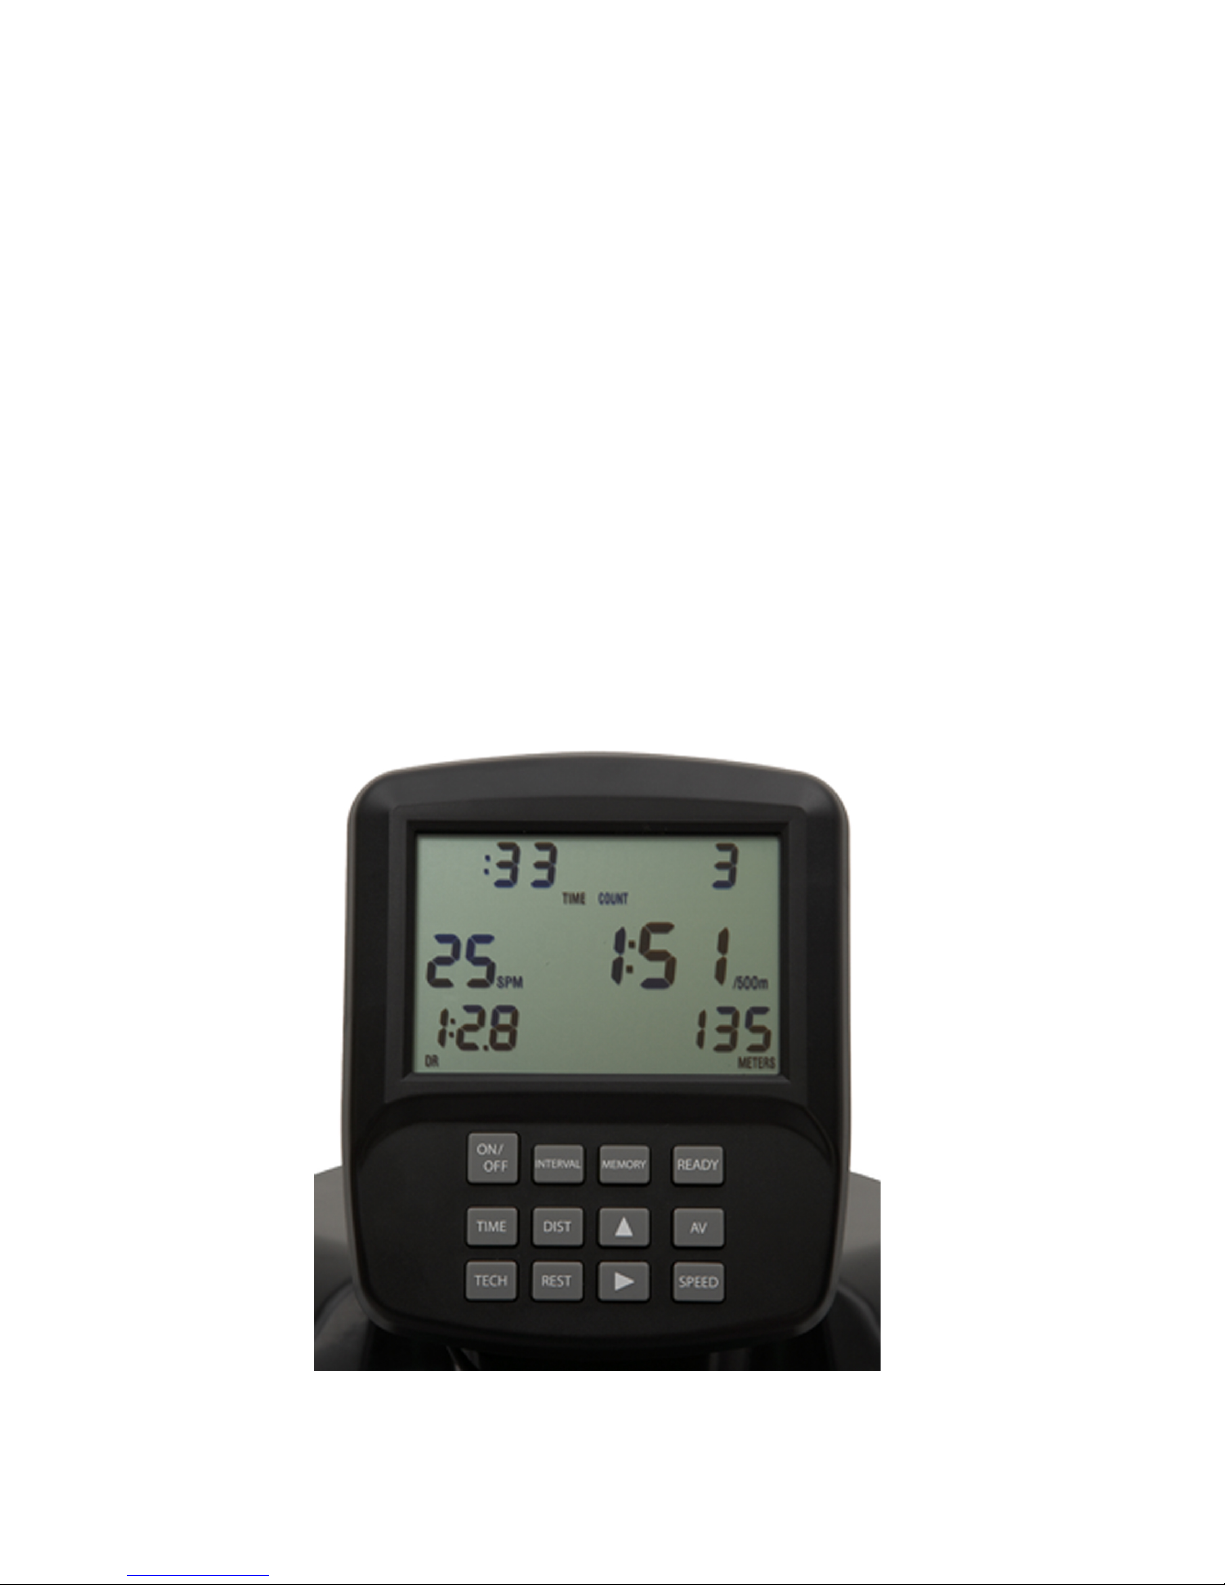
Drive Ratio (DR) is the ratio of the drive phase to the recovery phase, ie. if the
Drive time is 1 second and the recovery time is 2 seconds, the ratio displayed will
be 1:2.0
Average Strokes Per Minute (Av/SPM) is the average stroke rating since the
beginning of the workout.
Stroke Length (SL) is the arc length of the stroke ie the distance the handle travels
from catch to finish represented in a figure??
Drag is the deceleration factor of the flywheel at a given resistance setting. As the
resistance is changed, by moving the lever on the top of the flywheel housing, the
drag will automatically calculate the change in resistance and recalibrate the speed
values accordingly. The drag display allows the user to set the resistance to a
predetermined drag value to use when needing to be able to compare scores from
one simulator to another.
The Heart Rate (HR) display function allows the user to view their heart rate on the
monitor. To use this function, a standard Polar HR Chest Transmitter and a plug in
Polar receiver for rowing machines is required. These are available from Oartec or
a Polar supplier.
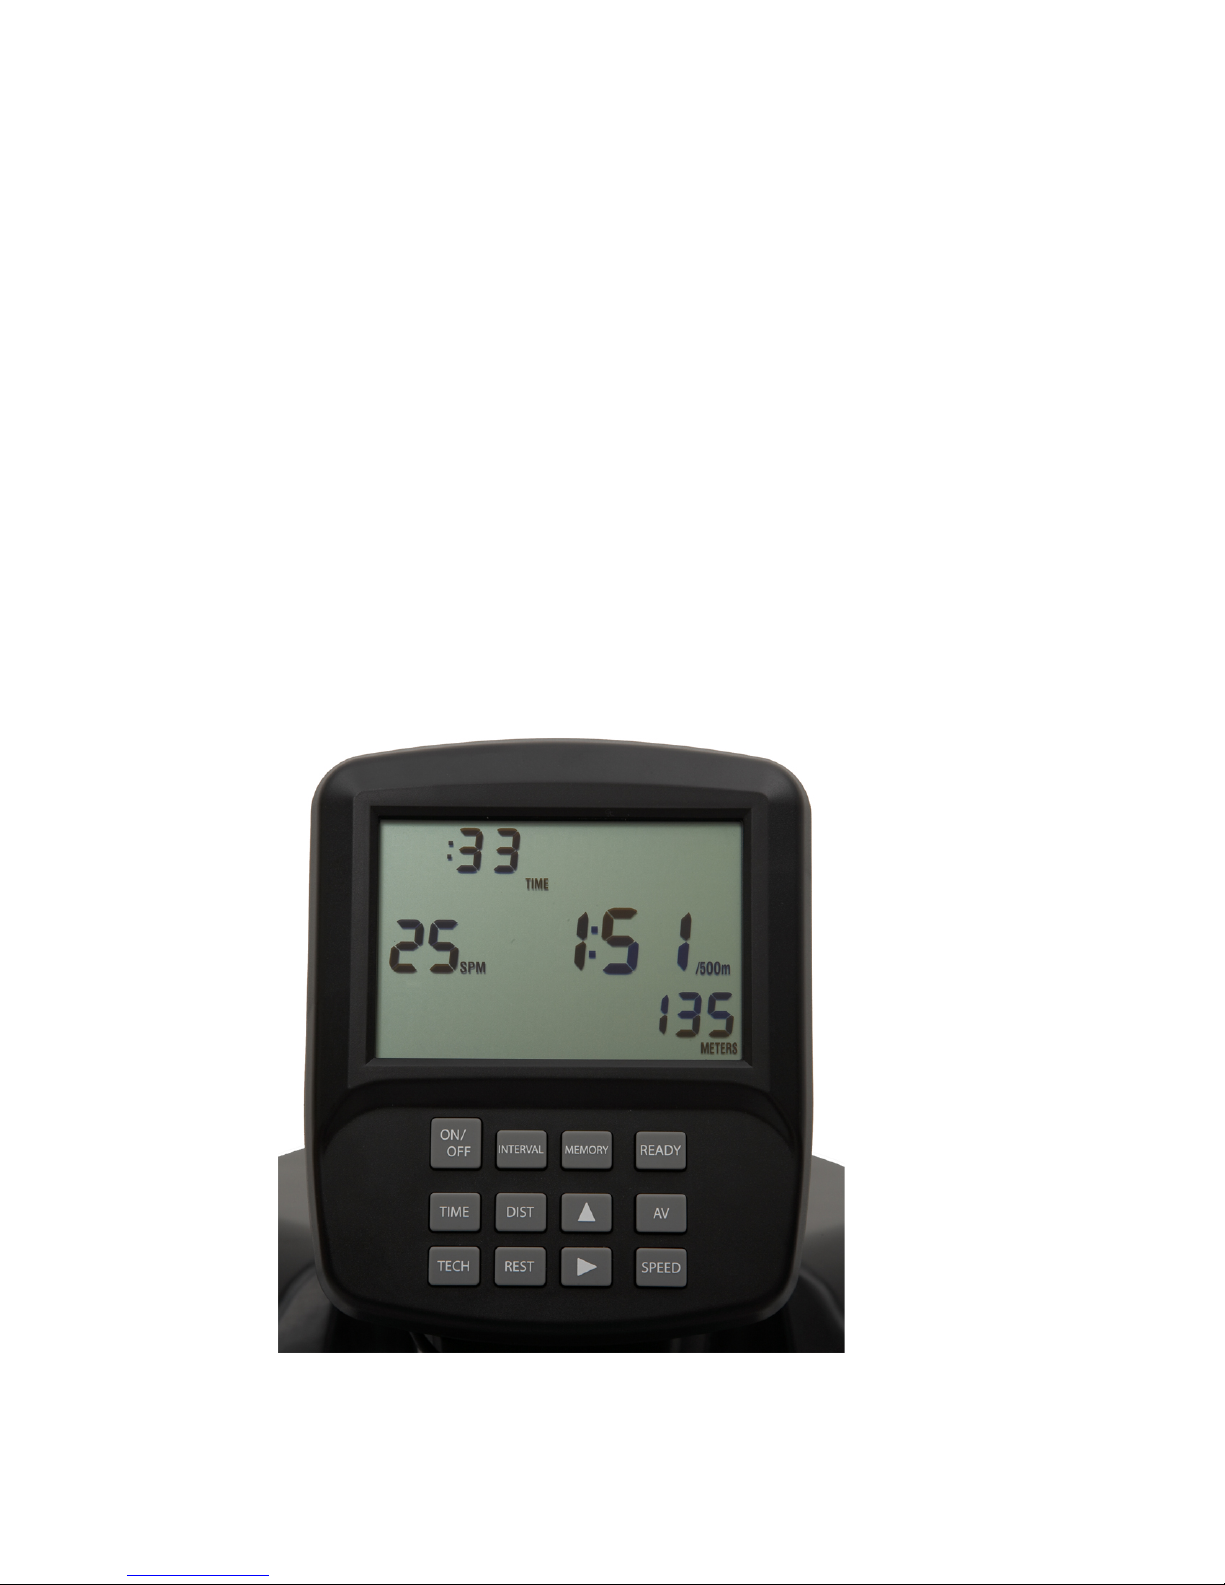
The default display does not illuminate the TECH field when the monitor is turned
ON. To display the TECH field press the TECH button.

OPERATING INSTRUCTIONS
MEMORY
When a set workout is completed the Total Distance or Total Time will be displayed
on a frozen screen.
During the workout, each split, set at a default of 500m intervals, is recorded for the
duration of the workout.
To access the data recorded for each split of a set workout, press the MEMORY
button to scroll through and view each of the recorded splits.
The first screen displayed will show the Total values for the set workout.
The INTERVAL digit value will read F to represent the Finished Totals. As the user
scrolls through the splits the interval field will display a number to indicate which
split of the workout the user is viewing.
The number assigned to each split is in order from beginning to last. For example,
the Interval 01 represents the first 500m (default) of the set workout.
Alternatively the user can scroll forward or back through the recorded data by using
the ARROW buttons.
To view the Total values for other units, press the AV button until the desired unit
value is shown.
Default unit for each interval will be Av Time/500m.
To view the other unit values for each interval, press the AV button to view: Av
Speed in Time/500m, M/S, KM/HR, M/HR, Power in WATTS, and Stroke Count in
COUNT
HEART RATE MONITORING
The Oartec workout monitor uses the Polar heart rate chest belt and receiver to
display the heart rate in the Technical field on the screen.
To monitor heart rate during a workout plug the Polar receiver into the port 2
located next to the flywheel sensor cable.

PORTS
AT the back of the monitor there are four ports for specific cable connection.
The first small port is for the flywheel sensor cable (labelled Sensor Port)
The second small port is for the Polar Heart Rate receiver.(labeled HR Port)
The USB port is for connecting the monitor to a computer.
The Network port is for connecting to other Oartec monitors.
BATTERIES
The Oartec Workout Monitor takes 4 AA standard batteries and access to the
battery compartment is by sliding open the battery cover as shown.
Other manuals for TRAINING MONITOR
1
Table of contents