Octava HDHC48MX-V1.3 User manual

Description Specifications
Model HDHC48MX-V1.3
HDMI Inputs 4
HDMI Outputs * 2
RJ-45 CAT 5/6 output * 8
* Outputs A and B are user configurable as either 1) HDMI out or 2) CAT 5/6
Ethernet cable output
Version 1.3
HDCP Yes
IN/Out Connectors 19 pin HDMI female type-A
RS-232 control port 1
Display Selection Remote, Manual, Smart Scan,RS-232
Video Resolution 480 P, 720 I/P, 1080 I/P
Video Data Rate 6.75 Gbps
Deep Color Support Yes
Vertical Frequency Scan Rate 24 / 50 / 60 Hz
Dimension 16.85 x 11.98 x 1.67 inch
(427.9x 304.2 x 42.3 mm)
DC adapter (included) 9VDC, 2.6A
Rackmount capable 1RU, Rack mounts included
Remote control (IR) Infrared, Discrete code
For Questions and support:
URL: www.octavainc.com
Copyright© 2010 Octava Inc. All rights reserved.
HDMI, the HDMI logo and High-Definition Multimedia Interface are trademarks or registered
trademarks of HDMI Licensing LL.C
All trademarks are the sole property of their respective companies
Rev.A
V 1.3
Deep Color
Installation Guide

Table of contents
1. Application Diagram
2. Features
3. Configuring Smart ScanTM
4. Installation
5. Connecting Using CAT 5/6 outputs
6. Front Panel Control
7. Remote Control Guide
8. EDID Configuration
9. Changing EDID mode
10. RS232 Controls
11. Configuring Outputs for HDMI or RJ-45
12. Source Display Switching
13. Disabling / Enabling IR Remote Control Receiver
14. I.R. Remote Control over CAT 5/6
1

Application Diagram
Features:
Watch ANY 4 HD programs simultaneously on 8 Displays!
V1.3, 1080P
4 HDMI inputs
8 CAT 5/6 Outputs. 2 configurable to HDMI
Matrix allows 65,356 viewing combinations
1 RU mountable
RS-232 control
Works with HDMI or DVI-D, HDCP-enabled HDTV
Supports high resolution video 480P, 720I/P, 1080I/P
Clear EYETM design optimizes HDMI signal transmission
Easy to switch 4 HDMI or DVI-D sources to 8 displays.
Remote Control (IR) included. Discrete Code allows direct channel
control.
External IR Jack for extension
2

Configuring Smart ScanTM:
The Smart Scan is disabled before shipment. It is recommended to
leave Smart Scan disabled in most applications.
To enable the Smart ScanTM
1) Set the Configuration switch #1 to the up position.
2) Re-power the matrix.
To disable Smart ScanTM
1) Set the Configuration switch #1 to the down position.
2) Re-power the matrix.
SCAN=OFF
SCAN=ON
3

I.R. Remote Control over CAT 5/6:
IR remote signals can be carried over the CAT 5/6 cables to control the
1) matrix and 2) video sources.
1) Connect the IR receiver cable to the CAT 5/6 HDMI receiver as
shown above
2) Connect the IR transmitter cables to the matrix IR TX 1-4 as
shown above.
3) Place and point a IR Transmitter to each video source as shown
above.
Note: No IR transmitter cable needed to control the 4x8 Matrix. The
4x8 Matrix IR control signals are carried directly over CAT 5/6
cables and will control the matrix internally.
Front View
Back View
Switch
Number 1 2 3 4
Name Smart Scan
Switch EDID
switch EDID
switch Programming/LOCK
switch
Function Enable/disable
Smart Scan EDID
MODE
select
EDID
MODE
select
Programming/LOCK.
Down = Smart
Scan Off
Up= Smart
Scan ON
Down= EDID
Programming mode
Up= Locked
Dis
p
la
y
LED Indicators
Manual Select Infrared
Jack
Infrared Detector
DC Power
Input
HDMI Output
(To TV)
CAT5/6 output
(To RECEIVER)
RS232
EDID & Smart Scan
Switch
IR
Transmitter
HDMI Input
4
15

Installation:
1) Verify that the Configuration Switch is in the factory default mode.
2) Connect the DC power adapter
3) Configure output A and B to either 1) HDMI OR 2) RJ-45 CAT 5/6 output.
The default from factory is RJ-45 CAT5/6 mode.
To configure each output, please follow these instructions.
Output Mode Action Indicator
RJ-45 CAT 5/6
mode Press the front panel button for the desired
output for ~ 10 seconds. The LED will
indicate a “c” for Cat 5/6 mode.
HDMI Mode Press the front panel button for the desired
output for ~ 10 seconds. The LED will
indicate a “0” for HDMI mode.
quick configure
To quickly change
ALL outputs to
CAT 5/6 or HDMI
Press and HOLD the front panel A and B
button for 10 seconds.
-The LED will indicate a “c” for Cat 5/6
mode.
-The LED will indicate a “0” for HDMI mode.
4) Connect the Monitors.
HDMI-If you are connecting HDTV with HDMI, simply connect the HDMI cable
CAT5/6 -If you are connecting using the RJ-45 CAT 5/6 output, you must use
a HDMI-CAT 5/6 Receiver. (see page 5 “Connecting Using CAT 5/6 outputs”)
5) Connect the HDMI sources to the HDMI INPUTS
6) Turn On your HDTV and at least 1 HD source
Configuring Outputs for HDMI or RJ-45 :
Disabling /Enabling Front Panel IR Remote Receiver:
To disable the front panel IR remote receiver-insert the plastic plug into the
IR jack as shown.
Output ASCII Command Mode
A <STX>911<ETX>
HDMI mode
A <STX>912<ETX>
RJ-45 CAT 5/6 mode
B <STX>921<ETX>
HDMI mode
B <STX>922<ETX>
RJ-45 CAT 5/6 mode
14
Front panel
IR receiver -disabled Front panel
IR receiver -enabled
5

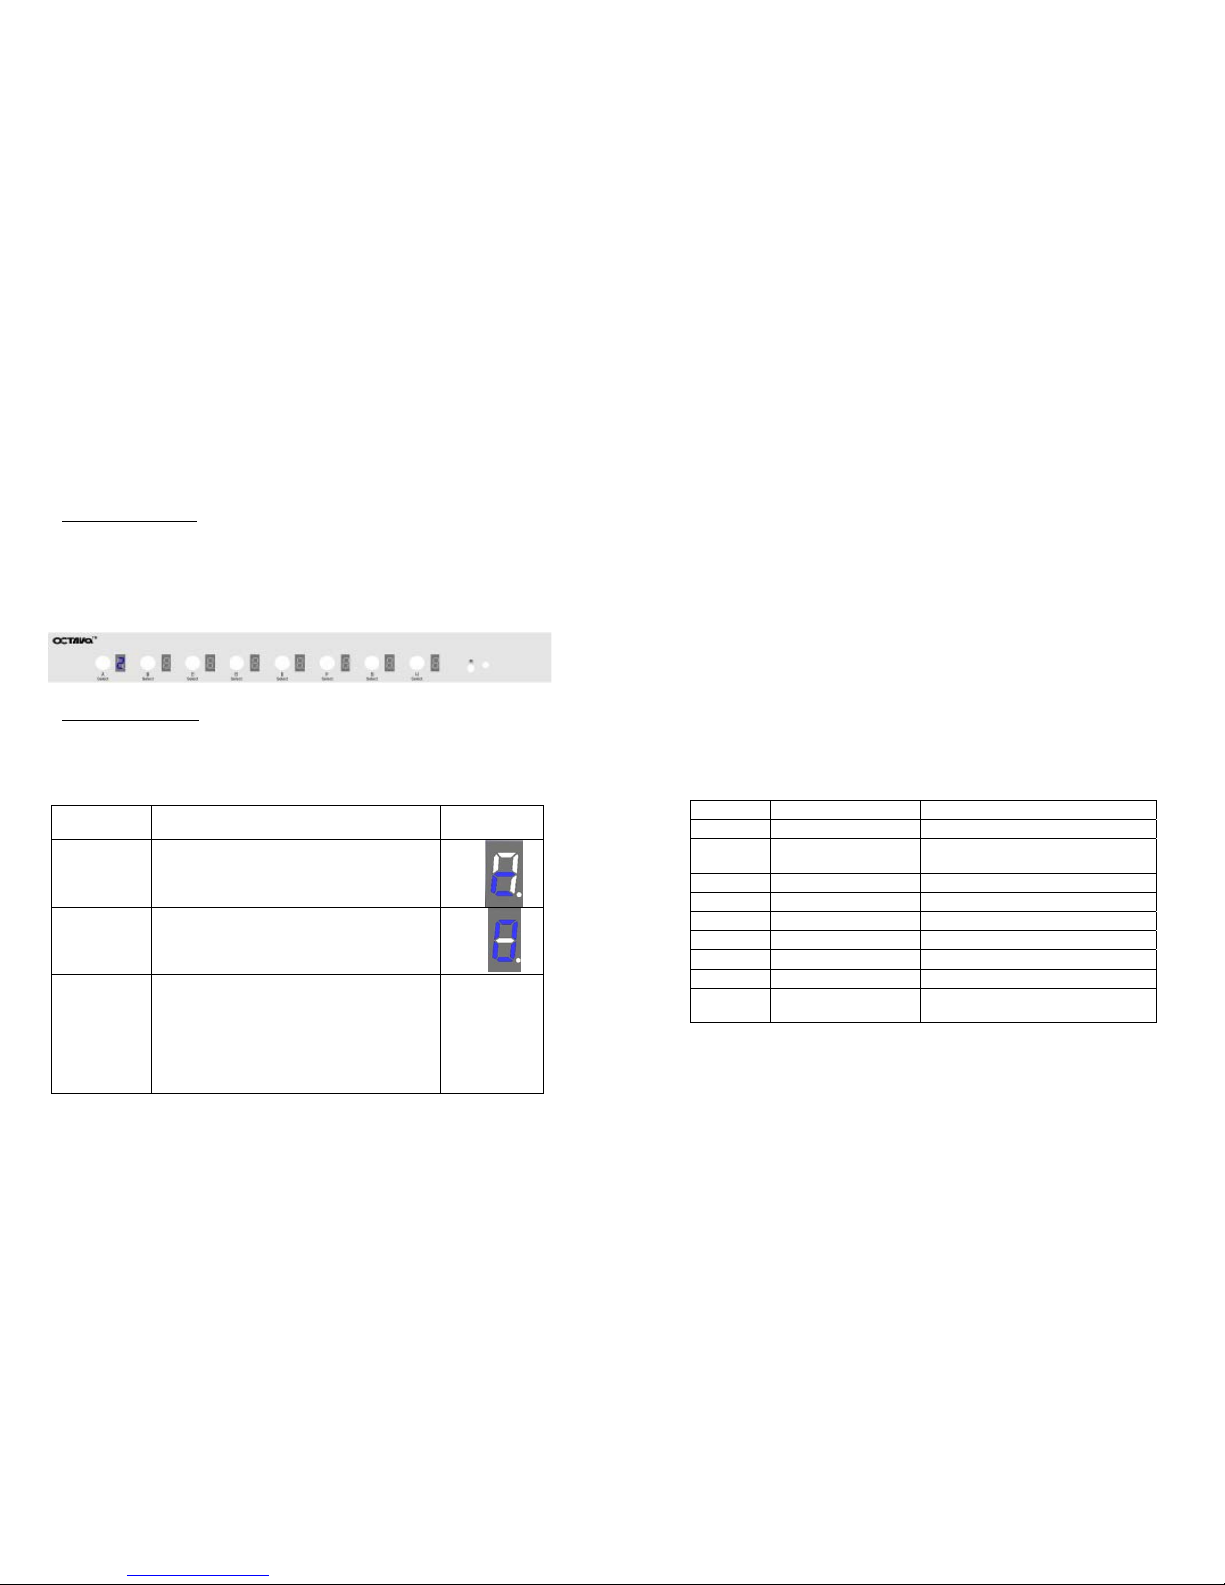
Source Display Switching:
Output-Input ASCII Command Function Selection
A-1 <STX>211<ETX> Select OUT A to Input port 1
A-2 <STX>212<ETX> Select OUT A to Input port 2
A-3 <STX>213<ETX> Select OUT A to Input port 3
A-4 <STX>214<ETX> Select OUT A to Input port 4
B-1 <STX>221<ETX> Select OUT B to Input port 1
B-2 <STX>222<ETX> Select OUT B to Input port 2
B-3 <STX>223<ETX> Select OUT B to Input port 3
B-4 <STX>224<ETX> Select OUT B to Input port 4
C-1 <STX>231<ETX> Select OUT C to Input port 1
C-2 <STX>232<ETX> Select OUT C to Input port 2
C-3 <STX>233<ETX> Select OUT C to Input port 3
C-4 <STX>234<ETX> Select OUT C to Input port 4
D-1 <STX>241<ETX> Select OUT D to Input port 1
D-2 <STX>242<ETX> Select OUT D to Input port 2
D-3 <STX>243<ETX> Select OUT D to Input port 3
D-4 <STX>244<ETX> Select OUT D to Input port 4
E-1 <STX>251<ETX> Select OUT E to Input port 1
E-2 <STX>252<ETX> Select OUT E to Input port 2
E-3 <STX>253<ETX> Select OUT E to Input port 3
E-4 <STX>254<ETX> Select OUT E to Input port 4
F-1 <STX>261<ETX> Select OUT F to Input port 1
F-2 <STX>262<ETX> Select OUT F to Input port 2
F-3 <STX>263<ETX> Select OUT F to Input port 3
F-4 <STX>264<ETX> Select OUT F to Input port 4
G-4 <STX>271<ETX> Select OUT G to Input port 1
G-4 <STX>272<ETX> Select OUT G to Input port 2
G-4 <STX>273<ETX> Select OUT G to Input port 3
G-4 <STX>274<ETX> Select OUT G to Input port 4
H-4 <STX>281<ETX> Select OUT H to Input port 1
H-4 <STX>282<ETX> Select OUT H to Input port 2
H-4 <STX>283<ETX> Select OUT H to Input port 3
H-4 <STX>284<ETX> Select OUT H to Input port 4
Note:
<STX> denotes Start of Text (0x2)
<ETX> denotes End of Text (0x3)
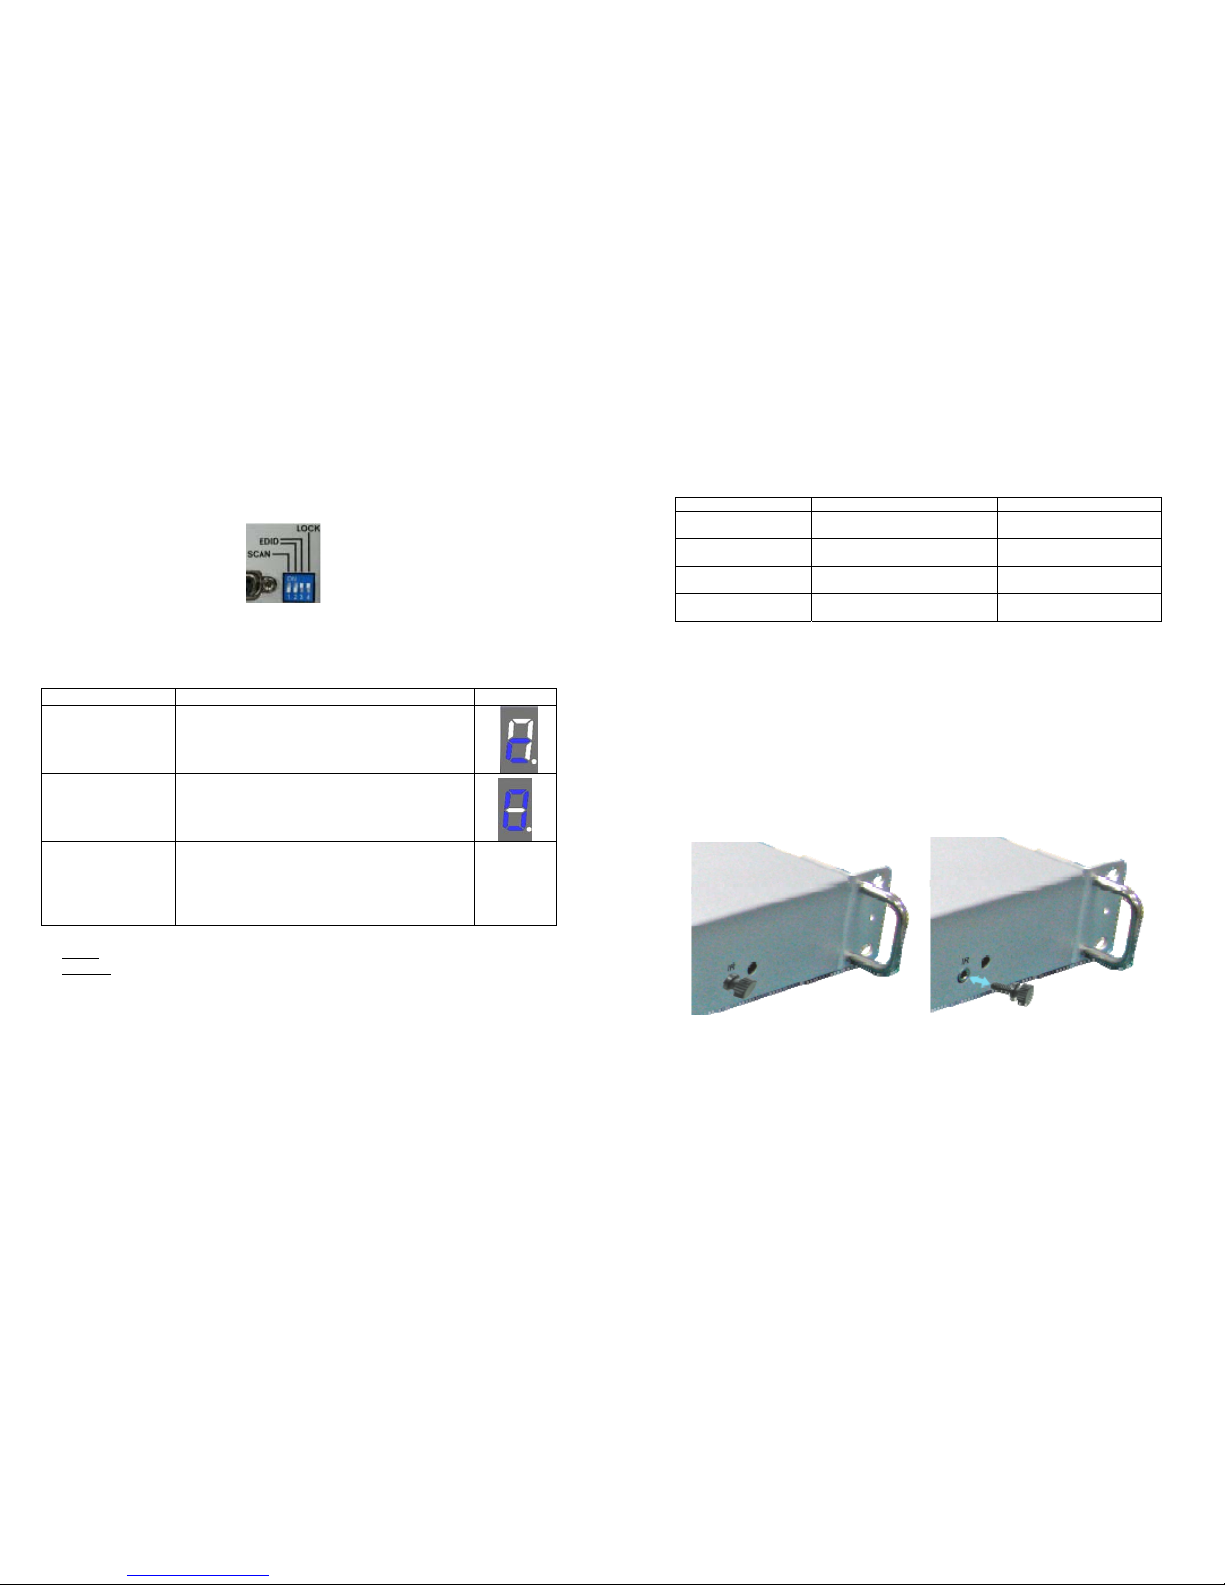
Connecting Using CAT 5/6 outputs:
1) Configure the output to CAT 5/6 output ( see page 7)
2) Connect CAT5e -1 of the HDMI Matrix and Receiver with CAT5e/6
cable.
3) Connect CAT5e -2 of the HDMI Matrix and Receiver with CAT5e/6
cable.
4) Connect the I.R. Receiver cable (optional) to the I.R. of HDMI
Ethernet Receiver unit.
5) Connect the I.R. Transmitter cable (optional) to the I.R. TX of HDMI
Matrix.
6) Connect the DC power adapter.
Ethernet CAT 6 cable is recommended for 1080P and best
performance.
HDMI Matrix CAT 5/6 output
-Connect I.R. Transmitter cable
(optional)
-CAT5e-1 must be connected to CAT5e-1 of
the Receiver unit.
-CAT5e-2 must be connected to CAT5e-2 of
the Receiver unit.
Receiver
-CAT5e-1 must be connected to
CAT5e-1 of the HDMI Matrix.
--CAT5e-2 must be connected to
CAT5e-2 of the HDMI Matrix.
-Connect to HDMI Display
-Connect I.R. Receiver cable (optional)
13 6

Front Panel Control:
Source Selection:
You may use the front panel buttons to select the sources connected to each
display.
For example,
To Set display A to Input 2. Simply press and release the A display button until
the LED shows 2.
Output Configure:
Configure outputs A and B to either 1) HDMI OR 2) RJ-45 CAT 5/6 output.
Each output is individually configurable.
To configure output, please follow these instructions.
Note : The default from factory is RJ-45 CAT5/6 mode
Output
Mode Action Indicator
RJ-45 CAT
5/6 mode Press the front panel button for the
desired output for ~ 10 seconds. The LED
will indicate a “c” for Cat 5/6 mode.
HDMI Mode Press the front panel button for the
desired output for ~ 10 seconds. The LED
will indicate a “0” for HDMI mode.
quick
configure
To quickly
change ALL
outputs to.
Press and HOLD the front panel A and B
button for 10 seconds.
-The LED will indicate a “c” for Cat 5/6
mode.
-The LED will indicate a “0” for HDMI
mode.
RS232 Controls:
The Octava 4x8 HDMI - CAT 5/6 Matrix Switch can be easily integrated
with 3rd Party control systems via RS232 control. The following shows
the control protocol for controlling the HDHC48MX.
1. Baud rate=9600
2. Data bits=8
3. Parity check=None
4. Stop bits=1
5. Flow Control=None
Controlling the HDHC48MX via RS232 can be done by send a series
of commands per the RS232 Command Table
Protocol:
<STX>Command to Execute<ETX>
A-General
Input ASCII Function Selection
1 <STX>001<ETX> Port Status
2 <STX>2XX<ETX> Source display switching
( see page 13)
3 <STX>003<ETX> Turn ON LED
4 <STX>004<ETX> Turn OFF LED
5 <STX>005<ETX> Turn ON Power
6 <STX>006<ETX> Turn OFF Power
7 <STX>007<ETX> Turn ON Smart Scan
8 <STX>008<ETX> Turn OFF Smart Scan
9. <STX>9XX<ETX> Output(HDMI/Ethernet) Configure
( see page 14)
Note:
<STX> denotes Start of Text (0x2)
<ETX> denotes End of Text (0x3)
12
7

Pressing +/-
Increments/Decrements
to the next available
Source.
Remote Control Guide:
Using the Remote:
Use the remote control to select the Display that you wish to control
followed by the Input (DVD, Settop) that you wish to watch.
For example:
-Pressing Display B, “2” will switch Input 2 to HDMI Out B.
Here are some more examples:
7 Press the A button
on the front panel.
LED will flash”0” for
~2 min while
programming.
LED will flash
“0"
while
programming.
8 Wait.
Programming is
complete when LED
indicates “1”
9 Set to LOCK
Position
10 Set output to either
HDMI or CAT5/6
mode
See page 7 Refer to Page 7 “Output
configure”
11 Connect all video
sources and
displays and turn
ON
.
12 Re-power the
Matrix.
Output Selection (Step 1) Input Selection
(Step2) Result
DISPLAY A “2” Display A switches to Input 2
DISPLAY B “1” Display B switches to Input 1
DISPLAY C “2” Display C switches to Input 2
DISPLAY D “1” Display D switches to Input 1
DISPLAY A “+” Display A increments to next
available Input
DISPLAY B “-” Display B decrements to next
available Input
DISPLAY C “+” Display C increments to next
available Input
DISPLAY D “-” Display D decrements to next
available Input
Pressing ON/OFF
Turns On/Off the
HDMI switch
Pressing LED
Turns on/off the
Blue LED light.
Pressing 1-4
Selects the
corresponding
numbered source.
Pressing A-H
Selects the Display
to be controlled.
8
11

EDID Configuration:
The Matrix can be configured to 3 EDID settings.
It is recommended to keep the EDID in the default factory mode 1.
Changing EDID mode:
It is recommended to keep the EDID in the factory default MODE1. If
necessary, you may set to different EDID mode by following these
instructions.
Step Action Notes
1 Set the Smart Scan
switch to OFF
2 Disconnect all sources
and display from Matrix
3 Set the Progam/Lock
switch #4 to “program
mode” ( down)
4 Set the EDID to the
mode desired.(MODE 2
shown.)
See page 9 for
other EDID
modes
5 Reset Power to the
Matrix by disconnecting
the power and
reconnecting power.
.
6 The LED will now
indicate the EDID Mode
that you will
program.(mode 2 shown)
flashed
Mode Video Audio Description Switch settings
1 480I,720I/P,
1080I/P PCM,
Bitstream
(Dolby
Digital, DTS)
Default Mode
2 480I, 720I/P,
1080I/P.
Reads EDID
of all
monitors and
sets to :
Video=Min
Resolution of
displays
connected.
PCM, Bitstream
(Dolby Digital,
Dolby Tru
HD,DTS,DTS
Master Audio)
Read EDID
from Monitor
and AV receiver
connected and
set AUDIO to
Maximum
capability.
Parsing/
Read Mode
3 480I,720I/P,
1080I 2 CH PCM Basic Mode
9 10
Table of contents