manuals.online logo
Brands
  1. Home
  2. •
  3. Brands
  4. •
  5. Oldsmobile
  6. •
  7. Automobile
  8. •
  9. Oldsmobile Cutlass 1978 Series User manual

Oldsmobile Cutlass 1978 Series User manual

This manual suits for next models

1

Other Oldsmobile Automobile manuals

Oldsmobile 1994 Achieva User manual

Oldsmobile

Oldsmobile 1994 Achieva User manual

Oldsmobile Cutlass Supreme 1993 User manual

Oldsmobile

Oldsmobile Cutlass Supreme 1993 User manual

Oldsmobile 2000 Alero User manual

Oldsmobile

Oldsmobile 2000 Alero User manual

Oldsmobile 1996 Achieva User manual

Oldsmobile

Oldsmobile 1996 Achieva User manual

Oldsmobile 1998 Aurora User manual

Oldsmobile

Oldsmobile 1998 Aurora User manual

Oldsmobile SILHOUETTE GTK 2004 Assembly instructions

Oldsmobile

Oldsmobile SILHOUETTE GTK 2004 Assembly instructions

Oldsmobile bravada 1996 User manual

Oldsmobile

Oldsmobile bravada 1996 User manual

Oldsmobile 1996 Aurora User manual

Oldsmobile

Oldsmobile 1996 Aurora User manual

Oldsmobile 1993 Bravada User manual

Oldsmobile

Oldsmobile 1993 Bravada User manual

Oldsmobile AURORA 2003 User manual

Oldsmobile

Oldsmobile AURORA 2003 User manual

Oldsmobile 1997 Aurora User manual

Oldsmobile

Oldsmobile 1997 Aurora User manual

Oldsmobile 2003 Alero User manual

Oldsmobile

Oldsmobile 2003 Alero User manual

Oldsmobile 1999 Cutlass User manual

Oldsmobile

Oldsmobile 1999 Cutlass User manual

Oldsmobile Bravada 1997 User manual

Oldsmobile

Oldsmobile Bravada 1997 User manual

Oldsmobile 1997 88 User manual

Oldsmobile

Oldsmobile 1997 88 User manual

Oldsmobile 1995 Achieva User manual

Oldsmobile

Oldsmobile 1995 Achieva User manual

Oldsmobile 1998 Cutlass User manual

Oldsmobile

Oldsmobile 1998 Cutlass User manual

Oldsmobile Cutlass Supreme 1997 User manual

Oldsmobile

Oldsmobile Cutlass Supreme 1997 User manual

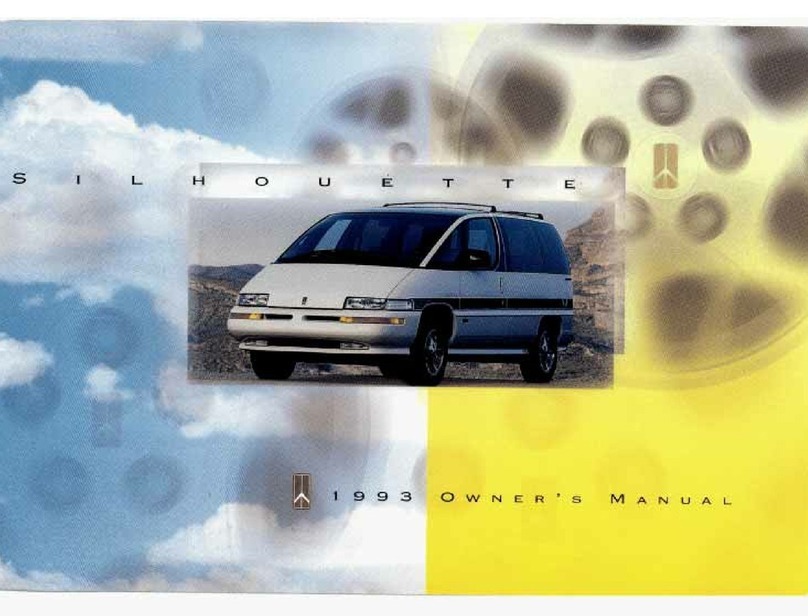
Oldsmobile 1996 Silhouette User manual

Oldsmobile

Oldsmobile 1996 Silhouette User manual

Oldsmobile 1999 88 User manual

Oldsmobile

Oldsmobile 1999 88 User manual

Oldsmobile 1993 Achieva User manual

Oldsmobile

Oldsmobile 1993 Achieva User manual

Oldsmobile 1994 88 User manual

Oldsmobile

Oldsmobile 1994 88 User manual

Oldsmobile 1996 88 User manual

Oldsmobile

Oldsmobile 1996 88 User manual

Oldsmobile 1999 Aurora User manual

Oldsmobile

Oldsmobile 1999 Aurora User manual

Popular Automobile manuals by other brands

Jeep Compass user guide

Jeep

Jeep Compass user guide

Mitsubishi 3000GT Service manual

Mitsubishi

Mitsubishi 3000GT Service manual

Chevrolet Traverse 2012 owner's manual

Chevrolet

Chevrolet Traverse 2012 owner's manual

Cadillac 2005 CTS Personalization guide

Cadillac

Cadillac 2005 CTS Personalization guide

Toyota AVALON HYBRID Warranty & maintenance guide

Toyota

Toyota AVALON HYBRID Warranty & maintenance guide

Toyota HILUX Owner's manual supplement

Toyota

Toyota HILUX Owner's manual supplement

Lincoln 2015 NAVIGATOR owner's manual

Lincoln

Lincoln 2015 NAVIGATOR owner's manual

Toyota Corolla 2002 owner's manual

Toyota

Toyota Corolla 2002 owner's manual

Toyota 2002 MR2 Spyder owner's manual

Toyota

Toyota 2002 MR2 Spyder owner's manual

Toyota Camry Hybrid 2012 Warranty & maintenance guide

Toyota

Toyota Camry Hybrid 2012 Warranty & maintenance guide

Mazda 323 Protege owner's manual

Mazda

Mazda 323 Protege owner's manual

Subaru 2014 Forester Quick manual

Subaru

Subaru 2014 Forester Quick manual

Toyota Avensis ZZT251 2003 Service and repair manual

Toyota

Toyota Avensis ZZT251 2003 Service and repair manual

Mercedes-Benz 2013 SL Operator's manual

Mercedes-Benz

Mercedes-Benz 2013 SL Operator's manual

Chrysler 300 2013 Product highlights

Chrysler

Chrysler 300 2013 Product highlights

Toyota Corolla 2008 owner's manual

Toyota

Toyota Corolla 2008 owner's manual

Volkswagen california d3519cdb02a9dab29cd827771f7c11a

Volkswagen

Volkswagen california d3519cdb02a9dab29cd827771f7c11a

Dodge 2006 Dakota owner's manual

Dodge

Dodge 2006 Dakota owner's manual

manuals.online logo
manuals.online logoBrands
  • About & Mission
  • Contact us
  • Privacy Policy
  • Terms and Conditions

Copyright 2025 Manuals.Online. All Rights Reserved.

www.PlandeGraissage.org
A
WORD
TO
OLDSMOBILE
OWNERS
manual has been prepared
to
a<XIuaint
you with the operation and maintenance
of
your
8 Oldsmobile, and
to
provide important safety information.
It
is
supplemented
by
two
convenient folders. These folders
give
you maintenance and warranty information.
We
urge
you
to
read these publications carefully. Follow the recommendations
to
help assure
the
most
enjoyable and troublefree operation
of
your car.
rPl<,tiiTIO this manual, you will notice that many specifications are given in
both
metric
CUl!ilO.maryunits.
precise accuracy
is
not needed, some conversions have been
l:lVe:nl1IUrrlb~lr$l()t
your handy use.
~lrneli~(I¥"i~,.~e]1ielnbler
that your Oldsmobile dealer knows your car best. Your
satisfaction. Return
to
your dealer for Guardian
repairs your car may need.
your needs, Oldsmobile maintains a number
of
Zone Offices
you have a problem that has not been handled
to
your satisfaction,
Section Six
of
this manual under the heading ''Owner Assistance".
if()lr.Clll.i:'I()siIlg an Oldsmobile product,
and
want
to
assure you
of
our continuing
"'''''''>lL'''''
and satisfaction.
OLDSMOBILE
DIVISION
General
Motors
Corporation
Lansing,
Michigan
48921
FOR
CONTINUING
SATISFACTION, KEEP
YOUR
GM
CAR ALLGM.
GENERAL
MOTORS
PARTS
ARE
IDEN-
TIFIED
BY
ONE OF
THESE TRADEMARKS:
,...
V
DelCO
"NOTE
TO
CANADIAN OWNERS:
If
preferred, a French Owner's Manual can
be obtained from either your Dealer or
by
writing to General Motors
of
Canada Limited,
Technical Publications Department, Oshawa,
Ontario L1J 5Z6."
Aux propriataires canadians
On
peut se procurer
un
exemplaira de ce
Guide
en
fran9ais aupres du concessionnaire
ou
du service des
publications
technique
General Motors
of
Canada Limited, Oshawa,
Ontario L1J 5Z6.
www.PlandeGraissage.org
1978
OLDSMOBILE
OWNER'S
MANUAL
This manual should be considered a permanent
part
of
this car.
It
should stay with the car when
sold,
to
provide the next owner with important
safety,
op~rating
and maintenance information.
All
information, illustrations and specifications
contained in this manual are based on the latest
product information available at the time
of
printing. The right
is
reserved to make changes at
any time without notice.
For
cars
sold in
Canada,
substitute the name
General Motors
of
Canada
Limited whenever
the name Oldsmobile Division
appear.;
in this
manual.
Applicable
to
California Sales
Only-
This car
as
delivered
by
GM
Oldsmobile Division has a
bumper energy absorption system meeting
California Vehicle Code Section 34715.
TABLE
OF
CONTENTS
Section
Page
II
II
E
II
E
E
II
BEFORE
DRIVING
YOUR
OLDSMOBILE
STARTING
AND
OPERATING
A-STEERING
COLUMN
CONTROLS
B-FLOOR
CONTROLS
C-INSTRUMENT
PANEL
D-OTHER
CONTROLS
AND
FEATURES
E-STATION
WAGON
FEATURES
IN
CASE
0F
EMERGENCY
APPEARANCE
CARE
SERVICE
AND
MAINTENANCE
SPECIFICATIONS,
OWNER
ASSISTANCE
&
INDEX
GAS
STATION
INFORMATION
--
-
--
-
-
-
8"4'+11
www.PlandeGraissage.org
BEFORE
DRIVING
YOUR
OLDSMOBILE
DRIVERDAllY
CHECKLIST
BEFORE.ENTERING CAR:
1. See that windows, mirrors and lights are
clean.
2.
Check whether any tire
is
low or flat.
(You may need to check with a
gage
to
tell
if
radial tires
are
properly inflated.)
3. Check that all lights
work
.
4. Look for fluid leaks.
5.
Check area behind car
if
about
to
back
up.
BEFORE·DRIVING OFF:
1. Lock all doors.
2. Adjust seat and head restraints.
3. Adjust inside and outside mirrors.
4. Fasten seat belts;
2
5. Check that warning lights work as key
is
turned
to
"RUN" or "START".
6. Check all gages.
7. Release parking brake and
see
that
"BRAKE" light turns off.
8.
Be
sure you know your car and its
equipment and how
to
use
it safely.
GUARD
AGAINST
THEFT
For tips on how to protect your car and its
contents,
see
the "Starting and Operating"
section
of
this manual.
KEYS
Two different keys are provided for the
locks
on
your car. The key code
is
stamped
on the "knock-out" plug in the key head.
• Key with square head (letter
"J")-for
ignition switch only.
• Key with oval head (letter
"K")
-for all
other locks.
For
car
security:
• Record the key code numbers; then
knock plugs out
of
keys.
• Keep the key codes in a safe place such
as
your wallet,NOT
IN
THE CAR.
If
the original keys are lost, duplicates
can
be
made
using
the key codes. Contact any
GM
dealer
ora
locksmith.
If
you park in an attended lot,separate and
leave yoursquare-head ignition key only.
Lock your glove box and take the
oval-head
key
with you. This will help
prevent any illegal entry into the glove box
and trunk compartment.
www.PlandeGraissage.org
REAR
SEAT
FILLER
PANEL
CAUTION:
The filler panel between
the rear seat
and
the rear window
should not be
used
to carry objects -
even
those that are small and light.
In
an
accident, they could be thrown about
and injure people in the car.
Large
items
will also reduce
vision
to
the rear.
DOOR
LOCKS
Front and rear doors
can
be locked from
the inside by pushing down the door lock
buttons on the upper door panel. All doors
can
be locked from the outside
by
pushing
down the lock button
and
clOSing
the door.
The front doors
can
also
be locked with
the oval·head key.
EXTERIOR
DOOR
LATCH
Pull lift bar upward and outward
to
open
door.
POWER
DOOR
LOCKS
The power door-lock system (optional)
makes it possible to lock and unlock all
doors
at
the
same
time.The switchbuttons
for the power door locks are on the lower
portion
of
both
front door panels or on the
door arm rests. The automatic locking
mechanism does
not,
at any time,interfere
with manual operation
of
any door lock
button. The doors will not open with the
inside door handle when the lock button
is
pushed down, but can be unlocked
individually by lifting the lock button.
3
CAUTION:
For safety's sake, always
lock
the
doors when driving. This
provides greater safety in accidents, and
helps
keep
children from opening the
door(s).
1t
also helps keep out intruders
when stopped for lights, etc.
TRUNK
COMPARTMENT
The trunk compartment (all models except
station wagons) may
be
opened with the
oval·head key and by lifting up on the
counterbalanced trunk lid.
To
close, the lid
must be shut firmly to
engage
the lock.
The spare wheel and wheel changing tools
are in the trunk.
FRONT
SEATBACK
LATCHES
Cars with folding front seats
have
inertial
seatback latches. The latches are designed
•
www.PlandeGraissage.org
to prevent movement
of
the front seatback
toward people in the front seat
ONLY
during a sudden
slowing
of the car.
Normally, when you want
to
get in
or
out
of
the rear seat, the seatback can be tilted
forward without unlatching the seatback
by hand. But when the car
is
"nose down",
such
as
on a
very
steep hill, the inertial
latch may keep the seatback from being
moved forward.
If
this happens, pull
rearward slightly on the seatback while
lifting
upon
the seatback release lever. The
release lever
is
either on the outboard
side
or center at the bottom
of
each front
seatback. This will release the latch and
allow the seatback to be
moved
forward.
Check periodically that
eachseatback
release
lever
moves
up and down freely.
If
the lever does not
move
freely,take the
car
to your dealer for service. For the inertial
4
latch
to
work properly, the lever must be
in the "down" position.
Keep seat belt webbing ·and hardware clear
of seat parts when you tilt folding seats
forward or backward. This helps prevent
damage to these belt systems.
RECLINING
SEATBACK-With this
option, the seatback
can
be tilted rearward
from nonna! position by rotating the
control lever located at the outboard
side
of
the seat cushion
or
the inboard rear
of
tlie seat cushion (depending on style
of
seat) and exerting rearward pressure
on
the
seatback.
With
no pressure on the seatback,
allow it to return forward
to
normal
position. The seatback may be kept in the
desired position by releasing the control
lever. However, when necessary, the
seatback
can
be pushed forward without
actuating the control
lever
.
MANUAL
SEAT
ADJUSTMENT
The front seat should be positioned
to
give
the driver access to the foot pedals,
steering wheel and instrument panel
SWitches,
and for the best driving visibility.
• Adjust the seat by
moving
to
the right
the seat lock control
lever
located at the
lower front
of
the seat.
• Once unlocked, exert slight body
pressure
to
move
the seat forward or
rearward.
• Release the lever
to
lock seat in desired
position.
www.PlandeGraissage.org
• Test seat to
be
sure it
is
securely locked.
CAUTION: After adjusting a manually
operated seat, push forward and
backward on seat
to
be
sure seat
adjusters have latched. Movement of the
seat indicates that
at
least one latch did
not engage. This could increase the
chance of injury and/or the amount
of
injury in an accident. Take the
car
to
your dealer for
service
if
you find that
your seat adjusters do not latch.
Do
not
adjust a manually operated driver's seat
while the car
is
moving. The seat could
move suddenly and could cause the
driver to lose control
of
the car.
POWER
OPERATED
FRONT
SEAT
SIX-WAY
CONTROL-The
six-way
control (optional on
some
models) is
located on the outer seat cushion
side
panel. The seat can be adjusted
as
follows:
1. The front control provides
up
and down
movement at the front of the seat.
2. The center control provides forward
and backward and up and down
movement
of
the entire
seat.
3. The rear control provides up and down
movement at the back
of
the seat.
MANUAL
WINDOW
CONTRO
L
On all vertical moving windows, turn
manual control clockwise to raise right
window and counterclockwise
to
raise left
window. Reverse direction
to
lower win·
dow. The rear quarter windows in coupes
and the rear door windows in sedans and
wagons are stationary. To open the rear
1.
Door
Handle
2.
Power
Door
Lock
Switch
3.
Manual
Window
Control
4.
Remote
Mirror
Control
window air deflector, rotate latch upward
to unlock. Push the rear
of
the
glass
outward. To close, pull window shut and
rotate latch into locked position.
POWERWINDOW
CONTROLS
With this optional power window system,
the two front vertical moving windows
and/or the rear quarter swing-out windows
on
sedans
are
controlled
by
the master
control switches located
on
the left front
door or on the door arm rest. Individual
switches are provided
on
each door for
passenger use.
All
of these switches have an
ignition interlock
so
that the windows
cannot be operated unless the ignition
switch
is
.
in
"RUN." 5
www.PlandeGraissage.org
DAY-NIGHT
ADJUSTMENT
REARVIEW
MIRRORS
INSIDE
REARVIEW MIRROR-The
mirror
can
be adjusted up, down or
sideways to obtain the best
view
to the
front and rear.
Move
the mirror lever to the
night position
to
reduce. glare from
headlights
of
vehicles behind you. For best
results,
move
the lever to the right for day
driving and to the left for night driving.
OUTSIDE REARVIEW MIRROR-Adjust
the outside mirror
so
you can just
see
the
side
of
your
car
in the
side
of the mirror
closest to the car.
NOTICE: A void hanging objects on the
right-hand coat
hook
in such a way that
you
block the driver's vision to theright
rear.
CONVEX
MIRROR
-Your
car
may
have
an optional convex outside
rearview
6
mirror. A convex mirror has a curved
surface. This type
of
mirror
is
designed
to
give
a much wider
view
to
the rear,
especially
of
the lane next to the car.
However,
cars
and other objects seen in
such a mirror will
LOOK
smaller and
farther away than when seen in a flat
mirror. Therefore,
use
care when judging
the
size
or distance
of
a car
or
object seen
in this convex mirror. You can determine
the
size
and distance
of
objects
seen
by
using
your inside
rearview
mirror. Adjust
the convex mirror
so
you can barely
see
the
side
of
your
car
in
the portion
of
the
mirror closest
to
the car. .
REMOTE 0 UTISDE
MIRRORS~The
control·lever for this optional left
side
view
mirror
is
located on the door.
It
is
on the
instrument panel .for the right
side
view
mirror.
To
adjust the position of the
mirror, simply
move
the lever
in
the
direction desired.
SUN
VISOR
ADJUSTMENT
The force needed to
move
the
visor
up
and
down may be adjusted by tightening or
100
sening the
..
screw
shown
in
the
illustration. The
visors
may be
swung
toward the door windows to prevent
glare
from the sides.
HEAD
RESTRAINTS
(For
Bench
Seats)
• Head restraints are designed to help
reduce "whiplash" injuries.
•
To
raise
or
lower, just
slide
the head
restraint up or down.
• Choose the position which
places
the
top of the head restraint closest to the
top of your ears.
www.PlandeGraissage.org
SEAT
BELTS
To
help lessen the chance
of
injury and/or
the amount of injury in accidents or
sudden stops, General Motors urges that
people riding in the car be properly
restrained at all times,
using
the seat belts
provided. This includes pregnant women
and children
of
all ages.
See
following
pages
for
use
of restraints by children and
pregnant women.
.FRONT
SEAT
LAP-SHOULDER
BELT
• Close the front door fully.
• Adjust the front seat
as
needed and sit
up straight and well back in the seat.
There are a number
of
ways the
lap-shoulder belt may be put on easily. For
example:
• The lap-shoulderbelt may be put on
using
one hand by: (1) Holding the latch
plate
and
pulling the belt
as
far
as
it
will
reach across your waist (see illustration).
(2) Then, hold the latch plate at a right
angle to the webbing. At the
same
time,
slide it
uP
.the belt
by
raising it toward
the upper outside corner
of
the
windshield. (3) Finally, pull the belt
downacross the body and push the latch
plate into the buckle until it clicks.
• One
easy
two-handed method
is
to hold
the webbing just behind the latch plate
using
the nearest hand. Then bring it
down across your body.
While
holding
the webbing taut with one hand,
slide
the latch plate up the belt with the other
hand. Finally, hold the latch plate and
push
it
into the buckle until it clicks.
• Position "lap" portion of belt across lap
as
LOW
ON
THE
HIPS
as
possible; Then
adjust to a
SNUG
FIT by holding the
"shoulder" portion
of
belt and pulling it
UPWARD
through the latch plate, until
the lap portion
is
snug
across the lap.
This reduces the risk
of
sliding under the
belt during an accident.
CAUTION: A
snug
fit with the lap belt
positioned low on the hips is necessary
to
help lessen the chance of
inj
ury
and/or the amount of injury in an
accident. This spreads the force of the
lap belt over the strong hip bone instead
of across the soft abdomen. To help
lessen the chance
of
injury and/or the
amount of injury in
an
accident:
never
use
the same belt for more than one
person
at
a time; do not wear twisted
belts; and
d()
not damage belts or belt
hardware
by
pinching them in the seat
or door.

www.PlandeGraissage.org
• The shoulder portion
of
the front seat
· belt restraint
has
a "whic1e sensitive
retractor" which
is
designed
to
lock
ONLY during a sudden stop
or
impact.
At other times it
is
designed
to
move
freely with the person.
• For those who want it,a tension reliever
is built into the retractor
to
help reduce
discomfort.
To
use
the tension reliever
feature: (1) Start
by
pulling the belt
outward a
few
inches and letting
it
go
so
it returns
to
the chest (Step
"A"
in the
figure) or lean FAR forward and then
back. (2) Then adjust the belt tension by
pulling down slightly on the shoulder
8
portion
of
the belt and letting
go
(Step
"B"
in
the figure), or lean forward
SLIGHTLY and then back. It
is
very
important .that the
LEAST
amount
of
slack needed to relieve tension
be
chosen
when
using
the tension reliever
~
not
more than 30 millimetres (about one
inch).
• To release the tension reliever and get
rid of slack, pull the shoulder belt out
and let it retract. Or lean far forward
and then back.
CAUTION:
Too much slack could
increase the amount
of
injury because
the belt would not be able to properly
restrain you in an accident. Do
NOT
wear the shoulder portion of
the
belt
under the arm
or
out
of
position. Such
use
could increase the chance
of
injury
and/or the amount
of
injury in an
accident.
•
To
unfasten the belt, push in the button
in the center of the buckle.
•
When
no longer in use, front seat belts
can
be stowed by letting them rewind
into their retractors. The tension reliever
is
designed
to
release by itself when the
front door
is
opened, or when the belt
is
pulled out about 150 rnillimetres (six
inches). This lets belt
slack
be taken up
www.PlandeGraissage.org