Onn ONK385-99 User manual

ONK385-99
Karaoke
Compact Disc + Graphics
with built-in Disco Light
Karaoké
Compact Disque + Graphiqués
avec jeu de lumiè
Operation Manual
Manuel de fonctionnement
Operation Manual
Manuel de fonctionnement

WARNINGS
E1
ENGLISH
E1
WARNING:TO REDUCE THE RISK OF
FIRE OR SHOCK HAZARD, DO NOT EXPOSE
THIS PRODUCT TO RAIN OR MOISTURE.
CAUTION: TO PREVENT THE RISK OF
ELECTRIC SHOCK, DO NOT REMOVE COVER
OR BACK. NO USER-SERVICEABLE PARTS
INSIDE. REFER SERVICING TO QUALIFIED
PERSONNEL.
CAUTION
RISK OF ELECTRIC SHOCK
DO NOT OPEN
This symbol is intended to alert you
to the presence of uninsulated
dangerous voltage within the
product's enclosure that might be of
sufficient magnitude to constitute a
risk of electric shock. Do not open
the product's case.
This symbol is intended to inform
you that important operating and
maintenance instructions are
included in the literature
accompanying this product.
DRIPPING WARNING
VENTILATION WARNING
Warning:
SAFETY CERTIFICATION
The product shall not be exposed to dripping or
splashing and that no objects filled with liquids, such
as vases, shall be placed on the product.
The normal ventilation of the product shall not be
impeded for intended use.
Changes or modifications to this unit not
expressly approved by the party responsible for
compliance could void the user’s authority to
operate the equipment.
This device is made and tested to meet safety
standards of the FCC, requirements and
compliance with safety performance of the U.S.
Department of Health and Human Services, and
also with FDA Radiation Performance Standards
21 CFR Subchapter J.
Main plug is used as disconnect device and it
should remain readily operable during intended
use. In order to disconnect the apparatus from the
mains completely, the main plug should be
disconnected from the main socket outlet
completely.
Warnings:
CAUTION!
!
!
!
This CD player employs a laser light beam.
Only a qualified service person should
remove the cover or attempt to service this
device, due to possible eye injury.
The use of controls, adjustments, or
procedures other than those specified
herein might result in hazardous radiation
exposure.
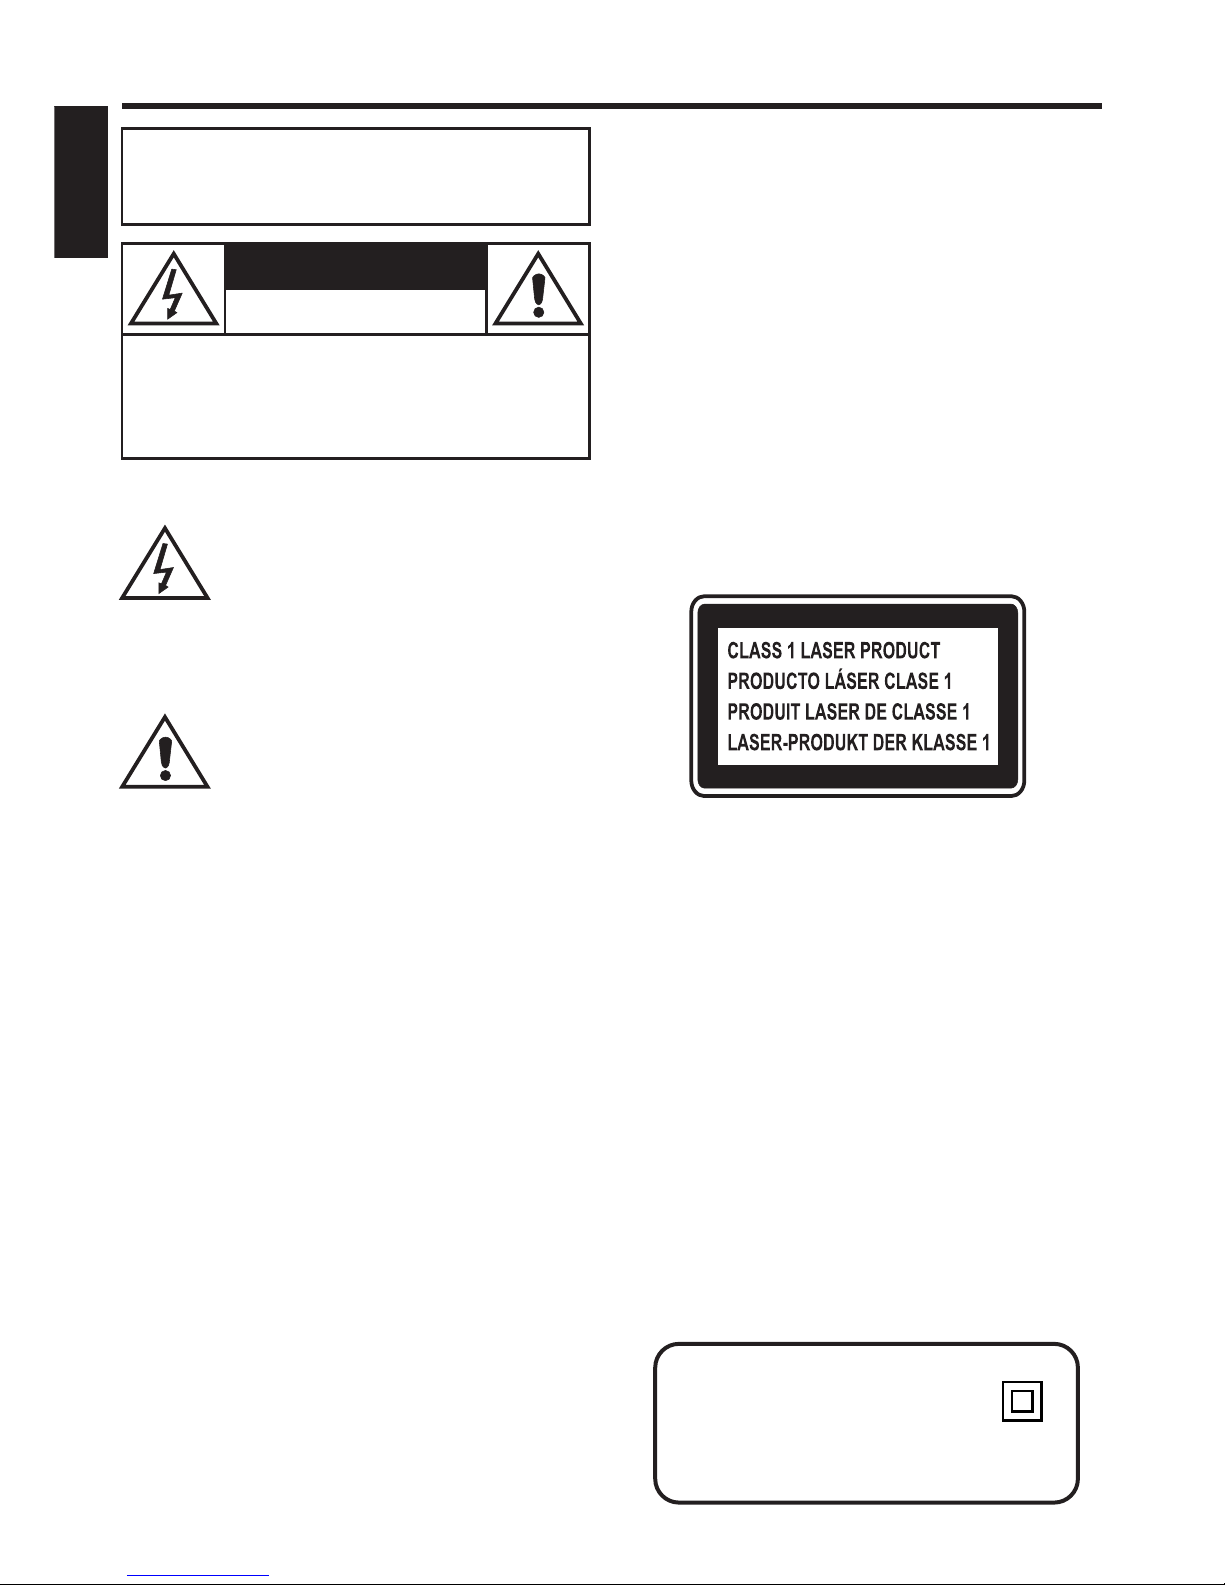
This compact disc player is classified as a
CLASS 1 LASER product.
The CLASS 1 LASER PRODUCT label is
located on the rear panel.
Invisible laser radiation when open and inter
locks defeated.Avoid exposure to beam.
The apparatus shall be used in an open
area.
Since CD circuitry may cause interference to
other radio tuners nearby, switch this unit off
when not in use or move it away from the
affected radio tuner.
This device complies with part 15 of the FCC
rules, operation is subject to the following two
conditions: (1) this device may not cause
harmful interference, and (2) this device must
accept any interference received, including
interference that may cause undesired
operation.
This class[B] digital apparatus complies with
canadian ICES-003.
CAUTION
FCC IMPORTANT
The CAUTION marking is located on the rear panel.
Class II equipment symbol
This symbol indicates that the unit
has a double insulation system.

ENGLISH
E2
WARNINGS
NOTE This digital apparatus does not exceed the Class B limits for radio noise emissions from digital apparatus as:
set out in the Radio Interference Regulations of Industry Canada These limits are designed to provide reasonable.
protection against harmful interference in a residential installation This equipment generates uses and can radiate.,
radio frequency energy and if not installed and used in accordance with the instructions may cause harmful,,
interference to radio communications However there is no guarantee that interference will not occur in a particular.,
installation If this equipment does cause harmful interference to radio or television which can be determined by.(
turning the equipment off the user is encouraged to try to correct the interference by one or more of the following),
measures:
Reorient or relocate the receiving antenna.
Increase the separation between the equipment and receiver.
Connect the equipment into an outlet on a circuit differentfrom that to which the receiver is connected.
Consult the dealer or an experienced radio TV technician for help/.
IMPORTANT SAFETY INSTRUCTIONS
!
!
!
!
1. Read these instructions.
2. Keep these instructions.
3. Heed all warnings.
4. Follow all instructions.
5. Do not use this apparatus near water.
6. Clean only with dry cloth.
7. Do not block any ventilation openings. Install in accordance with the manufacturer's
instructions.
8. Do not install near any heat sources such as radiators, heat registers, stoves, or other
apparatus (including amplifiers) that produce heat.
9. Do not defeat the safety purpose of the polarized or grounding-type plug. A polarized
plug has two blades with one wider than the other. A grounding type plug has two
blades and a third grounding prong. The wide blade or the third prong are provided for
your safety. If the provided plug does not fit into your outlet, consult an electrician for
replacement of the obsolete outlet.
10. Protect the power cord from being walked on or pinched particularly at plugs,
convenience receptacles, and the point where they exit from the apparatus.
11. Only use attachments/accessories specified by the manufacturer.
12. Use only with the cart, stand, tripod, bracket, or table specified by the
manufacturer, or sold with the apparatus. When a cart is used, use
caution when moving the cart/apparatus combination to avoid injury
from tip-over.
13. Unplug this apparatus during lightning storms or when unused for long
periods of time.
14. Refer all servicing to qualified service personnel. Servicing is required when the
apparatus has been damaged in any way, such as power-supply cord or plug is
damaged, liquid has been spilled or objects have fallen into the apparatus, the
apparatus has been exposed to rain or moisture, does not operate normally, or has
been dropped.

CONTROL LOCATIONS
E3
1. LED Display
2. CD Door
3. Master Volume Display
4. Master Volume Indicator
1.0MASTER VOLUME Control
FRONT VIEW
2.1 PROGRAM Button
2.2 DISCO LIGHT Slide
Button
2.4 REPEAT LED
2.3 PROGRAM LED
2.5 Mic Holder
2.6 MIC Volume Control
2.7 ECHO Control
2. 28 MIC Jack
2 Disco Light9.
3.0 Loudspeaker
1. /1 ON OFF LED
5 REPE.AT Button
6 SKI.P Button
7 PL.AY/PAUSE Button
8 SKI.P Button
9 Disco Light.
1. /2 ON OFF Button
1.3 PLAY/PAUSE LED
1.4 CDG LED
1.5 Mic Holder
1.6 Auto Voice Control
1.7 BALANCE Control
1. 18 MIC Jack
1 R Button9 ANDOM.
20 STOP Button.
1919
2020
2323
2424
2525
2626
2727
2121
2222
2828
2929
1 2 8
345 6 7
9
10
1111
1212
1313
1414
1515
1616
1717
1818
3030
ENGLISH

E4
31. AUX OUT Jack (R)
32. VIDEO OUT Jack
33. AUX OUT Jack (L)
34. AC Power Cord
REAR VIEW
ENGLISH
31
32 33
34

MAKING THE CONNECTIONS
CONNECTING POWER
SELECTING YOUR KARAOKE AS YOUR SOURCE/INPUT
You can power the system from a standard AC outlet by using the
supplied power cord.
Your Karaoke is designed to connect to your TV the same way you would connect most video
cameras, VCR/DVD players or video game consoles.
We have provided RCA cables to connect your unit to a TV, VCR/DVD player, video device or an external
audio/sound system. The RCA cables have three connections at each end (white and red are for left and
right audio connections and the yellow is for video connection).
Please follow the steps below to display CD+G lyrics on the TV screen:
(1) Locate the multi-colored patch cables
(2) Connect video cable (yellow) to the video out of the back of the Singing Machine
(3) Connect the other end of the video cable (yellow) to the video input on your TV or VCR/DVD
Player.
Selecting your Karaoke as a source/input on your TV is very similar to connecting a VCR/DVD or
Satellite system.
We’ve listed below the most common ways of selecting the source from yourTV or VCR/DVD Player:
(1) In the set up menu of the TV or VCR/DVD player there may be an option for “Input Select” where
you can choose between “Cable/Ant., Video 1, Video 2, etc.” as the input source.
(2) Look for a TV channel between the highest and lowest on your TV or VCR/DVD player (i.e. AUX,
EXT, LINE 1 or LINE IN)
(3) Your remote control for either your TV or VCR/DVD player may have source input selections as
well as detailed below:
“VIDEO, VIDEO 1, GAME, AUX, EXT or LINE-IN.“ Choosing one of those in most cases should
display the lyrics from your Karaoke as well.
CAUTION: The supplied AC power cord has a polarized plug that fits into
the wall outlet only one way. If the plug does not fit properly, turn it over and
try again. Do not force it.
CONNECTING TOYOUR TV OR VCR/DVD PLAYER
E5
ENGLISH
REAR VIEW
VIDEO INPUT
(Yellow Jack)
VIDEO OUTPUT
(Yellow Jack)
VIDEO
INPUT
AUDIO
INPUT
RL
REAR VIEW OF TV OR VCR

AUDIO CONNECTION
Please follow the steps below to connect the unit to your TV or VCR or home stereo system:
(1) Locate the multicolored patch cords.
(2) Connect audio cables (White and Red) to theAudio Out of the back of
the .
(3) Connect the other end of the audio cables to the audio/auxiliary input on your TV or VCR or home
stereo system.
(White-Left and Red-Right)
Karaoke
MAKING THE CONNECTIONS
E6
REAR VIEW
Home Stereo System
AUX OUTPUT
R
(Red Jack)
VIDEO
INPUT
AUDIO
INPUT
RL
REAR VIEW OF TV OR VCR
OR HOME STEREO SYSTEM
AUX OUTPUT
L
(White Jack)
AUX INPUT
R
(Red Jack)
AUX INPUT
L
(White Jack)
ENGLISH

This unit is designed to play CDs and CD+Gs bearing the identification logo . If the disc does not
conform to the standard, it may not play properly.
respectively
To turn on the unit, press the ON/OFF button, the ON/OFF LED Indicator will light up.
To turn it off, press the ON/OFF button again, the ON/OFF LED Indicator will turn off.
Open the CD door, place a CD or CD+G disc in the compartment with the printed side facing upward and
the shiny side facing down.
Gently close the CD door. The unit will start to play the first track automatically. (If no disc is loaded, it will
display “ ”. If a CDG is loaded, the CDG indicator will light up.)
Adjust MASTER VOLUME control on your unit, TV or audio system to a comfortable level.
To start playing, press the PLAY/PAUSE button. The first track [ ] and the PLAY/PAUSE LED will be lit.
To temporarily stop playing, press the PLAY/PAUSE button. The PLAY/PAUSE LED Indicator will flash.
To resume play, press this button again.
If the STOP button is pressed in the course of playing, the disc will cease to play. (The total number of tracks
will be shown on the LED window.)
Rotate to the MASTER VOLUME control to obtain the desired sound level.
You can always skip forward or back to your desired track number by pressing the SKIP buttons
SKIP
When playing any audio CD, press and hold the SKIP button ( -SKIP- ). The CD will search at high
speed in the forward or backward direction. Normal play will continue when you release the button.
To repeat the track currently playing, press the REPEAT button once.The REPEAT LED will start to flash.
To repeat all tracks, press the REPEAT button twice. The REPEAT LED will light up and stay lit. Press the
PLAY/PAUSE button to begin.
To clear the REPEAT function, press the REPEAT button again. The REPEAT LED will turn off.
TURNING POWER ON/OFF
!
!
!
!
!
!
!
!
!
!
!
!
LOADINGADISC
PLAY/PAUSE
STOP
MASTER VOLUME
SKIP (For both CD and CDG discs)
SEARCH (For audio CD disc only)
REPEAT
Note:
(Refer to the Trouble Shooting Guide if a disc is loaded but the total tracks do not appear.)
Note:
Note: The MIC Volume must be adjusted simultaneously with the master volume level.
- Never place anything except a compact disc in the disc tray. Foreign objects can damage the unit.
- Only place one disc on the disc tray at a time.
- Pressing pause repeatedly when a CD+G is playing may cause distorted lyrics on your TV screen. Any distortion will
remain on the TV screen until it is refreshed either during an instrumental break or the song is stopped and/or the
song is started from the beginning.
(-- ).
E7
CD OR CD+G OPERATION
ENGLISH

CD OR CD+G OPERATION
PROGRAM
!
!
Use this button to program and play back songs in a preselected order.
Step 1: Programming should be done in the stop mode only. Press the PROGRAM button until the
PROGRAM LED flashes, the track will read [ ].
Step 2: Press the SKIP buttons ( - SKIP - ) to select a desired track.
Step 3: Press PROGRAM button to confirm entry. You can repeat the same steps up to a maximum of 24
tracks.
Step 4: Press PLAY button when you have completed programming and you are ready to start singing.
Press the STOPbutton to clear all the programmed entries.
RANDOM
DISCO LIGHT OPERATION
KARAOKE FUNCTIONS
!
!
!
During STOPmode, press the RANDOM button and PLAY button to start the random play function.
During playback, press the RANDOM button to activate the random play function and it will be started
after the current track.
Press the RANDOM button to clear the random function
To illuminate the Disco light and get your desired lighting effect, slide the Disco Light slide button from the
OFF position to your desired level.
Sing a long with the music by plugging in the provided microphone into either one of the microphone jacks
on the unit.
Adjust the MIC VOLUME control to a desired level and obtain the best performance.
.
D
D
D
Warning - Tapping or dropping the microphone while it is on can permanently damage your microphone. Resist
the urge to swing the microphone around by the cord!
Warning -
MIC VOLUME
ECHO
BALANCE
AUTO VOICE CONTROL
To avoid Microphone feedback please avoid being too close to the speaker.
Adjust the ECHO control to enhance your voice for a concert hall effect.
Adjust the BALANCE control between the prerecorded singer’s voice and the music when using a multiplex karaoke disc.
(Please see Glossary of term to learn more about multiplex on our website.)
AUTO VOICE CONTROL can be activated by rotating the Auto Voice Control. The vocals on the multiplex recording will be
muted when the singer starts to sing through the microphone. When the singer stops to sing, the vocals will resume to
normal.
E8
ENGLISH

TROUBLE SHOOTING GUIDE
If you have followed the instructions and are having difficulty operating the unit, locate the
PROBLEM in the left column below. Check the corresponding POSSIBLE CAUSE column to
locate and remedy the problem.
E9
SOLUTION
Insert the power plug into the AC
outlet.
Turn up the volume.
Turn up the volume at TV/PA
system.
Turn on the power at TV/PAsystem.
Follow directions ‘Audio
Connection’page.
PROBLEM
No power when
POWER is on.
No sound.
POSSIBLE CAUSE
No power plug connection at
theAC outlet.
Volume control is set to
minimum.
Volume control on TV set/PA
system is set to minimum.
TV set/PA system power is
OFF.
AUX OUT jacks not
connected.
Check the outlet with a working
lamp or other electrical appliance.
No power when plugged
in.
The AC outlet may not have
power.
Insert disc correctly.
Wipe clean with soft cloth.
Use a new disc.
Use a new disc.
Only use discs bearing standard
logo.
Disc is inserted upside down.
Disc is dirty.
Disc is scratched.
Disc is warped.
A nonstandard disc is
inserted.
Moisture has formed inside
the CD deck.
CD PLAYER
Cannot work normally or
“”,“”
displayed.
, or “ ” areaai aa aaa
Wait about 20 to 30 minutes to let it
dry out.
Karaoke needs to be
reset.
Disconnect the machine from
power source for 30 seconds.
Lens is dirty. Use a CD lens cleaner.
Select the correct function.
The wrong function is
selected.
ENGLISH

E01
TROUBLE SHOOTING GUIDE
SOLUTION
PROBLEM POSSIBLE CAUSE
No song lyrics appear
on the TV screen.
Connect the video cable to the
Karaoke VIDEO OUT
and to the TV VIDEO IN.
Using your TV Remote to select
VIDEO input.
Connect from VIDEO OUT of the
system to the VIDEO IN on your
VCR or Connect to an RF
Modulator and then to the TV
cable input.Check the disc to
be sure it is a CDG.
Video cable is not connected
properly to the TV.
Source selector on TV is not
set to VIDEO.
Check disc to be sure it is clean.
A CDG is loaded but the
CDG indicator is not lit.
TV does not have video line
input.
No sound from mic.
Select AUX IN as the source for
your TV, VCR or home stereo.
No sound - If audio is
going through TV, VCR
or home stereo.
Source Selection on your TV,
VCR or home stereo is not set
properly.
Follow direction on ‘Audio
Connection’ page for connecting to
a home stereo system.
Improper Connection to
stereo system or PA.
Mic volume control.
Mic is off.Turn on mic with the ON OFF/
switch located on the microphone.
Adjust mic volume to max, and
then re-adjust to a comfortable
level.
ENGLISH

E11
AC 110V-120V~60Hz 25W
4
4
3.5
7.2 lbs / 3.3 kgs
ENGLISH
4

THE KARAOKE GLOSSARY OF TERMS
In addition to all of the terminology associated with consumer electronics products, a few
additional terms are used almost exclusively in karaoke. These terms are meant to familiarize
you with the world of Karaoke. The features listed below necessarily pertain to the
particular model Karaoke that you have. The following are some brief explanations of
karaoke terms:
Echo adds depth and resonance to a singer's voice without affecting the music. This echo is
produced by creating minor controlled feedback in the singer's voice.
When the AVC function is activated, the vocals on a multiplex recording are eliminated as soon
as the singer begins singing into the microphone. When the singer stops singing, the vocals on
the multiplex recording are automatically re-activated. This useful function is used primarily
during practice sessions while a singer is learning a song. Please note that the AVC function
only works with multiplex recording and not with standard audio recordings.
Key Controller changes the key of the music (+ or - steps) to adjust to the singer’s
voice.
This is an acronym for Compact Disc plus Graphics. You will also see variations CD+G, and
CD+Graphics. This is a regular audio CD with information stored on a data track simultaneous
to music. In laymen's terms, CDG has a video output for simple graphics (not full motion video).
In the case of karaoke, the graphics function is used to store song lyrics, and display the lyrics in
synch with music. In most cases, CDG software displays lyrics which change color as they are
to be sung.Aregular television is all that is required to display CDG lyrics.
- CDG is a particular type of compact disc encoding system that is different from VCD or
DVD. Your Karaoke can decode standard audio compact discs and CDG discs. It will
not read VCD or DVD encoded discs.
Standard audio discs and cassette tapes will not display lyrics on your TV. Audio CDs do not
contain the software necessary to display lyrics.
may not
Echo:
Multiplex:
Auto Voice Control (A.V.C.):
Key Controller:
CDG:
NOTE
Our multiplex recordings contain 2 copies of the same song. One version is a stereo recording of
the song without the lead singer. The second version is recorded with the music and
background vocals on the left channel and the lead singer recorded on the right channel. This
‘split track’recording allows you to control the volume of the lead singer by adjusting the balance
control. You can sing a duet with the lead singer or use the lead singer as a guide as you learn
the song, gradually fading them out with the balance control until you are able to sing the song
on your own.
CD/CDG
E12
ENGLISH

AVERTISSEMENTS
FRANÇAIS
F1
Ce symbole vous alerte de la
présence de voltage dangereux
non isolé à l'intérieur des produits et
qui auraient une force suffisante
pour provoquer des risques de choc
électrique. Ne pas ouvrir le boîtier
de l'appareil.
Ce symbole vous informe que
d'importantes instructions de
fonctionnement et d'entretien sont
comprises dans la littérature qui
accompagne le produit.
AVERTISSEMENT HUMIDITÉ
AVERTISSEMENT POUR LA VENTILATION
AVERTISSEMENT:
CERTIFICATION DE SÉCURITÉ
Ne pas exposer le produit à des gouttes ni à des
éclaboussures et il ne faut placer aucun objet
contenant des liquides (vases par exemple) à
proximité du produit.
La ventilation normale du produit ne doit pas être
obstruée pour l'usage prévu.
Des modifications non
autorisées expressément par le fabricant
pourraient annuler l’autorité de l’utilisateur pour
utiliser cet appareil.
Ce système de Haut-parleurs pour iPod est
fabriqué et testé pour répondre aux standards de
sécurité de FCC, aux exigences et à la conformité
de la performance de sécurité des Etats-Unis.
Département des Services Humains et de Santé et
aussi avec les Standards de Performance de
Radiation FDA21CFR Sous-chapitre J.
La prise du secteur ne doit pas être obstruée ou
doit être facilement accessible pendant son
utilisation. Pour être complètement déconnecté
de l'alimentation d'entrée, la prise doit être
débranchée du secteur.
AVERTISSEMENTS:
AVERTISSEMENT!
IMPORTANT FCC (FEDERAL
COMMUNICATIONS COMMISSION)
!
!
!
Le lecteur de CD utilise un rayon laser. Le
couvercle ne pourra être retiré que par une
personne qualifiée et les tentatives de
réparations de cet appareil aussi, à cause de
possibles blessures aux yeux.
L'utilisation de contrôles, réglages, ou
procédures autres que ceux/celles
spécifié(e)s ici pourrait causer une exposition
dangereuse à des radiations.
Utilisez l’appareil dans un endroit ouvert.
Le lecteur de disque compact est classé
PRODUIT LASER CLASSE 1.
L'étiquette PRODUIT LASER DE CLASSE 1 est
situé sur le panneau arrière.
Radiation laser invisible quand ouvert et
verrous désengagés. Eviter l'exposition aux
rayons solaires.
Puisque les circuits de ce lecteur CD peuvent
créer des parasites aux autres syntoniseurs
radio à proximité, mettez cet appareil hors
tension lorsque vous ne l'utilisez pas ou
éloignez-le du syntoniseur qui subit les
interférences.
Cet appareil est conforme aux règles FCC Partie
15. Son fonctionnement est sujet aux deux
conditions suivantes : (1) Cet appareil peut causer
des interférences dangereuses et (2), cet appareil
doit accepter n’importe quelle interférence reçue y
compris l’interférence causée par
unfonctionnement indésirable.
Cet appareil numérique de la classe B est
conforme à la norme NMB-003 du Canada.
AVERTISSEMENT
La marque AVERTISSEMENT est situé sur le
panneau arrière.
AVERTISSEMENT:POUR RÉDUIRE LE
RISQUE D'INCENDIE OU DE CHOC NE PAS
EXPOSER CE PRODUIT À LAPLUIE OU HUMIDITÉ.
AVERTISSEMENT
RISQUE DE CHOC
ÉLECTRIQUE NE PAS OUVRIR
AVERTISSEMENT: POUR ÉVITER DES RISQUES DE CHOC
ÉLECTRIQUE, NE RETIREZ PAS LE COUVERCLE NI LE
PANNEAU ARRIÈRE. NE CONTIENT PAS DE PIÈCES
RÉPARABLES PAR L'UTILISATEUR. SOUMETTRE TOUTES
LES RÉPARATIONS À UN PERSONNEL QUALIFIÉ.
Symbole d équipement de la classe II
Ce symbole indique que l unité a un
double système d isolation.
'
'
'

IMPORTANTES INSTRUCTIONS DE SECURITE
AVERTISSEMENTS
FRANÇAIS
F2
REMARQUE: Cet appareil numérique ne dépasse pas les limites de classe B se rapportant aux émissions
de parasites radio provenant d'appareils numériques, selon les restrictions d'Industrie Canada relatives aux
interférences radio. Cet appareil génère, utilise et peut émettre des fréquences radio et s'il n'est pas installé
et installé selon les instructions, peut nuire aux radiocommunications. Toutefois, rien ne garantit que des parasites
ne surviendront pas dans une installation particulière. Si cet appareil cause des interférences nuisibles à la
réception du téléviseur ou de la radio, ce que vous pouvez déterminer en ouvrant et en fermant votre appareil, nous
vous invitons à essayer l'une des mesures correctives suivantes:
Réorientez ou déplacez l'antenne de réception installée sur l'appareil qui manifeste les parasites.
Éloignez l'appareil du composant qui reçoit les ondes.
Branchez l'appareil dans une prise de courant CAdifférente de celle du composant qui reçoit les ondes.
Au besoin, consultez votre marchand électronique ou un technicien spécialisé dans le service des
Radios/téléviseurs pour des suggestions supplémentaires.
!
!
!
!
1.
2.
3.
4.
5.
6.
7. Installez selon des instructions de
manufacturer s.
8.
9. Apolorized la
prise a deux lames avec une plus au loin qui l autre. Un type au sol prise a deux lames et un tiers
groupant la lame de prong.The au loin ou la troisième fourche sont donnés pour la sûreté SI la
prise fournie ne s adapte pas dans votre sortie, consultez un électricien pour le remplacement de
la sortie désuète.
10.
11.
12. Quand un chariot
est utilisé faites attention en déplaçant la combinaison de cart/apparatus pour
éviter des dommages de tipover.
13.
14. On a renversé
l entretien est exigé quand l appareil a été endommagé de quelque façon, comme si puissance-
fournissez la corde ou la prise est endommagée, liquide ou les objets sont tombés dans
l appareil, ou quand l appareil a été exposé à la pluie ou à l humidité ne fonctionne pas
normalement, ou a été lâché
'' '
'
'' ,
'
-
'
.
'
'
'
.
'
,
'
.
''
'' ',
.
LISEZ LES INSTRUCTIONS
CONSERVEZ LES INSTRUCTIONS
CONFORMEZ-VOUSAUX AVERTISSEMENTS
SUIVEZ TOUTES LES INSTRUCTIONS
N utilisez pas l appareillage de ths près de l eau.
Nettoyez seulement avec un tissu sec
Ne bloquez aucune de ces ouvertures de ventilation.
N installez près d aucune source principale telle que des radiateurs des registres de tête,
des fourneaux, ou d autres amplificateurs apparatus(including) cette chaleur de produit.
Ne défaites pas le but de sûreté de la prise ou du fondre type polarisée prise.
Protégez le cordon de secteur contre être marchée dessus ou pincement, en particulier
derrière les prises, derrière les recepatcles d eonvenience, et derrière le point où ils
sortent de l appareil.
Employez seulement attachments/accessories indiqué par le fabricant
Utilisation sur ly avec un stand, un trépied, une parenthèse, ou une table de
chariot indiquée par le fabricant ou vendue avec l appareil.
Débranchez l appatatus pendant les orages de foudre ou si inutilisé pendant de longues
périodes.
Référez-vous tous qui entretiennent au personnel de service qualifié

F3
LOCALISATION DES CONTRÔLES
1.
2.
3.
4.
5.
6.
7.
8.
9.
Affichage Lumineux
LED
Porte du CD
D'affichage de Volume
Principal
Master Indicateur de
Volume
Bouton REPETER
Bouton SAUTER
Bouton
REPRODUCTION/PAUSE
Bouton SAUTER
Lumière Disco
11.
12.
13.
14.
15.
16.
17.
18.
19.
Contr le de VOLUME
PRINCIPAL
Indicateur LED
ALLUME/ETEINDRE
Bouton
ALLUMER/ETEINDRE
LED
REPRODUCTION/PAUSE
LED du CDG
Support de Micro
Contr le Automatique de
Voix
Contr le de BALANCE
Prise jack MIC 1
ô
ô
ô
20.
21.
22.
23.
24.
25.
26.
27.
28.
29.
30.
Bouton ALÉATOIRE
Bouton ARR T
Bouton PROGRAMME
DISCO Lumière bouton
Coulissant
LED PROGRAMME
LED REPETITION
Support de Micro
Contr le de VOLUME
MICRO
Contr le de ECHO
Prise jack MIC 2
Lumi
Haut-parleur
Ê
ô
ô
ère Disco
10.
1919
2020
2323
2424
2525
2626
2727
2121
2222
2828
2929
1 2 8
345 6 7
9
10
1111
1212
1313
1414
1515
1616
1717
1818
3030
FRANÇAIS

VUE ARRIERE
31. Jack de sortie auxiliaires ( )
32. Prise jack SORTIE VIDEO
33. Jack de sortie auxiliaires (Gauche)
34. Fil d'ALIMENTATION AC
Droite
LOCALISATION DES CONTRÔLES
F4
FRANÇAIS
31
32 33
34

POUR FAIRE LES CONNECTIONS
BRANCHEMENT DE L'ALIMENTATION
Vous pouvez brancher le système à une prise AC normale en
utilisant le fil d'alimentation fourni.
AVERTISSEMENT: Le fil d'alimentation AC fourni possède une
prise polarisée qui n'entre dans la prise murale que d'une façon. Si
la prise ne rentre pas débranchez et essayez à nouveau. Ne pas
forcer.
CONNEXIONAVOTRE TV OU MAGNÉTOSCOPE OU LECTEUR DVD
SÉLECTIONNER VOTRE KARAOKÉ COMME SOURCE/ENTRÉE
Votre Karaoké est conçu pour être connecté à votre TV, magnétoscope/DVD, appareil vidéo ou
tout système audio/son externe.
Des câbles RCA sont fournis pour connecter votre appareil à un téléviseur, magnétoscope/DVD, appareil
vidéo ou tout système audio/son externe. Les câbles RCA possèdent trois connexions à chaque extrémité
(Le blanc et le rouge sont pour les connexions audio droite et gauche et le jaune pour la connexion vidéo).
Veuillez suivre les étapes ci - dessous pour afficher les paroles du CDG sur Ecran de TV:
(1) Localisez les fils de connexion multicolores.
(2) Connectez le câble vidéo (jaune) à l'SORTIE Vidéo à l'arrière de la Singing Machine.
(3) Connectez l'autre extrémité au câble vidéo (jaune) à la ENTREE Vidéo d'une autre source vidéo, telle
que MAGNETOSCOPE/lecteur DVD ou TV.
Sélectionner votre Karaoké comme source/entrée sur votre téléviseur ressemble beaucoup à la
connexion d'un magnétoscope/DVD ou un système satellite.
Ci-dessous la liste des différentes façons de sélectionner la source depuis votre téléviseur ou
magnétoscope/LECTEUR DVD.
(1) Dans le menu réglage du téléviseur ou magnétoscope/DVD, il peut y avoir un choix « choix
entrée » où vous pouvez choisir entre «Cable/Ant., Video 1, Video 2, etc.» comme source
d'entrée.
(2) Cherchez un canal TV entre le plus élevé et le plus bas sur votre téléviseur ou lecteur DVD. (i.e.
AUX, EXT, LINE 1 or LINE IN)
(3) Votre télécommande pourrait également offrir le choix de la source d'entrée comme détaillé ci-
dessous:
“VIDEO, VIDEO 1, GAME, AUX, EXT or LINE-IN.“ Choisir l'une de ces options affiche dans la
plupart des cas également le menu de votre Karaoké .
F5
FRANÇAIS
VUE ARRIÈRE
ENTREE VIDEO
(Prise Jack Jaune)
SORTIE VIDEO
(Prise Jack Jaune)
VIDEO
INPUT
AUDIO
INPUT
RL
VUE ARRIÈRE DE TV OU VCR

CONNEXIONAUDIO
Veuillez suivre les étapes ci-dessous pour connecter votre appareil au téléviseur, ou
système stéréo.
(1)
(2) Connectez les câbles audio(blanc et rouge) à la sortie audio (blanc à gauche et rouge à droite) de
l'arrière du Karaoké .
(3) Connectez l'autre extrémité des câbles audio à l'entrée audio/auxiliaire de votre téléviseur,
ou système stéréo.
magnétoscope
Localisez les fils de connexion multicolores.
magnétoscope
POUR FAIRE LES CONNECTIONS
VUE ARRIÈRE
Home Stereo System
SORTIE AUX
Droite
(Jacks Rouge)
VIDEO
INPUT
AUDIO
INPUT
RL
VUE ARRIÈRE DE LA TV OU
MAGNETSCOPE OU CHAÎNE STÉRÉO
SORTIE AUX
Gauche
(Jacks Blanc)
ENTREE AUDIO
Droite
(Jack Rouge)
ENTREE AUDIO
Gauche
(Jack Blanc)
F6
FRANÇAIS

Cet appareil est conçu pour lire des CD et des CD+G portant respectivement le logo d'identification. Si le
disque n'est pas conforme au standard, il pourrait ne pas être lu correctement.
POURALLUMER/ETEINDRE
CHARGEMENT D'UN DISQUE
!
!
!
!
!
!
!
!
!
Pour allumer le Centre Karaoké, pressez le boutonALIMENTATION, l’indicateur LEDALLUME s'allume.
Pour ETEINDRE le système, pressez le bouton ALIMENTATION à nouveau, l’indicateur LED ALLUME
s'éteint.
Soulevez la porte de CD pour ouvrir le compartiment CD/CDG. Placez un disque dans le compartiment
avec le côté imprimé tourné vers le haut et le côté brillant vers le bas.
Fermez doucement la porte du CD du compartiment CD/CDG. L'unité commencera à jouer la première
voie automatiquement. (Si aucun disque n'est chargé, " " est affiché. Si un CDG est chargé, le témoin
CDG s'allumera.).
Réglez le VOLUME PRINCIPAL sur votre appareil, téléviseur ou système audio à un niveau
convenable.
Pour commencer à jouer, pressez le bouton LECTURE/PAUSE. La première piste [ ] et l'indicateur
LED REPRODUCTION/PAUSE seront affichés.
Pour arrêter de jouer momentanément pressez le bouton LECTURE/PAUSE à nouveau. L'indicateur
LED LECTURE/PAUSE clignotera.
Pour arrêter de jouer, pressez le bouton à nouveau.
Si le bouton ARRET est pressé pendant la reproduction, le disque s'arrêtera de jouer. (Le nombre total de
pistes est montré dan la fenêtre LED).
Tournez le bouton de contrôle PRINCIPALpour obtenir le niveau de son souhaité.
Vous pouvez toujours sauter en avant ou de nouveau à votre nombre désiré de voie en appuyant sur les
boutons de SAUT ( - SKIP - ).
Quand vous jouez un CD audio, pressez et maintenez le bouton SAUTER ( -SKIP- ) et le CD
cherchera à grande vitesse en avant ou en arrière. La lecture normale continuera lorsque vous aurez
relâché le bouton.
Note:
(Voir le Guide de Localisation si un disque est chargé mais que le nombre total de pistes n'apparaît pas.)
Note:
Note: Le volume MIC doit être réglé simultanément en fonction du volume principal.
- Ne jamais placer autre chose qu'un disque compact dans le compartiment à disques. Des corps étrangers peuvent
endommager l'appareil.
- Ne placer qu'un seul disque sur le plateau à la fois.
- Un appui répété sur pause lors de la lecture d'un CD+G pourrait provoquer des affichages déformés sur votre écran
TV. Toute déformation restera sur l'écran TV jusqu'à réinitialisation soit pendant une pause instrumentale ou quand
la chanson est arrêtée et/ou quand la chanson reprend depuis le début.
LECTURE/PAUSE
ARRET
VOLUME PRINCIPAL
SAUTER REPRODUCTION (POUR DISQUES CDAUDIO ET CDG)
RECHERCHE (SEULEMENT POUR DISQUES CDAUDIO)
FONCTIONNEMENT DU CD OU CD+G
F7
FRANÇAIS
Table of contents
Languages:
Other Onn Karaoke System manuals
Popular Karaoke System manuals by other brands

The Singing Machine
The Singing Machine SML2350 instruction manual

The Singing Machine
The Singing Machine STVG-519 instruction manual

RJ Tech
RJ Tech RJ-4200II user manual

Arirang
Arirang AR-18 DELUXE user manual

The Singing Machine
The Singing Machine SML329 BK instruction manual

Radio Shack
Radio Shack SEMI-PRO 3 CDG 32-3043 user guide