Optimus Vega User manual

OPTIMUS | CLEVER COOKING SINCE 1899™
VEGA
Optimus Vega – Remote gas canister
stove for outdoor use
ENEN
FR
DE
NL
DK
SWE
NO
FI
IT
PL
ES
CZ
PT
RU
0085

FIGURE [1]
FIGURE [3]
FIGURE [4]
FIGURE [5A] FIGURE [5B]
FIGURE [7]
A
B
C
G
A
B
C
E
F
D
FIGURE [6]
FIGURE [2]
10 °C
-20 °C
50 °F
-4 °F

ENGLISH
WARNING
FIRE OR EXPLOSION HAZARD
If you smell gas:
1. Do not attempt to light stove.
2. Extinguish any nearby ame(s).
3. Disconnect from fuel supply.
4. Evacuate area immediately.
5. Allow gas to dissipate 5 minutes.
Failure to follow these instructions
could result in re or explosion,
which could cause property
damage, personal injury, or death.
WARNING: Improper installation, use,
adjustment, alteration, service or
maintenance can cause injury or
property damage. Refer to this
manual. For assistance or additional
information consult a qualied retai-
ler, service agency or gas supplier.

5
FOR YOUR SAFETY
Do not store or use gasoline or
other liquids with flammable
vapors in the vicinity of this or
any other appliance.
ENENEN
FR
DE
NL
DK
SWE
NO
FI
IT
PL
ES
CZ
PT
RU
DANGER CARBON
MONOXIDE
HAZARD
This appliance can
produce carbon
monoxide which is
poisonous and has
no odor.
Using it in an
enclosed space
can kill you.
Never use this
appliance in an
enclosed space
such as a camper,
tent, car or home.

6
SAFETY FIRST
IMPORTANT: Read these instructions for use
carefully. Familiarise yourself with the appliance
before connecting it to its gas container. Keep
these instructions for future reference. FOR
OUTDOOR USE ONLY
DANGER
This stove uses a liquid pressurized gas (LPG) canister
that is highly ammable and explosive. Improper or unsafe
use can result in accidental re and explosions which can
cause serious injury or possible death.
• Listen and smell for leaking gas. LPG is invisible and may
be odorless as its strong odorant can fade over time. As a
result, leaks are not always detectable by smell.
•If you suspect that there is a leak, do not use the stove or
canister. To locate and stop the leakage, move stove to a
well-ventilated area outdoors away from any ignition
source. Check that the stove and fuel canister connection
is secure and tight.
• Do not leave this appliance unattended while the appliance
is in operation. Keep children and pets away from the appli-
ance at all times.
WARNING
Risk of re and explosion when using re to detect gas
leaks.
• Do not try to detect leaks using a ame, use soapy water.
• Check that seals (between the stove and the gas cartridge )
are in place and in good working condition before
connecting to the gas cartridge. Do not use the stove if it
has damaged or worn seals. FIGURE [1]
If you expose the fuel canister to high heat, the canister
could explode or leak.

7
• Keep stove and fuel canister away from other heat sources.
• Follow all warnings on fuel canister regarding use and
storage.
• Do not attach or remove canister near high heat, open
ames, direct sunlight, other ignition sources or where
temperature of canister exceeds 50°C (120°F).
• Do not store or use gasoline or any other liquids with
ammable vapors in the proximity of this stove.
• Only use fuel canisters which are intended to be used with
this stove.
INSTRUCTION FOR USE
Only use the stove as described in this manual.
FIGURE [2]
A: Gas canister E: Pre heating tube
B: Remote Control Valve F: Pot support legs
C: Fuel Hose G: Ground shield
D: Burner
TECHNICAL SPECIFICATIONS
Gas Category: direct pressure I3B/P– butane/isobutane/
propane mix. Combustibles: Use only Optimus
100,110,220,230,450g gas cartridges certied to the EN417
standard. IT MAY BE HAZARDOUS TO ATTEMPT TO FIT
OTHER TYPES OF GAS CANISTERS. Weight: 178 g
Dimension folded: 130 x 70 x 65mm Rating: 2.6kW nominal
EN521; 1.4kW vapour gas mode EN417, 3.7kW liquid gas (4
season mode) and 185g/h, ANSI Z21.72-2019/CSA 11.2-2019:
6‘000BTU/h vapour gas. Injector size of stove: 0.32mm Burn
time: Up to 160min at maximum output (230g canister) in
vaporized gas mode Boil time: 4.5min for 1 liter in efciency
mode depending on climate etc.
ENENEN
FR
DE
NL
DK
SWE
NO
FI
IT
PL
ES
CZ
PT
RU

8
1SET UP STOVE
1. Lay out fuel hose to full length and make sure that it is not
twisted in any place.
2. Fold out the control valve handle and make sure that it is
fully closed (turned fully clockwise). FIGURE [3]
3. Check that O-ring connects to gas canister before each
use for damage (see under 5. Maintenance). FIGURE [1]
4. Fold out legs of the stove. Legs lock into place automati-
cally by turning them clockwise until resistance is felt.
FIGURE [4]
2CONNECT STOVE TO GAS CANISTER
1. Hold onto the canister fuel adaptor of the valve housing
and screw the canister counterclockwise tightly. Tighten by
hand only and be careful not to damage the threads when
you connect the gas canister.
2. Always keep the gas canister in upright position while
connecting to the stove. FIGURE [5A]
3. Always ensure that the stove is placed on a rm horizontal
surface before using it.
4. Allow plenty of free space around the stove, at least 1.25m
(4ft) on each side and 1.5m (4.5ft) above it.
5. It gets very hot under the stove, so remember to place it on
a rm base which is not ammable. It is compulsary to use
a ground shield when using this appliance on a combustib-
le surface.FIGURE [5B]
6. When a canister change is necessary, please follow steps
1-4 of this manual carefully. Change the gas canister
outside and away from people.
WARNING
Risk of burning or serious injuries due to gas leakage
hazard.
• This appliance should only be used on a horizontal surface
in an open air situation with natural ventilation without
stagnant areas, where gas leakages and products of
combustions are rapidly dispersed by wind and natural

9
convection.
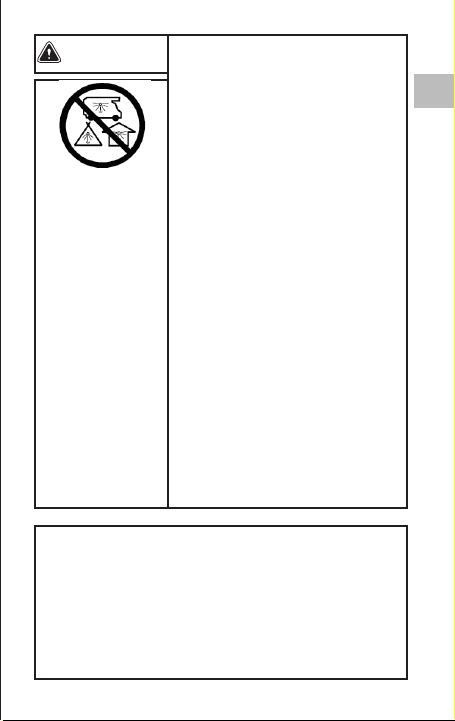
• Never light the stove if you detect a hissing sound or the
smell of gas after tightening the canister. The gas has an
additive with a foul smell. Never use a stove that smells of
gas.
• Do not use the stove if it has damages or worn seals. Do
not use the stove if it is leaking, damaged or if it does not
operate properly.
• Never over-tighten gas canister when connected to the
stove. Overtightening can damage stove or canister
causing gas to leak.
• Use extreme caution when using stove in temperatures
below freezing. In freezing temperatures, O-rings can stien
and leak gas.
• Always check for gas leaks before and after lighting the
stove.
• Keep children more than 3m (10ft) away from stove and
fuel.
• Keep highly flammable fabrics away from stove, such as
outdoor clothing, sleeping bags, tents etc.
3USE THE STOVE TO COOK
1. Always light up your stove with the canister in upright
position (vaporized gas mode) to avoid large are ups.
FIGURE [6]
2. Open the control valve approximately one turn counter-
clockwise and light the burner. The ame ring should be
complete and the ame should be mostly blue and
non-pulsating in normal operation.
CAUTION: If ame turns yellow and grows higher when
operating the stove in liquid gas mode, simply adjust
amesize by turning the control valve clockwise.
3. Adjust the control valve to get the ame you want.
4. If the output is weak, it could mean the gas is running out,
or that the canister is too cold. Turn off the stove and let it
cool down. Make sure there is no open ame nearby when
changing the gas canister.
5. As this is a remote burner stove, there will always be a
delay between turning the control spindle and the effect on
ENENEN
FR
DE
NL
DK
SWE
NO
FI
IT
PL
ES
CZ
PT
RU

10
the ame. Especially when the stove is used in liquid gas
mode, this delay will be longer (up to 30s).
6. CAUTION: accessible parts may become very hot. Keep
young children and pets away from the stove.
TIPS FOR OPTIMAL USAGE: FIGURE [7]
Vapor gas mode: For normal conditions and simmering
- most fuel efcient mode.
Liquid gas mode: For cold conditions and low gas pressure
in canister only. - high gas consumption.
In cold weather, the butane/isobutane/propane mix is
adversely affected by the cold. The gas mix becomes less
efcient even at 0°C (32°F). The butane ceases to vaporize
and the stove runs solely on isobutane and propane. If the
propane runs out, you can only use the rest of the container at
temperatures above freezing.
• Use the stove in vapor gas mode in normal conditions and
for optimal simmering results. FIGURE [7A]
• Use the stove in liquid gas mode when cooking in colder
conditions. Fold out the canister support legs on the valve
and turn canister over slowly. FIGURE [7B] Keep the canister
low when inverting it and hold fuel hose with one hand in
position to avoid movement of the stove. FIGURE [7C] Take
extra care that canister is standing stable and continue
cooking in liquid gas mode.
• Keep the gas canister warm inside your jacket or in your
sleeping bag at night.
WARNING
Risk of burning or serious injuries due to are up hazard
when lighting up the stove in liquid gas mode
• Never light up your stove in liquid gas mode as this can
lead to are ups.
• Let the stove burn for 30s before inverting the canister for
preheating.
• Never hold your face or any other part of your body over
the stove while lighting or cooking.

11
• Never shake a canister when the stove is lit as you risk big
ames shooting up.
• If ame turns yellow and grows higher when operating
the stove in liquid gas mode, simply adjust the
amesize by turning the control valve clockwise.
WARNING
Overheating and explosion hazards
• Never allow the canister to be inside a windscreen
perimeter.
• Keep solid combustibles at least 1.25m (4ft) away from the
top and 1m (3ft) from sides of a burning stove or a stove
that you are in the process of lighting.
• Keep ammable liquids and vapors at least 8m (25ft) away
from the top and sides of a burning stove, or a stove that
you are in the process of lighting.
• Never attempt to light a stove if control valve has been left
open. If control valve is left open, close it immediately and
thoroughly ventilate area before lighting stove. Failure to
ventilate area can result in an explosion.
• Never use cookware with a diameter larger than 220mm
(8.5in). The pan plus food must not weigh more than 4kg
(8.8lbs) combined.
• Never place and operate 2 or more stoves together.
• Never operate stove with empty or dry cookware.
4TURN OFF, COOL AND PACK STOVE
1. Turn off the stove and double-check that the ame is
completely extinguished.
2. Allow stove to cool properly.
3. Disconnect the gas canister after having double checked
that the ame is completely extinguished and that gas
supply is fully turned off by turning the control valve handle
fully clockwise.
4. It is normal for a small amount of gas to zz out when you
unscrew the gas canister.
5. Fold in pot support legs, wrap fuel hose around the stove
and store in stuff sack.
ENENEN
FR
DE
NL
DK
SWE
NO
FI
IT
PL
ES
CZ
PT
RU

12
6. How to check if the gas container is empty: Gently shake
the gas container - if movement of liquid is sensed or
audible then gas is present in the container.
WARNING
Risk of burning due to re hazard
As the Vega is a remote canister stove, there is a delay
between closing the valve and extinguishing the ame. This
delay can take up to 30s when stove is turned off in liquid gas
mode.
CAUTION
Burning hazard due to incorrect handling and storage
Storing fuel canisters near any heat or ignition source, or
where temperatures exceed 50°C (120°F) can result in the
canister exploding.
• Never move a burning or hot stove. Allow stove to cool for
at least 10min before moving it.
• Never transport or store the stove with the gas canister
connected.
• Always store gas canisters in a well-ventilated area away
from any possible heat or ignition source such as: water
heaters, stoves, pilot lights, furnaces or where temperatu-
res exceed 50°C (120°F).
5MAINTENANCE
Before each use, check the O-ring where the stove connects to
the gas canister. FIGURE [1] Leakage may result if the O-ring is
not in place, or if it is worn or damaged. Replace the O-ring by
tweezing it out with a tool such as the blunt end of a sewing
needle. Never use a sharp or pointed object that can damage
the seal surfaces. Fit the new O-ring with care to avoid
damaging it. Only use original Optimus O-rings (Art. No.
8017867) for this purpose. Do not modify the stove.
Only qualied individuals are allowed to do additional service.
For major repairs send the stove back to Optimus. This
appliance is not designed to be serviced by the user, and

1313
contains no user serviceable parts.
LIMITED WARRANTY
Optimus provides a 2 year limited warranty against
manufacturing defects for the original stove purchaser. Proof
of purchase is required for this warranty to be valid. This
warranty does not cover damage due to accident, improper
use or modications.
If you have any problems with your Optimus Vega, return it to
your dealer or contact Katadyn. Clean food and dirt from the
stove before returning it. For more information, contact your
dealer or Katadyn Products Inc. in Switzerland at +41 44 839
customers please contact Katadyn North America at
1-800-755-6701 or [email protected].
This warranty gives you specic legal rights and you may have
other legal rights which vary from state to state.
Please visit our website for additional information about our
other products. www.optimusstoves.com
For clean water and freeze dried food, visit www.
katadyngroup.com
ENENEN
FR
DE
NL
DK
SWE
NO
FI
IT
PL
ES
CZ
PT
RU

PRINT NO. 8017537/6
OPTIMUS VEGA
ARTICLE NO. 8018505
Manufacturer:
Katadyn Products Inc.
Pfäfkerstrasse 37
8310 Kemptthal | Switzerland
+41 44 839 21 11
www.optimusstoves.com
Distributor USA/Canada:
Katadyn North America Inc
130 Cyber Court
Rocklin, CA 95765 | U.S.A
+1 800 755 6701
Distributor Europe:
Katadyn Deutschland GmbH
Hessenring 23
64546 Mörfelden-Walldorf | Germany
+49 61 05 45 67 89
Certied to:
CSA/ANSI Z21.72 • CSA 11.2 2019
Camp Stove / Poêle de camping
EN 521
Other manuals for Vega
1
Table of contents
Other Optimus Camping Equipment manuals
Popular Camping Equipment manuals by other brands

Snow Peak
Snow Peak CK-304 instruction manual

Cadac
Cadac 6540L0 User instructions

Wolf
Wolf ATEX Fluorescent Leadlamp LinkEx LL-500 Operation & maintenance instructions

Coleman
Coleman Quickbed user guide

PRIMAL TREESTANDS
PRIMAL TREESTANDS PVHO-200 Instruction and safety manual

Cub
Cub 2.2 Series owner's manual