manuals.online logo
Brands
  1. Home
  2. •
  3. Brands
  4. •
  5. Oregon Scientific
  6. •
  7. CD Player
  8. •
  9. Oregon Scientific DDM328 User manual

Oregon Scientific DDM328 User manual

Music Orbit + Music Station
Portable MP3 / WMA / CD Player
with Stereo Speaker Dock
Model: DDM3 8
User Manual
DDM328 Eng Cover R9 OP 5/9/05, 6:13 PM1
EN
1
SAFETY AND MAINTENANCE
The Music Orbit + Music Station Portable MP3 / WMA /
CD Player with Stereo S eaker Dock are designed to
give you years of service if handled ro erly. All safety
and o erating instructions in this user manual should
be read before using the roducts, and retained for future
reference. Ensure that you heed all warnings to minimize
roduct malfunction and reduce the chances of incurring
ersonal injury. Before using the units, observe the
following guidelines to ensure ro er care and
maintenance.
The lightning flash with arrowhead
symbol within an equilateral triangle, is
intended to alert the user to the resence
of uninsulated "dangerous voltage" within
the roducts enclosure that may be of
sufficient magnitude to constitute a risk
of electric shock to ersons.
The exclamation oint within an equilateral
triangle is intended to alert the user to the
resence of im ortant o erating and
maintenance (servicing) instructions in the
literature accom anying the a liance.
CLASS 1 LASER PRODUCT
means that the layer's laser
construction makes it
inherently safe so that the
legally rescribed maximum
ermissible radiation values
can never be exceeded.
PLAYER, LINE REMOTE AND SPEAKER DOCK
• Using any equi ment or devices other
than those described and s ecified in these o erating
instructions, or tam ering with the units in any way,
can result in dangerous ex osure to radiation.
• The layer em loys a laser. Do not attem t to
disassemble the casing. The laser beam is harmful
to the eyes.
• The use of controls or adjustments or erformance
of rocedures other than those s ecified herein may
result in ex osure to hazardous radiation.
• To avoid electrical shock, do not o en any cabinet
or touch any ex osed circuitry. Refer servicing to
qualified ersonnel only.
• Avoid touching the layer lens. If you do, you may
damage the lens and the layer may not o erate
ro erly.
• Do not insert any foreign objects or dro anything
into any o enings as this could cause serious
damage, ossibly resulting in fire.
• Do not subject the units to extreme im act, shock or
fluctuations in humidity.
• Do not ex ose the units to dri ing and s lashing
and ensure that no objects filled with liquids, such
as vases, are laced on the units.
• Do not leave the units ex osed to direct sunlight for
long eriods of time. This may deform or discolour
the cabinet and may also cause malfunction.
• Do not lace the units near heat sources such as
radiators, heat registers, stoves or other a aratus
that roduce excessive heat.
• Kee your units in a dry, well-ventilated lace to
revent it from molding. Do not use or store the units
in locations that may adversely affect the roduct
such as rain, snow, moisture, dust or desert.
• For added rotection for the roduct during a
lightning storm, or when it is not used for long eriods
of time, un lug the units from the wall outlet and
disconnect any cables. This will revent damage to
the roducts due to lightning and ower-line surges.
• Stains on the units should be wi ed off with a soft,
lint-free cloth. If they are heavily stained, wi e them
with a cloth soaked in water-diluted neutral detergent
and wrung well, then wi e clean. Never use alcohol,
solvent, chemical, aint thinner or benzene to clean
the units. Remember to un lug the units from any
electrical socket or AC ada tor first before cleaning.
AUDIO CDs, MP3-CDs, WMA-CDs / DISC LENS
Use only digital audio CDs that have the logo.
• Never write or attach any stickers on an audio or
MP3 / WMA CD. Hold CDs by the edges, or by one
edge and the hole. Do not touch the signal surfaces.
Store CDs in its box after use with the label facing
u .
AC ADAPTOR
• If a disc becomes dirty, wet a soft, lint-free cloth in
water, wring it out well, wi e the dirt away gently,
and then remove any water dro s with a dry cloth.
Wi e discs from the inner edge of the disc toward
the outer erimeter in a straight line. Never wi e the
disc in a circular motion since circular scratches are
likely to occur and could cause noise during
layback.
CAUTION
DDM328 Eng R9 OP 5/9/05, 10:01 AM1
EN
2
• Do not use record cleaning s rays or antistatic
agents on discs. Also, never clean discs with
benzene, thinner, or other volatile solvents that may
cause damage to disc surface.
• To revent the layer's disc lens from accumulating
dust or dry articles, use a camera lens brush /
blower and blow on the lens, then wi e lightly with
the brush to remove dust.
• If the disc lens is covered with finger rints, clean
with a cotton swab starting in the middle and working
toward the outside edge.
RECHARGEABLE / DRY BATTERIES
To revent battery damage, electrolyte leakage and
short-circuiting, heed the following oints.
• Do not eel off the covering on batteries and do not
use if covering has been eeled off.
• Ensure the battery olarity is correctly aligned when
utting the batteries in the unit.
• Do not mix together different ty es or brands of
batteries or old and new batteries.
• Remove all batteries if you do not intend to use the
layer for a long time.
• Do not attem t to recharge AA batteries.
• Do not allow metal objects to touch the battery
terminals as this may cause short-circuiting and
increase the chance of fire and ersonal injury.
AC ADAPTOR
• This units should be o erated only from the ty e of
ower source indicated on the marking label. If you
are not sure of the ty e of ower su ly to your home,
consult your roduct dealer or local ower com any.
For roducts intended to o erate from battery ower,
or other sources, refer to o erating instructions.
• Do not touch the ada tor with wet hands, forcibly
bend it in any way, or lace heavy objects on to of
it.
• Connect only the AC ada tor rovided with the unit.
• When un lugging the AC ada tor from the wall,
always ull the lug or connector, not the cord.
• Do not overload wall outlets, extension cords, or
integral convenience rece tacles as this can result
in a risk of fire or electric shock.
• Leaving the AC ada tor connected can cause the
batteries to go flat. Disconnect the AC ada tor from
the ower outlet after recharging the batteries, and
disconnect all ower sources if the units will not be
used for a long eriod of time.
HEADPHONES
• Do not listen with your head hones at a high volume.
• If you ex erience a ringing in your ears, reduce
volume or discontinue use.
• Do not use while o erating a motorized vehicle.
• Discontinue use if you ex erience discomfort with
the head hones that directly contact your skin.
Continued use may cause rashes or other allergic
reactions.
SERVICING THE PRODUCT
• The units should be serviced by qualified service
ersonnel if:
• The AC ower su ly cord or AC ada tor has
been damaged.
• Objects or liquids have gotten into the units.
• The units have been ex osed to rain or excessive
moisture.
• The units do not o erate normally or exhibits a
marked change in erformance.
• The units have been dro ed or the casing has
been damaged.
• When arts need re lacing, ensure the authorized
service center uses arts s ecified by the
manufacturer or arts that have the same
characteristics as the original arts. Unauthorized
substitutes may result in fire, electric shock or other
hazards.
• U on com letion of any service or re airs to the
roducts, ask the service technician to erform safety
checks to determine that the roducts are in ro er
o erating condition.
DDM328 Eng R9 OP 5/9/05, 10:01 AM2
EN
3
Musi Orbit + Musi Station
Portable MP3 / WMA / CD Player
with Stereo Speaker Do k
Model: DDM328
USER MANUAL
CONTENTS
Safety and Maintenan e .......................................... 1
Player, Line Remote and S eaker Dock ................ 1
Audio CDs, MP3-CDs, WMA-CDs / Disc Lens ...... 1
Rechargeable / Dry Batteries ................................ 2
AC Ada tor ............................................................ 2
Head hones .......................................................... 2
Servicing the Product ............................................ 2
Contents ................................................................... 3
Introdu tion .............................................................. 4
Unpa king ................................................................. 4
Produ t Overview .................................................... 4
Audio Player .......................................................... 4
Line Remote .......................................................... 4
Head hones .......................................................... 5
S eaker Dock ........................................................ 5
Getting Started ......................................................... 6
Using the AC Ada tor ............................................ 6
Using Rechargeable Batteries ............................... 6
Using AA Batteries (O tional) ................................ 7
Connecting the Line Remote and Head hones ..... 7
Do king the Player to the Speaker Do k ............... 7
Inserting the Player ................................................ 7
Using the S eaker Dock AC Ada tor ..................... 8
Charging the Player's Batteries ............................. 8
Basi Operations ..................................................... 8
Adjusting Volume ................................................... 9
Pause / Sto / Play ................................................ 9
Ski ing Tracks ..................................................... 9
Selecting Different Directories
(MP3 / WMA CDs Only) ......................................... 9
Removing Discs ..................................................... 9
Hold Function ........................................................ 9
ESP (Ele troni Sho k Prote tion) ....................... 10
Clo k and Radio ..................................................... 10
Clock .................................................................... 10
Radio ................................................................... 10
Program Play Mode (Playlist) ............................... 10
Audio CDs ............................................................ 11
MP3 / WMA CDs .................................................. 11
Repeat and Random Playba k .............................. 12
Normal Playback .................................................. 12
Programmed Playback of Playlist
(Audio and MP3 / WMA discs) ............................. 12
Equalizer ................................................................. 13
Using the Player with an Audio System ............... 13
Troubleshooting ..................................................... 13
Spe ifi ations ......................................................... 14
Music Orbit Portable MP3 / WMA / CD Player ..... 14
Music Station Stereo S eaker Dock .................... 14
About Oregon S ientifi ........................................ 15
FCC Statement ....................................................... 15
Declaration of Conformity .................................... 15
EC-De laration of Conformity ............................... 15
DDM328 Eng R9 OP 5/9/05, 10:01 AM3
EN
4
12
INTRODUCTION
Thank you for selecting the Oregon ScientificTM Music
Orbit + Music Station Portable MP3 / WMA / CD Player
with Stereo S eaker Dock as your ersonal roducts of
choice. The ultra-slim and lightweight unit layer is just
15.7 mm thick, and along with the line remote, can easily
fit the unit into a travel bag and take it anywhere to listen
to your favourite music tracks using long-lasting
rechargeable batteries.
With su ort for CD text and ID3 tagging, the unit is
com atible with CD, CD-R and CD-RW discs and MP3
and WMA audio formats. It features sound and layback
effects such as a 5-band equalizer, 120-second anti-
shock rotection, and rogrammable laylist. For
extended layback, the unit comes with an external
battery case that uses AA batteries.
The S eaker Dock lug-and- lay docking station is a
erfect com liment to the layer. Sim ly insert the layer
into the S eaker Dock and it begins audio layback,
with the S eaker Dock itself serving as an external active
s eaker and as a battery charging station for the layer.
From the S eaker Dock, the unit's layback o tions
including equalizer, sound effects, volume, and
rogrammable laylist can be set. The unit features an
FM/AM radio with u to 40 reset stations.
UNPACKING
When you un ack your Music Orbit + Music Station
Portable MP3 / WMA / CD Player with Stereo S eaker
Dock, make sure to kee all the acking materials in a
safe lace, in case you need to later return it for servicing.
In this box you will find:
• Music Orbit + Music Station Portable MP3 / WMA /
CD Player with Stereo S eaker Dock
• Line remote with LCD
• In-ear head hones
• 2 rechargeable batteries
• External battery case
• AC ada tors ( layer and S eaker Dock)
• Carrying case
• Lint-free cloth
• User manual
• Warranty card
Please observe the local regulations regarding
the dis osal of acking materials, dead batteries and
old equi ment.
This equi ment has been designed and
manufactured to meet international safety standards but,
like any electrical equi ment, care must be taken if you
are to obtain the best results and safety is to be assured.
PRODUCT OVERVIEW
AUDIO PLAYER
OUTSIDE VIEW
1. In ut jacks
a. DC IN 4.5V
b. EXT BATT (External battery)
2. Line-out jack
3. Hold / Off / Chg (Charging) switch
4. Charging LED indicator
5. Volume control (- VOL +) button
6. Play / Pause button
7. Sto / Off button
8. Ski / Search (Fast forward / Rewind) button
9. Line remote jack
10. O en lid
INSIDE VIEW
1. Lens
2. Rechargeable battery com artment
LINE REMOTE
FRONT VIEW
1. Connector
2. EQ button
3. Mode button
4. Info / Prog button
5. ESP button
NOTE
NOTE
UBS
mode
prog
ESP
12
8
345 6 7
12 345 678
a
b
9 10
DDM328 Eng R9 OP 5/9/05, 10:01 AM4
EN
5
6. Hold switch
7. Head hone jack
8. LCD dis lay
BACK VIEW
1. Ski / Search (Rewind / Fast Forward) button
2. Sto / Off button
3. Play / Pause button
4. Volume - button
5. Volume + button
6. Cli
LINE REMOTE LCD DISPLAY
1. LCD (dis lays track length, track number, directory
number, ID3 tag, etc.)
2. Re eat 1
3. Re eat all
4. Re eat directory
5. ESP
6. Prog
7. Battery indicator
8. Random
HEADPHONES
1. Head hone connector
2. Intra-aural ear cou ling
SPEAKER DOCK
FRONT VIEW
1. LCD dis lay
2. FM / AM button
3. tune+ button
4. tune- button
5. Sto button
6. Four-way directional controller
a. Volume u (+) / down (-) buttons
b. Fast forward / rewind buttons
c. mem- / mem+ buttons
7. Slot-in mechanism for CD layer
8. Power on / off (Standby) button
9. Info / Prog button
10. EQ button
11. mode button
12. Play / Pause button
13. External s eaker
BACK VIEW
1. DC IN jack
2. FM igtail antenna
12345 6
PROG
1
2
56 7 8
3
4
1
2
2
1
1
2
3
4
5
6
7
8
9
11
10
12
13
DDM328 Eng R9 OP 5/9/05, 10:01 AM5
EN
6
SPEAKER DOCK LCD DISPLAY
1. LCD dis lay (dis lays track length, track number,
directory number, ID3 Tag, etc.)
2. Battery indicator
3. Prog (Program)
4. Re eat 1
5. Re eat all
6. Re eat Folder / Directory (MP3 / WMA CDs only)
7. Random
8. Stereo
9. AM / FM indicator
GETTING STARTED
USING THE AC ADAPTOR
1. Plug the layer's AC ada tor into an electrical ower
outlet.
2. Plug the AC ada tor jack into the layer's DC IN
4.5V jack. The layer is in standby mode when the
AC ada tor is connected.
Using the AC ada tor will hel to save on batteries.
Turn the unit off before lugging or un lugging
the AC ada tor. Should you notice any abnormality in
the AC ada tor, disconnect it from the electrical socket
and layer immediately.
Always use the su lied AC ada tor that is
designed s ecifically for the layer only. Using any other
AC ower ada tor may cause the unit to malfunction
and increase the risk of fire or injury.
USING RECHARGEABLE BATTERIES
The o tion of using rechargeable batteries to o erate
the layer instead of the AC ada tor rovides added
flexibility and ortability to use the unit almost anywhere
without being restricted by cables.
In a non-controlled environment, many factors
can affect battery life, such as volume, LCD backlight
and tem erature. When batteries are not used for a long
eriod of time, remove them to save battery ower.
Do not use different ty es of batteries together
or mix new batteries with old ones. When any of the
batteries are de leted, re lace all batteries with new
ones.
Your unit comes with 2 rechargeable NiMH 1400mAh
(1.2V) batteries that can be recharged directly from within
the layer.
The rechargeable batteries should be recharged
before they are used for the first time or if they have not
been used for a long eriod of time.
To insert the rechargeable batteries into the layer:
1. Push against the tab of the battery com artment
cover, then ull the battery cover u ward to o en.
2. Insert 2 NiMH batteries (su lied) into the
com artment according to the olarity indicators and
close the battery cover.
CHARGING THE BATTERIES
1. Slide the layer's HOLD OFF CHG switch to the
CHG osition. If the AC ada tor is already lugged
into the layer, the batteries should begin charging
from the layer and the charging LED indicator on
the unit lights u red.
2. Charging is com lete after a roximately 15 hours.
The LED indicator turns off to indicate the batteries
are finished charging. Un lug the AC ada ter from
the ower outlet and the DC IN 4.5V jack.
3. To take the rechargeable batteries out from the
com artment, ress against the "-" end of each
battery. The "+" end of the batteries will lift u ,
allowing you to easily ull out the batteries.
Playtime may be shorter than usual after
recharging batteries for the first time or after they have
been unused for a long time. Re eatedly recharge and
discharge the batteries to restore them to normal.
However, do not continuously charge the batteries for
more than 24 hours. Doing so may cause battery
erformance to deteriorate.
Only batteries es ecially designed for this unit
(NiMH) can be recharged. Do not attem t to charge other
ty es of batteries. The LED indicator will not light u
when charging rechargeable batteries that are not
designed for use with layer. may not be dis layed
if you are using rechargeable batteries that are not
designed for this layer.
1
23
4
5
6
78 9
NOTE
NOTE
TIP
NOTE
NOTE
TIP
NOTE
NOTE
DDM328 Eng R9 OP 5/9/05, 10:01 AM6
EN
7
21
Rechargeable batteries have a service life of
a roximately 300 charge-discharge cycles. The
batteries have reached the end of their o erational life if
they last for a noticeably shorter time after recharging.
USING AA BATTERIES (OPTIONAL)
1. External battery ack connector
2. Battery com artment cover
The su lied external battery case allows you to use
2 AA batteries (not su lied) and extend the use of the
unit when the rechargeable batteries have run out of
ower.
To insert the batteries:
1. O en the battery case by ushing down on the to
art of battery case cover, then slide out to o en.
2. Insert 2 AA batteries into the com artment according
to the olarity indicators. Close the battery case.
3. Plug the battery case connector to both the layer's
EXT BATT and DC IN 4.5V jacks for ower.
If rechargeable batteries are inserted into the
layer and AA batteries are connected via the external
battery case, the unit will use the AA batteries as the
ower source. If connected, un lug the AC ada tor.
Playback time (when using both rechargeable
and AA batteries) is u to 22 hours.
CONNECTING THE LINE REMOTE AND
HEADPHONES
1. Plug the line remote connector to the layer's line
remote jack.
2. To use the su lied head hones, connect it to the
line remote head hone jack. Ensure that volume is
set at a moderate listening level.
Once the line remote is ro erly connected to the layer
and the head hones connected to the line remote, you
are ready to o erate the unit.
DOCKING THE PLAYER TO THE SPEAKER
DOCK
The S eaker Dock offers the convenience of listening
to music tracks or the radio from the home or office,
taking u minimal desk s ace. Once the layer is docked
into the S eaker Dock, it lays back audio via its external
active s eaker, and can also conveniently charge the
layer's rechargeable batteries direct from within the
layer.
INSERTING THE PLAYER
Before inserting into the S eaker Dock's slot-in
mechanism, remember to check the following:
• The layer should be owered off.
• The layer's AC ada tor is not lugged in.
• The line remote and head hones are not connected
to the layer.
1. Position the layer so that the Oregon Scientific logo
on the device faces right-side u .
2. Align the layer directly over the S eaker Dock's slot-
in mechanism, taking note to horizontally align the
layer's logo with the Oregon Scientific logo on the
S eaker Dock.
3. Insert the layer into the slot's 12- in connector. It
should click into lace.
NOTE
NOTE
NOTE
NOTE
DDM328 Eng R9 OP 5/9/05, 10:01 AM7
EN
8
NOTE
NOTE
Since the layer's line-remote jack is fitted into
the S eaker Dock's 12- in connector, the line remote
that is su lied with the layer and connected to the
line-remote jack cannot be used to control the layer's
o erations.
While inserted into the S eaker Dock, the layer's
HOLD OFF CHG switch, Vol - / + button and button
can still be accessed from the unit.
USING THE SPEAKER DOCK AC ADAPTOR
Plug one end of the AC ada tor into an electrical ower
outlet and the other end into the S eaker Dock's DC IN
9V jack.
Should you notice any abnormality in the
S eaker Dock AC ada tor, disconnect it from the
electrical socket immediately.
Always use the su lied AC ada tor that is
designed s ecifically for the S eaker Dock only. Using
any other AC ower ada tor may cause the unit to
malfunction and increase the risk of fire or injury.
CHARGING THE PLAYER'S BATTERIES
The S eaker Dock rovides the o tion of recharging
the layer's rechargeable NiMH 1400mAh (1.2V)
batteries if they are used to ower the unit.
Make sure the rechargeable batteries are laced in the
layer's battery com artment. Once the unit is inserted
into the S eaker Dock and the S eaker Dock's AC
ada tor is lugged in, the batteries in the layer
automatically begin recharging. There is no need to use
the layer's AC ada tor.
a ears on the S eaker Dock LCD to indicate
battery-charging status. Charging is com lete after
a roximately 15 hours, and disa ears to indicate
the batteries are finished charging.
Only batteries es ecially designed for this unit
can be recharged. Do not attem t to charge or mix other
ty es of batteries. The LED indicator will not illuminate
when charging rechargeable batteries that are not
designed for use with the layer.
BASIC OPERATIONS
The use of the term "CD" refers to both audio
CDs and MP3 / WMA CDs unless s ecifically noted.
Both the layer and line remote can be used to o erate
the unit's basic functions. If docked, the layer's functions
can also be controlled via the S eaker Dock buttons.
1. Slide the OPEN switch to the right to o en the
layer's lid, then insert a CD with the label facing
u .
2. Press the area near the center hole of the CD until it
clicks into osition, then close the lid.
3. Connect the line remote to the layer's line remote
jack, then connect the head hones to the head hone
jack on the line remote.
4. Make sure the HOLD OFF CHG switch on the layer
and HOLD switch on the line remote is not on the
HOLD osition.
5. To ower on the layer, ress the button on the
unit or line remote. The CD automatically begins
laying the first track with track number and ela sed
time showing on the LCD. also a a ears.
For more information on ESP, read section on "ESP
(ELECTRONIC SHOCK PROTECTION)".
6. If the layer is docked into the S eaker Dock, ress
the S eaker Dock button to ower on the unit
and the S eaker Dock button to begin CD
layback. The S eaker Dock automatically converts
audio signals from the layer for layback via the
S eaker Dock's external s eakers.
If the layer or line remote is left in sto mode
for a rox. 1 minute, the unit owers off automatically
to revent the battery from running low. If the unit is
turned on but no CD is loaded, it owers off in about
30 seconds. When batteries are becoming low on ower,
a ears on the right side of the line remote LCD.
NOTE
TIP
NOTE
NOTE
NOTE
DDM328 Eng R9 OP 5/9/05, 10:02 AM8
EN
9
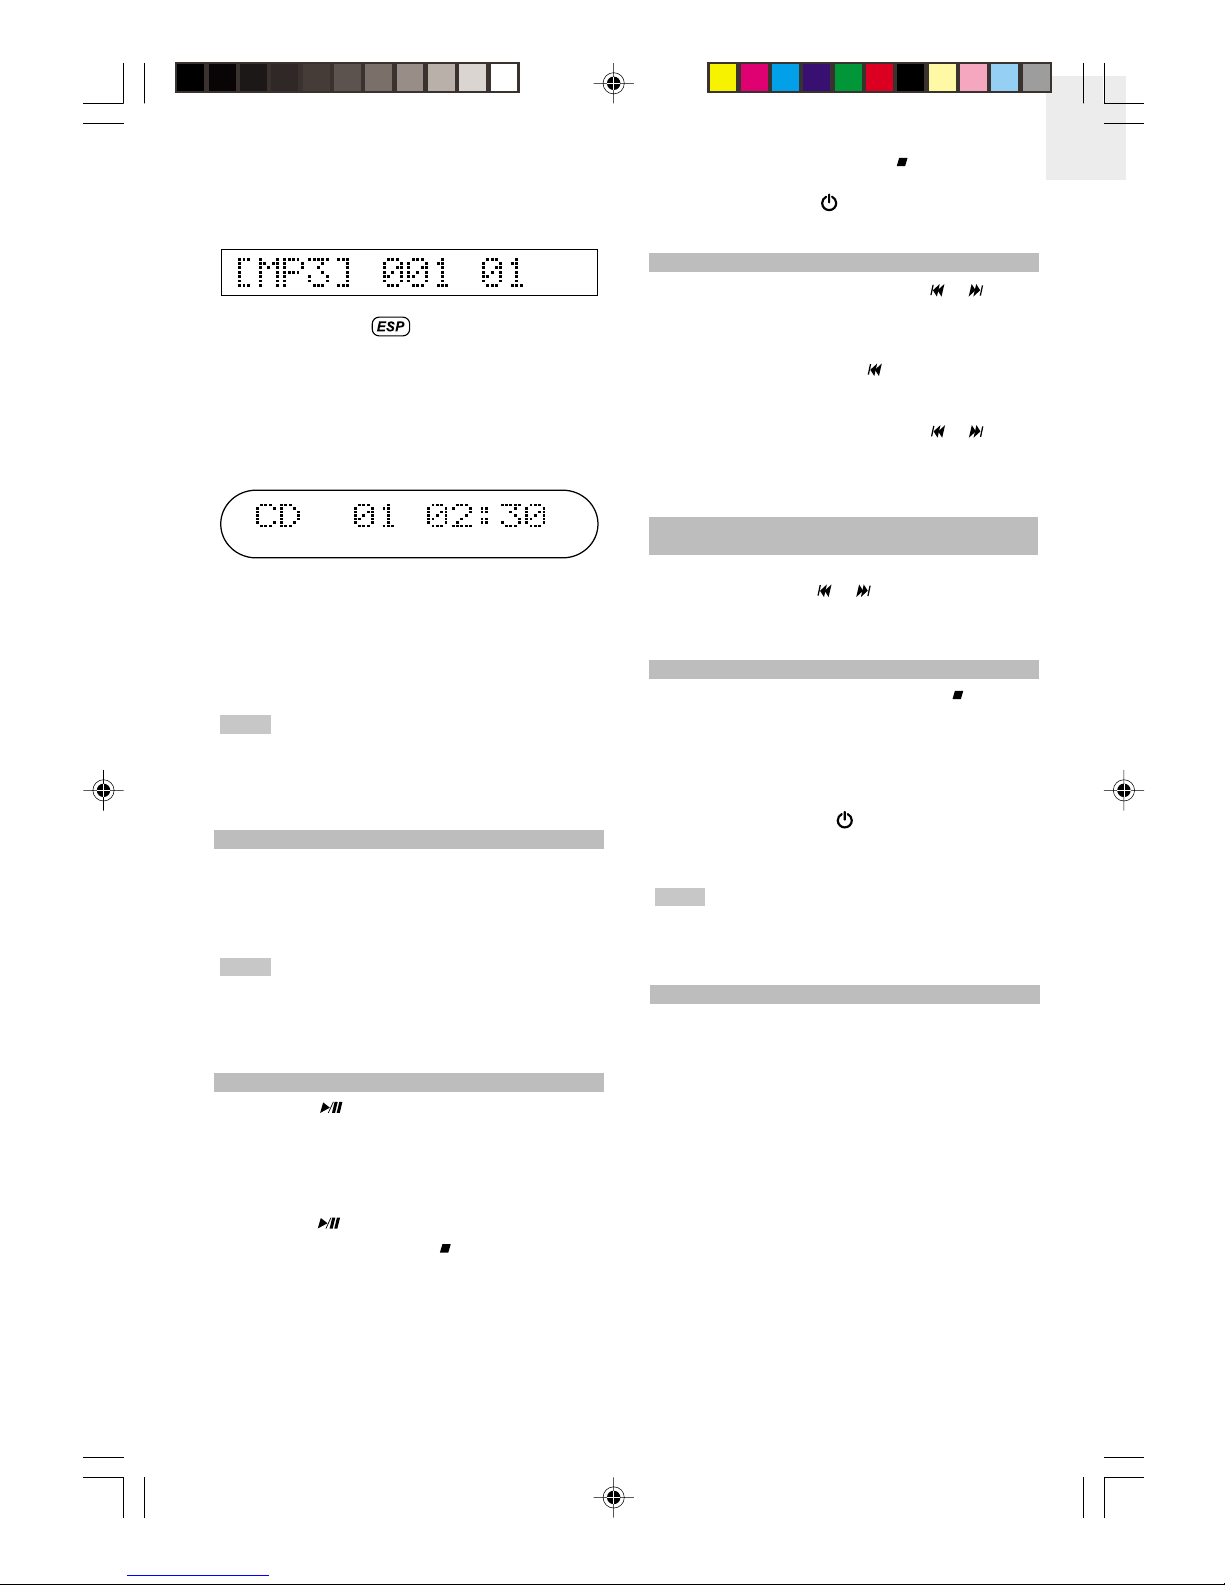
During MP3 / WMA CD layback, the directory number
(e.g., 01), current track number (e.g. 001), and ela sed
laying time a ears briefly on the LCD, then switches
to show "[MP3]", the current track number and file name.
With the exce tion of , information such as track
number, ela sed track laying time, total track time,
battery indicator, and re eat / random layback that is
normally viewed on the layer's line remote LCD can be
viewed directly from the S eaker Dock LCD. For MP3 /
WMA CD layback, information such as directory
number and ID3 tagging, if available, are also shown on
the LCD.
The layer su orts audio track ID3 tagging, which
contains information and data such as title, album or
artist that may be embedded in an MP3 track. Press the
INFO / PROG button on the layer or S eaker Dock to
view the ID3 tag information. If there is no ID3 tag
information, "[MP3] No ID3-Tag" is shown on the LCD.
When all tracks on the CD have finished laying,
the system will automatically sto . If the lid is o ened at
anytime during layback, "DOOR OPEN" a ears on
the LCD. If no CD is loaded, "NO DISC" a ears on the
LCD.
ADJUSTING VOLUME
1. Adjust the volume using the - / + buttons on the
layer, line remote or S eaker Dock.
2. Press and hold the - / + buttons to adjust volume
more quickly.
Volume level on the layer ranges from 00 to
32 (default volume level is 10). On the S eaker Dock,
volume level ranges from 00 (shown as "VOL MIN" on
the S eaker Dock LCD) to 40 ("VOL MAX"). Default
volume level is 20.
PAUSE / STOP / PLAY
1. Press the button on the layer, line remote or
S eaker Dock during audio layback to ause. The
ela sed time of the currently layed track on the line
remote or S eaker Dock LCD will flash. MP3 / WMA
CDs will show the directory number in addition to
track number and ela sed time.
2. Press the button again to resume layback.
3. To sto layback, ress the button on the layer,
line remote or S eaker Dock. The unit enters standby
mode with total number of tracks, total laying time
and "CD" is dis layed on the LCD (for MP3 / WMA
CDs, the total number of directories, total number of
tracks and "Track" a ear on the LCD).
NOTE
NOTE
4. To turn off the layer, ress the button on the unit
or line remote again. To ower off the layer, ress
the S eaker Dock button. The system clock
a ears on the LCD.
SKIPPING TRACKS
1. In sto or layback mode, ress the or button
on the layer, line remote or S eaker Dock to ski
the current track and go to the beginning of the
revious or next track.
2. During layback, ress the button once to ski to
the beginning of the current track and re eat
layback.
3. During layback, ress and hold the or button
to rewind or fast forward to a different location of the
currently layed track. Playing time shown on the
line remote or S eaker Dock LCD changes ra idly.
SELECTING DIFFERENT DIRECTORIES
(MP3 / WMA CDs ONLY)
To select the revious or next directory on an MP3 / WMA
CD, ress and hold the or button until the desired
directory number (e.g., 10) and track number (e.g., 001)
a ear on the line remote or S eaker Dock LCD.
REMOVING DISCS
1. If the layer is laying a track, ress the button on
the layer, line remote or S eaker Dock to sto
layback.
2. Once the disc sto s s inning, slide the layer's
OPEN switch to o en the layer's lid and remove
the CD.
3. If docked, ress the button to ower off the
S eaker Dock and un lug its AC ada tor, then
detach the layer from unit.
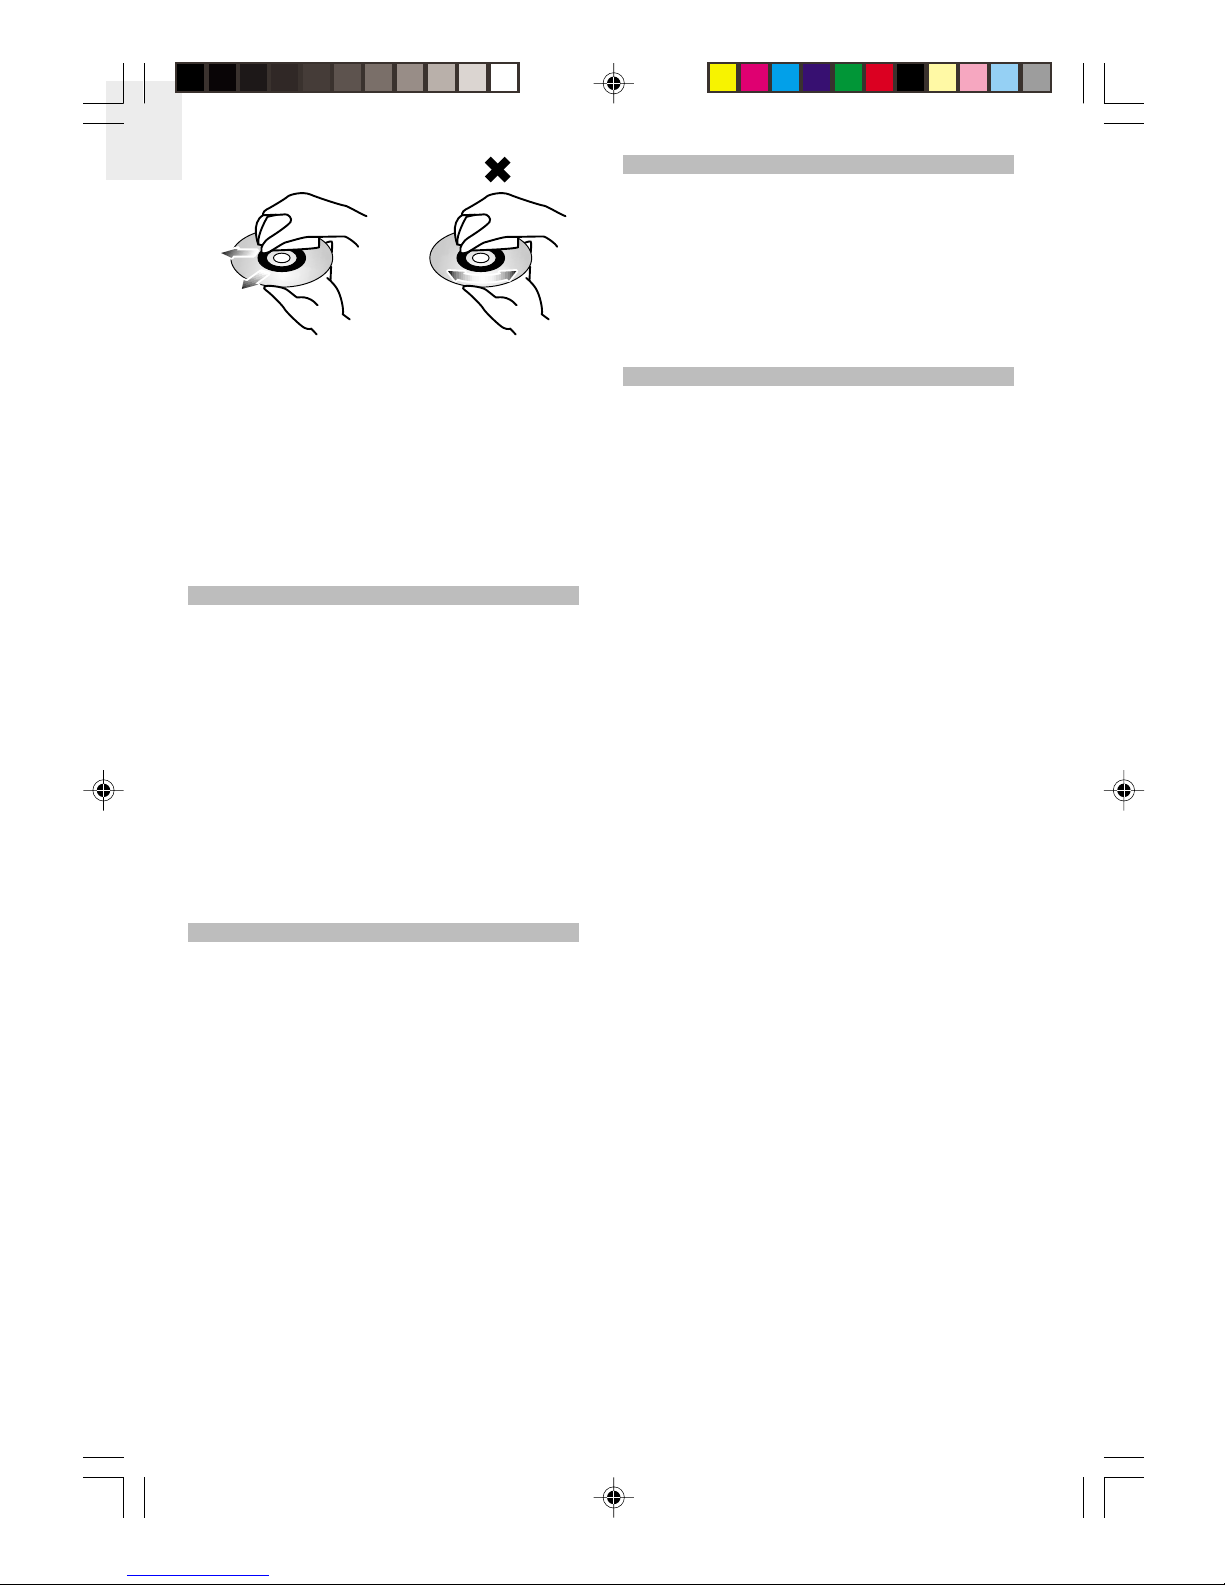
To avoid damaging discs / layer and incurring
electric shock, do not sto the CD by hand or try to
remove the layer from the S eaker Dock before
owering off and un lugging the AC ada tor.
HOLD FUNCTION
PLAYER
The HOLD OFF CHG switch on the layer is designed
to revent accidental selection of an unwanted function
during layback or sto mode.
1. Slide the HOLD OFF CHG switch to the HOLD
osition. "HOLD" is shown on the LCD for about
5 seconds. No buttons on the layer function when
ressed.
2. To resume normal button o eration, slide the HOLD
OFF CHG switch to the OFF osition on the unit.
LINE REMOTE
The HOLD switch is also available on the line remote.
Slide HOLD to the right on the line remote to activate
and slide to the left to deactivate. "HOLD" is shown on
the LCD for about 5 seconds. No buttons on the line
remote function when ressed.
NOTE
DDM328 Eng R9 OP 5/9/05, 10:02 AM9
EN
10
The hold function on the layer works
inde endently from the line remote. When the HOLD
OFF CHG switch on the unit is activated, no function
buttons on the layer can be o erated. However, this
will not affect the o eration of the line remote buttons.
Similarly, when the HOLD switch on the line remote is
activated, no function buttons on the line remote can be
o erated but function buttons on the unit are not affected.
The HOLD OFF CHG switch does not affect
the S eaker Dock's buttons, which continue to function
when ressed.
ESP (ELECTRONIC SHOCK PROTECTION)
The layer features an automatic 120-second anti-ski
electronic shock rotection (ESP) feature using a s ecial
electronic circuit to revent sound from ski ing when
the unit is subject to shocks and vibration (while walking
or riding in a car) during layback.
By default, ESP automatically turns on when audio CDs
are first layed. a ears on the line remote LED.
1. Press the ESP button on the line remote to cancel
the function. disa ears from the LCD.
2. Press the ESP button again to resume the function.
rea ears on the LCD.
When the unit receives a hysical shock that revents
the laser ick-u from "reading" the CD, the layer will
immediately start laying the sound stored in its memory.
Once the ick-u returns to its original osition, new data
is stored in memory.
When laying MP3 / WMA discs, the ESP function is
also activated by default. The function cannot be
disabled.
ESP continues to function when the layer is docked,
but does not a ear on the S eaker Dock LCD.
If the unit is re eatedly subjected to shocks and
vibrations, all data stored in memory will be used u
and sound will ski .
When turned on, ESP consumes more battery
ower because the layer's memory circuit is activated.
Sound is interru ted for a short time when ESP is
switched on or off. This is normal. Noise may be heard
or sound ski ing may occur under certain conditions:
• When the disc is dirty or scratched
• When the disc contains certain signals
• When the unit is subject to an extreme shock im act
In these conditions, try releasing the ESP function.
CLOCK AND RADIO
The clock and radio functions are available on the
S eaker Dock only.
CLOCK
1. Make sure the S eaker Dock is in standby mode.
The clock time a ears on the LCD. If the time is
being set for the first time, it will flash.
2. Press the INFO / PROG button. The clock hour
flashes on the LCD.
3. Use the TUNE+ or TUNE- button to decrease or
increase the hour value. Press and hold to adjust
the values more quickly.
4. Press the INFO / PROG button to store the desired
hour value. The clock minutes then flash on the LCD.
5. Re eat ste 3-4 to set the clock minute values.
The 24-hour clock format is available only on
Euro ean models of the S eaker Dock.
RADIO
1. During CD layback, sto mode or when the layer
is owered off and in standby mode, ress the
S eaker Dock FM / AM button to enter radio mode.
Press re eatedly to toggle between FM or AM
frequency.
2. Press the S eaker Dock TUNE+ or TUNE- button
once to manually tune a radio station. Press and
hold to auto-tune a station. Re eat manual or auto-
tuning to search for other stations. Searching ends
each time a station of sufficient signal strength is
found, with "STEREO" a earing on the LCD for FM
stations. Radio stations with weak rece tion are
ski ed automatically during auto-tuning.
3. To store a radio station into memory, ress the
S eaker Dock INFO / PROG button. The radio
station reset number "00" flashes on the LCD.
4. Press the S eaker Dock or button until your
desired reset number a ears (i.e., 1) and ress
the INFO / PROG button to store the station for the
selected reset station number.
5. To scroll through the reset stations, ress the mem-
or mem+ button until the desired station
automatically begins broadcasting. The active station
and corres onding reset number a ear on the
LCD.
PROGRAM PLAY MODE (PLAYLIST)
If you do not want to lay all tracks on a CD, the layer
can be rogrammed to layback only certain tracks on
a disc (u to 24 tracks). A laylist can be created in any
order chosen and then lay them back in that sequence.
A track may be stored more than once.
NOTE
NOTE
NOTE
NOTE
NOTE
DDM328 Eng R9 OP 5/9/05, 10:02 AM10
EN
11
A laylist can be rogrammed from the layer
itself, or from the S eaker Dock when the layer is
docked. The following screenshots below are exam les
of what would a ear on both the layer and S eaker
Dock LCD.
AUDIO CDs
1. Make sure the layer or S eaker Dock is in sto
mode. Press the INFO / PROG button on the line
remote or S eaker Dock to enter rogram mode.
"CD", "P-01", "PROG" and track number will a ear
on the line remote or S eaker Dock LCD, with the
track number flashing. P-01 is the first designated
laylist number to be saved in memory for the
selected track. Each saved track is designated in
laylist number order of P-01, P-02, P-03, etc.
2. Press the or button on the layer, line remote
or S eaker Dock to select the desired track.
3. Press the INFO / PROG button to store the track
and roceed to your next selection ("00" a ears
flashing as the track number each time a new track
is selected).
4. Re eat ste s 2-3 to rogram all the desired tracks.
5. Press on the layer, line remote or S eaker Dock
to begin laying the rogrammed tracks in the order
they were saved.
6. To scroll through and view the stored tracks and
corres onding laylist number, ress the button
on the layer, line remote or S eaker Dock during
rogrammed layback and then ress the or
button re eatedly.
ADDING PROGRAMMED TRACKS
1. In sto mode, ress the INFO / PROG button once.
A new laylist number a ears on the LCD with "00"
(track number) flashing.
2. Press the or button until a desired track is
selected, then ress INFO / PROG button to store.
Re eat to add more tracks.
REPLACING PROGRAMMED TRACKS
1. In sto mode, ress the INFO / PROG button
re eatedly until a track (which flashes) and laylist
number that you want to re lace is shown on the
LCD.
2. Press the or button until a desired track is
selected and ress the INFO / PROG button to save
the newly selected track over the revious track.
Re eat to re lace more tracks.
If a new laylist is rogrammed, the reviously
saved laylist will no longer be saved in memory and is
re laced with the new laylist. Similarly, if the layer or
S eaker Dock is turned off, the laylist will no longer be
saved in memory and will not be recognized when the
unit is owered on. When a laylist is being rogrammed
but no buttons are ressed for a rox. 30 seconds, the
layer or S eaker Dock will end the rocess
automatically and the laylist must be re- rogrammed
again.
MP3 / WMA CDs
1. Make sure the layer or S eaker Dock is in sto
mode. Press the INFO / PROG button to enter
rogram mode. The directory number (e.g., 00)
flashes on the line remote LCD and "P-01", "PROG"
and track number (e.g., 000) will also a ear. P-01
is the first designated laylist number to be saved in
memory for the selected track. Each saved track is
designated in laylist number order of P-01, P-02,
P-03, etc.
2. Press the or button to select the desired
directory, and ress the INFO / PROG button to store
the selection into memory ("00" a ears as the
directory each time a new directory is selected).
3. Press the or button to select the desired track,
and ress the INFO / PROG button to store the
selection into memory. ("000" a ears as the track
number each time a new track is selected).
4. Re eat ste s 1-3 to rogram all the desired tracks.
PROG
PROG
NOTE
PROG
PROG
PROG
NOTE
DDM328 Eng R9 OP 5/9/05, 10:02 AM11
EN
12
During layback, flashes to indicate random
layback o tion is selected, then sto s flashing when
the next random track is layed back.
The normal and rogrammed layback re eat modes
are the same for both audio CDs and MP3 / WMA CDs
with the exce tion of re eating tracks within a directory,
which is available only for MP3 / WMA CDs during normal
layback.
MP3 / WMA CDs
5. Press the button to begin laying the
rogrammed tracks in the order they were saved.
6. To scroll through and view the stored tracks and
corres onding laylist number, ress the button
during rogrammed layback and ress the or
button re eatedly.
ADDING PROGRAMMED TRACKS
1. In sto mode, ress the INFO / PROG button once
("00" directory number flashes and a new laylist
number a ears on the LCD).
2. Press the or button until a desired directory is
selected, then ress INFO / PROG button to store.
3. Re eat ste 2 to select and store a track and ste s
2-3 to add more directories and tracks to the laylist.
REPLACING PROGRAMMED TRACKS
1. In sto mode, ress the INFO / PROG button
re eatedly until a directory (which flashes), track
number and laylist number that you want to re lace
is shown on the LCD.
2. Press the or button until a desired directory is
selected and ress the INFO / PROG button to save
the newly selected directory over the revious directory.
3. Re eat ste 2 to re lace a revious track with a new
track and ste s 2-3 to re lace more directories and
tracks.
REPEAT AND RANDOM PLAYBACK
The layer can be set to control how the tracks are to
be re eated during layback. Press the MODE button
on the line remote or S eaker Dock re eatedly to toggle
between different modes during normal layback and
during rogrammed layback of a laylist. The
corres onding icon a ears on the line remote or
S eaker Dock LCD.
The selected mode is cancelled if the layer or
S eaker Dock is turned off or disconnected from the
ower source.
NORMAL PLAYBACK
AUDIO CDs
NOTE
ICON REPEAT
PATTERN
BUTTON
PRESS
DESCRIPTION
One MODE 1x Current track is
re eated. Press
to ski to the next
track.
All MODE 2x All tracks are
re eated.
INTRO Intro MODE 3x 10 seconds of
each track is
layed back in
sequence.
Random MODE 4x Tracks are layed
back in random
order.
NOTE
One MODE 1x Current track is
re eated. Press
to ski to the
next track.
Directory MODE 2x Tracks in a
directory are
re eated.
All MODE 3x All tracks are
re eated.
ICON REPEAT
PATTERN
BUTTON
PRESS
DESCRIPTION
INTRO Intro MODE 4x 10 seconds of
each track is
layed back in
sequence.
Random MODE 5x Tracks are
layed back in
random order.
During layback, flashes to indicate random
layback o tion is selected, then sto s flashing when
the next random track is layed back.
PROGRAMMED PLAYBACK OF PLAYLIST
(AUDIO AND MP3 / WMA DISCS)
NOTE
ICON REPEAT
PATTERN
BUTTON
PRESS
DESCRIPTION
One MODE 1x Current track is
re eated. Press
to ski to the
next track.
-- MODE 5x Re eat / Random
off.
--
-- MODE 6x Re eat /
Random off.
--
All MODE 2x All tracks
rogrammed
into the laylist
are re eated.
INTRO Intro MODE 3x 10 seconds of
each track is
layed back in
sequence.
DDM328 Eng R9 OP 5/9/05, 10:02 AM12
EN
13
Why is the player not playing CDs?
The layer's lid may not be closed ro erly or may be
raised slightly when LR6, AA, UM-3 batteries are inserted
in the battery com artment. Ensure the disc is secured
in lace, changing to the right ty e of batteries if
necessary.
The layer may not be ro erly inserted into the S eaker
Dock. Reinsert the layer, making sure it makes contact
with the 12- in connector in the S eaker Dock's slot-in
mechanism.
The disc may be dirty. Clean it with a soft, lint-free cloth
and try laying the disc again. If it still does not lay, this
may mean it is scratched or is not of the CDDA format
that is com atible with the layer.
There may be excess moisture condensed inside the
layer's lens, or on the 12- in connector. Leave the
layer turned off for a few hours until moisture
eva orates, then turn on.
The player is powered on but why is the player or
Speaker Do k emitting noisy ba kground? Or why
is no sound being emitted at all?
Your head hones may be defected, or the volume level
on the external audio system or S eaker Dock may be
too low. Check to see that the head hones and the line
remote lugs have been inserted as far as they will go.
Data signal interference or static electricity may disru t
the signal rece tion from the audio source. Power off
the layer or S eaker Dock, wait a few seconds, and
turn the unit back on. Make sure the unit is not near any
mobile hones, TVs or tuners.
The external s eakers of the S eaker Dock may be dirty
or damaged. Have the unit serviced by a qualified
Oregon Scientific dealer.
Why is the player or Speaker Do k not responding
when the buttons are pressed?
Check that the layer or the line remote is in not in HOLD
mode. Kee in mind that the HOLD function for both
devices work inde endently of one another. While the
HOLD function is actively turned on for the layer but is
not actively turned on for the line remote, you will be
able to control the layer functions from the line remote.
Remove and reconnect the AC ower lug or reinsert
new batteries and switch the layer and / or S eaker
Dock on again, checking that the ower is on. If there is
still no res onse, the buttons on the layer, line remote
or S eaker Dock may be damaged. Take the unit to a
qualified Oregon Scientific dealer for servicing.
Why does the dis not play starting with the first
tra k?
The random lay mode may be turned on. Ensure this
o tion is turned off.
EQUALIZER
The layer is equi ed with a 5-band equalizer that
allows you to ex eriment with different sound o tions
de ending on the kind of music being layed back.
Re eatedly ress the button on the line remote or EQ
button on the S eaker Dock to toggle between the
different sound o tions shown on the dis lay: Normal
(default), Classic, Po , Jazz and Rock.
The last o tion chosen is automatically saved for
layback until a new o tion is selected.
USING THE PLAYER WITH AN AUDIO
SYSTEM
Using a stereo connection cable (not su lied), you can
listen to CDs being layed on the layer through an audio
system.
1. Turn off the layer and your audio system before
connection.
2. Connect the stereo connection cable from the line-
out jack on the unit to the audio-in jack on the audio
system.
3. Use your layer as normal. Since audio is broadcast
through the audio system's s eakers, ensure that
volume level on your audio system is set to an
acce table level.
When the layer is connected to an audio
system, it cannot be docked into the S eaker Dock.
TROUBLESHOOTING
Use this troubleshooting guide to hel you remedy any
difficulties you may be ex eriencing while using the
layer or S eaker Dock. Should any roblem ersist after
you have checked these sym toms, consult your nearest
Oregon Scientific dealer.
Why does the unit not power on at all or the power
keeps turning off after turning on?
The lugs and jacks may be dirty, affecting the
connections. Ensure the AC ada tor is cleaned and
lugged into the ower outlet and other connections are
firmly established.
The rechargeable or AA batteries in the layer may have
run out of ower or are not correctly aligned with their
olarity. Re-install batteries checking the olarity; if the
unit still does not o erate, insert new batteries into the
unit.
NOTE
ICON REPEAT
PATTERN
BUTTON
PRESS
DESCRIPTION
-- MODE 4x Re eat /
Random off.
--
DDM328 Eng R9 OP 5/9/05, 10:02 AM13
EN
14
Why does it take the player or Speaker Do k a longer
time to a ess and playba k MP3 / WMA CDs?
MP3 / WMA CDs require a longer time to access tracks
than audio CDs due to the nature in which MP3 / WMA
files are stored on the CD and also by the number of
directories, if any. The more files and directories, the
longer the access time.
Why is the player or Speaker Do k not playing tra ks
a ording the order in whi h they are programmed
to playba k?
After selecting the tracks for layback, you may have
forgotten to ress the INFO / PROG button (on the layer
or S eaker Dock) to store the selected tracks (or
directory in the case of MP3 / WMA CDs). Or, the wrong
track may have been accidentally selected to save into
rogrammed memory. Re eat your selection of tracks.
Why is sound playba k skipping even though the
ESP fun tion is a tivated?
When the disc is dirty or scratched, contains certain
signals, or subject to an extreme shock im act, audio
layback may ski des ite ESP function being turned
on. Under these circumstances, try releasing the ESP
function. Ensure the disc is clean, not scratched and
avoid subjecting the unit the extreme shock im act.
SPECIFICATIONS
MUSIC ORBIT PORTABLE MP3 / WMA / CD PLAYER
TYPE DESCRIPTION
No. of channels: 2 (left and right, stereo)Audio
System Total harmonic distortion: 0.2% at
1kHz on head hone
Frequency res onse:
• +/- 1dB at 100Hz on head hone
• +/- 1dB at 10kHz on head hone
• +/- 3dB at 20kHz on head hone
Head hone out ut level:
RMS max. 18mW + 18mW / 16Ω
(adjustable)
Line out ut: 0.60V RMS (47KΩ)
Light source: semiconductor laser
Wavelength: 780nm
Total layback time (NiMH and AA
batteries combined):
• U to 22 hours layback time
Battery
522kHz to 1620kHz
(Euro e and Australia)
530kHz to 1710kHz
(U.S.)
87.5MHz to 108MHz
(Euro e and Australia)
87.5MHz to 107.9MHz
(U.S.)
FM
tuning
range
40 reset stations (20-station memory
for AM, 20-station memory for FM)
Presets
AM
tuning
range
Yes, by digital PLL tunerAuto
tuning
24-hour mode (Euro e and
Australia)
12-hour mode (U.S.)
Clock
1W x 2S eaker
ower
168 (diameter) x 215 mm (H)
(6.6 x 8.5 inches)
Dimension
TYPE DESCRIPTION
TYPE DESCRIPTION
AC ada tor:
• Euro ean version:
In ut 230V ~ 50Hz,
Out ut DC 4.5V / 800mA
• UK version:
In ut 230V ~ 50 Hz,
Out ut DC 4.5V / 800mA
• Australian version:
In ut 240V ~ 50 Hz,
Out ut DC 4.5V / 800mA
• U. S. version:
In ut 120V ~ 60 Hz,
Out ut DC 4.5V / 800mA
Power
Su ly
Power consum tion:
4W (when using AC ada tor)
General
Dimensions: 15.7 (H) x 136 (Dia.) mm
(0.62 (H) x 5.35 (Dia.) inches)
Weight: 225g (without batteries)
Battery:
• Internal: 2 x NiMH
Rechargeable gum batteries
(included)
• External: 2 x 1.5V, Ty e IEC
LR6 / AM3 / AA Size Alkaline
batteries (not included)
MUSIC STATION STEREO SPEAKER DOCK
DDM328 Eng R9 OP 5/9/05, 10:02 AM14
EN
15
ABOUT OREGON SCIENTIFIC
Visit our website (www.oregonscientific.com) to learn
more about Oregon Scientific roducts such as digital
cameras; MP3 layers; children's electronic learning
roducts and games; rojection clocks; health and
fitness gear; weather stations; and digital and conference
hones. The website also includes contact information
for our customer care de artment in case you need to
reach us, as well as frequently asked questions and
customer downloads.
We ho e you will find all the information you need on
our website, however if you're in the US and would like
to contact the Oregon Scientific Customer Care
de artment directly, lease visit:
www2.oregonscientific.com/service/su ort
OR
Call 1-800-853-8883.
For international inquiries, lease visit:
www2.oregonscientific.com/about/international/
default.as
FCC STATEMENT
This device com lies with Part 15 of the FCC Rules.
O eration is subject to the following two conditions: (1)
This device may not cause harmful interference, and
(2) This device must acce t any interference received,
including interference that may cause undesired
o eration.
Changes or modifications not ex ressly
a roved by the arty res onsible for com liance could
void the user's authority to o erate the equi ment.
This equi ment has been tested and found to
com ly with the limits for a Class B digital device,
ursuant to Part 15 of the FCC Rules. These limits are
designed to rovide reasonable rotection against
harmful interference in a residential installation.
This equi ment generates, uses and can radiate radio
frequency energy and, if not installed and used in
accordance with the instructions, may cause harmful
interference to radio communications. However, there
is no guarantee that interference will not occur in a
articular installation. If this equi ment does cause
harmful interference to radio or television rece tion,
which can be determined by turning the equi ment off
and on, the user is encouraged to try to correct the
interference by one or more of the following measures:
• Reorient or relocate the receiving antenna.
• Increase the se aration between the equi ment and
receiver.
• Connect the equi ment into an outlet on a circuit
different from that to which the receiver is connected.
• Consult the dealer or an ex erienced radio / TV
technician for hel .
NOTE
WARNING
DECLARATION OF CONFORMITY
The following information is not to be used as contact for
su ort or sales. Please call our customer service number
(listed on our website at www.oregonscientific.com), or
on the warranty card for this roduct for all inquiries
instead.
We
Name: Oregon Scientific, Inc.
Address: 19861 SW 95th Ave., Tualatin,
Oregon 97062 USA
Tele hone No.: 1-800-853-8883
Fax No.: 1-503-684-3332
is in conformity with Part 15 of the FCC Rules. O eration
is subject to the following two conditions: 1) This device
may not cause harmful interference. 2) This device must
acce t any interference received, including interference
that may cause undesired o eration.
EC-DECLARATION OF CONFORMITY
Hereby, Oregon Scientific, declares that this Music
Orbit + Music Station Portable MP3 / WMA / CD Player
with Stereo S eaker Dock model DDM328 is in
com liance with the essential requirements and other
relevant rovisions of EMC directive 89 / 336 / CE and
LVD directive 73 / 23 / EC. A co y of the signed and
dated Declaration of Conformity is available on request
via our Oregon Scientific Customer Service.
COUNTRIES RTTE APPROVAL COMPLIED
All EC countries, Switzerland CH
and Norway N
DDM328 Eng R9 OP 5/9/05, 10:02 AM15

Other manuals for DDM328

1

Popular CD Player manuals by other brands

Philips EXP322 Expanium Specifications

Philips

Philips EXP322 Expanium Specifications

Muse M-28 RD user manual

Muse

Muse M-28 RD user manual

Marantz SA-7S1 user guide

Marantz

Marantz SA-7S1 user guide

Kenwood KDC-9 instruction manual

Kenwood

Kenwood KDC-9 instruction manual

Philips/Magnavox COLOR TELEVISION AND REMOTE CONTROL Specifications

Philips/Magnavox

Philips/Magnavox COLOR TELEVISION AND REMOTE CONTROL Specifications

Audiovox CE249MP operating instructions

Audiovox

Audiovox CE249MP operating instructions

Yamaha CDX-420 owner's manual

Yamaha

Yamaha CDX-420 owner's manual

Sony CFD-V20 Service manual

Sony

Sony CFD-V20 Service manual

Coby CXCD240BLU instruction manual

Coby

Coby CXCD240BLU instruction manual

iCES : ISCD-36 USB user manual

iCES

iCES : ISCD-36 USB user manual

Philips CD SOUNDMACHINE AZ1839 user manual

Philips

Philips CD SOUNDMACHINE AZ1839 user manual

Philips MCS235 Service manual

Philips

Philips MCS235 Service manual

Lenoxx Durabrand CD-56 operating instructions

Lenoxx

Lenoxx Durabrand CD-56 operating instructions

Sony CDX-M8805X Operating Instructions (English, Espanol,... Installation/connections

Sony

Sony CDX-M8805X Operating Instructions (English, Espanol,... Installation/connections

Roadstar CDR-4552U instruction manual

Roadstar

Roadstar CDR-4552U instruction manual

Philips AZ1004/19 user manual

Philips

Philips AZ1004/19 user manual

Philips AZ8048/05 Instructions for use

Philips

Philips AZ8048/05 Instructions for use

Hitachi MX-W50 Service manual

Hitachi

Hitachi MX-W50 Service manual

manuals.online logo
manuals.online logoBrands
  • About & Mission
  • Contact us
  • Privacy Policy
  • Terms and Conditions

Copyright 2025 Manuals.Online. All Rights Reserved.