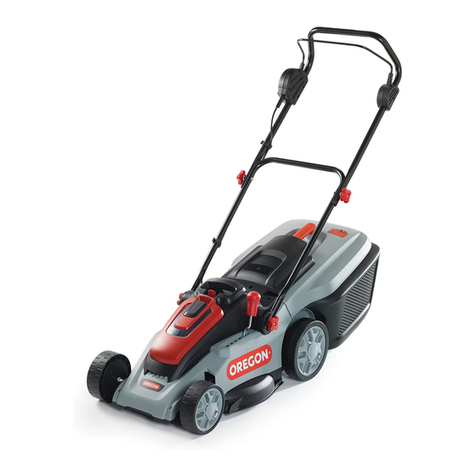
Oregon Professional 120V Series User guide

Oregon® 120V Professional Series™
LMA120VX-NA
Lawn Mower / Tondeuse à gazon / Cortacésped
Original Instruction Manual
Manuel d’instructions Original
Manual Original de Instrucciones


Instruction Manual . . . . . . . . . . . . . . . . . . . . . . . . . . . . . . . . . 4–23
WARNING: Read and understand all safety warnings and all instructions. Failure to
follow the warnings and instructions may result in electric shock, fire and/or serious
injury. Save all warnings and instructions for future reference.
This instruction manual contains translations of a manual drafted in English and are
provided to assist those who do not speak English as their first language. Being a
technical writing, some terms may not have a like or equivalent meaning as translated.
Therefore, you should not rely on this translation, and should cross-reference the
English version, where relying on the translated instructions could result in harm to
your person or property.
Manuel d'instructions . . . . . . . . . . . . . . . . . . . . . . . . . . . . . . 24–47
AVERTISSEMENT : Lisez et comprenez l’ensemble des instructions et
avertissements de sécurité. Le non-respect des avertissements de sécurité et des
instructions peut entraîner une décharge électrique, un incendie et/ou des blessures
graves. Conservez l’ensemble des avertissements et des instructions pour référence
ultérieure.
Ce manuel d’instruction contient des traductions d’un manuel rédigé en anglais et fournies
pour aider les personnes dont l’anglais n’est pas la langue maternelle. La présente étant
une documentation technique, certains termes peuvent ne pas avoir de synonyme ou de
signification équivalente dans la langue de la traduction. Par conséquent, vous ne pouvez
pas vous fier à cette traduction et devez vous reporter à la version anglaise, car s’en tenir
aux instructions traduites pourrait causer du tort à votre personne et à votre propriété.
Manual de instrucciones . . . . . . . . . . . . . . . . . . . . . . . . . . . . 48–71
ADVERTENCIA: Lea y comprenda todas las advertencias de seguridad y las
instrucciones. La omisión en seguir estas advertencias e instrucciones podría
ocasionar una descarga eléctrica, un incendio y/o lesiones personales graves. Guarde
todas las advertencias e instrucciones para referencia futura.
Este manual de instrucciones contiene traducciones de un manual redactado en inglés y
se provee para ayudar a aquellas personas que no hablan inglés como su primer idioma.
Dado que el manual es un documento técnico, es posible que algunos términos no
tengan un significado similar o equivalente al traducirlos. Por lo tanto, no debe confiar
en esta traducción y debe consultar la versión en inglés; confiar en las instrucciones
traducidas podría provocar lesiones personales o daños materiales.

Lawn Mower Model LMA120VX-NA
4
Table of Contents
Important Safety Information . . . . . . . . . . . . . . . . . . . . . . . . . . . . . . . . . . . . . . . . . . 5
Safety Signal Definitions . . . . . . . . . . . . . . . . . . . . . . . . . . . . . . . . . . . . . . . . . . 5
General Power Tool Safety Warnings . . . . . . . . . . . . . . . . . . . . . . . . . . . . . . . . . . 6
Safety Symbols. . . . . . . . . . . . . . . . . . . . . . . . . . . . . . . . . . . . . . . . . . . . . . . .10
At a Glance. . . . . . . . . . . . . . . . . . . . . . . . . . . . . . . . . . . . . . . . . . . . . . . . . . . . . .11
Unpacking and Assembly. . . . . . . . . . . . . . . . . . . . . . . . . . . . . . . . . . . . . . . . . . . . .12
Unpacking. . . . . . . . . . . . . . . . . . . . . . . . . . . . . . . . . . . . . . . . . . . . . . . . . . .12
Assembly . . . . . . . . . . . . . . . . . . . . . . . . . . . . . . . . . . . . . . . . . . . . . . . . . . .12
Operation. . . . . . . . . . . . . . . . . . . . . . . . . . . . . . . . . . . . . . . . . . . . . . . . . . . . . . .14
Intended Use . . . . . . . . . . . . . . . . . . . . . . . . . . . . . . . . . . . . . . . . . . . . . . . . .14
Before Starting Work . . . . . . . . . . . . . . . . . . . . . . . . . . . . . . . . . . . . . . . . . . . .14
Batteries and Battery Charging . . . . . . . . . . . . . . . . . . . . . . . . . . . . . . . . . . . . . .14
Stealth Mode™ . . . . . . . . . . . . . . . . . . . . . . . . . . . . . . . . . . . . . . . . . . . . . . . .14
Starting the Lawn Mower . . . . . . . . . . . . . . . . . . . . . . . . . . . . . . . . . . . . . . . . .15
Stopping the Lawn Mower. . . . . . . . . . . . . . . . . . . . . . . . . . . . . . . . . . . . . . . . .16
Disconnecting the Battery . . . . . . . . . . . . . . . . . . . . . . . . . . . . . . . . . . . . . . . . .16
Dashboard. . . . . . . . . . . . . . . . . . . . . . . . . . . . . . . . . . . . . . . . . . . . . . . . . . .17
Operating Tips . . . . . . . . . . . . . . . . . . . . . . . . . . . . . . . . . . . . . . . . . . . . . . . .17
Maintenance. . . . . . . . . . . . . . . . . . . . . . . . . . . . . . . . . . . . . . . . . . . . . . . . . . . . .18
Cleaning the Lawn Mower . . . . . . . . . . . . . . . . . . . . . . . . . . . . . . . . . . . . . . . . .18
Keep Plugs and Sockets Clean . . . . . . . . . . . . . . . . . . . . . . . . . . . . . . . . . . . . . .18
Blade Maintenance . . . . . . . . . . . . . . . . . . . . . . . . . . . . . . . . . . . . . . . . . . . . .19
Troubleshooting. . . . . . . . . . . . . . . . . . . . . . . . . . . . . . . . . . . . . . . . . . . . . . . . . . .20
Specifications . . . . . . . . . . . . . . . . . . . . . . . . . . . . . . . . . . . . . . . . . . . . . . . . . . . .21
California Emission Control Air Index Information . . . . . . . . . . . . . . . . . . . . . . . . . . . . . .21
Commercial Warranty and Service . . . . . . . . . . . . . . . . . . . . . . . . . . . . . . . . . . . . . . .22
Limited Warranty Coverage . . . . . . . . . . . . . . . . . . . . . . . . . . . . . . . . . . . . . . . .22
Servicing Equipment . . . . . . . . . . . . . . . . . . . . . . . . . . . . . . . . . . . . . . . . . . . .22
Contact Us. . . . . . . . . . . . . . . . . . . . . . . . . . . . . . . . . . . . . . . . . . . . . . . . . . .22
California Emission Control Warranty Statement . . . . . . . . . . . . . . . . . . . . . . . . . . . . . .23
© Blount, Inc. Pricing and specifications subject to change without notice. All rights reserved. Oregon® is a registered
trademark of Blount, Inc. in the United States and/or in other countries.

Lawn Mower Model LMA120VX-NA
Important Safety Information
5
Important Safety Information
Safety Signal Definitions
SYMBOL SIGNAL MEANING
DANGER Indicates that if the danger is not avoided, it will cause serious
property damage, injury or death.
WARNING Indicates that if the warning is not heeded, it can cause property
damage, serious injury or death.
CAUTION Indicates that if precautions are not taken, it may cause minor
or moderate injury, or property damage.
IMPORTANT Following this instruction will increase satisfaction with the tool.
WARNING:
Misuse of this product is capable of causing serious or even fatal injury and of throwing objects.
Always follow all safety instructions to avoid serious personal injury. Using this product for
purposes other than its intended use could prove dangerous to the operator and bystanders.
Read, understand, and follow the instructions and warnings in this Operator’s Manual and
on the Oregon Professional Series batteries before use.
Do not put your hands or feet near moving parts of or under the machine. Keep clear of
any discharge opening.
Do not operate the machine without all guards and other safety protective devices in place
and working on the machine.
Clear the area of objects such as rocks, wire, toys, etc., which could be thrown by the
blade. Stay behind the handle when the engine is running.
Keep bystanders and children a safe distance away from the machine. Do not allow
children to operate the machine. Allow only people who are responsible, trained, familiar
with the instructions, and physically capable to operate the machine.
Stop the machine, shut off the engine, and wait for all moving parts to stop before
removing grass catcher, changing the battery, servicing, or unclogging the machine.
Contact your Oregon dealer or the Oregon distributor for your area if you do not understand any of
the instructions in this manual.
Oregon Professional Series V tools have been specifically designed for safe operation during
exposure to rain or in wet conditions, but should be stored in a dry location.
The text used in the General Power Tool Safety Warnings section of this manual is verbatim, as
required from the applicable UL/CSA standard. This information applies to many different
types of power tools.
WARNING: In order to prevent accidental starting when setting up, transporting,
adjusting or making repairs, always disconnect battery when setting up or adjusting.
WARNING: Always secure the lawn mower when unattended. Never leave the lawn
mower in such way that an unauthorized person can operate or move the lawn mower.

Lawn Mower Model LMA120VX-NA
Important Safety Information
6
General Power Tool Safety Warnings
WARNING: Read all safety
warnings, instructions, illustrations and
specifications provided with this power
tool. Failure to follow all instructions listed
below may result in electric shock, fire and/
or serious injury.
Save all warnings and instructions for
future reference.
The term "power tool" in the warnings refers
to your mains-operated (corded) power tool or
battery operated (cordless) power tool.
WORK AREA SAFETY
•Keep work area clean and well lit.
Cluttered or dark areas invite accidents.
•Do not operate power tools in explosive
atmospheres, such as in the presence of
flammable liquids, gases or dust. Power
tools create sparks which may ignite the dust
or fumes.
•Keep children, pets, and bystanders away
while operating a power tool. Distractions
can cause you to lose control.
ELECTRICAL SAFETY
•Power tool plugs must match the outlet.
Never modify the plug in any way. Do
not use any adapter plugs with earthed
(grounded) power tools. Unmodified plugs
and matching outlets will reduce the risk of
electric shock.
•Avoid body contact with earthed or
grounded surfaces, such as pipes,
radiators, ranges and refrigerators. There
is an increased risk of electric shock if your
body is earthed or grounded.
•Do not expose power tools to rain or wet
conditions. Water entering a power tool will
increase the risk of electric shock. **
•Do not abuse the cord. Never use the cord
for carrying, pulling, or unplugging the
power tool. Keep cord away from heat, oil,
sharp edges or moving parts. Damaged or
entangled cords increase the risk of electric
shock.
•When operating a power tool outdoors,
use an extension cord suitable for outdoor
use. Use of a cord suitable for outdoor use
reduces the risk of electric shock.
•If operating a power tool in a damp
location is unavoidable, use a ground
fault circuit interrupter (GFCI) or residual
current device (RCD) protected supply.
Use of a GFCI or RCD reduces the risk of
electric shock. *
** Item above: “Do not expose power tools
to rain or wet conditions.” is applicable to
power tools in general; however, Oregon
battery operated V Professional Series
tools have been specifically designed for
operation during exposure to rain or wet
conditions.
* Item above: “If operating a power tool in a
damp location is unavoidable, use a ground
fault circuit interrupter (GFCI) or residual
current device (RCD) protected supply.” is
applicable to corded power tools in general;
however, use of a GFCI or RCD with Oregon
battery operated V Professional Series
tools is not applicable.
PERSONAL SAFETY
•Stay alert, watch what you are doing
and use common sense when operating a
power tool. Do not use a power tool while
you are tired or under the influence of
drugs, alcohol or medication. A moment of
inattention while operating power tools may
result in serious personal injury.
•Use personal protective equipment.
Always wear eye protection. Protective
equipment such as dust mask, non-skid
safety shoes, hard hat or hearing protection
used for appropriate conditions will reduce
personal injuries.
•Prevent unintentional starting. Ensure
the switch is in the off-position before
connecting to power source and/or battery
pack, picking up or carrying the tool.
Carrying power tools with your finger on the

Lawn Mower Model LMA120VX-NA
Important Safety Information
7
switch or energizing power tools that have the
switch on invites accidents.
•Remove any adjusting key or wrench
before turning the power tool on. A wrench
or a key left attached to a rotating part of the
power tool may result in personal injury.
•Do not overreach. Keep proper footing
and balance at all times. This enables
better control of the power tool in unexpected
situations.
•Dress properly. Do not wear loose clothing
or jewelry. Keep your hair, clothing and
gloves away from moving parts. Loose
clothes, jewelry or long hair can be caught in
moving parts.
•If devices are provided for the connection
of dust extraction and collection facilities,
ensure these are connected and properly
used. Use of dust collection can reduce dust-
related hazards.
•Do not let familiarity gained from
frequent use of tools allow you to become
complacent and ignore tool safety
principles. A careless action can cause
severe injury within a fraction of a second.
POWER TOOL USE AND CARE
•Do not force the power tool. Use the
correct power tool for your application.
The correct power tool will do the job
better and safer at the rate for which it was
designed.
•Do not use the power tool if the engine
control bar does not turn it on and off. Any
power tool that cannot be controlled with the
trigger is dangerous and must be repaired.
•Disconnect the plug from the power
source and/or remove the battery pack,
if detachable, from the power tool before
making any adjustments, changing
accessories, or storing power tools. Such
preventive safety measures reduce the risk of
starting the power tool accidentally.
•Disconnect the plug from the battery
pack, if detachable, from the power tool
and remove lock out key before making
any adjustments, changing accessories, or
storing power tools Such preventive safety
measures reduce the risk of starting the
power tool accidentally.
•Store idle power tools out of the reach
of children and do not allow persons
unfamiliar with the power tool or these
instructions to operate the power tool.
Power tools are dangerous in the hands of
untrained users.
•Maintain power tools and accessories.
Check for misalignment or binding of
moving parts, breakage of parts, and
any other condition that may affect the
power tool’s operation. If damaged, have
the power tool repaired before use. Many
accidents are caused by poorly maintained
power tools.
•Keep cutting tools sharp and clean.
Properly maintained cutting tools with sharp
cutting edges are less likely to bind and are
easier to control.
•Use the power tool, accessories and
tool bits etc. in accordance with these
instructions, taking into account the
working conditions and the work to
be performed. Use of the power tool for
operations different from those intended could
result in a hazardous situation.
•Keep handles and grasping surfaces
dry, clean and free from oil and grease.
Slippery handles and grasping surfaces do not
allow for safe handling and control of the tool
in unexpected situations.
BATTERY TOOL USE AND CARE
•Recharge only with the charger specified
by the manufacturer. A charger that is
suitable for one type of battery pack may
create a risk of fire when used with another
battery pack.
•Use power tools only with specifically
designated battery packs. Use of any other
battery packs may create a risk of injury and
fire.

Lawn Mower Model LMA120VX-NA
Important Safety Information
8
•When battery pack is not in use, keep
it away from other metal objects, like
paper clips, coins, keys, nails, screws or
other small metal objects that can make a
connection from one terminal to another.
Shorting the battery terminals together may
cause burns or a fire.
•Under abusive conditions, liquid may be
ejected from the battery; avoid contact.
If contact accidentally occurs, flush with
water. If liquid contacts eyes, additionally
seek medical help. Liquid ejected from the
battery may cause irritation or burns.
•Do not use a pack or tool that is damaged
or modified. Damaged or modified batteries
may exhibit unpredictable behavior resulting
in fire, explosion or risk of injury.
•Do not expose a battery pack or tool to
fire or excessive temperature. Exposure to
fire or temperature above °C ( °F) may
cause explosion.
•Follow all charging instructions and
do not charge the battery pack or tool
outside the temperature range specified
in the instructions. Charging improperly or
at temperatures outside the specified range
may damage the battery and increase the risk
of fire.
•Oregon V Professional Series tools are
intended for use only with Oregon V
Professional Batteries. Read and follow all
instructions provided in the Oregon V
Professional Battery Operators Manual.
•Oregon V Professional Batteries
must be charged only by Oregon V
Professional Charger. Read and follow all
instructions provided in the Oregon V
Professional Charger Operators Manual.
SERVICE
•Have your power tool serviced by a
qualified repair person using only identical
replacement parts. This will ensure that the
safety of the power tool is maintained.
•Never service damaged battery packs.
Service of battery packs should only be
performed by the manufacturer or authorized
service providers.
LAWN MOWER SAFETY WARNINGS:
•Do not use the lawn mower in bad
weather conditions, especially when there
is a risk of lightning. This decreases the risk
of being struck by lightning.
•Thoroughly inspect the area for wildlife
where the machine is to be used. Wildlife
may be injured by the machine during
operation.
•Thoroughly inspect the area where the
machine is to be used and remove all
stones, sticks, wires, bones, and other
foreign objects. Thrown objects can cause
personal injury.
•Before using the machine, always visually
inspect to see that the blade and the
blade assembly are not worn or damaged.
Worn or damaged parts increase the risk of
injury.
•Check the grass catcher frequently for
wear or deterioration. A worn or damaged
grass catcher may increase the risk of
personal injury.
•Keep guards in place. Guards must be in
working order and be properly mounted.
A guard that is loose, damaged, or is not
functioning correctly may result in personal
injury.
•Keep all cooling air inlets clear of debris.
Blocked air inlets and debris may result in
overheating or risk of fire.
•While operating the machine, always
wear non-slip and protective footwear. Do
not operate the machine when barefoot
or wearing open sandals. This reduces the
chance of injury to the feet from contact with
the moving blade.
•While operating the machine, always
wear long trousers. Exposed skin increases
the likelihood of injury from thrown objects.

Lawn Mower Model LMA120VX-NA
Important Safety Information
9
•Do not operate the machine in wet grass.
Walk, never run. This reduces the risk
of slipping and falling which may result in
personal injury.
•Do not operate the machine on
excessively steep slopes. This reduces
the risk of loss of control, slipping and falling
which may result in personal injury.
•When working on slopes, always be sure
of your footing, always work across the
face of slopes, never up or down and
exercise extreme caution when changing
direction. This reduces the risk of loss of
control, slipping and falling which may result
in personal injury.
•Use extreme caution when reversing or
pulling the machine towards you. This
reduces the risk of contact with feet or legs.
•Do not touch blades and other hazardous
moving parts while they are still in
motion. This reduces the risk of injury from
moving parts.
•When clearing jammed material or
cleaning the machine, make sure all
power switches are off and the battery
pack is disconnected. Unexpected operation
of the machine may result in serious personal
injury.
* Use only attachments included with
product. Use of any other accessory or
attachment might increase the risk of injury.
* WARNING: Blades continue to rotate
after machine is switched off
* If the mower blade strikes a foreign
object or if mower begins to vibrate
excessively, follow these steps:
a. Stop lawn mower. Release the Switch.
b. Unplug battery and make sure all
moving parts have come to a complete
stop.
c. Inspect for damage.
d. Repair any damaged parts, check for
and tighten any loose parts before
restarting and operating the mower.
* Do not allow the product to be used by
children, persons with reduced mental or
physical capability or people unfamiliar
with these instructions. Consult local
regulations for age restrictions.
* Keep in mind that the operator or user
is responsible for accidents or hazards
occurring to the other people or the
property.
* Stop the blade if the machine has to be
tilted for transportation when crossing
surfaces other than grass, and when
transporting the machine to and from the
area to be used.
* Switch on the motor carefully according
to instructions and with feet well away
from the blade.
* Do not tilt the machine when switching on
the motor.
* Do not transport the machine while the
power source is running.
MAINTENANCE AND STORAGE
•Beware of sharp blades. Blades continue
to rotate after the motor is switched
off. Remove disabling device before
maintenance
* Keep all nuts, bolts and screws tight to
be sure the machine is in safe working
condition.
* Check the grass collector frequently for
wear or deterioration.
* Be careful during adjustment of the
machine to prevent entrapment of the
fingers between moving blades and fixed
parts of the machine.
* Always allow the machine to cool down
before storing.
* When servicing the blades be aware that,
even though the power source is switched
off, the blades can still be moved.
* Replace worn or damaged parts for
safety. Use only genuine replacement parts
and accessories.
* Save These Instructions

Lawn Mower Model LMA120VX-NA
Important Safety Information
10
Safety Symbols
These symbols appear on the LMAVX-NA.
SYMBOL MEANING EXPLANATION
Safety alert A danger, warning or caution.
Follow instructions Read and follow instructions in this manual
carefully before assembling, operating or servicing
the product.
Beware of Sharp
Blades
Blades continue to move after motor switched off.
Remove battery before maintenance.
Maintain Safety
Devices Do not open or remove safety shields while the tool
is running.
Keep Bystanders
Away Do not mow when children or others are too close.
Look Behind While
Backing Look down and behind first to avoid tripping when
pulling back.
Steep Slope Hazard Use extra caution on slopes. Do not mow slopes
greater than 15 degrees.
Remove Safety Key Switch off and remove safety key before adjusting,
cleaning and before adjusting. Cleaning leaving the
product unattended for any period.
Beware of flying
debris
This product may throw debris, which can cause
personal injury or property damage, either directly
or by ricocheting 50 ft (15 m) or farther.
Risk of eye injury
Protect your eyes and
face
Wear protective safety glasses or goggles, hearing
protection and a face mask. Guard against dust and
debris-related injuries and illnesses by controlling
dust at the source if possible.
Protect your body Wear the appropriate approved personal protective
equipment, including substantial footwear.
Disconnect battery Disconnect the battery from the tool before
transporting or performing any maintenance on
the lawn mower.
Safety decals and instructions are easily visible to the operator and are located near any area of
potential danger. Replace any decal that is damaged or missing.

Lawn Mower Model LMA120VX-NA
At a Glance
11
At a Glance
Lawn Mower
U-handle Assembly
. Upper Engine Control Bar
Operator Presence Zone
and Start Control
. Engine Control Bar Lock Latch
. Lower Transmission Control Bar
Ground Speed Control
. Throttle Control
Battery Port
. Battery Release Lever
. Battery Plug
. Removable Lockout Key (Blue)
. Stealth Mode Button (Blue)
. Stealth Mode Indicator (Green, Red)
. LED Charge Indicator
Cutting Height Adjustment Levers
Gear Shift Lever
Rear Discharge Cover
Grass Catcher
Mulch Plug
1.1
1.2
2.1
2.2
2.3 2.4 2.5
2.6
2
3
5
6
7
4
3
1.3
1.4
1

Lawn Mower Model LMA120VX-NA
Unpacking and Assembly
12
Unpacking and Assembly
Unpacking
Carefully remove the lawn mower from its
packaging and check that you have all the
following items:
•Upper U-handle complete with cables
attached
•Lower Handle tube left with green tape
•Lower Handle tube right (red tape)
•Mower Bag
•Mulch Plug (installed on the lawn mower)
•Tool kit
•Owner’s Manual
Remove the lawn mower components from
the box and inspect them carefully to ensure no
damage has occurred during shipping and that
no parts are missing. If any parts are damaged
or missing, do not use the lawn mower.
Contact Oregon® Customer Service to obtain
replacement parts at --.
Assembly
Tools needed for assembly
• pcs mm wrench
• pcs mm wrench
Fasteners needed for assembly
• pcs M carriage bolts
• pcs M flange nuts
• pcs black square washers
• pcs M carriage bolts
• pcs M flange nuts
STEP
Install the black handle tubes to the lawn
mower with the M carriage bolts. Do not
tighten the nuts. Please note that there are
three holes for the upper clamp. We suggest to
install the bolt in the center hole as a start.
•Make sure the mulch plug () is installed to
hold the bolt () during right tube mount
installation.
•Install the bolt in center hole (). Install the
nuts finger tight (). Don't tighten completely
until step .
•Control cables route outside brackets () and
then through gap under tubes ().
10 mm
13 mm
1
2
1
2
12

Lawn Mower Model LMA120VX-NA
Unpacking and Assembly
13
STEP
Slide the upper handle assembly into the two
lower tubes until the holes align. Insert the
carriage bolt on the left side and use one
square washer on each side of the handle tube
(). Repeat for the right side.
STEP
To simplify the alignment of the handle, install
the grass catcher.
Tighten the bolts in the following order:
. Tighten the two M nuts on the right side
tube clamps.
. Align the left tube with the catcher (same as
the right side) and tighten the two M nuts
on the left side tube clamps.
. Tighten the upper M nuts that attach the
handle assembly to the tubes.
STEP
Thread the throttle cable through the
alternating clips under the left handle tube.
STEP
Thread the transmission cable and the engine
control cable through the alternating clips
under the right handle tube.
Eyelet screw used on
Zone Start models
to hold the starter
handle
1
1
12
3

Lawn Mower Model LMA120VX-NA
Operation
14
Operation
Intended Use
This rotary-blade, walk-behind lawn mower
is designed primarily for cutting grass on
well-maintained lawns on commercial and
residential properties. It is not designed for
cutting brush or for agricultural uses.
Before Starting Work
Read the Original Instruction
Manual for the battery carefully
before assembling, operating or
servicing the product.
•Check the battery is in good condition free
from any broken, missing or cracked parts.
•Check the lawn mower for misalignment or
bending of moving parts, breakage of parts
and any other condition that may affect the
power tool’s operation.
•Make sure the battery cable, plug and power
socket are not frayed or damaged.
To repair or replace any damage or worn
part, contact Oregon or an authorized Oregon
servicing dealer.
Even if you have operated other lawn mowers
in the past please take time to become familiar
with how this lawn mower works and practice
all operations to build up your skills.
•Inspect the lawn mower for any visible
damage or broken parts.
•Make sure the upper control bar can not be
engaged without first activating the engine
control bar lock lever. If it can, contact an
Oregon Authorized Service Dealer or contact
Oregon Products for advice.
•Make sure that when you release the upper
engine control bar the engine stops within
three seconds. If the engine does not stop,
contact an Oregon Authorized Service Dealer
or contact Oregon Products for advice.
•Never operate the lawn mower with obvious
damage or malfunction until the problems
have been corrected.
Batteries and Battery Charging
•Batteries must be used, stored and charged
within battery use, storage, charging
temperature ranges outlined in the
Specifications section of this manual.
•Oregon V Professional Series tools are
intended for use only with Oregon V
Professional Batteries. Read and follow all
instructions provided in the Oregon V
Professional Battery Operators Manual.
•Oregon V Professional Batteries must be
charged only by Oregon V Professional
Charger. Read and follow all instructions
provided in the Oregon V Professional
Charger Operators Manual.
•Batteries are to be removed from the tool
before being charged.
Stealth Mode™
The Oregon LMAVX-NA has a Stealth
Mode which reduces engine speed by .
The LMAVX-NA in Stealth Mode can
reduce noise up to and extend run time
more than .
•To activate Stealth Mode, press the Stealth
Mode button beneath the dashboard. A blue
light above the button indicates the tool is in
Stealth Mode.
•In Stealth Mode, the engine RPM cannot
be controlled by the throttle control. The
engine monitors the grass cutting load and
automatically adjusts speed to meet cutting
power needs.
•Press the button again to deactivate Stealth
Mode and return to operator controlled
throttle speed.
Stealth Mode activation
and de-activation button
120V

Lawn Mower Model LMA120VX-NA
Operation
15
Starting the Lawn Mower
Fully insert the plug into the power socket.
When fully inserted, the LED lights on the
dashboard will activate and be accompanied by
audible beeps.
WARNING: Never make adjustments or
repairs with the engine running. Disconnect
the battery to prevent accidental starting.
Rotate the Lock Lever on the right side of the
upper engine control bar out of the way and
press down on the upper engine control bar
to start the engine. If the engine control bar is
released during normal operation, the engine
should stop completely within three seconds.
Notice: The engine control bar has an
"Operators Presence Control" Lock Latch. It has
to be rotated out of the way before you can
push down the upper engine control bar and
start the engine.
Notice: When the throttle lever is in the off
position the engine can not be started.
DRIVE CONTROL
The drive system consists of a two speed
transmission and an adjustable belt drive from
the engine to the transmission.
The transmission speed can be set to
LO - N - HI. HI speed is approximately
mph - a fast walking speed. LO speed is
approximately mph - an average walking
speed.
Notice: Transmission speed is also related to
engine speed.
The shifter arm is intentionally made flexible.
When the arm is locked in the LO or the HI
position the transmission will automatically
mesh into the gears as soon as the drive is
engaged by operating the transmission control
bar.
ENGAGING THE DRIVE
To engage and disengage the drive system pull
up on the transmission control bar (). Typically
the drive will engage when the transmission
control bar is approximately to . inches
from the handle ().
Notice: Due to wear, the drive engagement
position of the transmission control bar can
change. If the distance between the lower
bar and the handle () is less than a / inch
when the lawn mower starts to drive make an
adjustment on the red knob located below the
back of the engine ().
Full
Speed Lock
Lever
Variable
Speed
Stop
Position
Stop
Engine Run
Engine
Drive Adjustment

Lawn Mower Model LMA120VX-NA
Operation
16
If needed turn the red knob turns clockwise.
Verify the drive position of the control bar by
operating the lawn mower. If needed repeat the
adjustment.
Notice: The red knob can be turned without
removing belt cover. Pull out [the red knob and
turn.
HEIGHT ADJUSTMENT
Each wheel can be adjusted individually to a
specific cutting height from inch to . inch.
Notice: It is only possible to move the
adjustment on one side - steps each
time.
Moving the front wheel height adjusters
forward raises the cutting height. Moving the
rear wheel height adjusters towards the rear of
the lawn mower raises the rear cutting height.
Always adjust the height adjusters to the same
position both in the front and the rear for best
cutting results.
WARNING: STOP the engine before
making any height adjustment.
WARNING: Never readjust the cutting
height while the engine is running. STOP
the engine. Never lift the lawn mower by
placing your hand or fingers under the edge
of the mower deck.
MODES OF OPERATION
This lawn mower is approved to be used in two
different operational modes:
. WITH A GRASS CATCHER IN PLACE
An original equipment Oregon catcher
has been tested to be used with this lawn
mower. It is important to always inspect the
catcher for deterioration. If the material is
ripped or worn the bag shall not be used.
. WITH THE MULCH PLUG INSTALLED
If the mulch plug is installed ensure that the
rear door can close completely.
WARNING: Do not operate the lawn
mower without the mulch plug or the grass
catcher in place. Never attempt to operate
the lawn mower with the rear door
removed, damaged, or propped open.
Stopping the Lawn Mower
•Release the upper engine control bar to stop
the lawn mower.
WARNING: Disconnect the battery from
the tool before transporting or performing
any maintenance on the lawn mower.
Disconnecting the Battery
Release the engine control bar to ensure that
the lawn mower is off and pull the battery plug
from the power socket.
When operating the transmission
control bar (1) typical movement
on the red adjustment knob (3)
should be between 1/4" to 3/8"
(6 to 10 mm)
1
2
3
Low 1" (25 mm)
7 steps - 1/2" (13 mm)
High 4.5" (114 mm)

Lawn Mower Model LMA120VX-NA
Operation
17
Dashboard
The dashboard is located on the rear face of the engine and displays the current charge state of the
battery connected to the tool and any faults from the tool or battery.
INDICATORS
LEDs
5 green LEDs 4 green LEDs 3 green LEDs 2 green LEDs 1 green LED 1 red LED
MEANING Full charge
100% to 81% 80% to 61% 60% to 41% 40% to 21% 20% to 10% Low power
<10%
To determine the approximate number of hours the lawn mower has been operated, insert the
battery and press the Stealth Mode button for seconds. The lawn mower will provide an audible
beep for each hours of operation.
To determine the approximate number of hours the lawn mower has been operated, insert the
battery plug and press the Stealth Mode button for seconds.
INDICATORS
LEDs
none blue LED flash
SOUND 1 beep beep
MEANING <49 hours 1 blue LED flash and beep
for every 50 hours
Operating Tips
•Maintain a sharp blade throughout the cutting
season. Periodically file down nicks on the
blade. Replace the blade when necessary
with an original Oregon replacement blade –
Oregon part no. -.
•Cut only about a third of the grass blade at a
time.
•If the finished lawn appearance is
unsatisfactory, try one or more of the
following:
– Sharpen the blade.
– Walk at a slower pace while mowing.
– Cut the grass more frequently.
– Overlap cutting swaths instead of cutting a
full swath with each pass.
•If engine speed drops, it could mean the
engine is being overloaded by the blade trying
to cut too much grass. Mow a narrower
swath, move the mower slower, or raise the
cutting height.
•When bagging, empty the bag before it
becomes filled to the limit. Mowing and
bagging performance will diminish after the
bag becomes about filled. Inspect the
grass bag for tears, holes, and excessive wear.
The grass bag wears during normal use and
will eventually require replacement.

Lawn Mower Model LMA120VX-NA
Maintenance
18
Maintenance
MAINTENANCE - SERVICE INTERVAL PROCEDURES
Before each use Check the operation and function of the Operators
Presence Control bar and lock latch.
Inspect the lawn mower blade for wear or
damage.
Inspect the cables for any wear or damage.
Inspect the grass catcher for any damage.
Check for any loose or missing screws, nuts, or
damaged parts.
Clean under the mower deck (after usage).
Every 50 Hours or every 2 months Lubricate the pivot arms and cables on the
control panel with oil.
Every 100 Hours or every 4 months Clean the engine with compressed air through
vents.
This maintenance schedule assumes daily use by a landscape company. One month of use is
assumed to be to days of operation.
Cleaning and user maintenance shall not be made by children without supervision.
Cleaning the Lawn Mower
We do not recommend using a garden hose
to clean the lawn mower. The buildup of moist
grass, fertilizer and water can cause extreme
corrosion damage to many parts of the lawn
mower and the engine.
NEVER USE A PRESSURE WASHER
The use of a pressure washer can force water
and moisture into ball bearings and engine
parts and cause substantial damage.
•Clean the underside of the lawn mower by
scraping any build-up of grass and trash.
•Clean off the outside of the engine and the
top of the lawn mower with compressed
air. Any accumulation of debris under the
belt cover can typically also be removed
with compressed air without removing the
protective belt cover.
•Wash the Grass Bag with a garden hose
frequently. The holes that allows the grass
bag to breathe will eventually clog with dirt. A
clogged bag will not collect the grass clippings
effectively. Do not install and use a wet grass
catcher. It will plug prematurely.
Keep Plugs and Sockets Clean
Inspect all electrical contact points often.
If dust, sand or other debris are present,
clean with automotive-grade electronic
contact cleaner spray.
Spray cleaner liberally into socket cavity,
allowing spray to loosen debris and dissolve
unwanted oil and grease. Allow a moment to
dry before connecting cable.

Lawn Mower Model LMA120VX-NA
Maintenance
19
Blade Maintenance
For best results, the mower blade must be
kept sharp. Always replace a bent or damaged
blade.
Replace blade with Oregon Part No. -
only.
REMOVING THE BLADE
. Remove the engine lockout key from the
rear face of the engine.
. Turn lawn mower on its right side.
. Use a wood block between blade and
mower deck to prevent blade from turning
when removing blade bolts.
NOTE: Protect your hands with gloves and/
or wrap the blade with a heavy cloth.
. Remove the two outer blade bolts by turning
counter-clockwise with a /" ( mm)
wrench or socket.
INSTALLING THE BLADE
. Position the blade with the bent corner of
the blade (sail) pointing towards the deck.
Install the blade bolts.
IMPORTANT: Blade bolts are heat treated.
If the bolts are worn or damaged use only
bolts available from Oregon.
. Use a block of wood between blade and
mower deck and tighten the blade bolts.
Always use a torque wrench.
The recommended tightening torque
is to ft. lbs. ( to Nm).
. Turn lawn mower back upright onto wheels.
. Insert the engine lockout key.
WARNING: Use only a replacement
blade approved by Oregon. Using a blade
not approved by Oregon is hazardous. It
can damage your lawn mower and cause
serious personal injury.
A worn or damaged blade can break and
parts of the blade could be thrown into the
operators or bystanders area, resulting in
serious personal injury or death.
INSPECTING THE BLADE
Carefully examine the blade for straightness,
damage and abnormal wear. In some areas
abrasive sand and dust can wear away the
metal of the blade - see illustration.
SHARPENING THE BLADE
File the top side of the blade () and maintain
the original angle of the cutting edge. Maintain
the radius where the cutting edge ends. Always
remove the same amount of material from
both ends of the blade. This ensures that the
blade stays balanced.
If sharpening is done with a grinding stone
the blade should always be balanced using a
blade balancing device. A blade balance tool
is available from Oregon or most lawn and
garden dealers and hardware stores.
If the blade shows wear or cracking at the
edge where the blade is bent up () it must
immediately be replaced.
1
1
1
2
2
3
3
3
4
4
4
1 Cutting edge
2 Square corner
3 Erosion from sand and dirt
4 Air lift wing (sail)

Lawn Mower Model LMA120VX-NA
Troubleshooting
20
Troubleshooting
All of the tools in the Oregon V Professional Series have the ability to self-diagnose issues.
Below is a table of fault codes the tool can display through the dashboard.
INDICATORS POSSIBLE
CAUSE RECOMMENDED
ACTION
LEDs SOUND
none
none
No power. Make certain the plug is fully
seated in socket.
1 continuous red light
red
steady on
Blade is jammed.
Disconnect the battery
plug from the tool. Remove
engine lockout key. Remove
obstruction from blade area.
1 slow blinking red light
red
slow beep
(repeating) Battery is fully
discharged. Charge battery.
alternating green and red lights
green red
rapid beep
(repeating) Battery fault.
Service battery.
Contact authorized repair
center.
4 green, 1 red, 1 blue quick blinking lights
green green green green red blue
very rapid short
beep (repeating) Hardware fault.
Unplug, wait 30 seconds, plug
back in.
Contact authorized repair
center.
1 short, 1 long blinking red light
red
1 short,
1 long beep
Battery too hot. Allow battery to cool.
2 short, 1 long blinking red light
red
2 short,
1 long beep
Lawn mower engine
too hot.
Allow lawn mower engine to
cool.
4 green and 1 red continuous lights
green green green green red
none
Failed dashboard. Replace dashboard.
5 blinking green lights
green green green green green
none Upper engine control
bar is activated
while battery plug is
inserted.
Release upper engine control
bar. Unplug lawn mower. Plug
in lawn mower.
This manual suits for next models
1
Table of contents
Languages:
Other Oregon Lawn Mower manuals