oset 12.5 Eco User manual
OWNER’S MANUAL
2017
12.5 ECO
12.5 RACING
OSET Corp
425 Kristen Ct, Unit 6
Montrose, CO 81401, USA
303 990-2390.
hp://www.OSETBIKES.com
inf[email protected]om
INS012455 - v1.1
2

3
Introducon - Page 4
Please Read - Page 5
Warnings, Cauons and Notes: - Page 6
Safe Operaon - Page 7
Safety Responsibilies - Page 9
Summary - Page 10
Bike Specicaons - Page 11
Unpacking and Assembly - Page 13
Switches - Page 16
Dials and Indicators - Page 17
Chain Adjustment - Page 18
Motor Care - Page 19
Suspension - Page 20
Wheel Removal/Installaon: - Page 21
Brake Adjustment - Page 22
Side Panel & Baery Removal - Page 23
Charging Instrucons - Page 24
Important Notes About Charging - Page 25
Baery Use, Care & Maintenance - Page 26
Baery Care & Disposal - Page 27
Bike Maintenance, Cleaning & Storage - Page 28
Electrical Diagnosc Flow Chart - Page 29
Wiring - Page 30
Wiring Diagram - Page 31
Seng Up Your OSET for Riding: - Page 32
Riding Instrucons & Safety Tips - Page 33
Staonary Learning: Page 33
First Ride: - Page 34
Learning to Stand Up - Page 35
Learning Some Technique - Page 36
Limited Warranty: - Page 37
Contact Us: - Page 38
TABLE OF CONTENTS
4
INTRODUCTION
A WORD ABOUT THIS OWNER’S MANUAL AND SAFETY
Firstly, thank you for purchasing an OSET Electric Trials Bike. This is a serious piece of
machinery designed for use by children in fully controlled and safe environments.
As the purchaser/owner of the machine, YOU are the responsible adult with the
task of keeping the rider(s) safe at all mes. If you defer this task to another adult,
it is YOUR RESPONSIBILITY to pass this owners manual and all relevant informaon
to whoever will take on this role, and ensure without queson that the rider is
controlled and taught in a safe manner.
Your OSET is very adjustable and can be specically set up for the rider. Please
do not allow the machine to be used or adjusted by other children or adults. There are
likely to be many children asking for a ride. DO NOT ALLOW THIS TO HAPPEN. It is likely
you know the abilies, levels of concentraon and aenon span of the child you
purchased the machine for. EVERY CHILD IS DIFFERENT and it is impossible for you to
properly supervise other children.
Your OSET is driven by a powerful electric motor. The control dials MUST be adjusted to
suit the abilies of the rider. Please remember that even when the speed is set to
a slow seng, if the power and response are at high seng, the full torque of the
bike will sll be available. This means that opening the throle will propel the machine
to the set speed very quickly. Your OSET has great capabilies, and can grow with the
skills of the rider to very high levels, but it is IMPERITIVE that the responsible adult controls
the enre learning process and gives full aenon at all mes.
IT IS YOUR RESPONSIBILITY TO FORESEE ALL POTENTIAL SITUATIONS AND
CONTROL THE RIDING ENVIRONMENT ACCORDINGLY.
This means not just the machine and the rider, but also the riding terrain and environment.
Our machines are virtually silent, and can be used in many places that gasoline bikes can’t.
They are brilliant for praccing in back yards; front yards, garages, and even indoors!
OSET Mini Bikes are designed for o road use only and must not be used on public roads
or sidewalks. Please check and obey all local laws. OSETs may only be ridden in safe areas
where all laws are being followed and all required permissions are given.
OSET’s are amazingly capable, and can be used from the earliest stages of
Learning to ride all the way through to o road compeons.
The secret of learning to ride well is being able to ride a lot. OSET’s enable this to happen,
and can make the learning process very grafying for both the children and the adults.
Thanks again for purchasing an OSET, and we hope you, and your child, will enjoy the ride!
Ian Smith, President, OSET CORP.

5
PLEASE READ
PLEASE READ THIS OWNER’S MANUAL PRIOR TO
OPERATIONS!
To ensure opmum performance from your new OSET, and to ensure safe operaon,
it is important to fully understand the features of the machine.
This manual contains IMPORTANT INFORMATION that every owner must fully understand.
If a child will operate your OSET, it is YOUR RESPONSIBILITY to set up the machine,
and make sure it is operated correctly and safely. Your OSET features a speed dial that sets
the speed from a walking pace to top speed. It also has a throle response ‘map’ dial.
This will set the throle response from very slow, up to very fast. The most important dial
is the power dial; the OSET controller is capable of outpung a lot of power.
This power should be treated with respect and must be learned. ALWAYS start the rider
at the slowest speed, response and power sengs. Even with a slow response,
a lot of power is available, and the rider must learn how to control it. These controls
must be set by the responsible supervising adult. Never allow the child to alter the sengs,
or to ride without suitable supervision.
Instrucng and praccing in a controlled situaon will allow the child to learn how
to operate the machine safely, and under control. The child’s enjoyment will be greatly
enhanced if they feel safe during the inial learning process. Please follow the instrucons
contained in this manual before operang the machine.
PARENTS/GUARDIANS
For all quesons regarding your OSET Electric Bike, please contact your local retailer/
distributor.
See distributor contact informaon on the osetbikes.com web site.
SERVICE/WARRANTY
OSET Electric Bikes are designed for o road use only and must not be used on public roads
or sidewalks. Please check and obey all local laws.
OFF ROAD USE ONLY!
6
WARNINGS, SYMBOLS & NOTES
This Owner’s Manual uses the following symbols and terms to call your
aenon to Warnings, Cauons and Notes:
Term:
Term:
Term:
Please read, understand and follow all Warning, Cauon and Note noces on your
OSET electric bike and those included in this Manual.
If you do not understand any of this important informaon, please contact your selling
dealer/distributor or the OSET Customer Service Department.
NOTE
Meaning: This term calls aenon to a Note. The text accompanying a Note provides
helpful or other important related informaon.
Meaning: This term calls aenon to a Warning. A Warning indicates a potenally
hazardous situaon which, if not avoided, could result in bodily injury or death, in addion
to property damage. Read the text accompanying the warning to be aware of the specic
hazard.
WARNING!
Meaning: This term calls aenon to a Cauon. A Cauon indicates a potenally
hazardous situaon which, if not avoided, may result in damage to equipment or
inadvertent system failure. Read the text accompanying the Cauon to be aware of the
specic hazard and avoid damage or system failure.
CAUTION

7
SAFE OPERATION
WARNINGS!
It is illegal and hazardous to use this vehicle on streets and thoroughfares. Use on streets
exposes the rider to hazards from motorists and other vehicles. Use on streets can lead to
accidents resulng in death or serious injury, and property damage. Check local laws and
regulaons to nd out where and how you may use this product legally.
WARNING!
WARNINGS!
This vehicle must be used in the presence of adult supervision to ensure that safe riding
pracces are established and followed. Even though a child is of the recommended age to
use this vehicle, not all children have the strength, skills or judgment needed to operate
this vehicle safely. A parent should supervise their child’s operaon of this vehicle at all
mes. Parents should permit connued use of this vehicle only if they determine that
their child has the ability and judgment to operate the vehicle safely.
WARNING!
WARNINGS!
• OPERATOR ONLY! NO PASSENGERS!
• Long hair, loose clothing or items worn by the rider must be covered to prevent
entanglement in moving parts of the vehicle or surroundings while riding.
• Do not exceed the weight limit. Heavier riders may signicantly reduce performance
and /or render the vehicle unstable and/or over-tax the brakes and other control devices.
Heavier riders may cause structural damage not covered by the warranty.
• Do not touch any moving or hot parts.
• Do not ride at night or under other low visibility condions.
• Do not immerse this vehicle in water.
• Do not ride on steep or uneven surfaces. Steep or uneven surfaces greatly increase the
likelihood of loss-of-control and a fall.
• Do not ride faster than condions permit for safe operaon. Excess speed greatly
increases the likelihood of loss-of-control and a fall.
• The rider should be securely seated on the vehicle ready to ride with the kickstand up
before turning on the vehicle.
WARNING!
8
SAFE OPERATION
WARNINGS!
Failure to obey all of the warnings & instrucons contained in this manual may result in
serious injury or death and permanent damage to your OSET.
WARNING!
It’s up to you. We’ve done everything we can to supply you with a safe and reliable
product. Please read, understand and pracce the following guidelines for safe operaon
of your OSET electric motocross bike:
WARNINGS!
A high quality helmet approved by your country’s governing body is the single most
eecve way to reduce the severity of an injury in the event of an accident.
ALWAYS use an approved helmet when riding this vehicle. As this vehicle is intended for
OFF-ROAD use, there is a very high likelihood that dirt and other debris will be thrown into
the air, presenng the risk of eye injury if protecve eyewear is not used.
OFF-ROAD riding presents many hazards such as loose dirt and gravel, obstacles and other
dicult-to-see-and-avoid condions. The possibility of a fall is high. Wear gloves, wrist,
knee and elbow protecon. Failure to use appropriate safety equipment greatly increases
the likelihood of death or serious injury in the event of an accident.
WARNING!
WARNINGS!
Failure to maintain this vehicle in proper operang condion can lead to an accident
resulng in death or serious injury, and property damage. If you have any quesons about
the proper care and maintenance of this vehicle, consult your selling dealer/distributor or
contact OSET Customer Service at [email protected].
Before each ride, make sure that all bolts and nuts are fastened securely and that the res
are properly inated. Before each ride, check that the throle and brake controls are
operang freely. Adjust and lubricate the drive chain as necessary. See pages 18-33 of this
manual for addional details regarding service, repair and maintenance. Check the OSET
web site for maintenance guides.
This vehicle should be returned for periodic maintenance to your selling dealer AT LEAST
once per year, but more frequently if used under severe condions.
WARNING!

9
SAFETY RESPONSIBILITIES
Always follow the Pre-Ride Checklist before every ride.
Do not operate your OSET if any damage is apparent.
Immediately contact your local retailer/distributor or OSET Customer Service.
Supervision: Riders must be supervised by responsible adults at all mes. The rider
should never be beyond eye and voice range. An adult must ALWAYS assess and
approve the riding condions and the bike preparedness before the bike is ridden.
Always ensure the rider is cauous, maintaining complete control and a reasonable
speed. Ensure the terrain is suited to the skills of the rider.
Helmets & Safety Are: There is no single factor that works beer at reducing the
severity of injuries sustained in accidents more than a quality helmet. Please don’t
ever allow your OSET to be ridden without one. Riders should also wear suitable
riding gear - gloves, eye protecon and boots. Boots should NOT HAVE LACES. Shoe
laces and loose clothing or even long hair could potenally get caught in wheels,
chains or sprockets.
One Rider Only: Your bike was engineered to carry one rider and NO (0) passengers.
Carrying a passenger would overload the machine and alter the handling. Do not
allow this to happen.
Do not overload the bike: OSET’s are designed for small, lightweight riders.
Exceeding the weight limitaons will adversely aect the handling of the machine,
and potenally cause damage.
It’s the law; obey it: Obey all laws. OSET bikes are for OFF-ROAD USE ONLY. OSET
bikes can not be used on public roads or sidewalks. The purchaser, owner, and/or
riders of this machine are directly responsible to know and obey all local, state, and
federal laws regarding the riding and use of this machine.
Night me: Don’t ride aer dark or in low light condions.
Weather & Riding Condions: Bike brakes don’t work well when they’re wet. Don’t
ride in the rain or snow. Please be aware that distance to stop may double or triple
over the distance that it takes under dry condions. Ride more slowly and ancipate
your stops by applying the brakes MUCH earlier. Don’t allow children to ride on
slopes that are too steep for their ability.
Maintenance: It worked ne when we put it in the box: please maintain your bike.
There are instrucons here in this manual. We haven’t gured out how to make a
bike that takes care of itself.
Check the brakes and the res and the ghtness of all those important fasteners
before each and every ride. Pretend that you’re a pilot doing a walk-around of his
airplane before taking-o. The pilot knows that his life depends on the airworthiness
of his airplane; the rider’s life depends on the preparedness of their bike.
Please have your bike checked by a qualied mechanic AT LEAST once a year.
It’s a small investment in the well-being of the rider.
10
Baeries: We have equipped your OSET electric bike with sealed lead-acid
baeries. We have devoted an enre chapter of this manual to the baeries.
Please read and understand this important informaon. As always, if you have any
quesons, please don’t hesitate to contact us.
Read this manual cover to cover: There is a lot of important informaon that you
need to know. Do not guess how to adjust the machine, charge it or ride it. We have
recommendaons that will instruct how to set–up, maintain, and ride your OSET.
Please read them thoroughly.
Call us with quesons or problems: We can be reached at the numbers listed on
the back cover of this manual. You can also get assistance from the OSET dealers.
1. SUPERVISION. A responsible adult must supervise at all mes.
2. WEAR A HELMET & SAFETY GEAR. The rider must wear a helmet & appropriate
safety gear EVERY TIME.
3. NO PASSENGERS.
4. DO NOT EXCEED THE WEIGHT LIMITATIONS OF THE MACHINE.
5. OBEY ALL LAWS
6. RIDING CONDITIONS. Braking and tracon are signicantly reduced in wet or
slippery condions. Terrain varies, so be responsible!
7. DO NOT RIDE in low light condions.
8. PLEASE MAINTAIN YOUR BIKE.
9. CARE FOR YOUR BATTERIES.
10. READ, STUDY AND UNDERSTAND THIS ENTIRE MANUAL.
11. If you don’t understand any aspect of the use and care of your bike, PLEASE call
OSET Customer Service.
OSET Bikes are designed to operate at specic voltages only. Use of any other baery with
a voltage higher than that specied will result in motor failure. OSET CORP considers such
modicaons and/or changes to its products to be a material alteraon of any such
products, thereby voiding any warranes and/or guarantees in their enrety and
will not be responsible for any injuries, death and /or other damage(s) caused by any such
modicaons.
WARNING!
IN SUMMARY
SUMMARY

11
BIKE SPECIFICATION - 12.5 ECO
Performance:
- Maximum Speed - 14 mph
- Weight Limit (Rider) - 60 lbs (27.3kg)
Gearing:
- 11T front sprocket, 76T rear. #25 chain.
Motor:
- 600w 24v OSET Neodymium magnet DC motor.
Chassis:
- Frame & Swing Arm - Steel frame & swing arm.
- Suspension (Front) - Telescopic coil spring fork.
- Suspension (Rear) - Spring & oil dampened.
- Wheels - Aluminium alloy, 16H alloy hubs.
- Tires - 2.4 x 12.5’’ front & 2.4 x 12.5’’ rear.
- Brakes - Front - V-brake, Rear - Band brake.
- Foot pegs - Cast Alloy.
- Handlebars - Steel.
Controller:
- 24 volt, 50 amp pulse width modulang, with inline relay and fuse.
- External speed dial and throle ‘map/response’ dial.
Throle:
- Twist type with LED baery charge indicator.
Baeries:
- 2 X 12 volt 10 amp hour sealed lead acid AGM. 2 baeries in series.
- Dimensions - 151mm x 65mm x 110mm (each).
Keys, Dials and Ports:
- Key Switch and handlebar on/o ‘rocker’ switch..
- Throle map/response dial. Tuneable response.
- Speed dial. Speed adjustment.
- 24v charger port.
Size:
- Wheelbase - 28.5” (725mm)
- Seat Height - 15.0” (390mm)
- Ground Clearance - 6.0” (152mm)
- Handlebar Height - 25.6” (650mm)
NOTE
Many factors aect speed and range capabilies. Terrain, average speed, rider weight,
re pressures, wind, hills, etc. all have an impact.
12
BIKE SPECIFICATION - 12.5 RACING
Performance:
- Maximum Speed - 14 mph
- Weight Limit (Rider) - 60 lbs (27.30kg)
Gearing:
- 9T front sprocket, 62T rear. #219 chain.
Motor:
- 600w 24v OSET Neodymium magnet DC motor.
Chassis:
- Frame & Swing Arm - Steel frame & swing arm.
- Suspension (Front) - Telescopic coil spring fork, adjustable rebound.
- Suspension (Rear) - Spring & oil dampened.
- Wheels - Aluminium alloy, F-16H, R-20H alloy hubs.
- Tires - 2.40’’ x 12.0’ front & 2.40’’ x 12.0’’ rear.
- Brakes - Mechanical disc, 160mm front & 140mm rear.
- Foot pegs - Cast Alloy.
- Handlebars - Alloy.
Controller:
- 24 volt, 50 amp pulse width modulang, with inline relay and fuse.
- External speed dial and throle ‘map/response’ dial.
Throle:
- Twist type with LED baery charge indicator.
Baeries:
- 2 X 12 volt 10 amp hour sealed lead acid AGM. 2 baeries in series.
- Dimensions - 151mm x 65mm x 110mm (each).
Keys, Dials and Ports:
- Key Switch and handlebar on/o ‘rocker’ switch..
- Throle map/response dial. Tuneable response.
- Speed dial. Speed adjustment.
- 24v charger port.
Size:
- Wheelbase - 28.5” (725mm)
- Seat Height - 15.0” (390mm)
- Ground Clearance - 6.0” (152mm)
- Handlebar Height - 25.6” (650mm)
NOTE
Many factors aect speed and range capabilies. Terrain, average speed, rider weight,
re pressures, wind, hills, etc. all have an impact.

13
1. Remove your OSET & Accessory pack from the box and check contents against the
following list:
1x Accessory Box containing:
1x Baery charger c/w power lead & manual
1x Number board
4x Black cable es
1x Hex Key set (Allen keys)
1x Spanner (8 & 10mm)
1x Manual for disc brakes (Not applicable for 12.5 Eco)
1x Manual for rear shock
2. Place your OSET on a solid & level stand, with both wheels o the ground.
3. Remove all the packing materials.
4. Using the supplied Allen keys, make sure the steering stem is in the forward facing
posion and ghten the top and side bolts securely and evenly.
Secure the handlebars ghtly in the steering stem. Double check ghtness and
alignment. Adjust the brake lever posions and reach to suit the rider. See page 22.
UNPACKING AND ASSEMBLY
Failure to properly assemble and adjust your bike prior to use may result in an
accident resulng in death, serious injury and/or property damage. If you are uncertain
about any aspect of the assembly and adjustment of your bike, seek help from a qualied
mechanic or the OSET Customer Service Department.
WARNING!
There are no user serviceable elements incorporated into the motor, motor controller,
baeries, baery charger, throle, or wiring harness of your OSET electric bike. DO NOT
ATTEMPT TO DISASSEMBLE OR ADJUST ANY OF THESE COMPONENTS. Doing so may cause
extensive damage to these components, will void your warranty, and may cause a
hazardous condion. If you cannot resolve a problem using this owner’s manual, contact
your OSET authorized dealer, or call the OSET Customer Service Department for
assistance.
WARNING!
NOTE
If you purchased your OSET at a local retailer your machine may be fully adjusted and ready
to ride. If you purchased your OSET in the carton, please carefully follow the instrucons
below and any supplemental instrucons to nish the assembly and adjustment of your
OSET.
14
UNPACKING AND ASSEMBLY
For seng up a 12.5 Eco, please follow step 5.
For seng up a 12.5 Racing, please follow steps 6-8.
5. 12.5 Eco: The 12.5 Eco is ed with a front V-brake and a rear band brake. Both
brakes will already be connected; they may need some minor adjustment. Please see
page 22. Now skip to point 9 to connue seng up our OSET.
6. 12.5 Racing: - Loosen top calliper Allen bolts with a 5mm hex key - so it will move
side to side (picture 1).
7. Spin the front wheel and apply the front brake. Do this twice. While holding the front
brake on - ghten calliper bolts. This will centre the calliper and help to give even
wear of the pads and free running of the front wheel.
8. Adjusng rear calliper. Ensure rear wheel is clear of ground and turn by hand and
check brakes are not binding if they are loosen cap screws and adjust. Be aware that
because the wheel can be moved back and forth for chain adjustment the calliper
does also - so make sure it does not rub on the outer diameter of disc.
9. Install the front number plate using the supplied ‘zip-es’. This aaches below the
handlebars and to the forks (picture 2).
(1.) (2.) (3.)
10. Check re pressure of both res and conrm they are properly inated to 20-40 psi.
Light riders can use lower pressures.
11. Baeries are placed in the bike for shipping purposes, but they will need connecng.
It is vital that connecons are made correctly. The baery strap should be ed
before connecng the main baery leads. Install the baeries as indicated
(picture 3).
12. Unpack charger from its box and read manual. Charge the baeries while thoroughly
reading the complete owners manual. See page 25.
13. Compress and check each brake lever in turn. The lever should not compress
completely to the bar. Each individual brake should hold the bike securely when you
push the OSET against the brake. If your brake needs adjustment, follow the
instrucons on page 22. Learning riders should be aware which lever operates which
brake.
14. For maximum baery life, always fully charge before operang your OSET for the rst
me and never store with discharged baeries
15. While your baeries are charging, please Read Your Owners Manual completely.
15
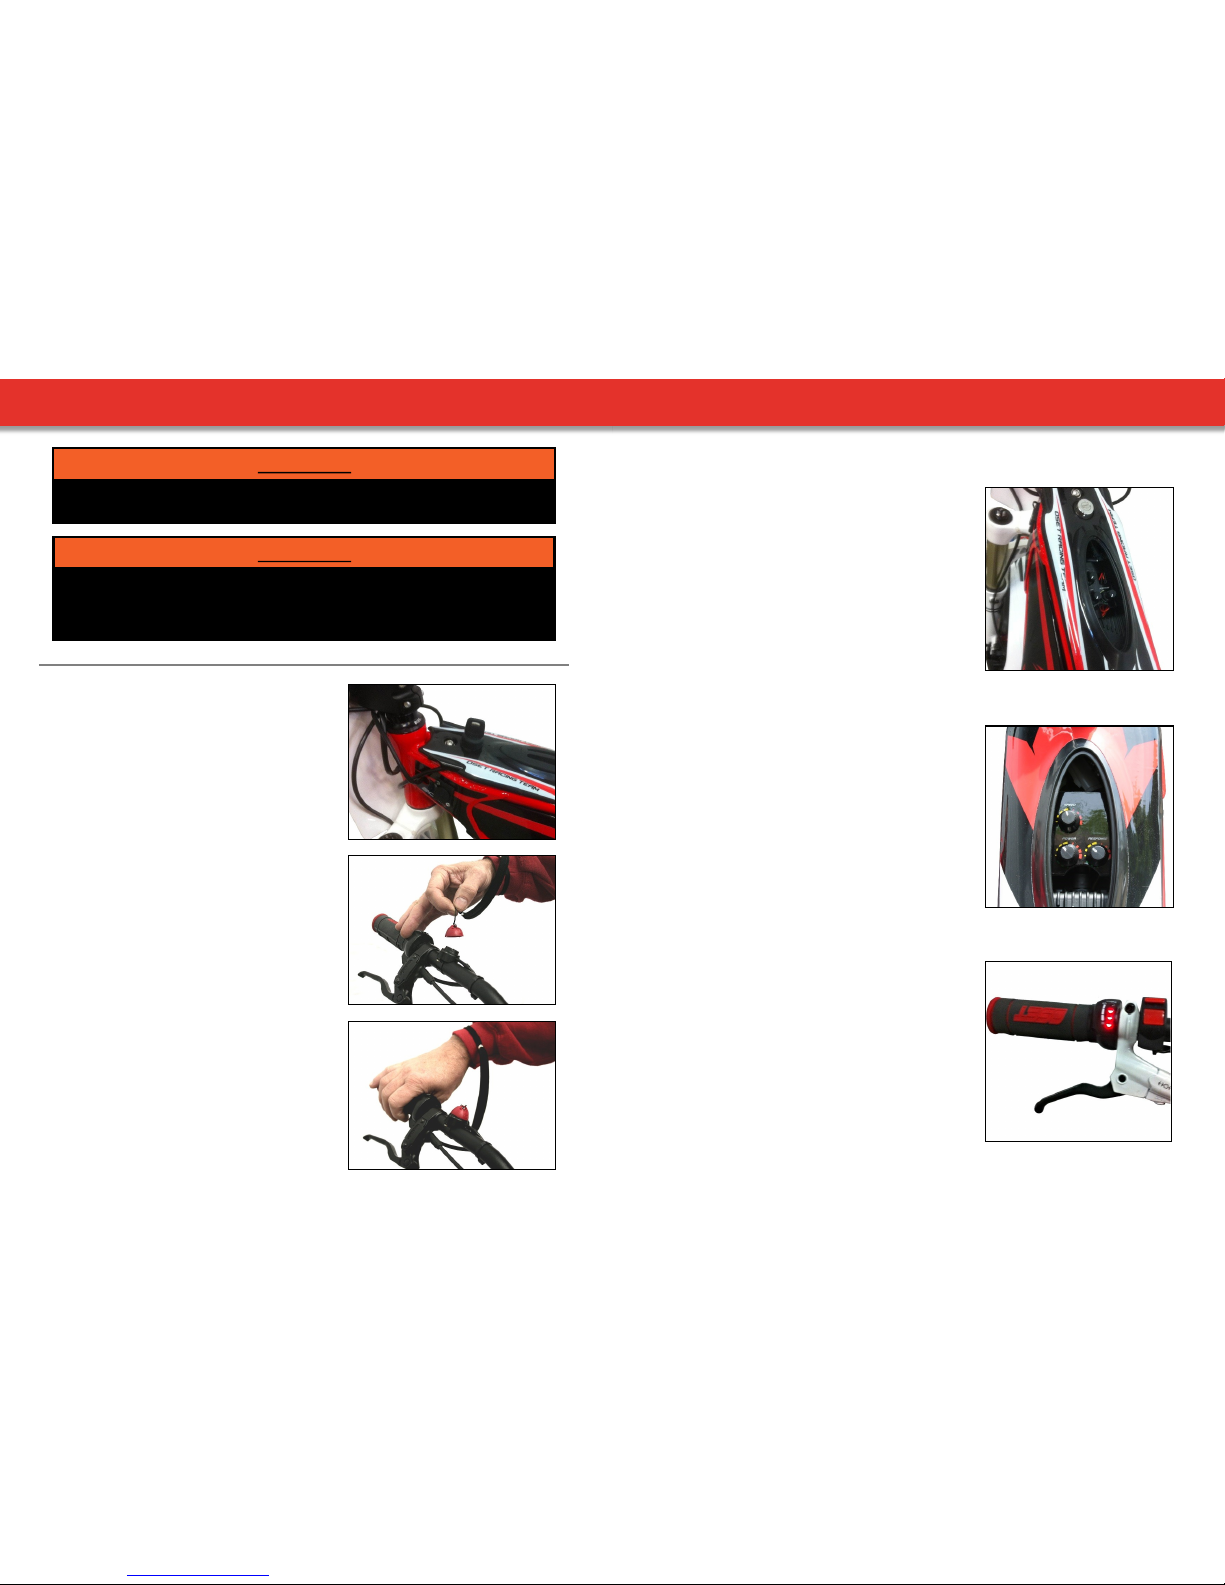
SWITCHES
The key switch turns the power on and o.
When the rider is sing on the bike, this is
located in front of them above the seat cover.
The key is removable and should be removed
when the bike is not in use.
KEY SWITCH
This switch is in addion to the key switch and
provides extra funconality. The key switch
MUST be in the ‘on’ posion for the magnec kill
switch to operate.
With the key switch in the ‘on’ posion, the kill
switch can be used to turn the bike on and o,
simply by connecng the red magnec cap to
the black base on the handlebar.
As a safety precauon, if the throle is applied
before the kill switch is connected, the bike will
not move.
Always ensure the rider is wearing the kill switch
around their wrist and that the cord is ghtened
rmly.
Please note, the magnec kill switch is ed as
standard on the 20.0 Racing. The 20.0 Eco model
has a convenonal on/o handlebar switch.
KILL SWITCH
The power must be switched to the o posion before aaching and
plugging in the charger.
WARNING!
Failure to properly install the baeries may result in an accident resulng in death, serious
injury and/or property damage. If you are uncertain about any aspect of the assembly and
adjustment of your bike, seek help from a qualied mechanic or the OSET Customer
Service Department.
WARNING!
16
DIALS & INDICATORS
The speed dial is located underneath the rubber bung
for convenience. This must only be changed by a
responsible adult. When dial is turned to the fully
clockwise posion, the bike will have a maximum
speed, when in the an-clockwise posion the speed
will be reduced to its minimum.
DIAL ADJUSTMENT
The baery charge indicator is located on the throle
assembly and shows the state of the baeries. The
indicator lights can be checked at any me to
determine if the main power is o or on. Always turn
the power o and remove the key when the bike is
not in use.
It must be treated very carefully as the range of
adjustability is enormous.
THIS DIAL IS TO BE ADJUSTED BY A RESPONSIBLE
ADULT ONLY.
The funcon of this dial is to adjust the ‘response’ of
the bike. Fully an-clockwise will give the slowest
throle response. Fully clockwise will give the
quickest response.
CHARGE INDICATOR
SPEED DIAL
This is the most important adjustability feature on the
bike and must ALWAYS start with the lowest seng,
and make changes in very small increments. It may
appear that the highest power will be suitable for an
advanced rider, but it must be understood that there
is a lot of power available.
It is a great feature to have such a range available, but
it MUST be treated with respect. ALWAYS adjust from
lower to higher, in very small increments.
POWER DIAL
THROTTLE RESPONSE DIAL

17
CHAIN ADJUSTMENT
Your OSET features a tradional chain and sprockets. It is direct drive, with no gears.
With the motor mounted in the swingarm, suspension movement has no eect on tension.
However, the chain does need to be checked and adjusted regularly, especially when the
bike is new.
The chain must be checked before every ride and adjusted as necessary. There should be
very lile slack in the chain. Adjustment is done as follows:
1. Ensure power is turned o.
2. Loosen axle nuts (shown below).
3. Turn chain tensioner nuts evenly on both sides. Very small movements can make a
big dierence. Do not ghten so much there is no slack at all.
It should be ‘taught’, not ‘ght‘. Rotate wheel by hand and check chain tension.
4. Lubricate the chain & check the sprocket bolts for ghtness.
5. Reverse the above procedure, ensuring all bolts are ght.
6. Check the wheel for alignment and the chain for tension. See page 20 for wheel
alignment informaon.
These two pictures show the correct tension. When the tensioner is pushing up on the
chain, it should only move between 5 and 10mm.
Axle Nut (15mm) Chain tensioner nut (13mm)
18
It is very important to keep everyone clear of the bike when changing and checking the
speed and response sengs. The dial is sensive to small adjustments. Do not guess at
changes. Always check before the rider gets back on to ensure the desired seng is
correct for the abilies of the rider.
WARNING!
MOTOR CARE
The OSET motor has been designed for high performance. DO NOT POWER WASH THE
MOTOR. Check that the sprocket bolt is ght periodically. Waterproof grease can be applied
around the sha where it enters the motor for addional protecon from the elements.
Similarly, a bead of silicone can be applied where the casings join for addional weather
protecon.
Failure to maintain and adjust the chain and align the wheel correctly could result in the
chain jumping o the sprockets, causing a potenally dangerous and damaging condion.
WARNING!
MOTOR PERFORMANCE & MAINTENANCE
The motor can get hot. It is designed to withstand high temperatures. However, sustained
maximum output is not recommended. The motor is designed to withstand pulses of
maximum output, not sustained.
WARNING!
19
SUSPENSION
The OSET 12.5’s feature front and rear suspension, both have adjustable rear suspension
and the 12.5R has adjustable front suspension. Separate owner’s manuals are provided.
Please read for further informaon on how to best set up the suspension
The front suspension is a coil spring fork with preload adjustment. The adjuster can be
found on the le hand fork leg, turning this clockwise will create ser suspension, for
soer turn it an-clockwise. Should you require a dierent spring rate please contact
OSET.
FRONT SUSPENSION FORKS - 12.5 Racing
Your OSET is equipped with a single coil spring type rear shock. For a harder/ser ride
at the rear ghten the adjustment ring in a clockwise direcon. For a soer ride, loosen
the adjuster by turning an-clockwise. Oponal springs are available from OSET to
adjust the spring rate.
REAR SUSPENSION - 12.5 Eco & Racing
Adjustment ring
Preload adjuster
20
WHEEL REMOVAL & INSTALLATION
12.5 Eco:
1. Disconnect the V brake by squeezing the brake arms together and releasing the cable
(picture 1).
2. Undo the 15mm axle nuts on the wheel axle and the wheel can be removed
(picture 2).
To re-install the front wheel, reverse these instrucons.
FRONT WHEEL
(1.) (2.)
12.5 Racing:
1. Undo the quick release lever (picture 3).
2. Undo the nut on the other side of the axle unl the wheel can be removed.
To re-install the front wheel, it can help to loosen the front brake calliper bolts rst (picture 4).
If this is necessary, be sure to ghten them correctly once the wheel has been installed, see
page 22 for more informaon on seng up brakes.
(3.) (4.)

21
WHEEL REMOVAL & INSTALLATION
1. Ensure power is switched o and the key removed.
2. Li the bike onto a block or stand so the wheels are o the ground.
3. Loosen the axle nuts (see image 5).
4. Loosen the chain adjustment nuts to the point where the wheel can be pushed
forward, and the chain slipped o to the right of the sprockets (image 6 & 7).
5. Twist the wheel slightly to avoid the calliper plate and pull back on the wheel to
remove it.
REAR WHEEL
(5.) (6.)
(7.) (8.)
6. To re-install the wheel reverse the above procedures. Ensure the chain is correctly
adjusted and lubricated, the wheel is aligned, and all nuts and bolts are ght
(image 8).
22
BRAKE ADJUSTMENT
Front V-brake:
A visual check will show if the brake pads are engaging the rim properly. If they are not, the
brake pad xing bolt can be loosened slightly, brake lever squeezed to ‘seat’ the pad then
reghtened to x in place. Repeat for both sides (picture 1).
Brake pads should meet the rim at the same me, if they do not the spring tension for each arm
can be adjusted via the small tension screw on the side. Turning the screw clockwise will
increase the spring tension in that brake arm (picture 2).
12.5 ECO
(1.) (2.)
(3.)
Rear Band brake:
The rear brake requires lile adjustment, if the brake lever is pulling too far the cable may need
adjustment. To do this, adjust the barrel adjuster on the boom of the brake (picture 3.)
For more adjustment, undo the cable clamp on the band brake and pull the cable through.

23
BRAKE ADJUSTMENT
The disc brakes on the 12.5 Racing are self adjusng to a point, but correct alignment is vital to
get the maximum performance. The pads must be equidistant from the disc for maximum
eciency.
Visually inspect the pads as you spin the wheel. Check that alignment is good and pad to disc
distance is even. If adjustments are needed follow the instrucons below:
Using an Allen wrench, loosen the calliper mounng bolts, allowing the calliper to
move freely from le to right.
With the wheel raised, pull the brake lever. This will allow the calliper to ‘centre’ on
the disc.
With the lever sll holding the pads ghtly on the disc, re-ghten the calliper bolts.
If the wheel does not spin freely with the brake released and further adjustment is
required beyond the limits of the built in adjustment, the calliper posion itself can be
adjusted further by the use of spacer washers. In this way, the calliper can be lined up
perfectly.
Loosen calliper. Squeeze lever.
Inspect pads. Adjust lever reach.
12.5 RACING
24
SIDE PANEL & BATTERY REMOVAL
• Ensure power is turned o and remove the key.
• With the side panel already removed, disconnect the power leads (image 4).
• Next, release the baery retaining strap bolt (image 5).
• Finally, remove the baery retaining strap & baeries (image 6).
To reinstall baery, reverse the procedure above.
REMOVING THE SIDE PANEL
(1.) Li side panel clear (2.) Side panel removed
To reinstall the side panel, reverse the procedure above.
BATTERY REMOVAL
(4.) (5.) (6.)
The brake levers can be adjusted for ‘reach’. Use a small 2mm Allen key.
Turn an-clockwise to bring the reach closer to the bar (for smaller hands).
All brakes need periodic adjustment. If and when your brake shows any decline in eciency
or needs adjustment, it is very strongly recommended you take your bike to your local retailer
for maintenance. Improper adjustment of your brake can cause poor braking and could lead
to an accident and very serious injury.

25
CHARGING INSTRUCTIONS
• Ensure that the key switch on your OSET is switched OFF before connecng the charger to the
bikes' charge port (see guide below).
• Carefully align the connector pins and connect the charger to the baery by plugging the
connector into the charger receptacle. Twist the lock ring to secure the charger lead to the
bike.
• Plug the charger into the wall outlet.
• Switch the charger on.
• LED Indicaons:
- The LED will illuminate RED when the charger is plugged into a wall outlet.
- The LED will illuminate YELLOW while the charger is charging the baery.
- The LED will change to GREEN when the baery is fully charged.
• When charging is complete (the Indicator LED is GREEN), switch the charger o, then
carefully unplug the charger from the wall socket, then from the baery by twisng the lock ring
and pulling the connector out of the charging port.
• Reconnect the baery to the bike and your OSET electric bike is now ready for use.
Charging Port OSET Charger
Use only the supplied baery charger. If you use any other baery charger, you will void
the warranty, you may damage the baeries and you could cause a re that would result
in property damage and possible injury or death.
WARNING!
26
IMPORTANT NOTES ABOUT CHARGING
• It normally takes three to ve hours to charge your baeries from a fully discharged
condion. Never overcharge. Remove from the charger aer 5 hours maximum.
• Fully charge the baeries before using your OSET electric bike for the rst me. 5 hours
maximum.
It is recommended that you fully charge the baery before & aer every ride and that
baeries are never le in a discharged state for an extended length of me.
Always connect the charger to the bike before connecng the charger to the AC power
source.
Always disconnect the AC power source from the wall socket before disconnecng the
charger from the bike.
To avoid damage to the charger, never subject it to intense physical shock or severe vibraon.
Improper use of the baery charger can result in a re with property damage and
physical injury or death.
WARNING!
Do not block the fan vent on the charger while charging the baery. This can cause the
charger to overheat.
CAUTION
The baery charger supplied with this baery is for INDOOR use only.
CAUTION
Avoid any contact with water or other uids while charging the baery. If the baery,
charger or any connecons become wet, immediately unplug the charger and thoroughly
dry all components prior to charging the baery.
CAUTION

27
BATTERY USE AND MAINTENANCE
Failure to properly use, charge and store the baeries will void the warranty, and may
cause a hazardous situaon. DO NOT use this baery with any other vehicle or appliance.
Use of this baery with any other product will void the warranty, and may create a
hazardous condion that could cause a re resulng in severe injury or death,
and property damage.
WARNING!
Never short circuit the discharge terminals of the baeries, ie touching the contacts
together via a tool, etc. A short circuit will damage the baery and could cause a re
resulng in severe injury or death, and property damage.
WARNING!
Keep the baery away from excessive heat and/or open ames. Avoid long term exposure
to direct rays from the sun.
CAUTION
Protect the baeries from water or other moisture. If the baeries become wet from rain
during use, dry as soon as possible. Remove the baeries from the bike before washing.
CAUTION
To avoid damage to the baery, never subject it to intense physical shock or
severe vibraon.
CAUTION
Never open the baery box. Doing so could damage the baery & will void the warranty.
WARNING!
28
BATTERY CARE AND DISPOSAL
Your OSET features a 24v drive system, with 2 x 10ah lead acid baeries joined in series to
make the 24v. It is very important that the baeries are kept ‘balanced’. If one baery is
driven to a lower voltage than the others, it can have the knock on eect of it undercharging,
while the other baeries in the system overcharge to compensate.
This will have performance repercussions, and will aect the life of the baeries. The
charger is treang the baeries as a single 24v baery rather than individual baeries
making up a pack.
OSET recommend using a ‘mulmeter’ to monitor
the health of the baeries. You will be able to easily
and instantly see the charge of each baery. A fully
charged baery should read between 10.5—13.0v
on a mulmeter. A reading outside of this range
could indicate a fault with that baery.
If dierent baeries show dierent readings then
the ideal course of acon would be to ‘balance’ the
baeries (see below). The mulmeter is also very
useful in diagnosing any electrical problems on the
bike.
OSET recommend ‘balancing’ the baeries
periodically. This can be done with a 12v smart
charger, such as the CTEK charger from OSET.
Each 12v baery can be charged individually this way.
We are condent that you will enjoy many miles of pleasurable riding with your OSET electric
bike baeries. However, baeries do eventually wear out.
When this happens, we urge you to properly dispose of your used baeries.
For guidance regarding proper disposal of your baeries, please contact your local dealer,
distributor or the customer service department at OSET.
In the USA you can nd very useful informaon regarding used baery drop-o sites from
the Rechargeable Baery Recycling Corporaon (RBRC) at www.rbrc.org or through their
ocial program www.call2recycle.org.
For UK customers, please visit www.recyclenow.com to nd your local recycling centre.
BATTERY DISPOSAL

29
MAINTENANCE, CLEANING & STORAGE
Keep your OSET clean and dry. Clean using the recommended procedure (see below).
Check all components for ghtness and adjustment, including handlebars, levers,
axles, chain, brakes.
Check the wheel spokes for ghtness. It is normal for spokes to loosen in operaon.
PLEASE CHECK aer every inial ride, and then regularly aerwards. If you need
guidance please consult a skilled wheel builder or call OSET customer service.
Check the speed, power and response seng before each ride.
Check the res for proper inaon. Also, inspect the res for damage.
CLEANING
Cleaning and maintaining your OSET correctly will provide a more enjoyable ownership and
riding experience. By hand cleaning the bike, you can simultaneously inspect all of the
components. We recommend cleaning be done with a damp cloth and slow running water.
Care must be taken when washing. This is an electric machine and water should never
reach sensive components. If a hose is used, cover sensive parts.
Never use a power washer as it may cause irreparable damage to sensive components.
Water and electrical components do not mix! Do not get water onto the
controller, throttle or wiring. Failure to follow this instruction could result in
permanent damage, and could cause erratic machine behavior, leading to
possible injury or death.
WARNING!
LONG TERM STORAGE
MAINTAINING YOUR OSET
If you do not plan to use your OSET for an extended period of me (1 month or more),
remove the baeries from the bike for storage.
• Fully charge the baeries before storing.
• Fully recharge the baeries at least every 60 days of storage.
• Store the baeries in a cool (50º to 70ºF, 10º to 21ºC), dry place. Avoid direct exposure
from the sun.
If you have any quesons about the baeries or their usage, please do not hesitate to
contact your local dealer or the OSET Customer Service Department.
30
ELECTRICAL DIAGNOSTIC FLOW CHART

31
WIRING
Your OSET is an electric bike, and features a considerable number of electrical components
and wiring. All must be protected from water and dirt! The components are listed below:
Controller: Shown below. This is the ‘brains’ of the drive system. It is a sophiscated and
complex component and is non-serviceable.
Throle: This sends an electronic signal to the controller, which is then interpreted to
determine the power required and the voltage to be sent to the motor. The throle is a
non-serviceable component. It must be protected from water.
The throle contains a small circuit board that can be damaged by water. Similarly, the
connecon between the throle and controller must be protected from water at all mes.
Baeries: There are two, 12V, 10ah lead acid baeries included with the OSET bike.
Motor: The motor is the end of the line where the power is actually delivered. The motor is
made up of many components. Any servicing must be carried out by trained technicians only.
Please do not aempt to separate or dismantle the motor in any way.
Relay: The relay is acvated by the switch. It makes a connecon that allows power to be
pulled from the baeries to the controller and ulmately to the motor. The relay has
connecons that should not be touched unless the baeries are disconnected. The relay is a
non-serviceable item.
Several other components make up the electrical system, such as the switch, the charge port,
the speed dial, the response dial etc.
There are no user serviceable elements incorporated into the motor, motor controller,
baeries, baery charger, throle, or wiring harness of your OSET electric bike. DO NOT
ATTEMPT TO DISASSEMBLE OR ADJUST ANY OF THESE COMPONENTS. Doing so may cause
extensive damage to these components, will void your warranty, and may cause a
hazardous condion. If you cannot resolve a problem using this owners manual, contact
your OSET authorized dealer, or call the OSET Customer Service Department for assistance.
WARNING!
Controller Fuse Relay
32
WIRING DIAGRAM

33
SETTING UP YOUR OSET FOR RIDING
1. Set the speed dial to the correct level for the rider.
Low for non-experts and all riders under 10 years old.
ALWAYS CHECK BEFORE RIDING.
2. Set the ‘response’ dial to the correct level for the rider.
Low for all non-experts and all riders under 10 years old.
ANTI-CLOCKWISE for low. CLOCKWISE for high.
3. Set the ‘power’ dial to the correct lever for the rider.
Low for non-experts and all riders under 10 years old.
A. Ensure everyone is clear of the bike.
B. Place the bike on a stand or block, so both wheels are above the ground.
C. Switch the bike on.
D. Turn speed dial to low. Set to high for experienced/advanced
riders over 10 years old ONLY.
ANTI-CLOCKWISE for low. CLOCKWISE for high.
Turn the power dial in very small increments to the desired seng. ALWAYS start the rider on
the slowest sengs!
4. Check the res are inated to between 20 & 40 psi. Light riders can run lower
pressures.
5. Check the chain for ghtness and lubricaon.
6. Set the controls correctly for the rider.
A. With the wheels on the ground, sit the rider on the bike.
B. Adjust the lever posions so they are easy to reach, and check that the
brakes are funconing correctly, and at the desired level. Adjust the ‘reach’ of
the levers to suit the rider. See page 22.
Improper set-up is dangerous! It is your responsibility to set the machine to the ability of
the rider. Failure to do so could result in serious injury or death, and damage to
the machine.
WARNING!
34
RIDING INSTRUCTIONS & SAFETY TIPS
NOTE
As the responsible adult, you must ensure that the OSET and its rider are ready to ride, every
me. The bike must be set to the abilies of the rider, and you must ALWAYS supervise when,
where and how the bike is ridden. Children can lose concentraon quickly, and be distracted
easily. If the speed or throle response is set too high then loss of control could result.
STATIONARY LEARNING
1. Ensure the key switch is in the o posion.
2. Li the machine on to a stand or block so the back wheel is an inch or two o the
ground. Ensure the bike is stable and cannot be rocked or fall o the stand.
3. Sit the rider on the machine.
4. Explain all the controls:
A. Throle
B. Front Brake (right hand side).
C. Back Brake (le hand side).
Have the rider pracce each control, while the power is sll o.
5. Explain that it’s me to try some staonary pracce, with the power turned on. Place
the rider’s feet either on the pegs, or on the ground. Either way, make sure the rider is
wearing boots with no laces, and no loose clothing.
6. Start with both hands on the handlebars.
7. With the power on, and the riders hands on the bars, have the rider pracce opening
and closing the throle. The aim is to get some throle control, and not use it as an
‘on-o’ switch. This is very important.
DO NOT RIDE UNTIL THIS HAS BEEN LEARNED FULLY.
8. While sll praccing the throle, pracce using the rear brake to stop the back wheel.
Make sure that this is coordinated. The throle and brake should not be applied
simultaneously.
UNTIL THESE SKILLS ARE MASTERED, DO NOT LET THE CHILD RIDE THE BIKE!
BEGGINERS & LEARNERS
With the bike set up correctly, your OSET is ready to ride! For learning riders, please use these
ps and instrucons. The riders will get the most enjoyment if they feel safe and in control.
Do not be tempted to start the riders too quickly. Make sure the speed and response are set
to their slowest sengs to begin.
NOTE
If the rider does not fully understand the controls and demonstrate these skills, do not let
them ride. They can try again at a later date when they are ready. The riders must learn at
THEIR pace.
35
FIRST RIDE
Do not exceed the abilies of the rider! Only allow competent riders with full instrucon
to ride the bike. Do not allow inexperienced riders on the bike before they have
demonstrated a complete knowledge of the controls. Always start on the slowest sengs.
WARNING!
Aer the rider understands the controls and is comfortable with them, it’s me for the rst
ride. For this, the rider must be dressed correctly in suitable safety gear. Boots, gloves, a
helmet and eye protecon are necessary.
The venue must be at, open and safe, with no obstacles of any kind. The machine must be
set up correctly, with the speed set to its lower seng and the throle response set to its
lowest.
1. Ensure the power is turned o.
2. While an adult supports the bike, the rider can get on.
3. The rider now can reach back with their le foot, and put the side-stand to the up
posion. Have an adult ready to hold the bike up for this!
4. Encourage the rider to rock the machine from side to side and forward and back, in
order to get comfortable with the weight of the bike.
5. The rider can now switch the machine on.
6. Before turning the throle, the rider’s legs can be splayed forward and out like
outriggers.
7. The rider can now twist the throle (as slowly as possible) and go. Encourage them to
go and stop, go and stop… using the brakes to stop. Have a supporve hand on the
rear fender whenever possible.
8. Once comfortable, the rider can try to ride along and li their feet onto the pegs as
they go.
9. When stopped, turn the power o.
If the rider drops the bike, ensure that the power is turned OFF before liing the bike. It is
good pracce to turn the power o whenever there is no rider on the bike.
CAUTION
OFF ROAD USE ONLY!
OSET Mini Bikes are designed for o road use only and must not be used on public roads
or sidewalks. Please check and obey all local laws.
WARNING!
36
LEARNING TO STAND UP
Once the basics are mastered, the bike response can be adjusted to match the growing skills
of the rider. Always use cauon when adjusng the bike to faster response sengs.
Any changes must be small and incremental. Do not change the sengs in big chunks on the
assumpon the rider can handle it. LEARN SLOWLY!
Before the rider gets going too fast it’s a good idea to get them riding the bike ‘correctly’.
This means, standing up and in control. Learning to stand up is very dicult if the skill set of
the rider does not include good throle control.
While the machine is staonary and the rider is on the bike, have an adult stand
behind and support the rider at their waist.
The rider must posion themselves correctly, standing in a very neutral posion,
holding the bars in such a way that their weight is not being supported by their
hands.
When the rider is ready, they can open the throle, smoothly and in control. An
adult should run along and help support when necessary.
Once up and running in the standing posion, it’s me to learn some technique.
NOTE
A common error (in our view) is to put children on machines that are too big. Please note
how large mul-me World Champion Dougie Lampkin and mul-me US Champ Geo
Aaron are on their bikes. A bike that seems too small when the rider sits can be just right
when they stand in the correct posion. OSET bikes are designed to be ridden standing up.
If the machine is too large for the child, they will have no leverage on the bike, and be unable
to develop techniques. To develop correct technique, the rider is beer o being too big
than too small.

37
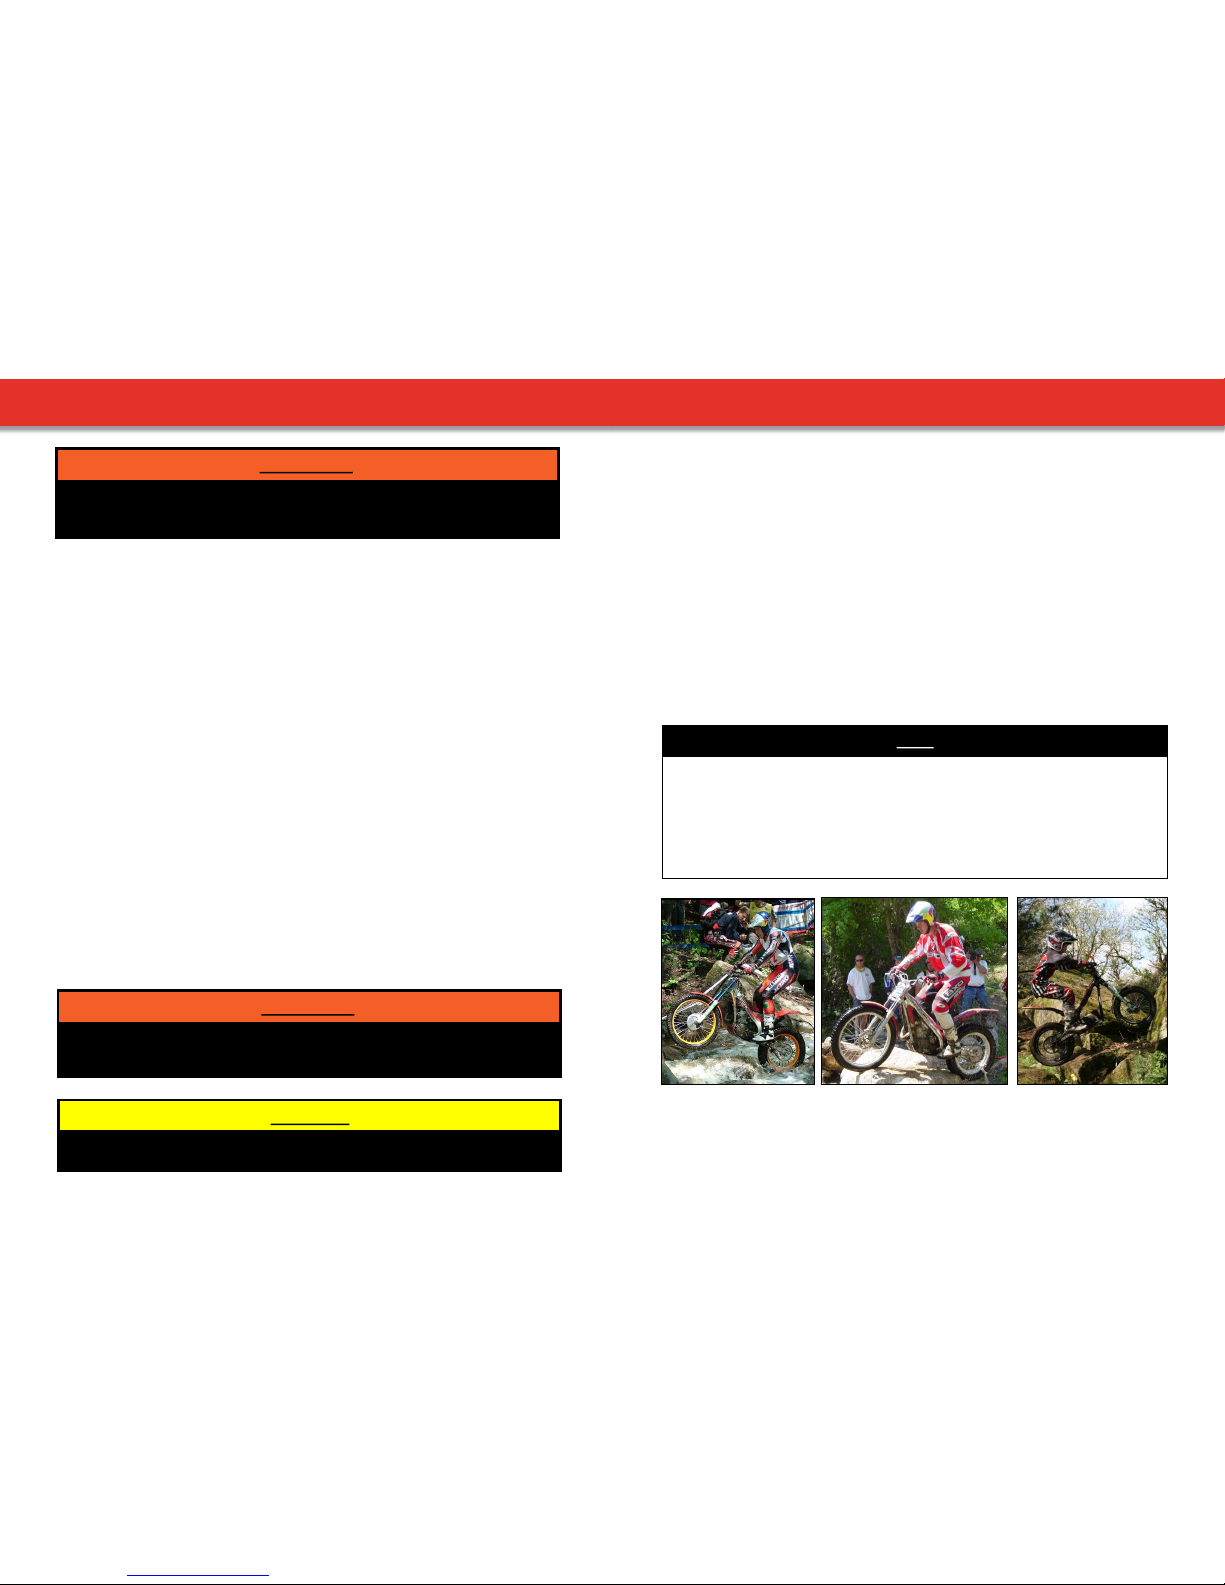
LEARNING SOME TECHNIQUE
Learning some correct ‘Trials’ style techniques will put the rider in a great posion for all
forms of riding that come later. The Trials rider learns how to control the machine at slow
speeds, and use correct skills to execute ght turns and other techniques. Many riders tend
to think that the way to turn is to simply turn the handlebars. This is natural, but wrong! If
ght turns are mastered correctly, many other skills will follow on naturally.
1. Riding in a straight line, the rider can pracce leaning the bike to one side, then to
the other. They will noce that when they do this, the bike will want to turn.
2. To execute a ght turn, lean the bike to the inside.
3. Weight should be on the ‘outside’ peg, and the outside knee should be out.
4. The foot on the outside peg can pivot out as well.
5. The inside arm can be almost straight, the outside arm bent, and the shoulders
square on to the angle of the bars.
Turning is the most important technique of all. Once this is mastered, many other tech-
niques will follow. Turning with this level of skill requires full control over the machine. It will
not be possible without the rider understanding all the intricacies of balance, body posion,
and throle control.
NOTE
A surprising amount of technique can be completely natural for children. In many cases, the
riders simply work out what works best, and go with it. Simple instrucons like “lean it in”
will oen iniate everything else being done correctly. The more exaggerated this technique,
the beer it will work. The aim is to master ‘full-lock’ turns. If a child can master this, they
are likely to become great riders. Very few adults can do this! Viewing Trials instruconal
videos may also help. Many children can learn simply by watching.
This manual should be enough to get you started. Further techniques can not be covered in
this manual. When learning any technique the most important thing is to do so slowly and
safely. Remember that OSET bikes are a Trials bike design, and therefore designed and
developed for slow speed riding.
Enjoy the ride!
38
LIMITED WARRANTY
OSET Electric Dirt Bikes are warranted to the original retail purchaser to be free from defects
in materials and workmanship in the frame and components except for batteries, tires, and
inner tubes for a period of sixty (60) days from the date of purchase. Batteries are warranted
to the original retail purchaser to be free from defects in materials and workmanship for a
period of thirty (30) days from the date of purchase. Tires and tubes are warranted to be free
of manufacturing and material defects for thirty (30) days. Such tire and tube warranty shall
not include flat tires, tire cuts, skid through, over inflation blowouts, or other such misuse or
normal hazards. Warranties are limited to repair and/or replacement of bike and/or parts
found by OSET to be defective, at the sole discretion of OSET.
OSET Limited Warranties do not cover or apply to the following: Normal wear and tear; any
damage, failure and/or loss caused by accident, shipping, misuse, neglect, abuse and/or
failure to follow instructions or warnings as stated in the applicable owner's manual or other
printed materials provided with the product; damage, failure and/or loss caused by the use of
the product for stunt riding, ramp jumping, speed competition, inappropriate off-road use,
acrobatics, trick riding or other similar activities, or in any other manner for which such
products were not specifically designed. This warranty does not apply to any products or
components, mechanical and/or electrical, which have in any way been altered from their
original configuration by any person. OSET will not be liable and/or responsible for any
damage, failure or loss caused by any unauthorized service or use of unauthorized parts.
The OSET Limited Warranty does not cover or apply to any OSET product used for rental or
commercial purposes unless the specific product is designated, labeled, or marketed by
OSET as acceptable for rental or commercial use. All warranty claims must be made directly
to selling retailer. The selling retailer is the primary provider of warranty support and
customer service. OSET may choose to perform warranty service at the sole choice of
OSET. The original owner of the product must provide proof of purchase prior to approval of
any warranty claim. Under no circumstances does this limited warranty include any costs
associated with shipment and/or transportation to or from retailer or OSET. OSET, at its sole
discretion, has the option of replacing with a new part, a factory recertified part, or repairing
any defective product and/or component thereof, or to pay to the owner of such product an
amount equal to the original purchase price of such product. The original owner shall pay for
all costs of labor associated with any warranty claims. This warranty supersedes all previous
warranties. The warranties stated herein are in lieu of and expressly excludes all other
warranties not expressly set forth herein, whether express or implied by law or otherwise,
including, but not limited to, any warranties for merchantability and/or fitness for any
particular purpose. OSET shall in no event be liable or responsible for incidental or
consequential losses, damages or expenses in connection with their electric dirt bike
products. The liability of OSET hereunder is expressly limited to the replacement of goods
complying with this warranty or at the sole election of OSET to the repayment of an amount
equivalent to the purchase price of the product in question. CAUTION: Some states or
countries may not permit the exclusion or limitation of consequential damages and therefore,
such limitations may not apply to the consumer in which such impermissible exclusions are
involved.
OSET Corp, 425 Kristen Ct, Unit 6, Montrose, CO 81401

39
OSET CONTACT INFORMATION
BE SAFE!
Never use OSET bikes in unsafe situaons! Follow all instrucons. Follow all laws.
WARNING!
VISIT THE OSET WEB SITE FOR YOUR COUNTRY TO:
BUY SPARE PARTS AND ACCESSORIES.
READ ARTICLES ON ADVANCED MACHINE SET-UP AND TECHNIQUES.
Importer informaon can be found on www.osetbikes.com.
OSET CONTACT INFORMATION
OSET Corp
425 Kristen Ct, Unit 6
Montrose
CO 81401
USA
303 990-2390
www.osetbikes.com
OSET Bikes Ltd
Unit 32, Edge Workshops
3 Elva Way
Bexhill on Sea
East Sussex TN39 5BF
01424 211-804
www.osetbikes.co.uk
www.Facebook.com/osetbikes
www.Twier.com/osetbikes
OSET are in over 25 Countries. Please visit www.osetbikes.com for
importer/distributor informaon.
40
hp://www.OSETBIKES.com
info@OSETBIKES.com
Other manuals for 12.5 Eco
1
This manual suits for next models
1
Table of contents
Other oset Scooter manuals


