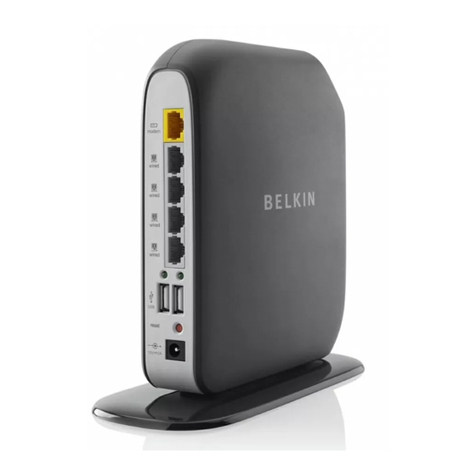
Ositech Communications Titan II User manual

Title: Titan II Wireless Router User Manual Revision: B
Document # : 290090-002-NA Page 1
1 of 69
Ositech Titan II Wireless Router
User Manual
Document Status: Released

Title: Titan II Wireless Router User Manual Revision: B
Document # : 290090-002-NA Page 2
2 of 69
Revision History
DATE REV REASON
August 08, 2011 A Initial Document Creation, supports V1.00.2.sub1 firmware – JC
January 25, 2012 B Updated to support V1.00.3.sub1 firmware – JC

Title: Titan II Wireless Router User Manual Revision: B
Document # : 290090-002-NA Page 3
3 of 69
Table of Contents
1INTRODUCTION ................................................................................................................... 5
1.1 PURPOSE ..................................................................................................................................... 5
2DEFINITIONS........................................................................................................................ 6
3WINDOWS INSTALLATION ................................................................................................ 7
3.1 WINDOWS CONFIGURATION SOFTWARE INSTALLATION ........................................ 7
3.2 TITAN II DEVICE DRIVER INSTALLATION .................................................................... 10
3.2.1
WINDOWS XP USB DEVICE DRIVER INSTALLATION..........................................................10
3.2.2
WINDOWS VISTA USB DEVICE DRIVER INSTALLATION...................................................13
3.2.3
WINDOWS 7 USB DEVICE DRIVER INSTALLATION.............................................................15
3.2.4
WINDOWS 8 USB DEVICE DRIVER INSTALLATION.............................................................16
4TITAN II WIRELESS ROUTER CONFIGURATION UTILITY ...................................... 17
4.1 WELCOME ................................................................................................................................ 19
4.2 WIRELESS SETTINGS ............................................................................................................ 20
4.2.1
CONNECTIONS................................................................................................................................20
4.2.1.1
New..................................................................................................................................................20
4.2.1.1.1
New WiFi Connection...............................................................................................................21
4.2.1.1.2
New Cellular Connection - Manually........................................................................................24
4.2.1.1.3
New Cellular Connection - AutoDetect.....................................................................................26
4.2.1.2
Connection Test ...............................................................................................................................28
4.2.1.3
Connection Management .................................................................................................................29
4.2.1.3.1
Connection Prioritization ..........................................................................................................29
4.2.1.3.2
Connection Manipulation..........................................................................................................30
4.3 ADVANCED SETTINGS .......................................................................................................... 34
4.3.1
ADVANCED.......................................................................................................................................35
4.3.2
IMPORT/EXPORT SETTINGS.......................................................................................................36
4.3.2.1
IMPORT CONFIGURATION.........................................................................................................37
4.3.2.2
EXPORT CONFIGURATION ........................................................................................................39
4.3.3
RESTORE FACTORY SETTINGS .................................................................................................41
4.3.4
POWER MANAGEMENT ...............................................................................................................42
4.3.5
OTHER...............................................................................................................................................43
4.3.5.1
Restore Previous Settings.................................................................................................................44
4.3.5.2
Perform Firmware Upgrade .............................................................................................................45
4.3.5.3
Change Login Credentials................................................................................................................49
5TITAN II STATUS PAGE .................................................................................................... 51
6PHILIPS HEARTSTART MRx MONITOR/DEFIBRILLATOR OPERATIONS ............ 52
6.1 Create WiFi Connection ............................................................................................................ 54
6.2 Create Cellular Connection - Manually ................................................................................... 55
6.3 Create Cellular Connection – AutoDetect ...............................................................................57
6.4 Test Connectivity........................................................................................................................ 58
7TECHNICAL SUPPORT...................................................................................................... 61

Title: Titan II Wireless Router User Manual Revision: B
Document # : 290090-002-NA Page 4
4 of 69
APPENDIX A: WIRELESS OPERATION AND THRESHOLD VALUES............................. 62
APPENDIX B: FCC INFORMATION TO USERS................................................................... 63
APPENDIX C: HOW TO RESET USERNAME AND PASSWORD ....................................... 64
APPENDIX D: TROUBLESHOOTING FAILED CONNECTIONS ....................................... 66
APPENDIX E: FRONT PANEL LED’S .................................................................................... 68

Title: Titan II Wireless Router User Manual Revision: B
Document # : 290090-002-NA Page 5
5 of 69
1 INTRODUCTION
1.1 PURPOSE
This document is a detailed user manual for the Ositech Titan II Wireless Router.
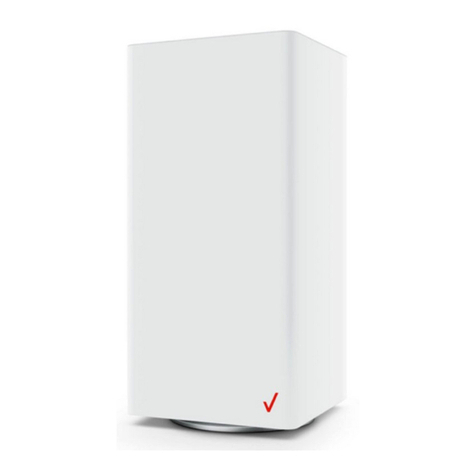
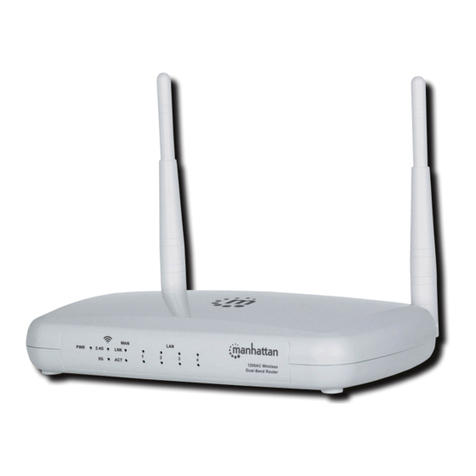
Below, is an illustration of the Titan II Wireless Router including its protective enclosure. This manual will detail
how to install and configure the Titan II Wireless Router prior to use with your Philips HeartStart MRx
Monitor/Defibrillator.
.
Titan II Wireless Router with Enclosure

Title: Titan II Wireless Router User Manual Revision: B
Document # : 290090-002-NA Page 6
6 of 69
2 DEFINITIONS
3G – 3
rd
Generation Cellular Data Transmission
APN – Access Point Name
DNS – Domain Name Server
ECG – ElectroCardioGram
ID – IDentification
INI – INItialization File
LED – Light Emitting Diode
MRx – Philips HeartStart MRx Monitor/Defibrillator
SIM – Subscriber Information Module
SSID – Service Set IDentifier
URL – Universal Resource Locator
USB – Universal Serial Bus
WEP – Wireless Encryption Protocol
WiFi – 802.11 Wireless Fidelity (Wireless Networking)
WPA-PSK – 802.11 WiFi Protected Access – Pre Shared Key
WPA2-PSK – 802.11 WiFI Protected Access 2 – Pre Shared Key

Title: Titan II Wireless Router User Manual Revision: B
Document # : 290090-002-NA Page 7
7 of 69
3 WINDOWS INSTALLATION
The Titan II Wireless Router configuration is accomplished thru various versions of Microsoft Windows using
Internet Explorer. For the scope of this document, the installation process is illustrated for Windows XP, Vista,
Windows 7 (32 and 64bit) and Windows 8 (32 and 64bit). Windows 95, 98, ME, NT, and 2000 are unsupported.
The Windows installation and configuration includes the installation of the Titan II Wireless Router and its USB
drivers, and as well, its corresponding network connection that is automatically created by Windows.
Once your Titan II Wireless Router has been installed and configured under Windows, you are then ready for
operations with your Philips HeartStart MRx Monitor/Defibrillator and the Philips Telemedicine System.
During the software installation, for your convenience, a link to the User Manual is created for you and provided thru
your system Start Menu, as well as a link to the Status page. You must review the User Manual prior to configuring
your Titan II Wireless Router, to familiarize yourself with its operations. Do not connect your Titan II Wireless
Router until you have run the installation software.
3.1 WINDOWS CONFIGURATION SOFTWARE INSTALLATION
Insert your installation CDROM that was provided as part of your kit. The Fastmenu system will appear. Click the
“Install Titan II Wireless Router Configuration Software” button to begin the installation process. If you do not see
the Fastmenu system appearing on your computer system, your CDROM Autostart feature is disabled. However,
you can still launch the Fastmenu system by browsing the contents of the CDROM, and then double clicking the file
Autorun.exe.

Title: Titan II Wireless Router User Manual Revision: B
Document # : 290090-002-NA Page 8
8 of 69
During this time, be patient while the Titan II Wireless Router Configuration Utility Setup Wizard launches, it may
take a few moments. Once the Titan II Wireless Router Configuration Utility loads, click the Next button to
continue.
At this point, you need to examine the software license agreement that is displayed. You must accept the software
license agreement in order to continue. Once you have read and agree to the terms and conditions of the software
license agreement, click the “I Agree” button to proceed.
The setup wizard will now prompt you for the installation destination folder. If you are satisfied with the default
installation path, simply click the Install button. However, if you choose to install to your choice of destination
folders, click the browse button and select your destination folder of choice, then click the Install button to continue.
You are advised to keep the default installation path that is shown.

Title: Titan II Wireless Router User Manual Revision: B
Document # : 290090-002-NA Page 9
9 of 69
The setup wizard will now advise you that the Titan II Wireless Router Configuration Utility has been installed on
your computer. Click the Finish button to exit the Titan II Wireless Router Configuration Utility Setup Wizard. The
software for the Titan II Wireless Router is now fully installed and accessible via your Start button. You are now
ready to install your Titan II Wireless Router device in Windows.

Title: Titan II Wireless Router User Manual Revision: B
Document # : 290090-002-NA Page 1
10
0 of 69
3.2 TITAN II DEVICE DRIVER INSTALLATION
** IMPORTANT NOTE **
Since there are many ways and aspects of customizing Windows to your needs, please be advised that the
following Windows installation directions and illustrations may not reflect your computer system
exactly. The installation instructions are designed to guide you thru the device driver installation as
closely as possible to your specific computer system.
3.2.1 WINDOWS XP USB DEVICE DRIVER INSTALLATION
Start your computer system, and then connect the USB
Cable to the Titan II Wireless Router and then insert
the other end of the USB cable into any free USB port
on your computer system. Your Philips HeartStart
MRx Monitor/Defibrillator should not be connected at
this time.
In a moment, Windows will detect the presence of new hardware,
and accordingly Windows will launch the Found New Hardware
Wizard. Please be patient during this time, as the Titan II Wireless
Router requires a few seconds to start up normally. Since you do
not need to connect to Windows Update to search for software,
ensure your bullet is set to “No, not this time”, and then click Next
to proceed. Please note, certain configurations of Windows XP may
not display this screen, and if so, please continue to the next step.

Title: Titan II Wireless Router User Manual Revision: B
Document # : 290090-002-NA Page 1
11
1 of 69
Ensure that your bullet is set to “Install the software automatically [Recommended]”, then click Next to continue
with the USB installation.
You will now be advised that the Titan II device has not passed Windows Logo testing. You must click “Continue
Anyway” to continue with the installation at this point. Please be assured that this software will neither impair nor
destabilize your computer system. Please note, certain configurations of Windows XP may not display this screen,
and if so, please continue to the next step.

Title: Titan II Wireless Router User Manual Revision: B
Document # : 290090-002-NA Page 1
12
2 of 69
The Found New Hardware Wizard should now advise you that it has completed installing your Titan II device. Click
Finish to close the wizard.

Title: Titan II Wireless Router User Manual Revision: B
Document # : 290090-002-NA Page 1
13
3 of 69
3.2.2 WINDOWS VISTA USB DEVICE DRIVER INSTALLATION
Start your computer system, and then connect the USB
Cable to the Titan II Wireless Router and then insert the
other end of the USB cable into any free USB port on your
computer system. Your Philips HeartStart MRx
Monitor/Defibrillator should not be connected at this time.
In a moment, Windows should detect the presence of
new hardware, and accordingly Windows will launch the
Found New Hardware Wizard. Please be patient during
this time, as the Titan II Wireless Router requires a few
seconds to start up normally. Please click “Locate and
install driver software (recommended) to proceed with
the device driver installation.
You will now be advised that Windows can’t verify the
publisher of this driver software. You must click “Install
this driver software anyway” to continue with the
installation. Please be assured that this software will neither
harm your computer nor steal information.

Title: Titan II Wireless Router User Manual Revision: B
Document # : 290090-002-NA Page 1
14
4 of 69
The Found New Hardware Wizard should now advise you (via your system tray) that it has successfully completed
installing your Titan II Wireless Router.

Title: Titan II Wireless Router User Manual Revision: B
Document # : 290090-002-NA Page 1
15
5 of 69
3.2.3 WINDOWS 7 USB DEVICE DRIVER INSTALLATION
Start your computer system, and then connect the USB
Cable to the Titan II Wireless Router and then insert the
other end of the USB cable into any free USB port on
your computer system. Your Philips HeartStart MRx
Monitor/Defibrillator should not be connected at this
time.
In a moment, Windows should detect the presence of new hardware, and accordingly Windows will launch the
Found New Hardware Wizard. Please be patient during this time, as the Titan II Wireless Router requires a few
seconds to start up normally.
At this point, Windows 7 will proceed to install the Titan II Wireless Router, without any further intervention on
your behalf.
The Found New Hardware Wizard should now advise you (via your system tray) that it has successfully completed
installing your Titan II Wireless Router.

Title: Titan II Wireless Router User Manual Revision: B
Document # : 290090-002-NA Page 1
16
6 of 69
3.2.4 WINDOWS 8 USB DEVICE DRIVER INSTALLATION
Start your computer system, and then connect the USB
Cable to the Titan II Wireless Router and then insert the
other end of the USB cable into any free USB port on
your computer system. Your Philips HeartStart MRx
Monitor/Defibrillator should not be connected at this
time.
In a moment, Windows should detect the presence of new hardware, and accordingly Windows will launch the
Found New Hardware Wizard. Please be patient during this time, as the Titan II Wireless Router requires a few
seconds to start up normally.
At this point, Windows 8 will proceed to install the Titan II Wireless Router, without any further intervention on
your behalf.
The Found New Hardware Wizard should now advise you (via your system tray) that it has successfully completed
installing your Titan II Wireless Router.

Title: Titan II Wireless Router User Manual Revision: B
Document # : 290090-002-NA Page 1
17
7 of 69
4 TITAN II WIRELESS ROUTER CONFIGURATION UTILITY
This section describes the Titan II Wireless Router Configuration Utility in greater depth and detail. In order to have
your Titan II Wireless Router functional for operations with your HeartStart MRx, it needs to be configured for your
specific connection prior to use. This is accomplished using the Titan II Wireless Router Configuration Utility.
Before you begin, ensure that you have all the connection parameters for your WiFi and/or cellular connections
handy. If you are unsure of these settings, please contact your network administrator accordingly. Before you
begin, please ensure your Titan II Wireless Router is connected to your computer system via the USB cable, and that
it has been installed properly.
Note:
To access the Titan II Wireless Router Configuration Utility, your system must have Windows Internet
Explorer version 6 installed, as a minimum.
Access to the Titan II Wireless Router Configuration Utility is made conveniently through your Start menu system.
Click your Start button, and select your Program Files. Within your Program Files, locate folder Titan II Wireless
Router Configuration Utility. From the Titan II Wireless Router Configuration Utility folder, select Titan II
Wireless Router Configuration Utility. Windows will now launch the configuration utility.
When the configuration utility opens, you will be challenged to login to the configuration utility. Your default
username is “admin” and the accompanying password is also “admin”, of course without the quotation marks. Enter
your username and password accordingly, and then click OK to login to your Titan II Wireless Router.

Title: Titan II Wireless Router User Manual Revision: B
Document # : 290090-002-NA Page 1
18
8 of 69
On the very first time you launch the configuration utility, it will load factory default settings. Please proceed to
configure your Titan II Wireless Router for your specific operational environment, and then click “Apply Changes”
to save your settings appropriately.
The main Titan II Wireless Router Configuration Utility has four sub areas on the left that are selectable; Welcome,
Wireless, Advanced Settings, and Apply Changes.

Title: Titan II Wireless Router User Manual Revision: B
Document # : 290090-002-NA Page 1
19
9 of 69
4.1 WELCOME
Whenever you launch the Titan II Wireless Router Configuration Utility, it will open to the Welcome screen.
The Welcome screen provides an easy avenue to determine version histories. Here you can view both the version of
the Titan II Wireless Router firmware, the version of the configuration utility itself and the electronic serial number
of your Titan II Wireless Router. This information is useful and required should you require or contact Technical
Support.
From the illustration below (taken from the lower left quadrant of the illustration), you can determine the electronic
serial number of the unit is 99T80200123456, the version of the actual Configurator utility itself is “Configurator
V1.0.0.13”, and the version of the Philips Router firmware is “Philips Router V1.0.0.3”. Should you require
technical support in the future, this information will be required. Your version details may differ from those
illustrated below.
Generally speaking, when entering characters, you should NOT use the following characters. [ ] = . <sp>
As an alternate to the space <sp>, we suggest that you use an underscore _for improved readability.

Title: Titan II Wireless Router User Manual Revision: B
Document # : 290090-002-NA Page 2
20
0 of 69
4.2 WIRELESS SETTINGS
To access the Wireless Settings options, on the left side of the configuration utility, select Wireless Settings. You
will now observe the Connection options that comprise the Wireless Settings.
The Wireless Settings are a local function on the Titan II Wireless Router. These settings will determine how the
Titan II Wireless Router will connect to the Internet to allow communications with the Philips Telemedicine System.
4.2.1 CONNECTIONS
4.2.1.1 New
If you do not have any Connections created as yet, please click the New Connection selector. From the pull down
menu, you will now have the option to create a WiFi connection, create a Cellular connection manually, or create a
Cellular connection via AutoDetect. Make your selection to proceed.
Table of contents
