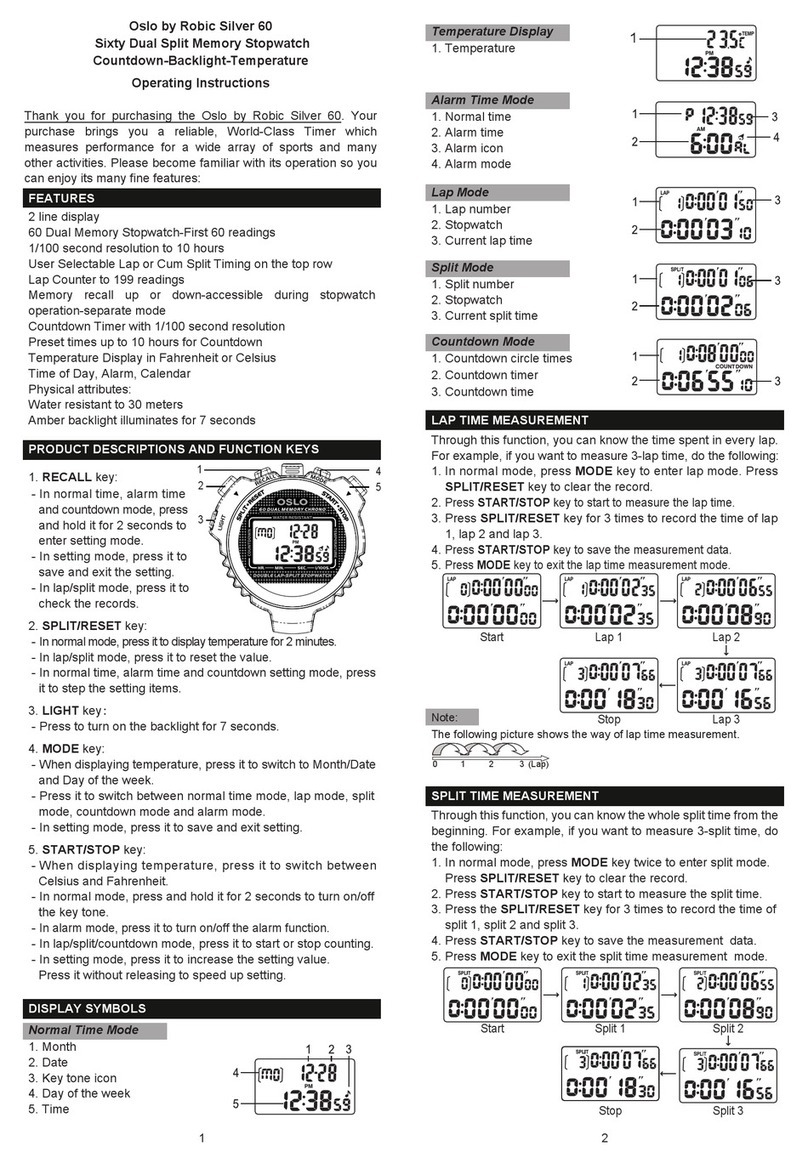
Oslo Silver 2.0 User manual

OSLO®SILVER 2.0 OPERATING INSTRUCTIONS
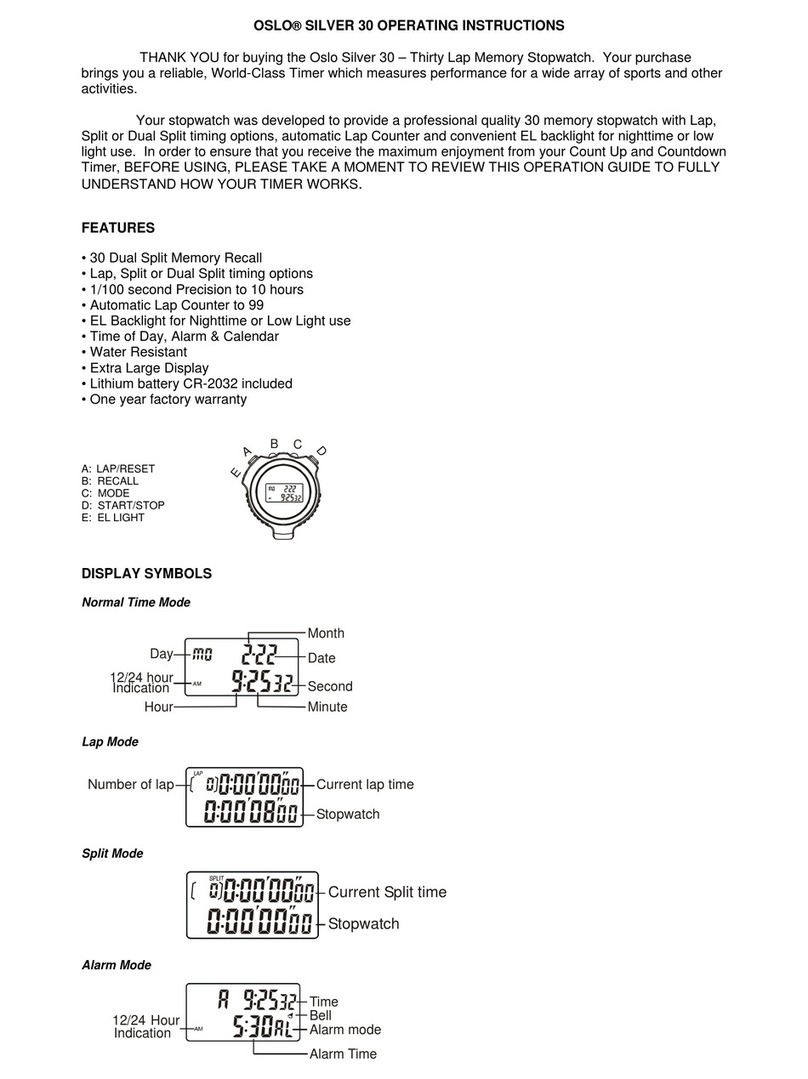
THANK YOU for buying the Oslo Silver 2.0 Twin Chronograph and
Countdown Timer. Your purchase brings you a reliable, World-Class Timer with
separate modes for Lap and Split Timing and a Full Function Countdown Timer.
Your Twin Chronograph and Countdown Timer was developed to provide
a multi-mode chronograph with Two Finish Time Memory Recall, plus a
Countdown Timer which shows time remaining and signals completion of the
countdown. In order to ensure that you receive the maximum enjoyment from
your Twin Chronograph and Countdown Timer, BEFORE USING, PLEASE
TAKE A MOMENT TO REVIEW THIS OPERATION GUIDE TO FULLY
UNDERSTAND HOW YOUR TIMER WORKS.
FEATURES
• Event, Lap or Split Timing
•1/100 second Precision to 10 hours
• Two Finish Time Memory Recall
• An unlimited number of time readings can be taken
• Countdown Timer shows Time Remaining; Counts up at completion
• Audible Alarm at Completion of Countdown
• Countdown Timer range from 1 second to 10 hours
• Extra Large Display, Long life LR44 battery included
• One year factory warranty
IMPORTANT NOTE:
Please select the timing function you wish to use by pressing button B. Then,
proceed as described in these instructions.
Pressing button Bwill continue to change modes even while the timer is running
(active).
Do not change modes while timing or the timer may not record your desired
results.
For example: Should you wish to record lap times, do not mode into SPLIT to
take time readings.
Display Mode
Function keys
A: SPLIT/RESET
B: MODE
C: START/STOP
M
O
D
E
A
B
C

Split mode
Lap mode
Countdown timer mode
How to Use the Stopwatch
Press button Bto enter Split mode.
1. Single event measurement
Press buttons in the following order:
C>C>A
2. Split time measurement.
Press buttons in following order:
C >A > A > C>A
3. Consecutive split time measurement.
You may take as many split times as you require.
Press buttons in following order:
C > A > C >A > A
Start Stop Reset
Start Split
Continous Counting
Stop
Reset

Press button Bto enter Lap mode.
1. Single event measurement.
Press buttons in the following order:
C>C>A
2. Lap time measurement.
Press buttons in following order:
C > A > A > C>A
3. Consecutive lap time measurement.
You may take as many lap time readings as you require.
Press buttons in following order:
C > A > C >A > A
Countdown Time Setting
Start Split 1
Reset
Stop
Split 2
Start Stop Reset
Start Split
Continous Counting
Stop
Reset
Start Lap 1
Reset
Stop
Lap 2

Ountdown time mode
Minute setting
Hour setting
Second setting
Start ountdown
timer
Reset
Stop ountdown
timer
1. Press button Bto enter the countdown timer mode.
2. Press button B for 2 seconds until hour digit starts flashing, press button Cto
enter the countdown times.
3. Press button Ato select minute digit, press button Cto adjust its value.
4. Press button Ato select second digit, press button Cto adjust its value.
Please Note but Do Not Print:
Cis missing in Countdown.
Please Fix.
→
5. To exit this setting mode, press button B.
Note:
1. The countdown time setting range is from 1 second to 9 hours 59 minutes
seconds.
2. While the countdown time is approaching to 0, it will alarm with two beeps if
the set time is less than 30 seconds, or it will alarm with five beeps in the last 5
seconds if the set time is more than 30 seconds.
How to Use the Countdown Timer
1. Set the countdown time as described in the previous section.
2. Press button Cto start the countdown timer.
3. Press button Cto stop the countdown timer.
4. Press button Awhile stopped to reset the countdown timer to the print times.
Please Note but Do Not Print:
Cis missing in countdown twice.
Please Fix.
↑↑
Note:
You may stop and restart the countdown timer as required for pause or “time out”
timing
Battery Replacement
When the display becomes dim, unscrew the screws on the back case and
replace with a new battery (LR44). Pay attention to the battery polarity when
replacing battery.

Note:
Attention! Please dispose of used unit and batteries in an ecologically safe
manner.
LIMITED WARRANTY
OUR BASIC POLICY
Marshall –Browning International Corporation (MBI Corp.) warrants to the original owner, this timepiece
(excluding battery, lanyard, clip, band or strap) for the period of one year from the original purchase date.
This limited warranty is given by MBI Corp. and not by the dealer from whom the timepiece was
purchased.
______________________________________________________________________
THE WARRANTY PROCESS – WHAT IS COVERED BY THE WARRANTY
If the timepiece develops a manufacturing defect within the one year limited warranty period, it will be
either repaired or replaced (at MBI Corp.’s option) with a timepiece of equal value, providing the original
owner submits the following:
1. Proof of purchase, i.e. a validated store receipt showing date of purchase.
2. A check or money order (no cash, please) in the amount to cover the cost of shipping and handling
WHAT IS NOT COVERED BY THE WARRANTY
A. MBI Corp. will not repair defects of damages caused by or showing evidence of:
1. Improper or unauthorized service.
2. Misuse, tampering, abuse or mistreatment of the timepiece.
3. Damage to the case or viable cracking of the lens.
4. Moisture damage, if the product is a non-water-resistant timepiece.
B. If we find that the battery is the cause of the defect, MBI Corp. reserves the right to charge you for a
new replacement.
MBI Corp. is not liable for incidental or consequential damages. Some states do not allow the exclusion or
limitation of incidental or consequential damages, so the above limitation may not apply to you.
YOUR RIGHTS UNDER IMPLIED WARRANTIES AND STATE LAW.
MBI Corp. limits the duration of any warrant implied by state law, including the implied warrant of
merchantability, to one year from the date of original purchase. Some states do not allow limitations on
how long an implied warranty lasts, so the above limitations may not apply to you. This warranty gives
you specific legal rights, and you may also have other rights which vary from state to state.
CARING FOR YOUR OLSO SILVER 2.0
Proper care of your timepiece will provide many years of enjoyment. We recommend that:
1The battery be replaced at once when it becomes depleted. Please ask your local retailer to replace the
battery for you using LR44 or equivalent.
2. The lens be replaced immediately if it becomes damaged, as contamination from dust, moisture, and
other foreign substances will damage the module.
3. If the timepiece is not marked “water-resistant,” avoid immersing or exposing it to water, steam, or
other forms of moisture.
Shop for quality Robic products on our website. Learn more about sports equipment on our website.
Table of contents
Other Oslo Watch manuals
Popular Watch manuals by other brands

Casio
Casio QW 5513 Operation guide

Piaget
Piaget 560P Instructions for use

Armitron
Armitron pro sport MD0346 instruction manual

West Marine
West Marine BlackTip 13411293 Instruction Booklet and Care Guide

Jaeger-leCoultre
Jaeger-leCoultre HYBRIS MECHANICA CALIBRE 184 manual

FOREVER
FOREVER iGO PRO JW-200 user manual