Ovation iDea User manual

TM
TM
TM
TM
TM
Quick Start Guide
Record. Playback. Create. Learn.
The rst and only acoustic/electric
guitar with a built-in MP3 recorder
To upload and download MP3 les, your computer
must have a USB connection. Minimum operating
system requirements are PC with Windows XP
or Mac with OSX.
Pat. Pending – Preamp Model No. OPi-1
Complete installation and operation
information at www.OvationiDea.com
©2008 Ovation Guitars • A KMC Music Company
www.OvationGuitars.com
Layout:
Stereo Headphone Output
USB Connector
Display Window
Master Volume Control
Guitar Bass EQ
Guitar Midrange EQ
Guitar Treble EQ
Preamp Release Latch (to access
battery on preamp rear)*
Built-in Microphone
Play/Stop Button
Repeat/Loop Button
Record Button
Joystick (Menu Navigation Control)
Preamp Mounting Receptacle
*Battery is accessed by pushing Preamp
Release latch and removing preamp
from Mounting Receptacle. Slide off rear
compartment cover to access battery.
Replace with quality Alkaline 9V battery.
Turn On:
The analog circuits in the preamp are
activated by either inserting stereo
headphones into the headphone jack or
by connecting your guitar to an amp or PA
with a 1/4" instrument cable.
Turn on the preamp's digital functions and
display window by pressing and holding
the (Play/Stop) button for two
seconds. Upon release, the player will boot
and bring you to the MAIN MENU.
Please note that the preamp is programmed
to save battery power by tuning off the
display after about 10 seconds. As soon as
you touch any of the player functions, the
display will illuminate again. The analog
preamp functions are not affected.
Press & Hold
Insert
Or
Then
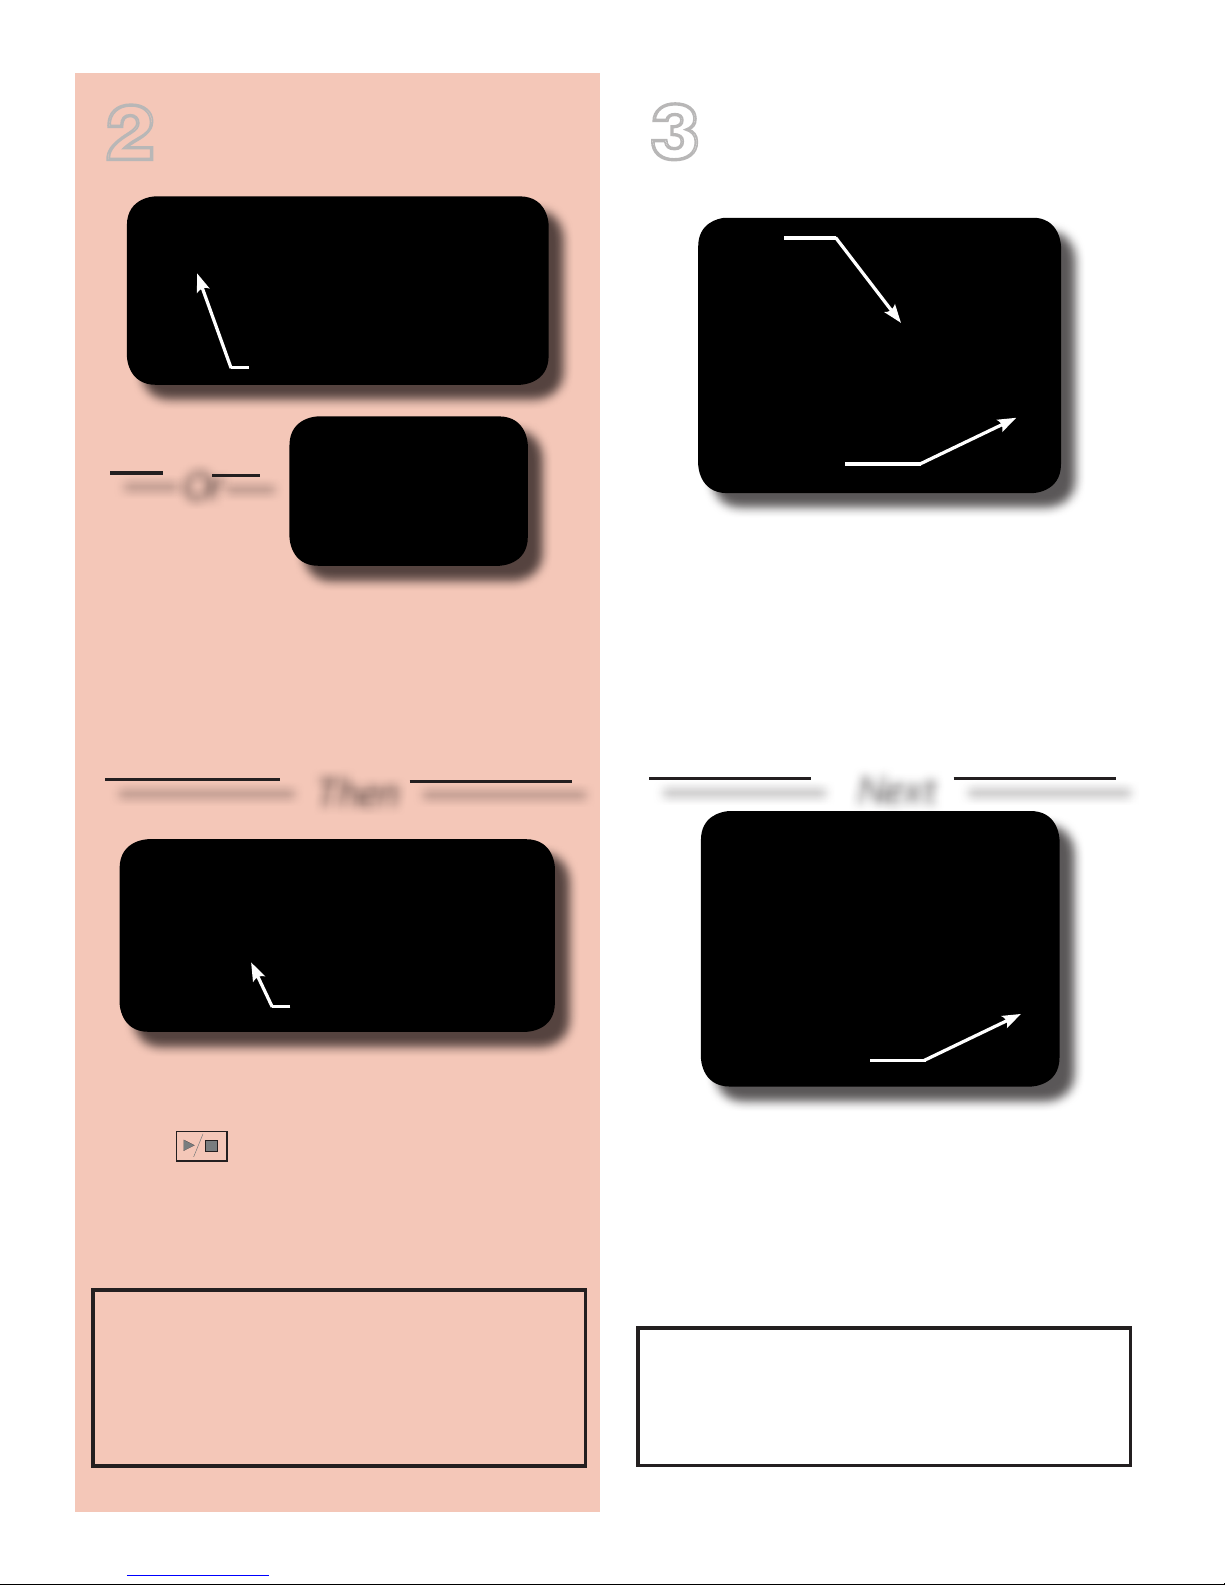
Scroll the screen cursor (A) by moving the
joystick (B) up or down until it highlights
the TUNER selection on the menu. Then
navigate to the tuner by moving the joystick
to the right or by pushing in.
Play any string on the guitar. The note name
will appear in the display. If the string is not
in tune, an up or down arrow will also appear
indicating the direction to adjust the string
pitch. When both arrows illuminate, you're in
tune. When done, simply move the joystick to
the left to return to the MAIN MENU.
Please note that moving the joystick to
the right moves you to the next submenu,
while leftward movement returns you to
the previous menu.
Tune In:
To Main Menu
Next
A
B

To select a track to play:
Scroll to1. PLAY from the MAIN MENU.
Push the joystick in or move it to the2.
right to select PLAY.
On the next screen, in the same way,3.
choose FILE SELECT.
Now you'll see folders containing the contents4.
of the iDea's memory or the last selected
file. Using the same navigation and selection
movements, use the joystick to select your
desired file. When selected you'll land on
the PLAY standby screen.
Simply press the5. button to begin
playback.
Play Out:
MAIN MENU
SCRLL
SCRLL
NV NV
88%
2.PLAY
1.TUNER
3.RECORD
P L A Y
SCRLL
SCRLL
NV NV
88%
1.FILE SEL
2.TEMP SET
3.PLAY!
Press to
Play Last Program
To play the last-played track, simply press
the button twice, and playback will
begin. The iDea preamp is programmed to
play an introductory message the first time
it is used.
Or
SCRLL
SCRLL
NV NV
ROOT
INSTRUCTION
JAM TRAX
RECORDINGS
SONGS
WELCOME!
PLAY
88%
LESSON 1
Record With:
Press to
Record New Material
To quickly record a new idea, just press
the REC button to set the preamp into the
Record-Ready mode. Press the REC button
once again and your recording will begin.
After you're finished recording, press the
REC button yet again to stop. Playback
your new recording by pressing the
button.
Or
To record and select the input source:
Scroll to1. RECORD from the Main Menu.
Push the joystick in or move it to the right to2.
select RECORD.
Select3. GUITAR/MIC to use the built-in
microphone to record the guitar with
a vocal, or, choose GUITAR/AUX IN to
eliminate the mic and use only the pickup
signal and the source plugged into your
Aux In jack.
Selecting the4. GUITAR/MIC item and
confirming the GUITAR/MIC record mode
leads to the RECORD ready page.
Press the REC button to begin your5.
recording and then again to stop.
To playback your latest recording, simply6.
press the button twice.
MAIN MENU
SCRLL
SCRLL
NV NV
88%
2.PLAY
1.TUNER
3.RECORD
RECORD
SCRLL
SCRLL
NV NV
88%
2.GUITAR/AUX
1.GUITAR/MIC
GUITAR/MIC REC
SCRLL
SCRLL
NV NV
RECORD
88%
RECORD
GMIC-
ThemostexcitingfeatureoftheiDeapreamp
is its ability to transfer program material to
and from a computer using a standard USB
connection.
While the iDea comes with a variety of
introductory sample material, Ovation has
seen to it that a large variety of additional
program material is available and constantly
updated on the web. Just log onto
www.OvationiDea.com for additional free
materials as well a wealth of links to
specialized iDea content.
The iDea stores program material in the
widely used MP3 format. Virtually any
MP3 program material can be stored in
the preamp's memory. So, if you'd like to
update the content that came with your
preamp, or if you just want to download the
recordings you've already created to your
computer, here's the simple process that
connects your iDea to the virtual world:
Using the supplied USB cable, insert the1.
smaller end into the mini connector
on the front panel of the preamp.
Connect the other end of the cable to a2.
free USB connector on your computer.
Wait for your computer to recognize the3.
preamp. When recognized, the preamp
will display the USB CONNECT screen.
The iDea will now appear as a removable
storage device on your computer.
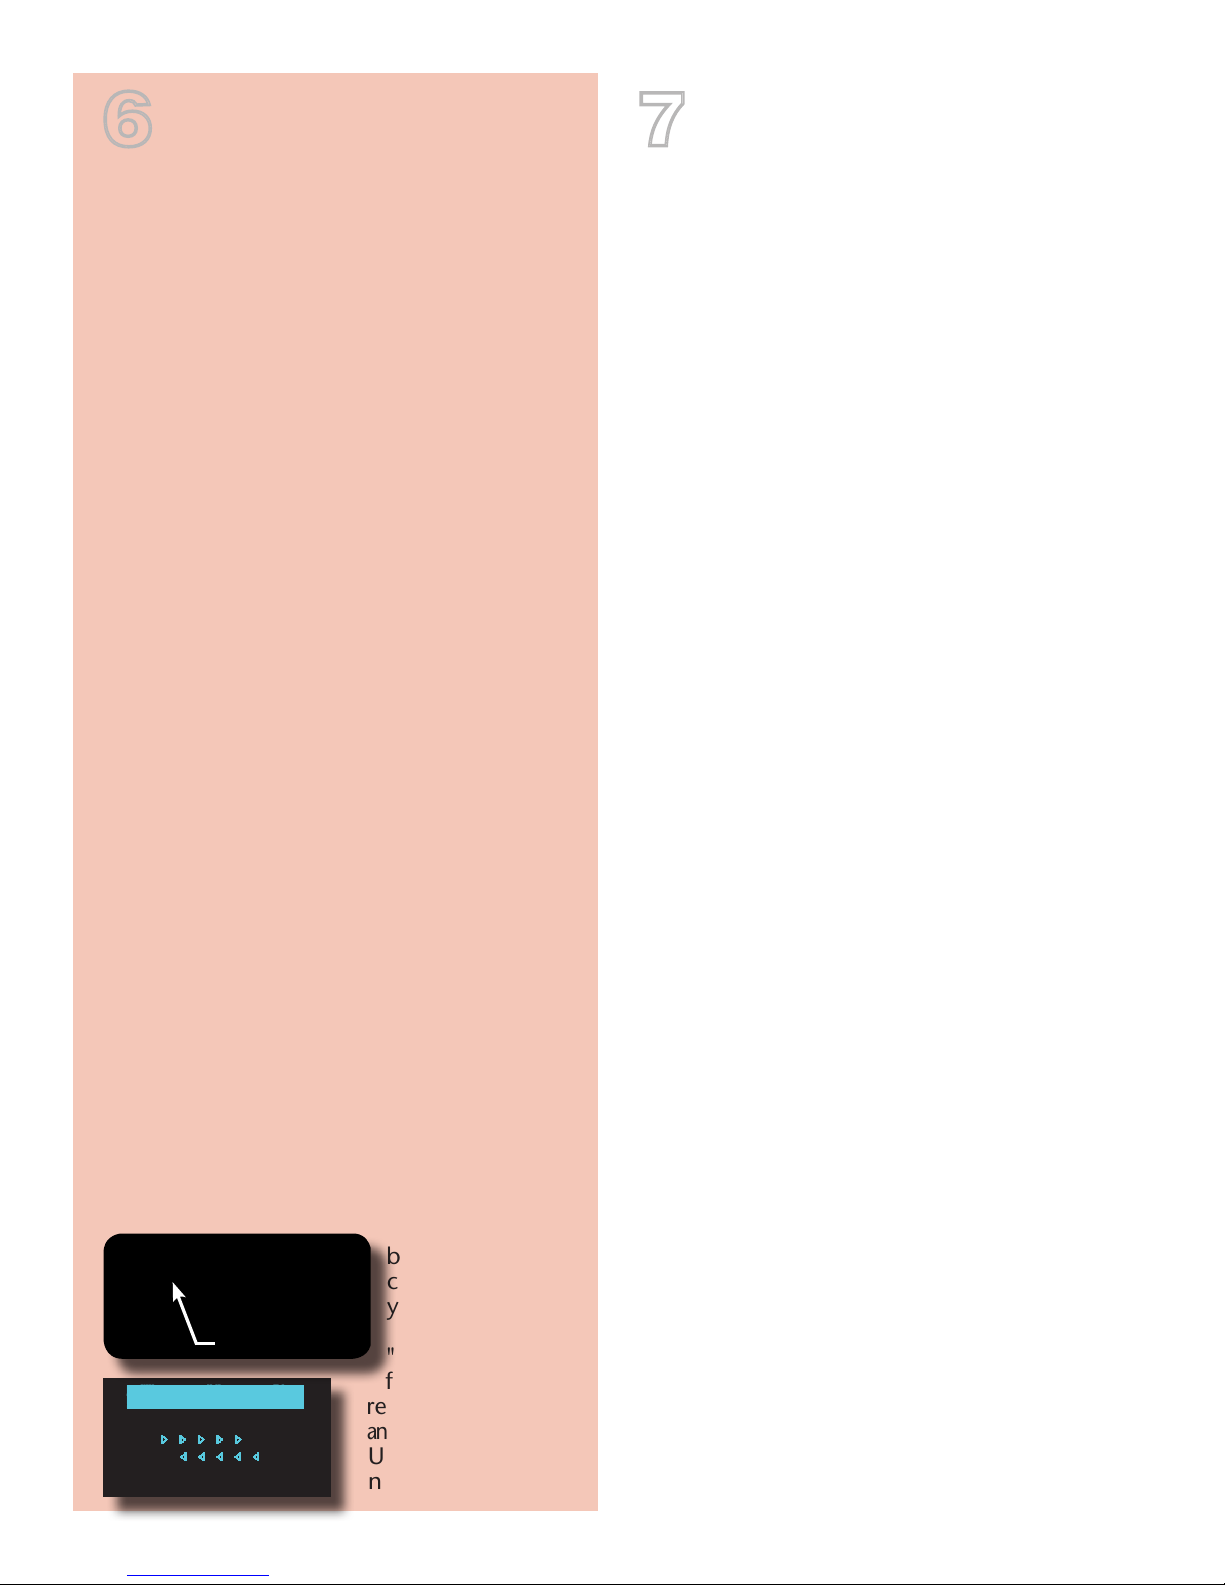
Using your computer's file system finder/4. explorer, you can now upload or download
your MP3 files
between your
computer and
your preamp as
well as perform
"housekeeping"
functions like
renaming,
deleting,
and reorganizing.
Unplug to return to
normal operation.
Connect With USB
INSTRUCTION
USB CONNECT
INSERT
Get Technical
For warranty information, system specifications,
an in-depth video user guide, as well as links and
"freebies" for your new iDea preamp visit:
www.OvationiDea.com
On the Web
What makes the iDea preamp such a break-
through product is its functionality allowing
you to update the program material stored
in it. Whether you want to take lessons, play
along with jam tracks, or load in backing
tracks for your own compositions, the iDea
keeps your music and your guitar in sync.
To explore the ever-growing catalog of
program material and community created for
your iDea, be sure to visit:
www.OvationiDea.com
Besides the downloads, you'll find a wealth
of information that can help you get the
most from your new preamp.
Get Help
If you've searched through all the use and
function materials on the iDea web site
and you still can't find an answer to your
question, please contact us at:
askus@ovationguitars.com

Explore Your iDea
There are a number of additional useful
features available with the iDea preamp.
Here's a quick look at how to use them.
Playback Speed Control
The iDea preamp features a pitch-stable
playback speed adjustment that allows you
to slow down program material without key
change while practicing.
Select PLAY from the MAIN MENU, scroll to
the TEMPO SET and select it. It will bring
you to a screen that will allow you to select
the percentage of playback speed you
desire. Scroll to the speed you wish, then
navigate back to the PLAY menu. Now your
program material will playback slower, but
at the same pitch:
The selected playback speed will remain in
effect until you change it back.
MAIN MENU
SCRLL
SCRLL
NV NV
88%
2.PLAY
1.TUNER
3.RECORD
PLAY
SCRLL
SCRLL
NV NV
88%
2.TEMPO SET
1.FILE SELECT
3.PLAY!
TEMPO SETTING
SCRLL
SCRLL
NV NV
100%
TEMPO SETTING
SCRLL
SCRLL
NV NV
60%
PLAY
SCRLL
SCRLL
NV NV
88%
2.TEMPO SET
1.FILE SELECT
3.PLAY!
Using the 1/8" stereo input jack on your
guitar, connect a stereo (or mono) program
source to the iDea.
Now you're ready to begin recording:
INSERT STEREO
MINI JACK
MAIN MENU
SCRLL
SCRLL
NV NV
88%
2.PLAY
1.TUNER
3.RECORD
RECORD
SCRLL
SCRLL
NV NV
88%
2.GUITAR/AUX
1.GUITAR/MIC
GUITAR/AUX REC
SCRLL
SCRLL
NV NV
RECORD
REC LEVEL
REC LEVEL
SCRLL
SCRLL
NV NV
28
GUITAR/AUX REC
SCRLL
SCRLL
NV NV
RECORD
REC LEVEL
From the1. MAIN MENU select RECORD.
On the2. RECORD menu, select GUITAR/AUX.
If it is necessary to adjust input levels, select3.
REC LEVEL otherwise see step 5.
On the4. REC LEVEL screen scroll to your
desired input level (0-30).
Navigate back to the5. GUITAR/AUX REC
screen and select RECORD.
For those without a computer, you can still
use the iDea to store your favorite backing
tracks or play-along program material. By
using the Aux In recording feature, you can
connect any line-level player or mixer and
record your tracks into the iDea memory.
Aux In Recording
Table of contents
Other Ovation Guitar manuals


