Panamalar F9 User manual
QUICK GUIDE
ORIGINALITY DESIGN-SMART AND PRACTICAL
F9

Contents
EN
DE
FR
..........................................................
..........................................................
..........................................................
01-10
21-30
11-20
1
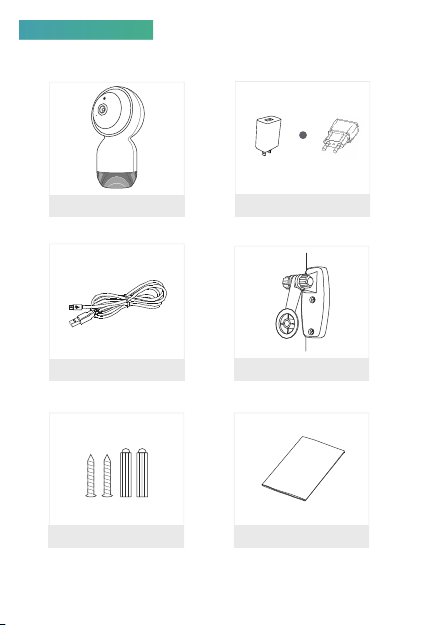
USB Cable
Power Adapter
F9
Screws
Bracket
What's in the box
Please consult this checklist for all parts
I/M
or
US EU
2
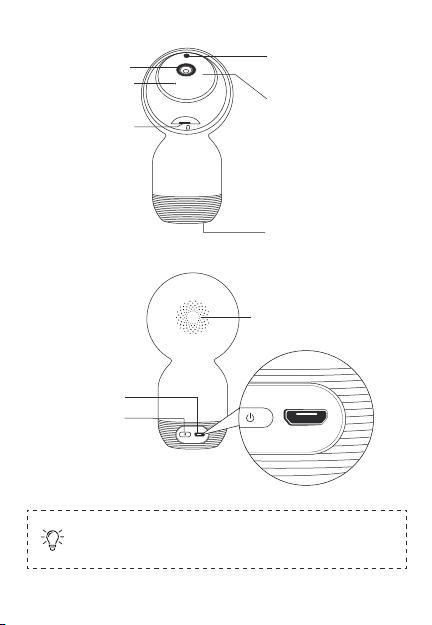
MicroSD Card Slot
Reset Button
The limitation of the body structure may lead to a small
deviation of this USB port. However, after our professional
testing, it does not impact on the safe use, please don't worry.
Infrared Light
Anti-slip Pad
Light Resistor
(IR Auto Switch Sensor)
Microphone
Lens
Speaker
Power Port
IN-5V
IN-5V
3
Description
Name Smart Camera
F9
DC 5V ± 10%
2.0MP
1/2.7″CMOS
71*67*130mm/170.6g
WEP/ WPA/ WPA2
2.4GHz WiFi Only (IEEE802.11/b/g/n)
Support MicroSD Card (Max 64G)/Cloud
Storage
Model
Power
Pixel
Image Sensor
Size & Weight
Wireless Encryption
Network
Storage
Reset: Press and hold the reset button for 7 seconds to reset the
camera. (if you have modified settings, the device will return to
factory defaults)
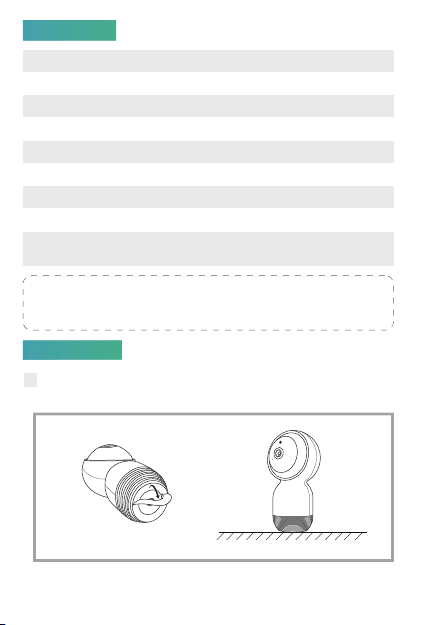
1 Remove the paster of the Anti-slip Pad attached on the bottom of
the camera, then put the camera on a clean surface.
安装
Installation

4
2 Mount it on the wall or ceiling
① Fix the bracket to the wall with the screws included.
② Put the camera on the holder, then tighten the screws on.
③ Adjust the nut gently to get the angle you need.
Smart Life is available for both iOS and Android OS. Search the
name 'Smart Life' in App Store or Android Market, or scan the
QR-Code to download the App.
Connection
Android
IOS
·Support
Download App(IOS&android)
Download
12 3
5
This device can only work with 2.4GHz WiFi network, do not support
for 5GHz WiFi network, if you have a dual-band WiFi router, please
set the relevant parameters of the router before WiFi configuration.
The length of the router name and passwords should not exceed 24
digits and do not include special characters such as ~!@#$%^&*().
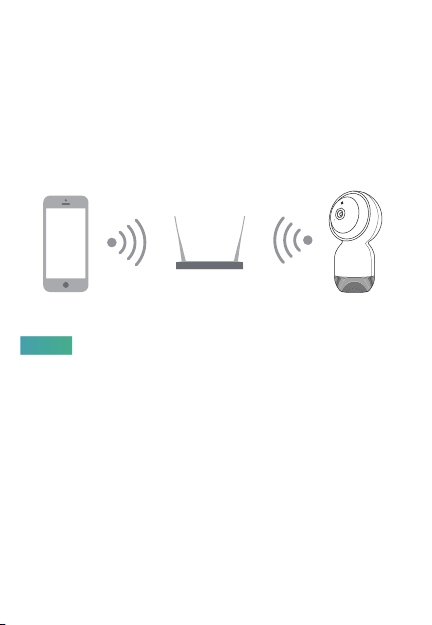
Keep the mobile phone and device as close as to the router, which
can speed up the configuration of the device.
Please keep network available
1. Please follow the instructions and keep it for reference.
2. One device can only be added with one app account, if the device
has been added by one account, then it will not available for
another account again unless you remove it in the app. But you
can share it with multiple accounts.
3. The MicroSD Card Slot is at the bottom of the lens, please turn up
the lens to find it.
4. There are two infrared lights on both sides of the lens, it will turn
on automatically at night, please note that the IR light can not
be turned off.
5. If you have any other query about this camera, please contact our
technical support team: [email protected]
Notes
Set-up the Router
6
Operation
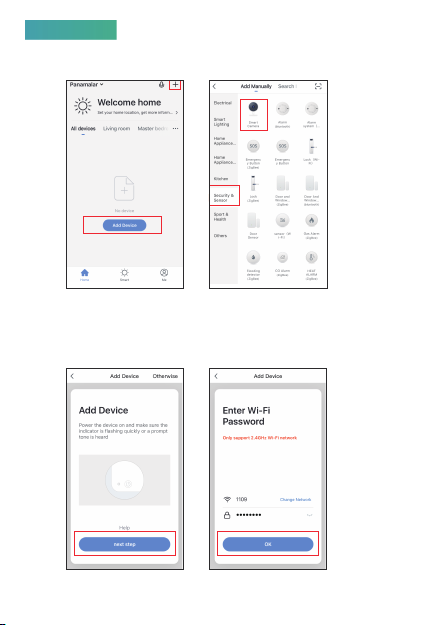
1. Access to“Smart Life”App, add the device with“Smart Camera”
in“Security & Sensor”.
2. Power the device on, you will hear the first prompt tone, wait
about 8 seconds, the second prompt tone will be heard, click
“next step”, input your wifi passwords (this steps only required
for the first connection), then click “OK” go into the next step.

7
3. Read the guideline of the OR-Code Scanning first, click
“continue”, scan the QR-Code with your camera. (Please hold
the camera 15-20cm in front of your smart phone for scanning. )
4. Click “heard the beep” when the camera comes out the third
prompt tone, then wait about 10-20S until the progress bar
comes to 100%, it means connected successfully.
About 20cm
8
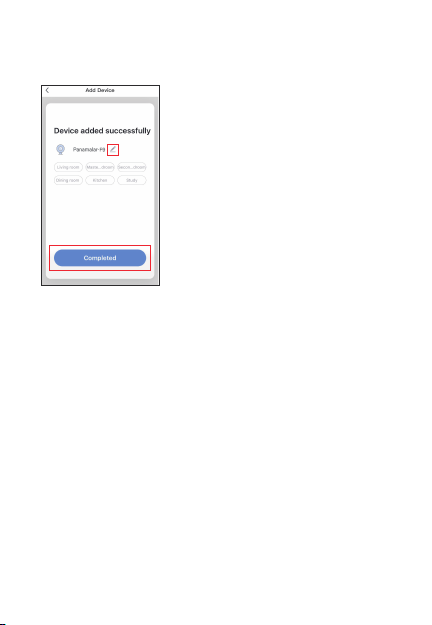
5. The camera is added successfully, you can change the device
nickname in this interface.
Open the“Amazon Alexa”App, click“Home”button;
Select “Skills”on menu bar that pops up on the left.
How to connect with Amazon Echo Show to control
your camera
Step 1
Step 2
Step 3
Step 4
Search“Smart Life”App on the search box. Then click
“Enable”to activate the App, and log in your account.
Click“Authorize”for the connection between Amazon
Alexa and Smart Life App. Once the Smart Life App has been
linked successfully, then back to“Home”interface.
Now you can use your Echo Show to voice control your
camera like“Alexa, show me the living room”
Table of contents
Languages:


