manuals.online logo
Brands
  1. Home
  2. •
  3. Brands
  4. •
  5. Panasonic
  6. •
  7. Camcorder
  8. •
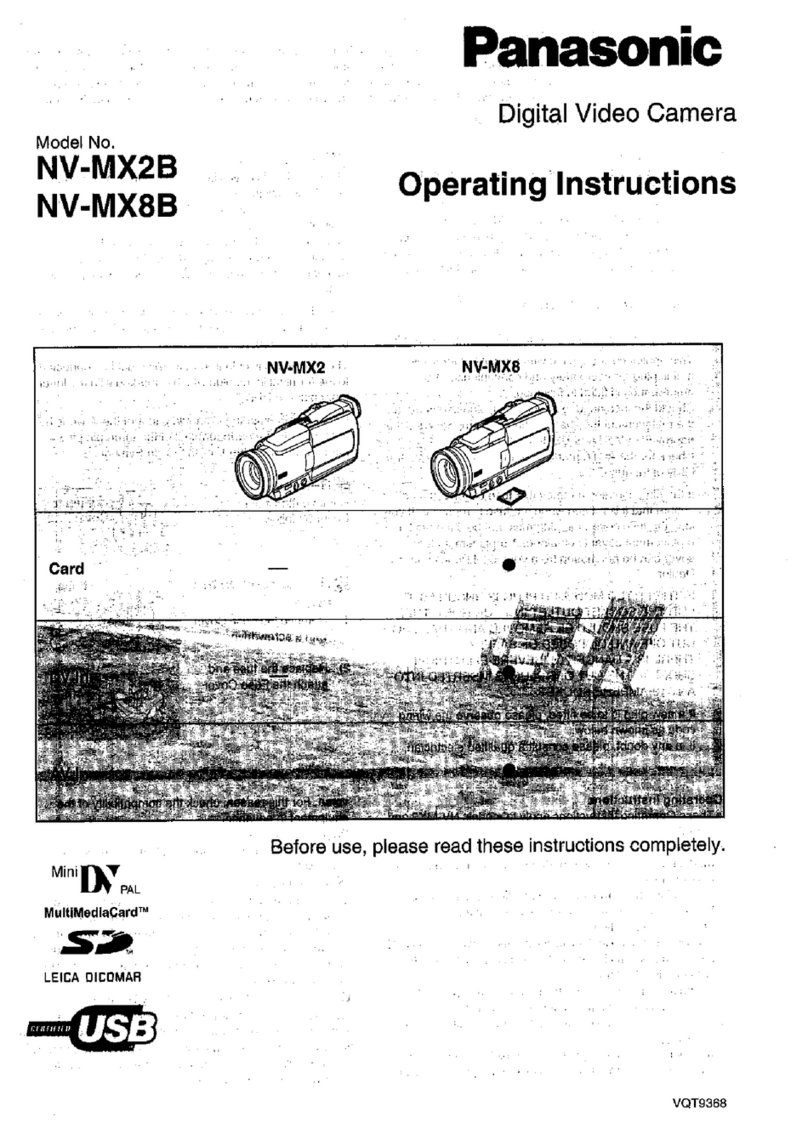
  9. Panasonic NV-DS99EN User manual

Panasonic NV-DS99EN User manual

Other manuals for NV-DS99EN

3

This manual suits for next models

1

Other Panasonic Camcorder manuals

Panasonic VDR-D220EB User manual

Panasonic

Panasonic VDR-D220EB User manual

Panasonic NV-RX10A User manual

Panasonic

Panasonic NV-RX10A User manual

Panasonic NV-RZ1B User manual

Panasonic

Panasonic NV-RZ1B User manual

Panasonic SDR-S50A User manual

Panasonic

Panasonic SDR-S50A User manual

Panasonic PV-GS80 User manual

Panasonic

Panasonic PV-GS80 User manual

Panasonic Palmcorder PV-L50 User manual

Panasonic

Panasonic Palmcorder PV-L50 User manual

Panasonic PV-DV102 User manual

Panasonic

Panasonic PV-DV102 User manual

Panasonic AJ-SPC700 User manual

Panasonic

Panasonic AJ-SPC700 User manual

Panasonic NV-GS150 User manual

Panasonic

Panasonic NV-GS150 User manual

Panasonic AG-AC90EJ User manual

Panasonic

Panasonic AG-AC90EJ User manual

Panasonic PV-GS80 User manual

Panasonic

Panasonic PV-GS80 User manual

Panasonic NVRX11 User manual

Panasonic

Panasonic NVRX11 User manual

Panasonic Palmcorder IQ PV-A306 User manual

Panasonic

Panasonic Palmcorder IQ PV-A306 User manual

Panasonic HDC-SD9D User manual

Panasonic

Panasonic HDC-SD9D User manual

Panasonic Palmcorder PV-L757 User manual

Panasonic

Panasonic Palmcorder PV-L757 User manual

Panasonic HC-V130 Technical specifications

Panasonic

Panasonic HC-V130 Technical specifications

Panasonic HC-V520P User manual

Panasonic

Panasonic HC-V520P User manual

Panasonic NV-GS35EB User manual

Panasonic

Panasonic NV-GS35EB User manual

Panasonic NV-GS50A User manual

Panasonic

Panasonic NV-GS50A User manual

Panasonic AG-196UP User manual

Panasonic

Panasonic AG-196UP User manual

Panasonic SDR-H86 User manual

Panasonic

Panasonic SDR-H86 User manual

Panasonic AG HVX200 - Camcorder User manual

Panasonic

Panasonic AG HVX200 - Camcorder User manual

Panasonic Palmcorder PV-GS85 Instruction Manual

Panasonic

Panasonic Palmcorder PV-GS85 Instruction Manual

Panasonic Palmcorder PV-L781 User manual

Panasonic

Panasonic Palmcorder PV-L781 User manual

Popular Camcorder manuals by other brands

Vivitar DVR 830XHD owner's manual

Vivitar

Vivitar DVR 830XHD owner's manual

Sony HDR-AS10 operating guide

Sony

Sony HDR-AS10 operating guide

Canon FS1 instruction manual

Canon

Canon FS1 instruction manual

Sharp VL-H400S Operation manual

Sharp

Sharp VL-H400S Operation manual

Samsung VP-D6550 Owner's instruction book

Samsung

Samsung VP-D6550 Owner's instruction book

Sony Handycam HDR-FX1E operating instructions

Sony

Sony Handycam HDR-FX1E operating instructions

Sony Handycam HDR-FX1000 Specifications

Sony

Sony Handycam HDR-FX1000 Specifications

Naxa NDC-402 instruction manual

Naxa

Naxa NDC-402 instruction manual

LG L320-BN owner's manual

LG

LG L320-BN owner's manual

Vivitar DVR 865HD user manual

Vivitar

Vivitar DVR 865HD user manual

Toshiba CAMILEO Z100 user guide

Toshiba

Toshiba CAMILEO Z100 user guide

Canon RC 260 instructions

Canon

Canon RC 260 instructions

Sony Handycam DCR-DVD7E operating guide

Sony

Sony Handycam DCR-DVD7E operating guide

Brinno TimeLapse TLC200 user manual

Brinno

Brinno TimeLapse TLC200 user manual

JVC GR-SXM68AC Schematic diagram

JVC

JVC GR-SXM68AC Schematic diagram

MYDLINK DCS-6100LH Quick installation guide

MYDLINK

MYDLINK DCS-6100LH Quick installation guide

Sony video Hi8 Handycam CCD-TR555 operating instructions

Sony

Sony video Hi8 Handycam CCD-TR555 operating instructions

SECURECOM V-5014B installation guide

SECURECOM

SECURECOM V-5014B installation guide

manuals.online logo
manuals.online logoBrands
  • About & Mission
  • Contact us
  • Privacy Policy
  • Terms and Conditions

Copyright 2025 Manuals.Online. All Rights Reserved.

Panasonic
Digital
Video
Camera
Si
sER
Re
NV-DS99EN/ENA
Operating
Instructions
x
(2A
aS
a
DN
Before
use,
please
read
these
instructions
completely.
ke
SEAR»
SREABERA
ERE
-
VQT8151
BHR
ER
SRE
©
ERR
©
SORE
©
RLERRNA
LASER
oS
TERE
AI
MR
ATLL
>
SACRE
BBETTIAE
°
ANCA
MPR
SIPRZERIPY
©
2
(PAROS
ASAE
>
TO
TERE
GE
SERCH
©
©
SUR
ARIE
TAS
CA
MEAT
TAR
EAD
BOT
E+
BER
Ua
PEED
HAG
AEE
©
BREEAM
©
HMA
RMEA
»
RUSS
PRA
SR
ARGRARR
ME
~
FUNC
Sta
ARAN
Ae
at
me
TI
EAD
FARK
+
RUE
RRS
BET
AIMGMARWER
>
SUERTE
PRUE
SR
RGR
SHAS
~
FLA
PSY
appt
Ae
em
Ste
RR
TAY
FAM
AREK
+
RUE
RES
Na
BEE
(RTRSY
©
“iP
LE:
©
RR
.
BRM»
RNC
RHE
ETL
SS
DONO
SRO
+
TRE
UCHR
»
AIGA
EAY
>
seca
Em
th
AT
Ae
ABI
OR
San
SRARAAMARR
>
Hm
:
(00)
-
aga
CRTRIARTMB
CR
LOT
»
MRE
MH
»
ASL
°
THREE
ROM)
»
VERA
RATT
RANET
o
ay
HORNE
L
PFZOREAS
RIE
A
©
pee:
Ait
RANG
..
Seep
RARE
=@ER
.
BaRRERERS
MBBS
A
BE
EHS
Hts
GREE
BASRE
WLP
HARE
...
RASTZERR
.
EARREREAS
RABRE
...
FS
RRBAPS...
NNN
OANA
WHDCOND
wl
HARE
RACH
HR
JAMRE)
FARE
ORR
(BM)
........
EIA
(RRB
TS
EAR
SBME
TIER)
BAB
SORA
RAS
HAT
/
HR)
RRR
A
(BM
THEE)
.......
SMR
A
FS
(A
a
(HOR)
BRIAR
....
FARRER
(ECAR)
ERB
RE
BNR
FARE
(KR
RRL
DAE)
..
a
BH)
.
WEB
occ
SRC
ARKH
BR
....
DUAR
ETB
(I
TF
Lt
RA
—
Hirai
(BALE
/
ELLER)
RUS
DETR
(RET
OHTA
[AV
ONE
TOUCH
STATION]
84)
.
PFE
oeseesssstisennnnnnnn
1
IRE
THEE
TRE
CER
(MES
E)
SRR
S|
ORR
NER
(PAB)
|
SEU
AS
te
RRO
mR
RZ
(RalBR)
RA
1H
ER
AGAR
PGi
(ASF
AE)
PR
RIA
(BUR)
.....
BRAS
RIK
SFHSREKE
SEpaHre..
ME
UIMEAARE
MEARE...
beth
J
EAR
AEH
(
BEEBE)
a
ssnmnnenntmnnnneniee
Sl
BA
EER
eos
“ENT
BROW
(FOB)
“BNE
SH
tA
PIR
SR
(F
RP)
ee
DANS
MEIKE...
SFHSMHR...
ORs
SRaKE
E2B0WR
RIM
TDREBA
DEE...
CATE
AE
TE
HY
a
(
CRE)
ropa
CARR
LARS
(BSA)
..
BUTE
S-VHS
(BR
VHS)
SRC
(FEB)
oe
Bic
RC
ASR
AB
CE
FA
(
SEY)
BARS
HF
AES
HEM...
GRRE
RIT
ED
NECA
BAR
FA
S)FT
EDN
RE
(Autoprint)
....
RY
Sh
BE
AHN
A
..
SRRERR
RBDBE........
eruiitdtel
93
BERTIER
LASS
ee
93
SRHLERE
BRCAAMIES
MERE...
ERURRAR
BBR
oc
TD
ce
Ll):
BAAR
OS
AE
..
mR
RAMEE
BF
BRB
aig
Ml
aivctwitiniiiced
HERBIE
cs
HUE...
ENGLISH
information
for
Your
Safety
Movie
Camera
®The
rating
plate
is
on
the
underside
of
the
Movie
Camera
S
AC
Adaptor
©The
rating
plate
is
on
the
underside
of
the
AC
Adaptor.
*As
this
equipment
gets
hot
during
use,
operate
it
in
a
well-ventilated
place;
do
not
install
this
equipment
in
a
confined
space
such
as
a
eeuocaed
or
similar
unit.
@
Carefully
read
the
Operating
Instructions
and
use
the
Movie
Camera
correctly.
Injury
or
material
damage
resulting
from
any
kind
of
use
that
is
not
in
accordance
with
the
operating
procedures
explained
in
these
Operating
Instructions
are
the
sole
responsibility
of
the
user.
Try
out
the
Movie
Camera.
Be
sure
to
try
out
the
Movie
Camera
before
recording
your
first
important
event
and
check
that
it
records
properly
and
functions
correctly.
The
manufacturer
is
not
liable
for
loss
of
recorded
contents.
The
manufacturer
shall
in
no
event
be
liable
for
the
loss
of
recordings
due
to
malfunction
or
defect
of
this
Movie
Camera,
its
accessories
or
cassettes.
Carefully
observe
copyright
laws.
Recording
of
pre-recorded
tapes
or
discs
or
other
published
or
broadcast
material
for
purposes
other
than
your
own
private
use
may
infringe
copyright
laws.
Even
for
the
purpose
of
private
use,
recording
of
certain
material
may
be
restricted.
Pages
for
reference
Pages
for
reference
are
indicated
with
an
arrow,
for
example:
(>
00)
@
WARNING
®To
reduce
the
risk
of
fire
or
shock
hazard
and
annoying
interference,
use
only
the
recommended
accessories
and
do
not
expose
this
equipment
to
rain
or
moisture.
Do
not
remove
the
cover
(or
back);
there
are
no
user
serviceable
parts
inside.
Refer
servicing
to
qualified
service
personnel.
Contents
st)
Celcom
al
-reelaeitare]
Standard
Accessories
Controls
and
Components
The
3
Types
of
Power
Supplies
@
Supplying
Power
from
an
AC
Mains
Socke'
@
Supplying
Power
from
the
Cigarette
Lighter
Socket
in
a
Car..
‘i
@
Supplying
Power
with
‘the
Battery
@
Quick
Charge...
e
Inserting
the
Cassette
.
®
LP
Mode
.
Using
the
Finder
..
Using
the
LCD
Monitor.
Handling
the
Lens
Cap
Adjusting
the
Grip
Belt
.
Attaching
the
Shoulder
Strap
his
ietbaaisscialoncccctonc
dies
17
Basic
Operations
PROGONGING
3
i0cciesciscnencsecaasenConsossvasabasesetascsceucdsesincdkendidelsleaveuis
18
Checking
If
the
Picture
Is
Recorded
(Recording
Check)
..............
Recording
Backlit
Scenes
{Backlight
Compensation)
........ccc:ccesssessessesssssrsesneseeneennees
19
Recording
Yourself
eer
with
the
LCD
Monitor
Facing
Forward)
Enlarging
Your
Subject
c
or
r
Widening
|
the
|
Recording
Angle
(Zooming
In/Out)
Enlarging
Your
Subjects
Even More
(Digital
ZOOMING)
...........sscecsescsesssessssessecssesenecaserssseesvensee
22
Using
the
Movie
Camera
as
a
Digital
Still
Camera
(Photoshot)
@
Progressive
Photoshot
Recording
in
the
Cinema
Mode
(Cinema
Mode)
Recording
with
Minimised
Camera
Shake
(Optical
Image
Stabilizer)...
sseesesessseesseesssessseesseeese
27
Viewing
the
Just
Recorded
Scenes
on
the
Movie
Camera
(Playback)
.....
™
Adjusting
the
Sound
Volume
.
Searching
for
a
Scene
That
You
Want
to
Play
Back
Playing
Back
in
Slow
Motion
{Slow
Motion
Playback)
.......ccccscssssesscceessseesscsssseseesseneeneces
30
Playing
Back
Stil!
Pictures
and
Advancing
Them
One
by
One
(Still
Playback/Still
Advance
Playback)
....
Playing
Back
on
a
TV
(With
the
Output
Terminal
Box
[AV
ONE
TOUCH
STATION]
Attached)
After
Use
20
ENGLISH
Advanced
Operations
Notes,
Others
mm
fiewing
Recorded
Scenes
During
Recording
Pause
(Camera
Search)...
%
on
visvoncibeanaay
OF
searching
for
the
End
of
the
Recorded
Parton
a
a
Cassette
(Blank
Search)
..
searching
for
the
Beginning
of
Recorded
Scenes
Marked
with
Index
Signal
(Index
Search)
........eescscccsssssoes
36
‘ading
In/Out
lecording
in
Special
Situations
(Programme
AE).
lecording
with
Special
Effects
(Digital
Effects)
..
@
Strobe
Multi-Picture
Mode
@
Manual
Multi-Picture
Mode
.
Picture-in-Picture
Mod
@
Wipe
Mode
...............
49
@
Mix
Mode
..
‘
-
50
fecording
with
Natural
Colours
(White
Balance)
51
djusting
the
White
Balance
Manually
ocusing
on
the
Subject
Manually
(Manual
Focus)
djusting
the
Shutter
Speed
Manually
..
djusting
the
Iris
(F
Number)
Manually...
laying
Back
with
Special
Effects
(Playback
Digital
Effects)
.....
@
Strobe
Multi-Picture
Mode
@
Manual
Multi-Picture
Mode
@
Index
Multi-Picture
Mode
.
@
Multi-Picture
Search
.....
™@
Wipe
Function
and
Mix
Function
nlarging
the
Playback
Picture
(Playback
Zoom)
....
a
eerote
dding
New
Sound
on
‘a
‘Recorded
Cassette
|
(Audio
Dubbing)
..
emote
Controller
...
@
Inserting
the
Button-type
Battery
@
Using
the
Remote
Controller
......
opying
onto
an
S-VHS
(or
VHS)
Cassette
(Dubbing)...
sing
with
Digital
Video
Equipment
(Recording)
.
opying
with
the
Help
of
an
Editing
Controller
.
sing
the
Movie
Camera
with
a
Video
Printer
..
sing
the
Automatic
Printing
Function
(Autoprint)
sing
the
Movie
Camera
with
a
Computer
Using
the
Menu
Screen
Menu
Functions
Setting
the
Date
and
Time
.........
Adjusting
the
LCD
Monitor/Finder
.
88
Cautions
for
US@
........seecssseesseone
89
Mf
Notes
about
the
AC
Adaptor
@
Condensation
™@
Video
Head
Clogging
and
Remedy
.
@
Optimum
Use
of
the
Battery
™@
When
the
Charge
Lamps
on
the
AC
Adaptor
Flash
as
Warning
........0........
@
Precautions
for
Storage
..
@
Other
Useful
Information
@
Repeat
Playback
........
Glossary
®
Digital
Video
System
@
Focus...
ea
@
White
Balance
‘Adjustment
@
Colour
Temperature
.......
™@
Progressive
Photoshot
Function
@
Time
Code
.
™@
Memory
Stop
Function
Indications
on
the
LCD
Monitor/in
the
Findel
Before
Requesting
Service
(Problems
&
Solutions)
Optional
Accessories
Specifications
.........
REM
=
sd
ge
on
«
SOARES
(>
10,
11,
87)
CSR
MH
»
WEIS
»
ELAR
A
aR (>
10)
ESC
OR
RABIES
A
©
SETEMAR
(>
10,
11)
ESOT
BER
REGGE
(A)
PRS
ATR
[B]
PBDEs
53
BITE
ZN
Wabi
(>
11)
CMR
MEE
»
SEER
AAA
SCE
ith
(-»
66,
70)
=
LH
Oo
FE
[AV
ONE
TOUCH
STATION]
(-#
32,
33,
72)
fA
AV
TERE»
MARRIES
»
BART
AB
TL
°
.
AV
MR
(>
32,
72,
74,
75)
S-Video
M4
(->
32,
72,
74,
75,
76,
77)
-
FARES
(>
17)
.
RB
ERAS
SOBRE
LOMHES
BBR
Re
.
HE
DV
BRIER
(>
14)
.
RE
FCS
RSA
RATER
»
BADE
RRR
(>
92)
ENGLISH
Standard
Accessories
1.
AC
Adaptor
(->
10, 11,
87)
To
supply
power
to
the
Movie
Camera.
To
charge
the
Battery.
DC
Input
Lead
(
10)
To
connect
the
AC
Adaptor
to
the
Movie
Camera.
AC
Mains
Lead
(-
10,
11)
To
connect
the
AC
Adaptor
to
an
AC
mains
socket.
[A]
Hong
Kong
Special
Administrative
Region
of
China
[B]
Area
others
Hong
Kong
Special
Administrative
Region
of
China
.
Battery
Pack
(+>
11)
To
supply
the
Movie
Camera
with
power.
.
Remote
Controlter
and
Button-Type
Battery
(7
66,
70)
Output
Terminal
Box
[AV
ONE
TOUCH
STATION]
(->
32,
33,
72)
Equipped
with
AV
Sockets,
Edit
Socket,
Digital
Still
Picture
Terminal,
and
Headphones
Socket.
.
AV
Cable
(->
32, 72,
74,
75)
S-Video
Cable
(->
32,
72,
74, 75, 76,
77)
7.
Shoulder
Strap
(->
17)
8.
Soft
Bag
When
not
using
the
Movie
Camera
or
carrying
it
in
the
hand,
store
it
in
this
bag.
.
Mini
DV
Cassette
(>
14)
.
Cleaning
Tissue
To
clean
the
Lens
and
the
LCD
Monitor.
.
Digital
Video
Head
Cleaner
(-
92)
@—
SEARCH
+
FADE
WB
BLC
i
ll
a
Re
4
>
2M
Biae
[MULTI]
(~
45,
46,
57, 58,
59)
MP
MG
[P-IN-P}
(+
48)
>
RR
[—
SEARCH]
(-»
34)
{BLP
/
RASA
A
[44]
(-»
28,
29)
GARNERED
A
[TS]
(>
19)
)
SEMIS
(SEARCH
+](+
34)
‘REE
/
PRE RBA
[PP
](->
29)
>
k(t
[FADE](-»
39)
‘$1b
GE
[mm]
(->
28)
>
AS
2
[W.B]
(>
51,
52)
i
(1)
(>
31)
)
4m
[BLC](-
19)
HUE
AE
[>]
(-»
28)
9
EME
(+
16)
)
MR
thisFLHSH
[BATT.
EJECT
PUSH]
(>
11)
)
NE83
(>
28)
)
RMT
ELAR
(>
16)
HR
RARER
AAR
ERR ERM
ee
EA
USC
RABLARRA
°
SAT
>
WBDSR
aR
the
Pree
TA
RE
)
ERMA
B37
ad
[PUSH
OPEN]
(>
16)
“p
FF
Ppp
je
EE
a
ENGLISH
Controls
and
Components
©
Muiti-Picture
Button
[MULTI]
(->
45, 46, 57, 58,
59)
Picture-in-Picture
Button
[P-IN-P]
(->
48)
[2]
Reverse
Search
Button
[—
SEARCH]
(>
34)
Rewind/Review
Button
[4]
(-»
28,
29)
Recording
Check
Button
[[G)]
(+
19)
@
Forward
Search
Button
[SEARCH
+]
(-»
34)
Fast
Forward/Cue
Button
[>>]
(>
29)
@
Fade
Button
[FADE]
(+
39)
Stop
Button
[ml]
(-»
28)
©
White
Balance
Button
[W.B]
(>
51,
52)
Pause
Button
[Il]
(->
31)
@
Backlight
Button
[BLC}
(+
19)
Play
Button
[>]
(-»
28)
@
Eyepiece
Corrector
Lever
(->
16)
©
Battery
Eject
Button
(BATT.
EJECT
PUSH]
(>
11)
©
Speaker
(-»
28)
@
LCD
Monitor
(-
16)
Due
to
limitations
in
LCD
production
technology,
there
may
be
some
tiny
bright
or
dark
spots
on
the
LCD
Monitor
screen.
However,
this
is
not
a
malfunction
and
does
not
affect
the
recorded
picture.
®
LCD
Monitor
Open
Button
[PUSH
OPEN]
(-»
16)
©
Abie
BART
AR
I
PRB
BA
AD
BEE
[AUTO]
(
38h)
BS
+
BUS
eRe
®
Ste
[PUSH]
(>
28,
29,
31,
53,
54,
55,
61,
80,
86,
88)
@
#2888
(MENU)
(-
80)
®
Bshiz
[FOCUS]
(+
53)
©
WAAR
BEAR
[AUTO/MNL]
(>
18,
40,
51,
52, 53, 54,
55)
O
an
@®
5H
(+
95)
©
AS
Tamms
(+
99)
@
BAR
(Am
>
hee)
@
BiH
RMF
(1.LINK){§)]
ATIBA
/
WO
WRATH
©
“TLINK
”
245
BR
BRRAE
IEEE
1
394-1995
w2
miei
Ay
2
Be
o
“BO
WOSCH
“LLINK
”
SARE
EL
AT
ARRAN
TERE
©
@
sei8
(-
18)
@
ew
(>
71)
@
SRA
WT]
(>
21, 22,
52)
€D
#ANRA
[PHOTO
SHOT]
(->
23,
24)
®
nm
@
FARA
A
/
EP
/
SE
[POWER]
(~»
16,
18,
28, 33,
80)
@
ss
/
ibe
(>
18)
@
ARGS
(>
17)
@
B35
M38e
Mic]
FRIUEOME
BR
oe
BLY
SRE
AS
>
RHEE
»
HS
RE
FAAS
°
)
@
Rese
(>
14)
@
RH
17)
ENGLISH
@®
Auto
Mode
Lamp
This
lamp
lights
when
you
set
the
Mode
Selector
Switch
to
[AUTO].
@®
Mult!-Function
[PUSH]
Dial
(>
28, 29, 31, 53, 54, 55,
61,
80,
86,
88)
®
Menu
Button
[MENU]
(->
80)
@
Focus
Button
[FOCUS]
(-
53)
@O
Mode
Selector
Switch
[AUTO/MNL]
(+
18,
40, 51, 52,
53,
54,
55)
@
Lens
@®
Lens
Hood
(-»
95)
@
White
Balance
Sensor
(-»
99)
@
Microphone
(built-in,
stereo)
@
DV
Terminal
(i.LINK)
[i]
To
input/output
digital
signals.
“i.LINK”
is
the
name
of
the
connector
in
accordance
with
the
International
Standard
IEEE1394-1995.
“B’
is
the
logo
marked
on
products
conforming
with
the
“i.LINK”
specifications.
@
Recording
Lamp
(-
18)
@®
Remote
Contro!
Sensor
(+
71)
@
Zoom
Lever
[W/T]
(>
21,
22,
52)
®
Photoshot
Button
[PHOTO
SHOT]
(>
23,
24)
@
Eyecup
@
Selector
Switch
for
Camera
Mode/Power
Oft/
VCR
Mode
[POWER]
(+
16,
18,
28, 33,
80)
@®
Recording
Start/Stop
Button
(+
18)
@®
Shoulder
Strap
Holders
(>
17)
@
Microphone
Socket
[MIC]
To
connect
an
external
microphone
or
audio
equipment.
(Connecting
to
this
socket
deactivates
the
built-in
microphone.)
@
Cassette
Compartment
Window
(-»
14)
@
Grip
Belt
(+
17)
D
Leewaras
(-+
14)
D
WERE
(+
16)
ENGLISH
@®
Upper
Cassette
Compartment
Cover
(-
14)
@)
Finder
(+
16)
HA
RRMER
MIRE
EBFERRRM
LAR
e
A
HEAD
OSERSSR
ARR
©
FATT
+
TEEIEARRE
»
LAN
REST
BOWES
-
D
MSs
(>
11,
33)
D
SRR
ABBE
[OPEN/EJECT](-9
14,
33)
D
TRAP
SERE
(-»
14)
D
SRF
(+
32,
33,
72)
D
SMR
METL,
PORE
RAY
i
ee
Zz
=
FH
IP
bo
D
aaa
(>
14)
D
SARE
(-»
17,
33,
52)
D
Ria
Due
to
limitations
in
LCD
production
technology,
there
may
be
some
tiny
bright
or
dark
spots
on
the
Finder
screen.
However,
this
is
not
a
malfunction
and
does
not
affect
the
recorded
picture.
©
Battery
Holder
(-»
11,
33)
@®
Cassette
Eject
Lever
[OPEN/EJECT]
(-
14,
33)
@
Lower
Cassette
Compartment
Cover
(-»
14)
©
Multi
Terminal
(-
32, 33,
72)
®
Tripod
Receptacle
To
mount
the
Movie
Camera
on
an
optional
tripod.
@
Cassette
Holder
(-»
14)
@
Lens
Cap
(+
17,
33,
52)
@
Lens
Cap
Holder
=i
w
AEE
1
ROM
FH
RESTS
REN
RHR
O
A
MET
RR
(PRBS
Hm
HR
RIGA
EM
o
DREARY
EF
SRR
-
ROLEMMPR
ATS
+
dS
RE
AE
AR
A
a
RB
es
APBURNS
UE
RRCRATAD
BE
HIRE
—
BRAD
HE
ERG
A
MAREN
Fe
—
IE
RTO
ERE
©
WICHE
MAREE
RRM
-
WE
MR
A
—
te
EEE
@
FESS
TRE
URC
MAR
BT
+
ANSARI
Lb
89(POWER]
(BR)
PARER
ERE
(OFF)
»
AMER
AC
MENT
ARMS
CRM
-
TT
MIESRR
-
BAAR
RAS
RFR
SS
SCALES
—
BG
AN
ASS
SEAR
BB
SEAR
(VW-KATE
+
8
&)
>
ALE
ACR
RS»
LOR
TIARY
>
tay
PRERR
RN
BITS
OALZE
»
AREA
SHETL
Litt
5
BEM
-
ERE
A
BBE
RMR
ZA
AS
BRS
>
AAS
FT
BE
eB
©
oe
ATR
NSA
TARR
°
*SNERESARERERTBERS
ARE
TRE
BE.
©
HOE
BERS
Ba
aR
MLR
AT
NYE
RABE
>
af
&
a
3B
“an
The
3
Types
of
Power
Supplies
@
Supplying
Power
from
an
AC
Mains
Socket
Hook
your
finger
on
the
protruding
edge
Oot
the
Finder,
slide
the
Finder
backward
to
Its
fully
extended
position
and
then
tilt
It
upward.
Do
not
pull
on
the
Eyecup
to
extend
the
Finder.
Insert
the
battery-shaped
connector
of
the
DC
Input
Lead
as
shown
above
into
the
Battery
Holder
on
the
Movie
Camera
and
slide
it
downward
until
it
locks
with
a
click.
Connect
the
other
end
of
the
DC
Input
Lead
to
the
AC
Adaptor.
Connect
the
AC
Malns
Lead
to
the
AC
Adaptor.
Connect
the
other
end
of
the
AC
Mains
Lead
to
an
AC
mains
socket.
®
Hong
Kong
Special
Administrative
Region
of
China
©Before
disconnecting
the
AC
Mains
Lead,
set
the
[POWER]
Switch
on
the
Movie
Camera
to
[OFF].
elf
you
use
the
Movie
Camera
for
a
long
time,
it
becomes
warm.
However,
this
is
normal.
@
Supplying
Power
from
the
Cigarette
Lighter
Socket
in
a
Car
The
use
of
the
Car
Adaptor
Cord
(VW-KA7E;
optional)
together
with
the
AC
Adaptor
makes
it
possible
to
supply
power
to
the
Movie
Camera
in
a
car
for
recording
and
playback.
It
also
allows
charging
the
Movie
Camera's
Battery.
After
use,
be
sure
to
disconnect
the
Car
Adaptor
Cord
from
the
Cigarette
Lighter
Socket.
©Be
sure
to
start
the
car
engine
before
you
connect
the
Car
Adaptor
Cord,
otherwise
the
fuse
may
blow.
Use
the
DC
Input
Lead
supplied
with
the
AC
Adaptor.
®Quick-charging
is
not
possible
when
the
Car
Adaptor
Cord
is.
connected
to
the
AC
Adaptor.
Also
read
the
operating
instructions
of
the
Car
Adaptor
Cord.