manuals.online logo
Brands
  1. Home
  2. •
  3. Brands
  4. •
  5. Panasonic
  6. •
  7. Camcorder
  8. •
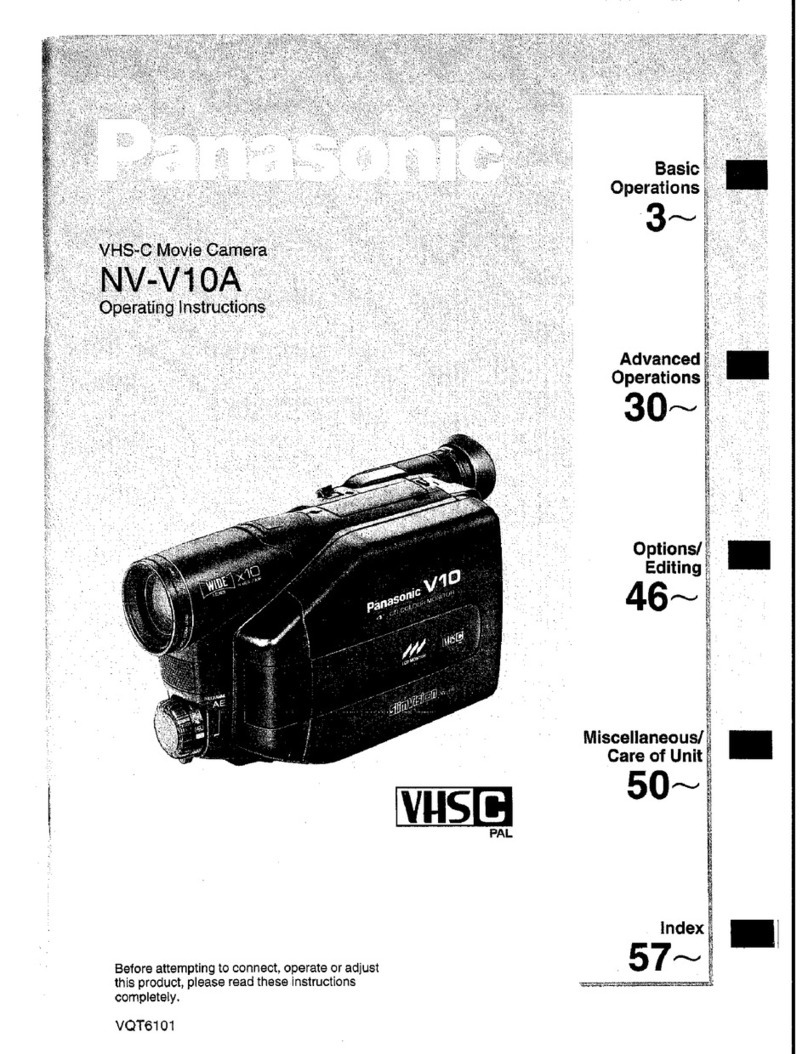
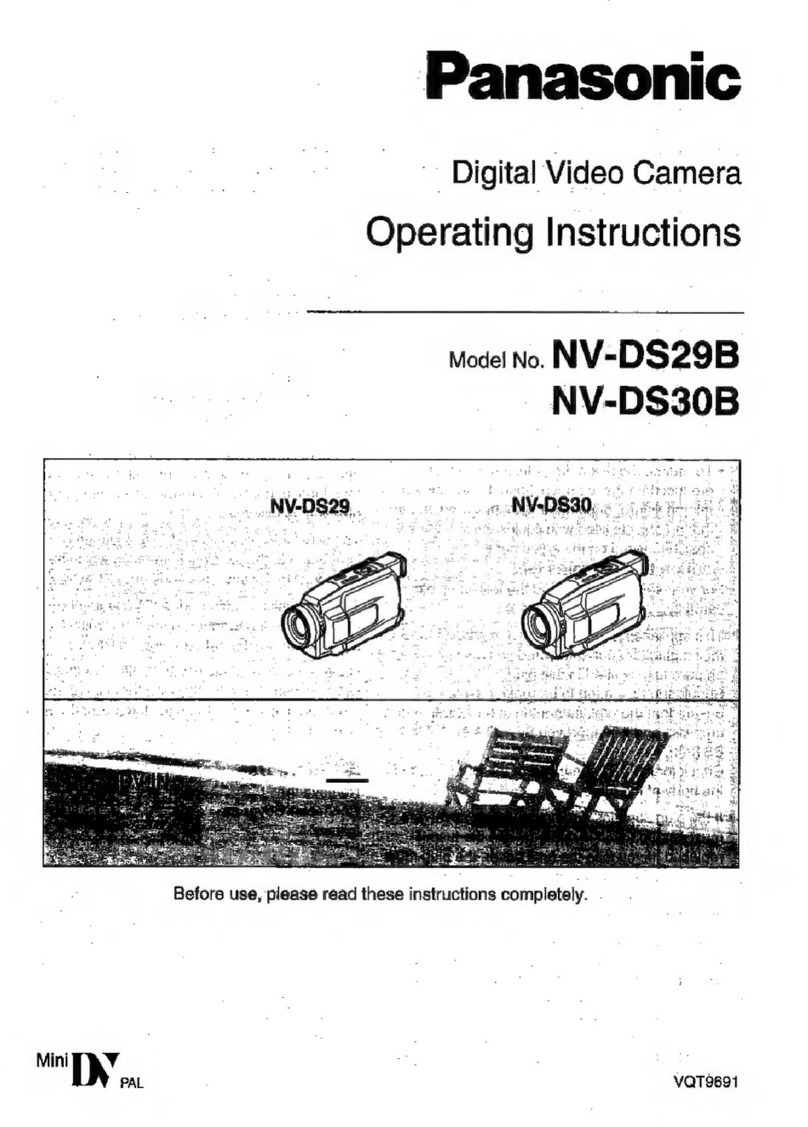
  9. Panasonic Digital Palmcoder PalmSight PV-DV100 User manual

Panasonic Digital Palmcoder PalmSight PV-DV100 User manual

Digital
Palmcorder”
za
A
PalmSight”
Panasonic
Digital
Video
Camcorder
Operating
Instructions
model
No.
PV-DV100
Before
attempting
to
connect,
operate
or
adjust
this
product,
please
read
these
instructions
thoroughly.
Spanish
Quick
Use
Guide
is
included.
Leo
Things
You
Should
Know
Thank
you
for
choosing
Panasonic!
You
have
purchased
one
of
the
most
sophisticated
and
reliable
products
on
the
market
today.
Used
properly,
we're
sure
it
will
bring
you
and
your
family
years
of
enjoyment.
Please
take time
to
fill
in
the
information
below.
The
serial
number
is
on
the
tag
located
on
the
underside
of
your
Palmcorder.
Be
sure
to
retain
this
manual
as
your
convenient
Palmcorder
information
source.
Date
of
Purchase
Dealer
Purchased
From
Dealer
Address
Dealer
Phone
No.
Model
No.
Serial
No.
Unpack
your
Camcorder
1
pc.
AC
Adaptor
1
pc.
Battery
Pack
1
pc.
A/V
Cable
(PV-DAC10)
(PV-DBP8
or
PV-
(LSJA0280)
with
AC
Cable
and
DC
DBP8A)
Cable
1
pc.
Lens
Cap
1
pc.
PC
Connection
1
pc.
PHOTOVU
LINK
1
pc.
Shoulder
(LSYF0395)
Cable
tor
Windows
DRIVER
(LSFTO195)
Strap
(LSFCO013)
(LSJA0276)
ÁS
Microsoft
and
Windows
are
registered
trademarks
of
Microsoft
in
the
United States
and
other
countries.
2
For
assistance,
call
1-800-211-PANA(7262)
Things
You
Should
Know
Safety
Precautions
WARNING:
TO
PREVENT
FIRE
OR
SHOCK
HAZARD,
DO
NOT
EXPOSE
THIS
EQUIPMENT
TO
RAIN
OR
MOISTURE.
Your
“if,”
Palmcorder
is
designed
to
record
and
play
back
in
Standard
Play
(SP)
mode
and
Long
(LP)
mode.
It
is
recommended
that
only
cassette
tapes
that
have
been
tested
and
inspected
for
use
in
VCR
machines
with
the
"iy"
mark
be
used.
G)
(D
=
=>
Ce)
0
=>
w
ium.
1
et
(D
Q
This
symbol
warns
the
user
that
uninsulated
IN,
EA
CAUTION
voltage
within
the
unit
may
have
sufficient
RISK
OF
ELECTRIC
SHOCK
magnitude
to
cause
electric
shock.
fea
eee
NOT
OPEN
Therefore,
it
is
dangerous
to
make
any
kind
of
contact
with
any
inside
part
of
this
unit.
CAUTION:
TO
REDUCE
THE
RISK
OF
ELECTRIC
SHOCK,
This
symbol
alerts
the
user
that
important
DO
NOT
REMOVE
COVER
(OR
BACK)
literature
conceming
the
operation
and
NO
USER-SERVICEABLE
PARTS
INSIDE
maintenance
of
this
unit
has
been
included,
REFER
SERVICING
TO
QUALIFIEO
SERVICE
PERSONNEL
Therefore,
it
should
be
read
carefully
in
orde
to
avoid
any
problems.
The
above
markings
are
located
on
the
appliance
bottom
cover.
This
device
complies
with
Part
15
of
the
FCC
Rules.
Operation
is
subject
to
the
following
two
conditions:
(1)
This
device
may
not
cause
harmful
interference,
and
(2)
this
device
must
accept
any
interference
received,
including
interference
that
may
cause
undesired
operation.
Note:
This
equipment
has
been
tested
and
found
to
comply
with
Part
15
of
the
FCC
Rules.
These
limits
are
designed
to
provide
reasonable
protection
against
harmful
interference
when
operated
in
a
residential
environment.
If
this
equipment
does
cause
interference
to
radio
or
television
reception,
which
can
be
determined
by
turning
the
equipment
off
and
on,
use
the
equipment
in
another
location
and/or
utilize
an
electrical
outlet
different
from
that
used
by
the
receiver.
If
necessary,
consult
the
dealer
or
an
experienced
radio/TV
technician
for
help.
You
may
find
the
booklet,
‘Something
About
Interference’
available
from
FCC
local
regional
offices
helpful.
FCC
Warning:
To
assure
continued
FCC
compliance,
use
only
the
provided
shielded
interface
cable
when
connecting
digital
video
camera
to
computer
in
accordance
with
instruction
herein.
Also,
any
unauthorized
changes
or
modifications
to
this
equipment
could
void
the
user’s
authority
to
operate.
Read
Instructions
—
All
the
safety
and
operating
instructions
should
be
read
before
the
unit
is
operated.
Retain
Instructions
—
The
safety
and
operating
instructions
should
be
retained
for
future
reference,
Heed
Wamings
—
All
warnings
on
the
unit
and
in
the
operating
instructions
should
be
adhered
to,
Follow
Instructions
—
All
operating
and
maintenance
instructions
should
be
followed.
Cleaning
—
Unplug
this
video
unit
from
the
wall
outlet
before
cleaning.
Do
not
use
liquid
or
aerosol
cleaners.
Use
a
dry
cloth
for
cleaning.
Attachments
—
Do
not
use
attachments
not
recommended
by
the
video
product
manufacturer
as
they
may
be
hazardous.
Water
and
Moisture
—-
Do
not
use
this
video
unit
near
water
—
for
example
near
a
bath
tub,
wash
bowl,
kitchen
sink,
or
laundry
tub,
in
a
wet
basement,
or
near
a
swimming
pool,
and
the
like.
Accessories
—
Do
not
place
this
video
unit
on an
unstable
cart,
stand,
tripod,
bracket,
or
table.
The
video
unit
may
fall,
causing
serious
injury
to
a
child
or
adult,
and
serious
damage
to
the
unit.
Use
only
with
a
cart,
stand,
tripod,
bracket,
or
table
recommended
by
the
manufacturer,
or
sold
with
the
video
unit.
Any
mounting
of
the
unit
should
follow
the
manufacturer's
instructions
and
should
use
a
mounting
accessory
recommended
by
the
manufacturer.
An
appliance
and
cart
combination
should
be
moved
with
care.
Quick
stops,
excessive
force,
and
uneven
surfaces
may
cause
the
appliance
and
cart
combination
to
overturn.
Ventilation
—
Slots
and
openings
in
the
cabinet
are
provided
for
ventilation
and
to
ensure
reliable
operation
of
the
video
unit
and
to
protect
it
from
overheating.
These
openings
must
not
be
blocked
or
covered.
Never
place
the
video
unit
on
a
bed,
sofa,
rug,
or
other
similar
surface,
or
near
or
over
a
radiator
or
heat
register.
This
video
unit
should
not
be
placed
in
a
built-in
installation
such
as
a
bookcase
or
rack
unless
proper
ventilation
is
provided
or
the
manufacturer's
instructions
have
been
adhered
to.
.
Power
Sources
—
This
video
unit
should
be
operated
only
from
the
type
of
power
source
indicated
on
the
marking
label.
If
you
are
not
sure
of
the
type
of
power
supply
to
your
home,
consult
your
appliance
dealer
or
local
power
company.
For
video
units
intended
to
be
operated
from
battery
power,
or
other
sources,
refer
to
the
operating
instructions.
14.
Important
Safeguards
11.
Grounding
or
Polarization
—
This
video
unit
may
be
equipped
with
either
a
polarized
2-wire
AC
(Altemating
Current)
line
plug
(a
plug
having
one
blade wider
than
the
other)
os
3-wire
grounding
type
plug,
a
plug
having
a
third
(grounding)
pin.
The
2-wire
polarized
plug
will
fit
into
the
power
outlet
only
one
way.
This
is
a
safety
feature.
If
you
are
unable
to
insert
the
plug
fully
into
the
outlet,
try
reversing
the
plug.
If
the
plug
still
fails
to
fit,
contact
your
electrician
to
replace
your
obsolete
outlet.
Do
not
defeat
the
safety
purpose
of
the
polarized
plug.
The
3-wire
grounding
type
plug
will
fit
into
a
grounding
type
power
outlet.
This
is
a
safety
feature.
If
you
are
unable
to
insert
the
plug
into
the
outlet,
contact
your
electrician
to
replace
your
obsolete
outlet.
Do
not
defeat
the
safety
purpose
of
the
grounding
type
plug.
.
Power-Cord
Protection
—
Power-supply
cords
should
be
routed
so
that
they
are
not
likely
to
be
walked
on
or
pinched
by
items
placed
upon
or
against
them,
paying
particular
attention
to
cords
of
plugs,
convenience
receptacles,
and
the
point
where
they
exit
from
the
unit.
.
Outdoor
Antenna
Grounding
—
If
an
outside
antenna
or
cable
system
ts
connected
to
the
video
unit,
be
sure
the
antenna
or
cable
system
is
grounded
so
as
to
provide
some
protection
against
voltage
surges
and
built-up
static
charges.
Part
1
of
the
Canadian
Electrical
Coda,
in
USA
Section
810
of
the
National
Etectrical
Code,
provides
information
with
respect
to
proper
grounding
of
the
mast
and
Supporting
structure,
grounding
of
the
lead-in
wire
to
an
antenna
discharge
unit,
size
of
grounding
conductors,
location
of
antenna
discharge
unit,
connection
to
grounding
electrodes,
and
requirements
for
the
grounding
electrode.
POWER
SE
E
GROUNDING
ELECTRODE
SYSTEM
{NEC
ART
250,
PART
H)
NEC
-
NATIONAL
ELECTRICAL
CODE
Lightning
—
For
added
protection
of
this
video
unit
receiver
during
a
lightning
storm,
or
when
itis
left
`
unattended
and
unused
for
long
periods
of
time,
unplug
it
from
the
wall
outlet
and
disconnect
the
antenna
or
cable
system.
This
will
prevent
damage
to
the
video
unit
due
to
lightning
and
power-line
surges.
e
E
»
ls
"a.
+
CN
or
assistance,
call
1-800-211-PANA(7262)
Important
Safeguards
15.
Power
Lines
—
An
outside
antenna
system
should
b.
If
any
liquid
has
been
spilled
onto,
or
objects
have
not
be
located
in
the
vicinity
of
overhead
power
lines
falten
into
the
video
unit.
or
other
electric
light
or
power
circuits,
or
where
it
can
c.
If
the
video
unit
has
been
exposed
to
rain
or
water.
tall
into
such
power
lines
or
circuits.
When
installing
d.
If
the
video
unit
does
not
operate
normally
by
an
outside
antenna
system,
extreme
care
should
be
taken
to
keep
from
touching
such
power
lines
or
circuits
as
contact
with
them
might
be
fatal.
following
the
operating
instructions,
Adjust
only
those
controls
that
are
covered
by
the
operating
instructions,
as
an
improper
adjustment
of
other
16.
Overtoading
—
Do
not
overload
wall
outlets
and
controls
may
result
in
damage
and
will
often
extension
cords
as
this
can
result
in
a
risk
of
fire
or
require
extensive
work
by
a
qualified
technician
to
electric
shock.
restore
the
video
unit
to
its
normal
operation.
17.
Objects
and
Liquids
—
Never
push
objects
of
any
e.
If
the
video
unit
has
been
dropped
or
the
cabinet
kind
into
this
video
unit
through
openings
as
they
has
been
damaged.
may
touch
dangerous
voitage
points
or
short
out
f.
When
the
video
unit
exhibits
a
distinct
change
in
parts
that
could
result
in
a
fire
or
electric
shock.
perfarmance
—
this
indicates
a
need
for
service
Never
spill
liquid
of
any
kind
onto
the
video
unit.
a
]
iyd
.
20.
Replacement
Parts
—
When
replacement
parts
are
18.
Servicing
—
Do
not
atternpt
to
service
this
video
unit
required,
be
sure
the
service
technician
has
used
yourself
as
opening
or
removing
covers
may
expose
replacement
parts
specified
by
the
manufacturer
or
you
=
dangerous
voltage
or
other
hazards.
Refer
all
have
the
same
characteristics
as
the
original
part.
servicing
to
qualified
service
personnel,
Unauthorized
substitutions
may
result
in
fire,
electric
18.
Damage
Requiring
Service
—
Unplug
this
video
unit
Shock
or
other
hazards.
from
the
wall
outlet
and
refer
servicing
to
quailed
21.
Safety
Check—
Upon
completion
of
any
service
or
service
personnel
under
the
following
conditions:
repairs
to
this
video
unit,
ask
the
service
technician
to
a.
When
the
power-supply
cord
or
plug
is
damaged.
perform
safety
checks
to
determine
that
the
video
unit
is
in
safe
operating
order.
Precautions
USE
&
LOCATION
*
TO
AVOID
SHOCK
HAZARD
...
Your
Camcorder
and
power
supply
should
not
be
exposed
to
rain
or
moisture.
Do
not
connect
the
power
supply
or
operate
your
Camcorder
if
it
gets
wet.
Your
Camcorder
has
been
designed
for
outdoor
use,
however
it
is
not
designed
to
sustain
direct
exposure
to
water,
rain,
sleet,
snow,
sand,
dust,
or
a
direct
splashing
from
a
pool
or
even
a
cup
of
coffee.
This
action
could
permanently
damage
the
internal
parts
of
your
Camcorder.
Do
not
attempt
to
disassemble
this
unit.
There
are
no
user
serviceable
parts
inside.
Unplug
your
Camcorder
from
the
power
supply
betore
cleaning.
*
DO
NOT
AIM
YOUR
CAMCORDER
AT
THE
SUN
OR
OTHER
BRIGHT
OBJECTS
*
DO
NOT
LEAVE
THE
PALMCORDER
WITH
THE
EVF
AIMED
DIRECTLY
AT
THE
SUN
AS
THIS
MAY
CAUSE
DAMAGE
TO
THE
INTERNAL
PARTS
OF
THE
EVF
»
DO
NOT
EXPOSE
YOUR
CAMCORDER
TO
EXTENDED
HIGH
TEMPERATURE
...
Such
as,
in
direct
sunlight,
inside
a
closed
car,
next
to
a
heater,
etc...
This
action
could
permanently
damage
the
internal
parts
of
your
Camcorder.
*
AVOID
SUDDEN
CHANGES
IN
TEMPERATURE
...
If
the
unit
is
suddenly
moved
from
a
cold
place
to
a
warm
place,
moisture
may
form
on
the
tape
and
inside
the
unit.
*
DO
NOT
LEAVE
YOUR
CAMCORDER
OR
THE
POWER
SUPPLY
TURNED
ON
WHEN
NOT
IN
USE.
»
STORAGE
OF
YOUR
CAMCORDER
...
Store
and
handle
your
Camcorder
in
a
manner
that
will
not
subject
it
to
unnecessary
movement
(avoid
shaking
and
striking).
Your
Camcorder
contains
a
sensitive
pick-up
device
which
could
be
damaged
by
improper
handling
or
storage.
CARE
*
TO
CLEAN
YOUR
CAMCORDER
...
Do
not
use
strong
or
abrasive
detergents
when
cleaning
your
Camcorder
body.
*
TO
PROTECT
THE
LENS
...
Do
not
touch
the
surface
of
the
lens
with
your
hand.
Use
a
commercial
camcorder
lens
solution
and
lens
paper
when
cleaning
the
lens.
Improper
cleaning
can
scratch
the
lens
coating.
*
TO
PROTECT
THE
FINISH
OF
YOUR
CAMCORDER
...
Before
handling
your
Camcorder,
make
sure
your
hands
and
face
are
free
from
any
chemical
products,
such
as
suntan
lotion,
as
it
may
damage
the
finish.
5
Q)
©
=
5
©
(p
=
D
um
=
D
Q
Table
of
Contents
|
Getting
Started
Things
You
Sheuld
KNOW
ici
aii
is
di
seine
SA
NSPE
SETE
2
Important
Safeguards
sion
dario
iaa
ld
4
PTCA
ONS:
PM
RD
5
¡ANT
AO
A
A
A
A
A
ie
s
7
TaT
at
Ta
To
PE
aa
iria
9
Cassete
Inlormallori
arar
aii
Dotes
noia
os
12
Color
Enhancement
Light
(Optional)
cromada
ers
14
Attaching
the
Shoulder
Strap
a
15
Setting
the
e
oo
ai
A
17
Using:
the:
Palmeorder
Menú
aa
ii
at
a
18
MENUNOSD
C
—————————————
Á——
19
Electronic
Viewfinder/LCD
Monitor
Indications
....o.ooococnccnoniocnnionnoncnoroncnrr
cnn
conan
roo
nr
rnnaro
nos
24
Basic
Operation
|
Camera
Recording
ara
28
Remote
Control
(Optional)
sc
A
ea
32
Playback
Your
Recordings
Special
Features
Dual
Digital
Electronic
Image
Stabilization
System
(D.E.1.S.)
....oonnconincccnccnncccnaracanarananras
39
A
A
A
RM
DP
ER
40
Digital
POIS
ancora
at
41
o
soucis
on
co
retos
M
Teu
ut
Ert
eess
E
dened
a
anA
URN
SEU
tase
41
White:
BalangB.
ad
id
42
Recording:
Still
PICIUTeS
ie
cies
ue
rire
Epit
ber
rine
iR
de
mci
dica
42
Prodram
AE.
aiii
la
43
Digital
Functions
aida
ta
ico
44
EOS
ies
45
Audio/Video
Fade
In/Out
.................
sese
ne
nnne
nnns
nnns
nennen
nennen
46
A
xot
su
eub
rer
ebd
detis
Rd
Uer
Rig
LAE
isto
edt
de
e
MM
tu
46
High
Speed
SUE
cui
estaa
o
VER
eB dS
En
MERE
E
Le
47
Audio
Dubbing
using
the
External
or
Built-in
Microphone
.......concccccnnccnnncononinnoniconoranoranors
48
Marorv-Stop.
EGG
yu.
is
ii
oi
49
Copying
your
Tapes
to
S-VHS
or
VHS
Cassette
...............
essen
50
Copying
from
Digital
Equipment
(dubbing)
..........ooocoonononnonanonncconnacononaronrnr
nora
nooo
mn
51
PC
Connection
with
DV
Interface
Cable
(IEEE
1394)
......................sseesssseeeeeree
52
PO
Gra
a
AA
A
A
A
E
MIEL
53
Software
Installation
(Windows
95/98)
,.....
«acceso
n
ern
auk
cios
idad
daran
andan
54
PHOTOVU
LINK
eec
iaa
55
Printer
Connection
oid
ca
api
dui
doi
iio
57
For
Your
Information
Palracorder
Accessory
System
iier
redc
e
naci
di
eap
oa
poU
qva
inn
a
nang
dup
ke
Raw
eau
58
Palmcorder
Accessory
Order
Form
....ooooooccccncnnonancnnccnorannnnnrccnrannnnncco
nana
tienne
nena
nete
nnne
59
Notes
O-
OBBrIBllOFlS
suscrita
60
e
cc
uci
ters
Quidni
O
x
GI
a
vta
Ne
rude
vot
Vide
aa
Rr
P
62
Before
Requesting
Service
..oooocooccconociconcoconccooorcnnrrnnooronooronanranonrano
nora
nonnannrnanrrnan
corona
ronennono
63
Request
for
Service
Notice
......oooooooccccccnonccnonccnanocanononanocnnoccnnoroanaronorccnarrocrnnocnnaranrrncananocnnro
65
Index:
of
Controls
ria
pi
iii
rado
66
WITIVI
Gp
ae en
Suae
a
eater
70
Spanish
Quick
Use
Guide/Guía
Para
Uso
Rápido
..................
sess
72
[jl
———Á—Á—————
'————
€
—
—
74
6
For
assistance,
call
1-800-211-PANA(7262)
Insert
the
Battery
Before
you
begin...
*
Charge
the
Battery
(page
9).
C)
D
>
-
Te
o)
=
9
=
nad
D
o.
Protection
Film
*«
Remove
the
Protection
Film
before
use.
2
Insert
the
Battery
and
slide
it
down
until
it
locks
with
a
click.
Insert
Cassette
1
Set
POWER
Switch
to
VCR
or
CAMERA.
Slide
TAPE
EJECT
Switch
to
open
the
3
Cassette
Compartment
Insert
a
cassette
with
its
Cover.
window
side
facing
up.
*
Make
sure
the
record
tab
is
closed
(page
13).
o
.
D
OFF
CAMERA
Protection
Film
T
i
——
OO
SO
0
OCHO
ie
jme
l
«
Remove
the
Protection
Film
before
use.
-
a
a
4
Press
PUSH
TO
CLOSE
mark
to
close
the
Cassette
Compartment
Cover.
Camera
Recording
P
When
the
LCD
monitor
is
fully
open,
the
Adjust
the
Vision
Adjustment
Viewfinder
automatically
turns
OFF.
Control
to
your
eyesight.
Viewfinder
Protection
Film
*
Remove
the
Protection
Film
before
use.
3
Press
LCD-OPEN
Button
to
unlock
4
the
LCD
monitor.
Swing
it
fully
open
ano
AUSE
Button
and
adjust
the
angle.
Press
RECORD/PAUSE
Button
again
to
pause
recording.
To
Watch
Playback
in
the
LCD
(Liquid
Crystal
Display)
When
the
LCD
monitor
is
fully
open,
the
Viewfinder
automaticaily
turns
OFF.
Before
you
begin...
*
Charge
the
Battery
(page
9).
2
Press
LCD-OPEN
Button
to
unlock
the
LCD
monitor.
457
Swing
it
fully
open
and
&
adjust
the
angle.
Set
POWER
Switch
to
VCR.
OFF
CAMERA
3
Press
REW
Button
to
rewind
the
tape.
Press
PLAY
Button
to
5
Press
STOP
Button
start
playback.
to
stop
playback.
8
For
assistance,
call
1-800-211-PANA(7262)
Supplying
Power
Charge
the
Battery
Pack
on
the
AC
Adaptor
1
Connect
and
plug
in
the
Cable
as
T
shown.
*
POWER
Lamp
will
light.
Y
|
2
Attach
the
battery
as
shown
to
charge.
*
Charge
lamps
on
the
AC
Adaptor
will
flash
and
then
turn
solid
red
to
indicate
current
charge
level.
When
all
3
lamps
are
constantly
on,
the
battery
is
fully
charged.
(approx.
1
hour)
Expect
approx.
1
hour
15
minutes
of
operation
when
fully
charged
(EVF
usage).
0)
Qo
=
-
le)
Y)
pun
Q)
=
(D
oa
3
Remove
the
Battery.
CHARGE
Slide
the
Battery
out
and
then
lift
up.
Lamps
*
The
three
Charge
Lamps
"5092",
“80%”
and
“100%”
flash
and
then
remain
lit
one
after
another
to
indicate
how
much
the
Battery
has
been
charged.
When
all
three
lamps
are
lit,
charging
is
finished.
*
The
Charge
Lamps
give
a
good
approximate
indication
of
the
charging
condition
under
normal
ambient
temperature.
However,
when
charging
at
high
or
low
temperature,
the
charge
lamps
may
differ
considerably
from
the
actual
charging
condition.
Battery
Charging
Confirmation
Marker
Battery
Charging
Confirmation
Marker
Use
this
marker
as
a
reminder
to
yourself
when
the
battery
is
fully
charged
or
in
need
of
a
charge.
This
marker
performs
no
function
and
is
for
your
reference
only.
e
c^
MN
A
*
The
Battery
is
no
longer
serviceable
if
(PV-DBP8
only)
the
operation
time
is
very
short,
even
after
a
sufficient
charge.
*
PV-DBP8A
has
no
marker.
Supplying
Power
|
Insert/Remove
the
Battery
Pack.
BATTERY
RELEASE
Switch
Battery
Care
Caution:
*
Charge
only
with
specified
charger.
*
The
Battery
can
be
charged
within
a
temperature
range
of
32°
F
(0°
C)
and
104°
F
(40°
C).
*
The
Battery
may
be
warm
after
charging
or
just
after
use.
This
is
normal.
*
Do
not
use
an
insufficiently
charged
or
worn
out
Battery.
*
|n
extreme
cold
surroundings,
Battery
charging
time
will
increase.
Safety
precautions:
*
Do
not
get
the
Battery
near,
or
dispose
of
in
fire.
*
Do
not
directly
connect
{short-circuit}
the
positive
(+)
and
negative
(—)
terminals.
*
Never
attempt
to
disassemble
or
reassemble
the
Battery.
1
Tilt
Viewfinder
upward.
2
Insert
the
Battery
and
slide
it
down
until
it
locks
with
a
click.
To
remove
the
Battery:
Slide
the
Battery
upward
while
sliding
the
BATTERY
RELEASE.
To
avoid
damage
to
the
Battery:
*
Do
not
drop
or
jar
the
Battery.
*
Use
the
Battery
with
specified
models
only.
*
If
the
Battery
is
used
in
extremely
high
temperatures,
a
safety
device
will
automatically
prevent
operation.
To
insure
longer
battery
life:
*
While
not
in
use,
remove
Battery
from
the
Palmcorder
and
AC
Adaptor
and
store
in
a
cool,
dark,
dry
place.
if
you
leave
the
Battery
in
the
Palmcorder
or
on
AC
Adaptor,
the
Battery
will
no
longer
be
rechargeable.
*
Keep
the
Battery
terminais
clean.
10
For
assistance,
call
1-800-211-PANA(7262)
Supplying
Power
AC
Adaptor
1
Slide
the
Battery
upward
while
sliding
the
BATTERY
RELEASE
to
remove
the
Battery
(page
10).
e)
©
zi
5
©
o
+
D
m
Load
D
o.
BATTERY
RELEASE
Switch
2
Insert
the
DC
Cable
into
the
DC
iN
Terminal.
3
Connect
the
other
end
of
the
DC
Cable
to
the
AC
Adaptor
as
shown.
4
Piug
in
the
AC
Adaptor.
*
The
POWER
Lamp
of
the
AC
Adaptor
_
fights
up.
DC
IN
Terminal
DC
IN
Terminal
DC
Cable
(Supplied)
*
When
not
in
use,
unplug
the
AC
Adaptor
o
from
the
AC
outlet.
(AC
Adaptor
consumes
1W
of
electric
power
when
plugged
into
an
AC
outlet
even
when
not
in
use.)
11
Cassette
Information
Cassette
Insertion
TAPE
Cassette
Compartment
Cover
Cassette
Ejection
*
|f
the
Palmcorder
is
connected
to
a
power
source,
the
cassette
can
be
inserted
and
ejected
without
turning
the
Palmcorder
on.
1
Slide
TAPE
EJECT
to
open
the
Cassette
Compartment
Cover.
2
Puil
the
cassette
tape
straight
out.
Note:
Before
you
begin...
*
Connect
the
Palmcorder
to
a
power
source
(pages
10,
11).
1
Slide
TAPE
EJECT
to
open
the
Cassette
Compartment
Cover.
2
Insert
a
cassette
with
its
window
side
facing
up.
3
Press
PUSH
TO
CLOSE
mark
to
close
the
Cassette
Compartment
Cover.
Hint
for
recording
position
when
inserting
Cassette
*
When
you
insert
a
cassette
that
is
partially
recorded,
use
the
Edit
Search
Function
to
search
for
the
position
from
which
you
want
to
record
again.
Especially
when
you
want
to
record
again
on
a
cassette
that
is
already
fully
recorded,
be
sure
to
first
locate
the
position
where
you
want
to
add
the
new
recording,
before
starting
to
record.
*
If
hand
strap
is
tight
it
may
prevent
Cassette
Compartment
Cover
from
fully
opening
for
tape
insert
or
eject.
Loosen
hand
strap
if
necessary.
*
When
inserting
the
cassette,
make
sure
it
faces
in
the
right
direction
and
then
push
in
completely.
12
For
assistance,
call
1-800-211-PANA(7262)

Cassette
Information
Record
Speed/Playback
Time
Use
only
those
tapes
having
the
""[Ņ
logo
indicating
the
6.35mm
digital
standard.
Cassette
type
|
Record
Speed/Playback
time
|
—
SP
|
LP
C)
O
=
5
©
Y)
=
to
m
!
=
D
o
AY-DVM80EA
80
minutes
120
minutes
Erase
Protection
Cassettes
have
a
sliding
record
tab
to
ensure
recordings
are
not
accidentally
erased.
record
tab
1
To
prevent
accidental
erasure
Slide
the tab
to
the
left
(open).
2
To
record
again
Slide
the
tab
to
the
right
(close).
13
Color
Enhancement
Light
(Optional)
Using
the
Light
Before
you
begin...
To
brighten
the
natural
colors
in
a
scene.
*
Connect
the
Palmcorder
to
a
power
source
(pages
10,
11).
*
Set
POWER
to
CAMERA.
1
Slide
Light
into
the
Built-in
Light
Mount.
Be
sure
it
locks
into
place.
2
Press
LIGHT
ON.
3
Press
LIGHT
again
to
OFF.
LIGHT
RELEASE
LIGHT
Button
Button
To
remove
the
Light:
Press
LIGHT
RELEASE
and
slide
the
Light
out
of
the
mount.
Caution:
This
light
becomes
hot
during
operation.
Make
sure
nothing
covers
the
Light
during
operation.
*
Using
the
light
will
reduce
battery
operating
time.
*
|f
using
the
enhancement
Light
for
an
extended
period
of
time,
be
sure
to
provide
ventilation
when
using
it
in
a
hot
environment.
*
Be
sure
LIGHT
is
set
to
OFF
when
not
in
use.
*
Do
not
attempt
to
lift
or
carry
the
Palmcorder
by
holding
the
Enhancement
Light.
*
If
light
bulb
needs
to
be
replaced,
take
Light
to
your
nearest
authorized
service
center.
14
For
assistance,
call
1-800-211-PANA(7262)
Attaching
the
Shoulder
Strap
1
Undo
the
two
strap
ends
from
their
buckles.
C)
©
zi
5
©
o
p
D
mi
D
o
2
Remove
the
buckles
from
one
end
of
the
strap.
3
Thread
the
strap
(with
no
buckle)
through
the
Light
Holder
so
that
it
faces
outward.
Then
reinsert
the
buckle.
4
Thread
the
strap
ends
through
the
Strap
Attachment
Rings.
5
Reinsert
the
strap
ends
through
their
buckles.
*
Make
sure
the
straps
are
not
twisted.
1
Loosen
the
strap
from
the
Buckle
and
create
a
loop.
2
Pull
the
strap
firmly
through
the
Buckle
to
shorten
or
lengthen
the
strap.
15
Attaching
the
Shoulder
Strap
1
Insert
the
Light
into
the
Light
Holder
for
Storage.
2
To
remote
the
Light,
press
LIGHT
RELEASE
and
slide
Light
out
from
the
holder.
LIGHT
RELEASE
Button
AS
ES
&
Light
Holder
S
S
=
E
h
Adjust
the
length
of
the
Hand
Strap
to
the
size
of
your
hand
as
illustrated.
Hand
Strap
Lens
Cap
Attaching
the
Lens
Cap
Cord
to
the
Hand
Strap
Remove
the
Hand
Strap
from
the
front
clasp
and
run
the
Strap
through
the
Lens
Cap
Loop.
Reattach
the
Hand
Strap.
fj
v
IN
)
A
EA
16
For
assistance,
call
1-800-211-PANA(7262)
Setting
the
Clock
Set
the
Date
and
Time
Before
you
begin...
e
Connect
the
Palmcorder
to
a
power
source
The
date
and
time
is
calculated,
including
(pages
10,
11).
leap
year,
up
to
DEC
31
2089.
+
Set
POWER
to
CAMERA
or
VCR.
JOG
KEY
1
Press
MENU
to
display
the
Camera
or
VCR
mode
menu
screen
(page
19).
CAMERA
MENU
VCR
MENU
CAMERA
MENU
vCR
MENU
JU
c
G)
D
>
5
Te
(o
end
y
ms
D
o.
T
ODE
S
M
T-
UP
t
s
AY
SETTING
ETTING
"SELECT:
ROTATE
JOG
KEY
*SELECT:
ROTATE
JOG KEY
*SET
:
PUSH
JOG
KEY
*SET
:
PUSH
JOG
KEY
"EXIT
:PUSH
MENU
KEY
“EXIT
:
PUSH
MENU
KEY
2
Rotate
JOG
KEY
to
select
SLAY]
EARO,
and
then
press
JOG
KEY
to
display
the
DISPLAY
SETTING
menu
screen.
*
DISPLAY
SETTING
menu
is
displayed.
EXAMPLE:
3
Rotate
JOG
KEY
to
selectkallolo.e
YEAR
:
200
YEAR
xcd
Say],
and
then
press
JOG
KEY
to
set
4
«(PUSO)»
to
ON
(pages
20,
22).
Ti
*
The
DATE/TIME
SETTING
menu
appears.
:
JAN
+(FUSH)»
4
Rotate
JOG
KEY
to
select
the
desired
Rotate
Ly
RET
y
BIER
numbers,
then,
press
JOG
KEY
down
to
fix
that
portion
and
move
to
the
next.
:
FEB
Adjust
the
shaded
items
for
the
year,
month,
day,
hour,
and
minute.
|
Note
|
*
If
you
should
pass
the
current
year,
‘OCT.
continue
pressing
down
on
the
JOG
KEY
HOUR
capi
until
the
year
appears
again.
"abe
REN
A50 KEY
*
A
built-in
battery
maintains
clock
ER
ro.
EN
IOO
KEY,
operation.
If
the
Palmcorder
is
not
ur
connected
to
a
power
source
for
a
few
When
time
setting
is
completed,
press
months,
the
built-in
battery
may
discharge
the
MENU
to
start
the
clock.
and
"CLOCK
BATTERY”
indication
appears
(page
27).
17
Using
the
Palmcorder
Menu
The
Palmcorder
features
two
menu
displays:
one
for
CAMERA
mode
(recording)
and
the
other
for
VCR
mode
(Playback)
(pages
19-23).
*
While
the
Menu
screen
is
displayed,
you
cannot
record
or
play
the
tape.
*
While
recording,
the
Menu
screen
will
not
be
displayed.
*
While
in
playback,
the
Menu
screen
can
be
displayed.
MENU
Button
18
Displaying
the
MENU
Before
you
begin...
*
Connect
the
Palmcorder
to
a
power
source
(pages
10,
11).
*
Set
POWER
to
CAMERA
or
VCR.
1
Press
MENU
to
display
the
CAMERA
or
VCR
menu.
(CAMERA
MENU)
CAMERA
MENU
(VCR
MENU)
ECT:ROTATE
JOG
KEY
7
PUS
JOG
KEY
¿PUSH
MENU
KEY
*SELECT:ROTATE
JOG KEY
"SET
:
PUSH
JOG KEY
‘EXIT
:PUSH
MENU
KEY
2
Rotate
JOG
KEY
select
a
menu
item.
Setting
the
MENU
Items
(EX.
VCR
Mode
menu)
1
Press
down
on
the
JOG
KEY
to
set
your
selection.
Rotate
JOG
KEY
to
select
a
menu
item.
*
The
characters
of
your
selection
will
be
inversely
displayed.
VCR
PLAY
FUNCTION
VCA
PLAY
FUNCTION
D.FUNCTIONOOFF
STRO
E]
D.EFFECT
@OFF
MONO
"SELECT:
ROTATE
JOG
KEY
"SET
:
PUSH
JOG
KEY
"EXIT
"SELECT:ROTATE
JOG
KEY
‘SET
:
PUSH
JOG
KEY
:PUSH
MENU
KEY
:PUSH
MENU
KEY
‘EXIT
3
Press
down
on
the
JOG
KEY
to
set
your
selection.
*
The
"6"
mark
will
indicate
your
selection.
Press
MENU
twice
to
exit
the
menu.
For
assistance,
call
1-800-211-PANA(7262)
Camera
and
VCR
main
menu
CAMERA
MENU
VCR
MENU
1
2
3
4:
5
6
:
D.
FUNCTION
:
ADJUST
:
REC
MODE
SET-UP
:
DISPLAY
SETTING
:
LCD
SETTING
CAMERA
MENU
1:
D.
FUNCTION
CAMERA
FUNCTION
menu
is
displayed.
To
select
one
of
the
9
digital
functions
(MIRROR,
STROBE,
MOSAIC,
SLIM,
TRAIL,
STRETCH,
GAIN-UP,
WIPE,
or
MIX).
:
ADJUST
CAMERA
ADJUST
menu
is
displayed.
To
select
PROG.
AE,
W.
BALANCE,
or
H.S.S
(High
Speed
Shutter).
:
REC
MODE
CAMERA
REC-MODE
menu
is
displayed.
To
select
REC-SPEED,
AUDIO-REC,
INDEX,
SHUTTER,
or
SELF-REC.
:
SET-UP
CAMERA
SET-UP
menu
is
displayed.
To
select
REMOTE,
TALLY
LED,
or
BEEP.
:
DISPLAY
SETTING
DISPLAY
SETTING
menu
is
displayed.
To
select
DISPLAY,
C.RESET,
DATE/
TIME,
or
CLOCK-SET.
:
LCD
SETTING
LCD
SETTING
menu
is
displayed.
To
select
LCD
BRIGHTNESS
or
LCD
COLOR.
:
PLAY
FUNCTION
:
REC
MODE
:
PLAY
MODE
:
DISPLAY
SETTING
:
LCD
SETTING
VCR
MENU
1
:
PLAY
FUNCTION
VCR
PLAY
FUNCTION
menu
is
displayed.
To
select
D.
FUNCTION
or
D.EFFECT.
:
REC
MODE
VCR
REC
MODE
menu
is
displayed.
To
select
REC-SPEED.
:
PLAY
MODE
VCR
PLAY
MODE
menu
is
displayed.
To
select
INDEX,
AUDIO,
REMOTE,
or
B.SEARCH.
:
DISPLAY
SETTING
DISPLAY
SETTING
menu
is
displayed.
To
select
DISPLAY,
C.RESET,
DATE/
TIME,
or
CLOCK-SET.
:
LCD
SETTING
LCD
SETTING
menu
is
displayed.
To
select
LCD
BRIGHTNESS
or
LCD
COLOR.
19
C)
©
=
3
(O
(o
+
D
2
D
o.
Camera
Mode
Menu
Screen
CAMERA
FUNCTION
Camera
Mode
Menu
Screen
CAMERA
FUNCTION
D.
FUNCTION
@OFF
MIRROR
STROB
MOSAIC
TRAIL
CAMERA
ADJUST
PROG.
AE
eorr
ma
G]
W.BALANCE
o:
@AU
CAMERA
REC
MODE
REC
-
SPEED
eSP
AUDIO-REC
6012
bit
INDEX
ODAY
2HOUR
SHUTTER
@OFF
ON
SELF
-
REC
NORMALe
MIRROR
CAMERASET-UP
REMOTE
OFF
OVCRI
TALLY
LED
OFF
BEEP
@OFF
16
bit
DISPLAY
SETTING
DISPLAY
OFF
OLINEAR
MEMORY
T.CODE
C.RESET
@OFF
DATE/TIME
OFF
@D/T
CLOCK
-
SET
@OFF
LCD
SETTING
LCD
BRIGHTNESS
LOWI
|
|
|
—
——-—
HIGH
LCDCOLOR
LOWI
|
|
|-———
HIGH
20
DIGITAL
FUNCTION
(page
44)
To
select
one
of
the
9
digital
functions.
Setting
to
OFF
cancels
the
previously
selected
digital
function.
CAMERA
ADJUST
PROG.
AE
(page
43)
To
select
one
of
the
5
Program
AE
modes.
Setting
to
OFF
cancels
the
previously
selected
Program
AE
mode.
W.BALANCE
(page
42)
To
select
one
of
the
3
White
Balance
modes.
H.
S.
S
(High
Speed
Shutter)
(page
47)
To
select
a
desired
shutter
speed.
CAMERA
REC
MODE
REC-SPEED
(page
13)
SP:
Normal
recording
speed
mode.
LP:
Recording
time
is
1.5
times
as
long
as
in
the
SP
mode.
For
example,
120
minutes
of
recording
is
possible
on
a
80
minutes
tape.
AUDIO-REC
(page
48)
42
bit:
The
sound
is
recorded
in
the
12
bit/32
kHz
mode.
16
bit:
The
sound
is
recorded
in
the
16
bit/48
kHz
high-quality
mode.
INDEX
(page
37)
DAY:
An
index
signa!
is
recorded
when
recording
is
restarted
after
the
date
has
changed
since
the
last
recording.
2
HOUR:
An
index
signal
is
recorded
when
recording
is
restarted
after
a
lapse
of
more
than
2
hours.
For
assistance,
call
1-800-211-PANA(7262)

Other manuals for Digital Palmcoder PalmSight PV-DV100

3

Other Panasonic Camcorder manuals

Panasonic NV-DS88A User manual

Panasonic

Panasonic NV-DS88A User manual

Panasonic PV-800 User manual

Panasonic

Panasonic PV-800 User manual

Panasonic AJ-HPX3000 User manual

Panasonic

Panasonic AJ-HPX3000 User manual

Panasonic HC-V770 User manual

Panasonic

Panasonic HC-V770 User manual

Panasonic Palmcorder PV-GS90P User manual

Panasonic

Panasonic Palmcorder PV-GS90P User manual

Panasonic WV-F565 User manual

Panasonic

Panasonic WV-F565 User manual

Panasonic HDCSD100P - HD VIDEO CAMERA User manual

Panasonic

Panasonic HDCSD100P - HD VIDEO CAMERA User manual

Panasonic SDR-H20GN User manual

Panasonic

Panasonic SDR-H20GN User manual

Panasonic NV-GS55GC User manual

Panasonic

Panasonic NV-GS55GC User manual

Panasonic NV-DS99EN User manual

Panasonic

Panasonic NV-DS99EN User manual

Panasonic GP-KH232 User manual

Panasonic

Panasonic GP-KH232 User manual

Panasonic HC-V520P User manual

Panasonic

Panasonic HC-V520P User manual

Panasonic AG-UX90PJ Product guide

Panasonic

Panasonic AG-UX90PJ Product guide

Panasonic VDRM95PP - DVD MOVIE CAMERA User manual

Panasonic

Panasonic VDRM95PP - DVD MOVIE CAMERA User manual

Panasonic Palmcorder MultiCam PV-DV203 User manual

Panasonic

Panasonic Palmcorder MultiCam PV-DV203 User manual

Panasonic Palmcorder Palmsight PV-L600 User manual

Panasonic

Panasonic Palmcorder Palmsight PV-L600 User manual

Panasonic AG-HVX200E User manual

Panasonic

Panasonic AG-HVX200E User manual

Panasonic NV-DS77EN User manual

Panasonic

Panasonic NV-DS77EN User manual

Panasonic NV-GS50EN User manual

Panasonic

Panasonic NV-GS50EN User manual

Panasonic AJ-HDX400 User manual

Panasonic

Panasonic AJ-HDX400 User manual

Panasonic Palmcorder PalmSight PV-L578 User manual

Panasonic

Panasonic Palmcorder PalmSight PV-L578 User manual

Panasonic WV-F565 User manual

Panasonic

Panasonic WV-F565 User manual

Panasonic AVCCAM AG-HMR10 User manual

Panasonic

Panasonic AVCCAM AG-HMR10 User manual

Panasonic NVMS50 User manual

Panasonic

Panasonic NVMS50 User manual

Popular Camcorder manuals by other brands

RCA EZ409HD - Small Wonder Camcorder quick start guide

RCA

RCA EZ409HD - Small Wonder Camcorder quick start guide

Sanyo VPC-GH2 - Full HD 1080 Video Mode d'emploi

Sanyo

Sanyo VPC-GH2 - Full HD 1080 Video Mode d'emploi

JVC GR-DVL167 instructions

JVC

JVC GR-DVL167 instructions

JVC GR-AX760 instructions

JVC

JVC GR-AX760 instructions

Samsung SGH-X300 Owner's instruction book

Samsung

Samsung SGH-X300 Owner's instruction book

JVC GZ-MC500U instructions

JVC

JVC GZ-MC500U instructions

Canon FS30 quick guide

Canon

Canon FS30 quick guide

JVC GR-D63 instructions

JVC

JVC GR-D63 instructions

DXG DXG-506V user manual

DXG

DXG DXG-506V user manual

Samsung AD68-00516C Owner's instruction book

Samsung

Samsung AD68-00516C Owner's instruction book

JVC D-9 DY-70 instructions

JVC

JVC D-9 DY-70 instructions

Tekxon Technology TX6000 product manual

Tekxon Technology

Tekxon Technology TX6000 product manual

Hitachi DZ-HV575E instruction manual

Hitachi

Hitachi DZ-HV575E instruction manual

Sony FCBEX48E Technical manual

Sony

Sony FCBEX48E Technical manual

JVC LYT0085-001A instructions

JVC

JVC LYT0085-001A instructions

Sony HDR-PJ430V Specifications

Sony

Sony HDR-PJ430V Specifications

JVC GZ-HD5 AA Guide book

JVC

JVC GZ-HD5 AA Guide book

Sharp ViewCam Slim VL-AX1S Operation manual

Sharp

Sharp ViewCam Slim VL-AX1S Operation manual

manuals.online logo
manuals.online logoBrands
  • About & Mission
  • Contact us
  • Privacy Policy
  • Terms and Conditions

Copyright 2025 Manuals.Online. All Rights Reserved.