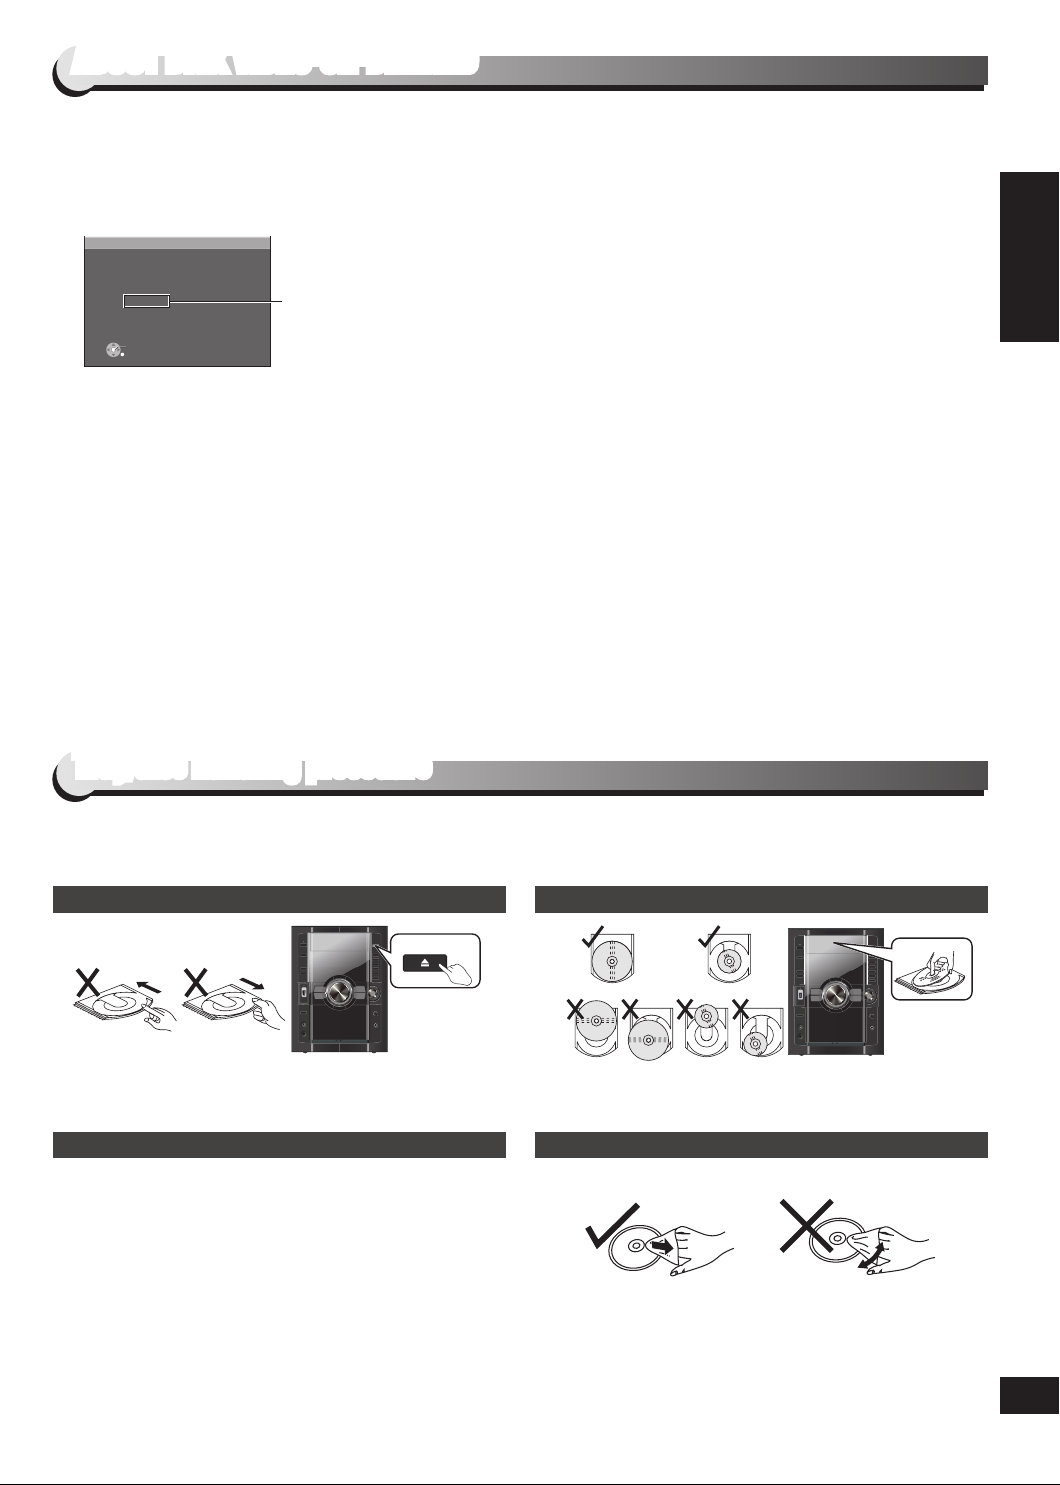
ABOUT DIVX VIDEO-ON-DEMAND/Tray/disc handling procedure
Tips for making data discs
(Extension: “.MP3” or “.mp3”)
This unit does not support ID3 tags.
Sampling frequency and compression rate:
– DVD-RAM, DVD-R/RW: 11.02, 12, 22.05, 24 kHz
(8 to 160 kbps), 44.1 and 48 kHz (32 to 320 kbps)
– CD-R/RW: 8, 11.02, 12, 16, 22.05, 24 kHz (8 to 160 kbps),
32, 44.1 and 48 kHz (32 to 320 kbps)
(Extension: “.JPG”, “.jpg”, “.JPEG” or “.jpeg”)
JPEG files taken on a digital camera that conform to DCF
Standard (Design rule for Camera File system) Version 1.0
are displayed. Files that have been altered, edited or saved
with computer picture editing software may not be displayed.
This unit cannot display moving pictures, MOTION JPEG
and other such formats, and still pictures other than JPEG
(Example: TIFF), or play pictures with attached audio.
(Extension: “.ASF” or “.asf”)
You can play MPEG4 data [conforming to SD VIDEO
specifications (ASF standard)/MPEG4 (Simple Profile) video
system/G.726 audio system] recorded with Panasonic SD
multi cameras or DVD video recorders with this unit.
The recording date may differ from that of the actual date.
(Extension: “.DIVX”, “.divx”, “.AVI” or “.avi”)
You can play all versions of DivX® video (including DivX®6)
[DivX video system/MP3, Dolby Digital or MPEG audio
system] with standard playback of DivX® media files.
Functions added with DivX Ultra are not supported.
DivX files greater than 2 GB or have no index may not be
played properly on this unit.
This unit supports all resolutions up to maximum of
720 x 480 (NTSC)/720 x 576 (PAL).
You can select up to eight types of audio and subtitles on this
unit.
•
•
•
•
•
•
•
•
•
•
When there are more than eight groups, the eighth group
onwards will be displayed on one vertical line in the menu
screen.
There may be differences in the display order on the menu
screen and computer screen.
This unit cannot play files recorded using packet write.
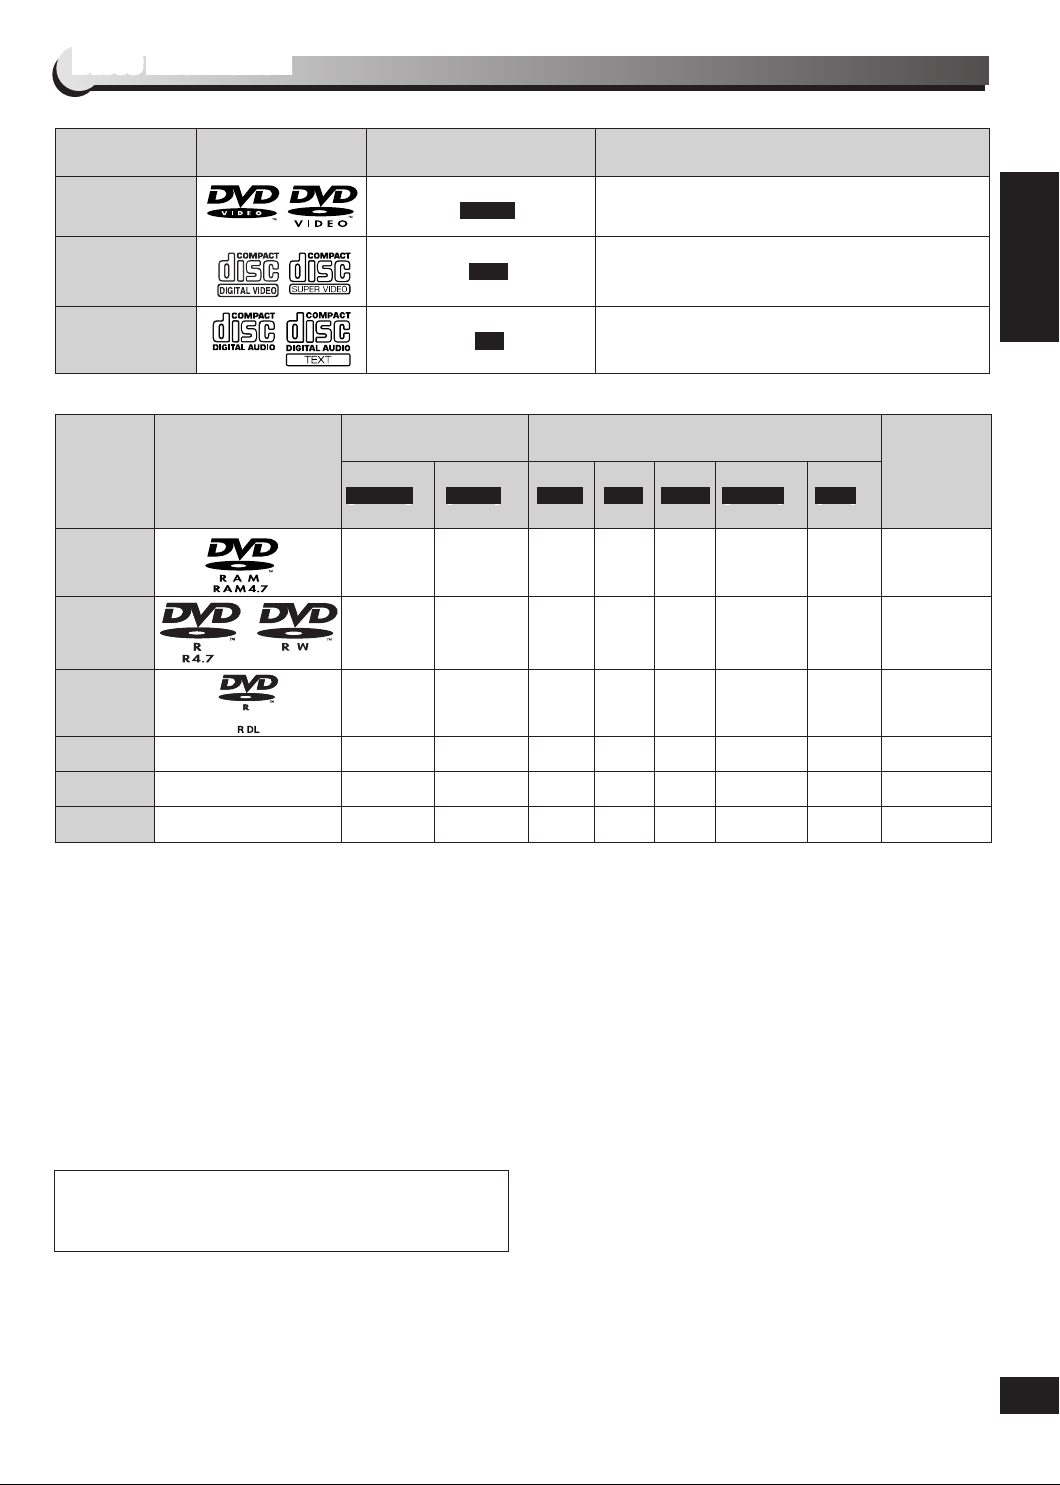
DVD-RAM
Discs must conform to UDF 2.0.
DVD-R/RW
Discs must conform to UDF bridge (UDF 1.02/ISO9660).
This unit does not support multi-session. Only the default
session is played.
CD-R/RW
Discs must conform to ISO9660 level 1 or 2 (except for
extended formats).
This unit supports multi-session but if there are many
sessions it takes more time for play to start. Keep the number
of sessions to a minimum to avoid this.
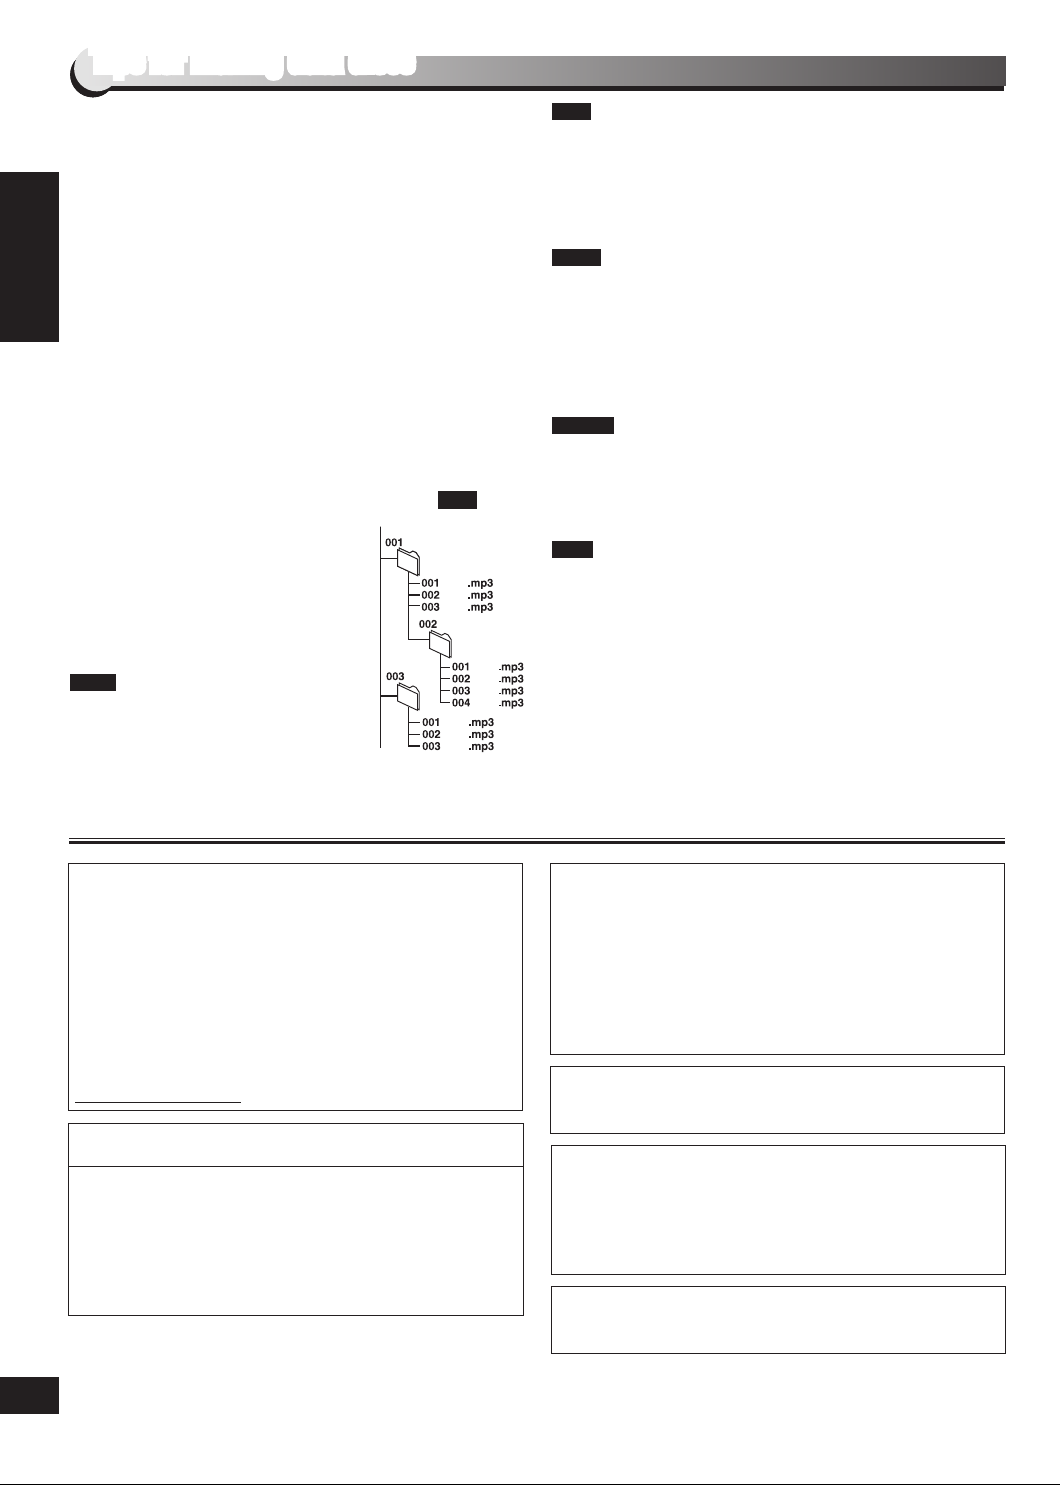
Naming folders and files
Files are treated as contents and folders
are treated as groups on this unit.
At the time of recording, prefix folder and
file names. This should be with numbers
that have an equal number of digits, and
should be done in the order you want to
play them (this may not work at times).
Files must have the extension ( below).
(Extension: “.WMA” or “.wma”)
Compatible compression rate:
between 48 kbps and 320 kbps.
You cannot play WMA files that are
copy-protected.
This unit does not support Multiple Bit Rate (MBR).
•
•
•
•
•
•
•
•
•
•
•
001
root
track
track
track
track
track
track
track
track
track
track
group
group
group
Example: MP3
WMA
MP3
JPEG
MPEG4
DivX
This product is licensed under the MPEG-4 Visual patent
portfolio license for the personal and non-commercial use
of a consumer for (i) encoding video in compliance with
the MPEG-4 Visual Standard (“MPEG-4 Video”) and/or (ii)
decoding MPEG-4 Video that was encoded by a consumer
engaged in a personal and non-commercial activity and/or
was obtained from a video provider licensed by MPEG LA
to provide MPEG-4 Video. No license is granted or shall be
implied for any other use. Additional information including that
relating to promotional, internal and commercial uses and
licensing may be obtained from MPEG LA, LLC. See
http://www.mpegla.com.
Plays DivX® video
DivX® is a registered trademark of DivX, Inc., and is used
under license.
Windows Media, and the Windows logo are trademarks, or
registered trademarks of Microsoft Corporation in the United
States and/or other countries.
This product is protected by certain intellectual property rights
of Microsoft Corporation and third parties. Use or distribution
of such technology outside of this product is prohibited without
a license from Microsoft or an authorized Microsoft subsidiary
and third parties.
U.S. Patent Nos. 6,836,549; 6,381,747; 7,050,698; 6,516,132;
and 5,583,936.
This product incorporates copyright protection technology that
is protected by U.S. patents and other intellectual property
rights. Use of this copyright protection technology must be
authorized by Macrovision, and is intended for home and
other limited viewing uses only unless otherwise authorized
by Macrovision. Reverse engineering or disassembly is
prohibited.
Manufactured under license from Dolby Laboratories.
Dolby and the double-D symbol are trademarks of Dolby
Laboratories.
Manufactured under license under U.S. Patent #’s: 5,451,942;
5,956,674; 5,974,380; 5,978,762; 6,487,535 & other U.S. and
worldwide patents issued & pending. DTS and DTS 2.0 +
Digital Out are registered trademarks and the DTS logos and
Symbol are trademarks of DTS, Inc. © 1996-2008 DTS, Inc.
All Rights Reserved.
Tips for making data discs
SC-VK480_GA_EN_Final.indb 6 5/21/2009 12:08:41 PM