7
English
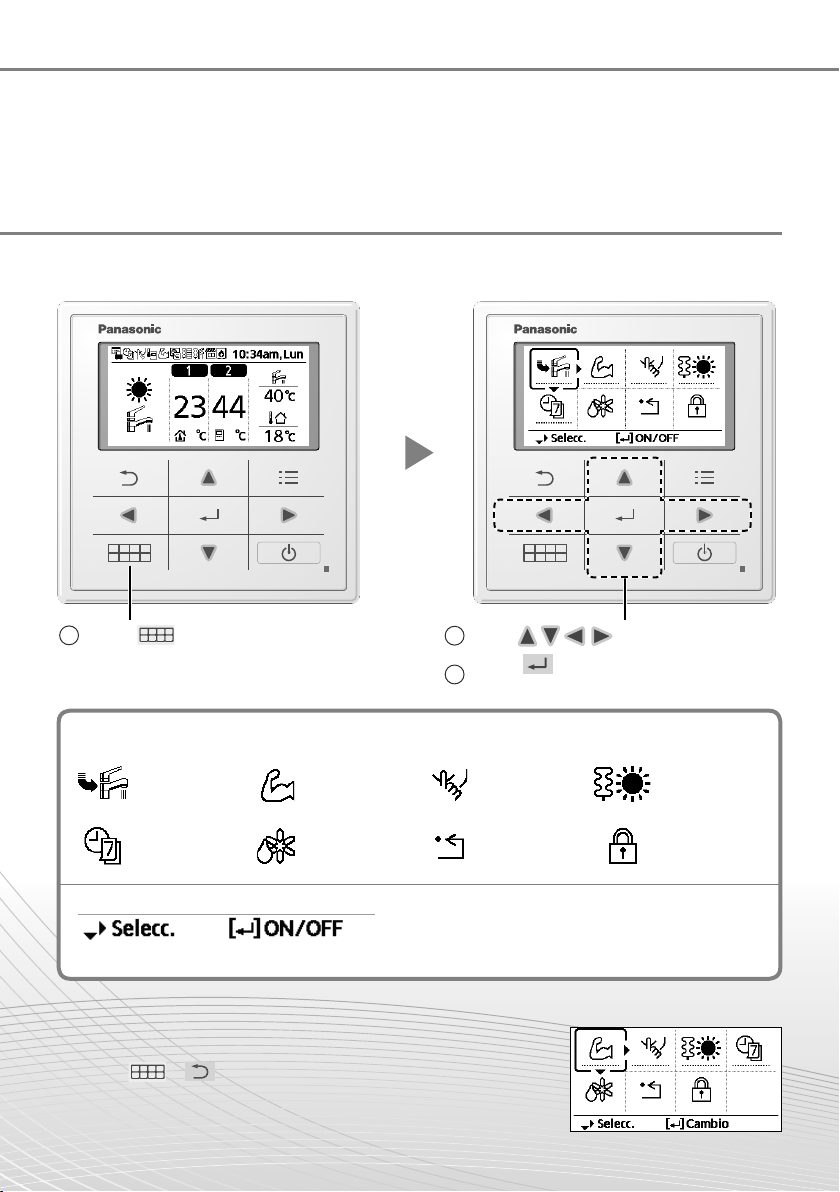
How to use the Quick Menu
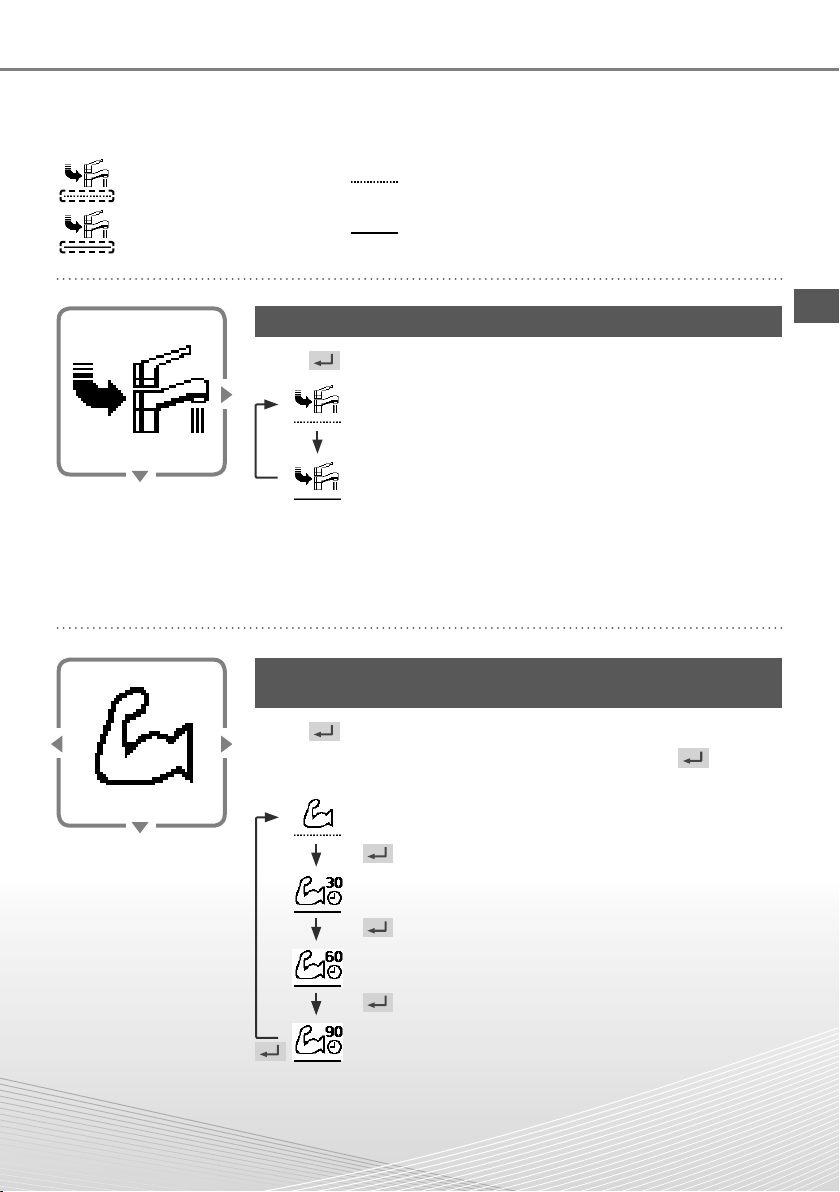
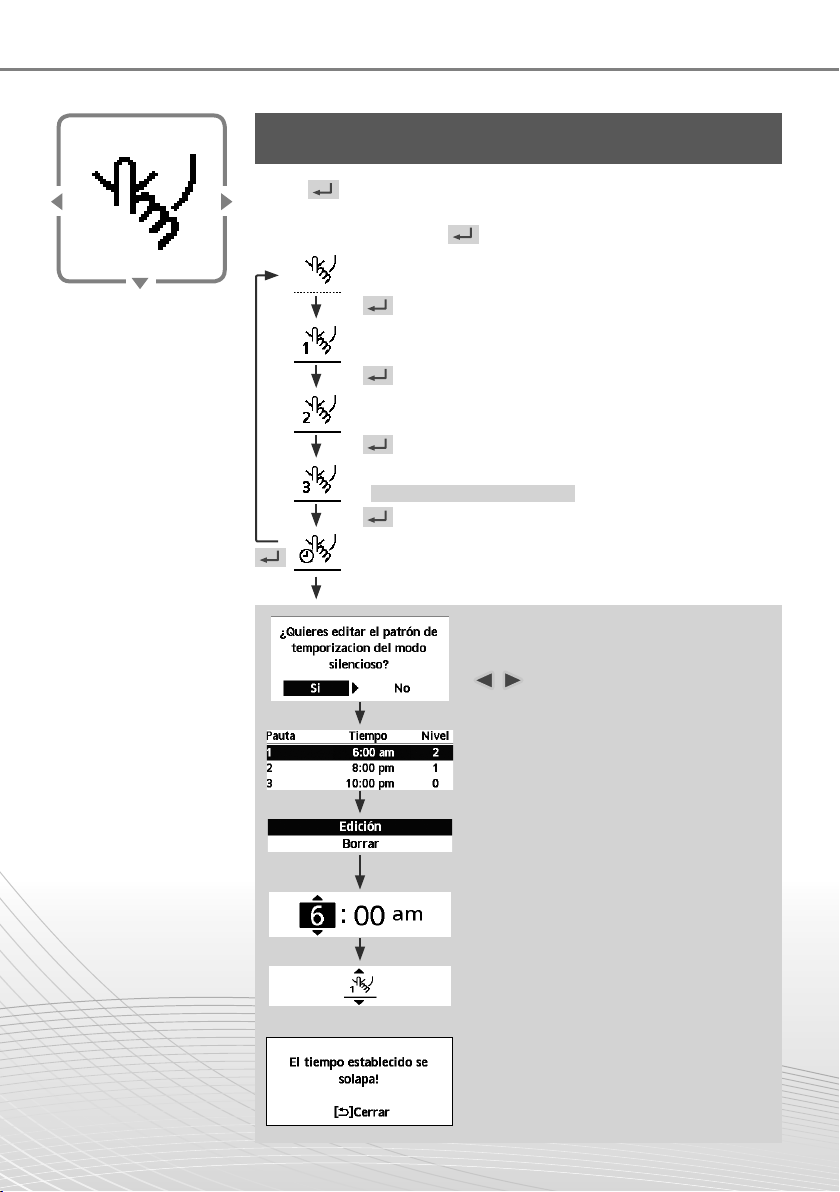
Select to defrost the frozen pipes.
Press to confirm your selection.
(When the mode is accepted, below screen will be displayed.)
Force
Defrost
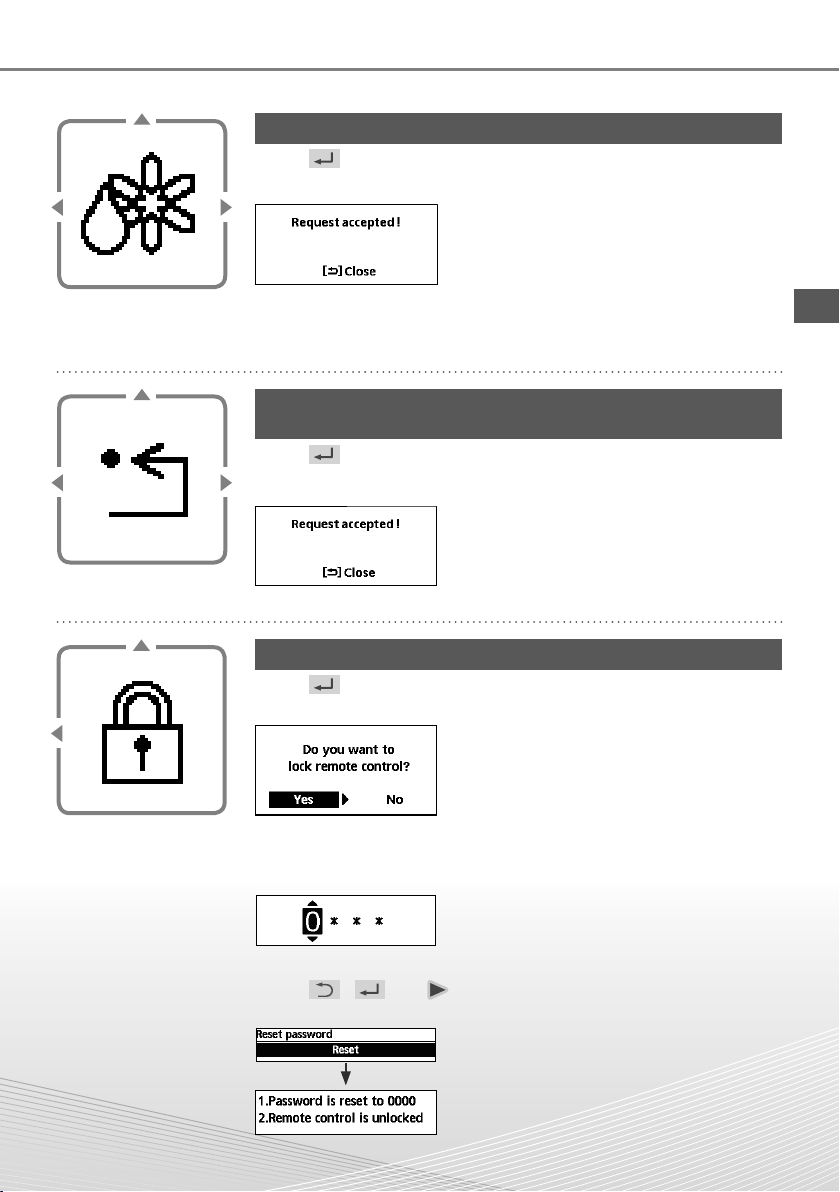
Select to restore the previous settings when error has
occurred.
Press to confirm your selection.
(When the mode has been accepted, below screen will be displayed.)
• Make sure all units are turned off before
selecting this mode which restores the whole
system to the previous settings.
Error Reset
Select to lock the Remote Controller.
Press to confirm your selection.
(When the mode has been accepted, below screen will be displayed.)
Select “Yes”.
(The Main Screen will be locked.)
• If “No” is selected, the screen will return to the
Main Screen.
To unlock the Remote Controller
Press any key.
(When the mode has been accepted, below screen will be displayed.)
Enter any 4 digits of number (if the number is
correct, the screen will be unlocked).
To reset forgotten password (under operation OFF screen)
Press , and continuously for 5 seconds.
(When the mode has been accepted, below screen will be displayed.)
Select “Reset”.
(The screen will be off after 3 seconds.)
R/C Lock